Who hasn’t suffered bad luck when sharing stoves with the humble egg at one time or another? We’ve all had that poached egg which couldn’t even walk over the muffin, let alone run. The yellowy yolk of a boiled egg has once been less Simpson, more Incredible Hulk after forgetting to put on the timer. Scrambled should’ve been silky, but instead came out like leather. We’ve even f’ed up fried, and we know you have too. Not to worry. We’re here to banish your huevos hoodoo, to raise the odds of oeuf omnipotence, with these simple tips. IDEAL’s resident Chef Joseph Gann shares his best tips to achieve the IDEAL egg, 5 ways.
Boiled
Fry off Delia, we all know how to boil an egg, you say angrily. It’s surprising, though, how often this simple task goes south. Most know the basic timings (4 minutes for soft-boiled, around 8 for hard) and leave the rest in the hands of the gods. But with so many other factors at play, it’s foolish to trust these vague timings implicitly and expect perfection. A few simple steps should set you right.
Firstly, your pan of water needs to be large and your boil strong, so the introducing of the eggs doesn’t stop the boil in its tracks. Eggs should be at room temperature to make the cooking more predictable and a slotted spoon for entry and exit will likely avoid any shell-based mishaps. Post-boil, a plunge into iced water or a running under the cold tap will stop the egg continuing cooking.
A second school of thought suggests filling a pan with water to the same height as the egg, and no more. Then, bring to the boil with the lid on and once boiling, remove from the heat and set a timer for six minutes. When it goes off, bingo – you have a perfectly runny yolk and set white.
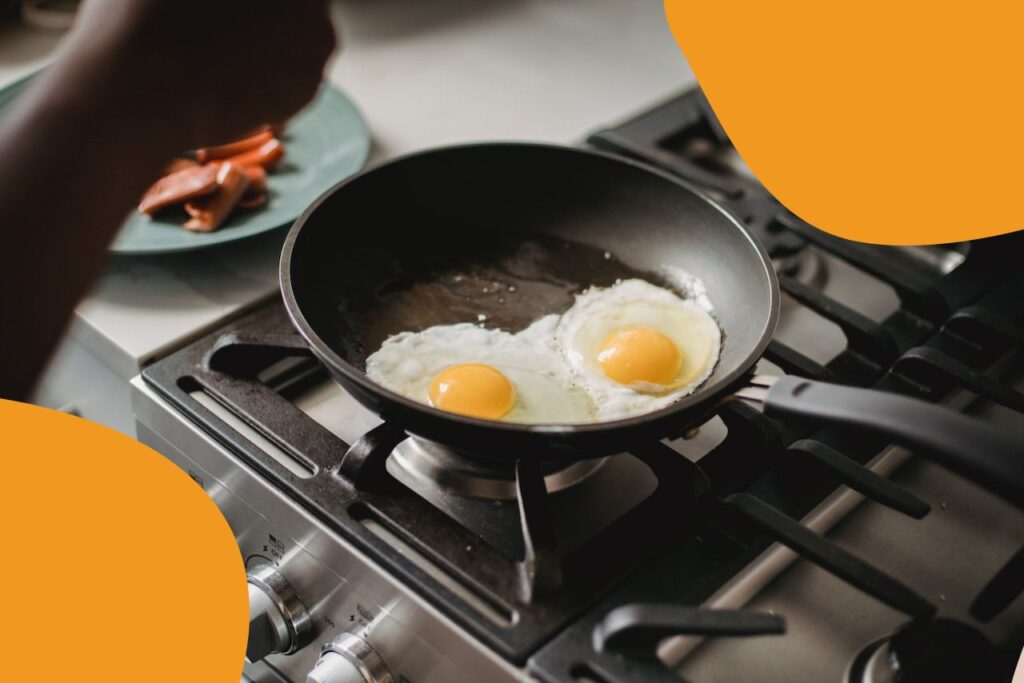
Fried
Of course, the perfect fried egg is a matter of preference, but for the purposes of this piece, we’re talking runny yolk, set white and a touch of the crispy rim for textural contrast. So, take a non-stick frying pan to a medium to high heat and in with a decent knob of butter and a touch of cooking oil to prevent it burning. Crack an egg into a small cup, and when the fat shimmers slightly, add to the pan and reduce to medium. Add a lid so the upper white manages to cook in tandem with the yolk, and occasionally baste, for around two minutes. Use your eyes to know when it’s done to your liking. A couple of flakes of sea salt on the yolk to finish are just the ticket.
Poached
As if to celebrate World Egg Day, The Food Standard’s Agency have announced that ‘at risk’ groups can now enjoy a runny yolk without fear, and there’s no egg happier about the announcement than our poached friends, for a poached egg without a runny centre is one without any point or purpose.
Of importance is the freshness of the egg, so check by placing it in a pan of cold water. If it stays on its side, it’s fresh; if it points skywards, it’s okay to eat but probably best not to poach; if it floats, encourage its floating to continue towards the bin.
So, get a deep (you don’t want your egg to ever meet the pan’s base, so depth is great) pan of water boiling hard. Break an egg into a small cup. Many people mention vinegar at this stage, but the addition is inconsequential and taste not welcome. Reduce the temperature to medium, take a whisk and swirl. When a ‘vortex’ is created, slide the egg into the middle of the water. You’ll notice the swirling water shapes the egg into the desired spherical finish. Let poach for two and a half minutes (make sure the water isn’t boiling too vigorously, or conversely, too still), then carefully remove with a slotted spoon – you’ll be able to see when it’s done. If to be enjoyed later, refresh in ice cold water.
If you’re cooking a few at a time, then forgo the vortex and poach each egg in cling film. Simply line a ramekin with some cling film, rubbing a little olive oil on the film so the egg doesn’t stick, crack an egg into it then twist it shut. Same rules apply to the rest of the process.
Scrambled
In many kitchens trialists or new additions to the brigade are asked to make a staff tea of scrambled eggs. It’s a great way to check their grasp of basic kitchen skills; of timing, of patience, of reacting to heat and of correct seasoning.
It’s vital to cook your eggs gently, as nothing but the silkiest finish will do. A bain-marie is ideal for the regulating of heat required, but this method works too: Firstly, add a knob of butter to a heavy-bottomed pan and let it melt on a low heat.
Don’t allow the butter to brown, as the nutty flavour and colour will corrupt the wonderful purity of the eggs. Add a couple of whisked eggs to the pan and slowly mix the butter and eggs together with a spatula. Allow to sit for a few seconds, then stir again. Don’ allow the eggs to catch at all. Season with salt. Repeat this process a few times until you notice a slight setting of the eggs. Take entirely off the egg and stir again.
Bring back to heat, allow to sit, stir, allow to sit, take off the heat, and repeat until your desired consistency has been achieved. Add a touch of cream, crème fraiche or another knob of butter, and mix through, bringing a velvety, creamy finish. A good crack of freshly ground black pepper and some finely chopped chives are the only adornments you should need.
Omelette
An unfussy, expertly cooked omelette is one of life’s great, and easiest, pleasures. You can sex it up with diced tomatoes, peppers, mushroom or ham, but for me, simply egg with a touch of grated gruyere or emmental cheese is perfection. The exterior needs to be set and the middle runny, with the overall mouth feel silky and almost custard like. A non-stick pan is essential.
Put your pan on a low-medium heat, and add a knob of butter. Whisk two eggs in a bowl (don’t whisk them in the pan, it leads to an uneven texture) and add to the pan when the butter has melted. You want silence – no sizzle – as the eggs meet the butter. Season and stir gently and entirely with a flat-ended spatula, making sure you’re making contact with the bottom of the pan and covering 100% of the pan.
Keep the heat low and don’t rush. When a more stable mixture has formed, add a small line of grated cheese down the middle of the circle. Lift up the pan, and if your omelette is able to move slightly as a homogeneous unit, it’s time to remove from the heat entirely. Now, starting at one edge, fold over with your spatula; either in half, or by rolling – the finish is your preference. Job done.


")

