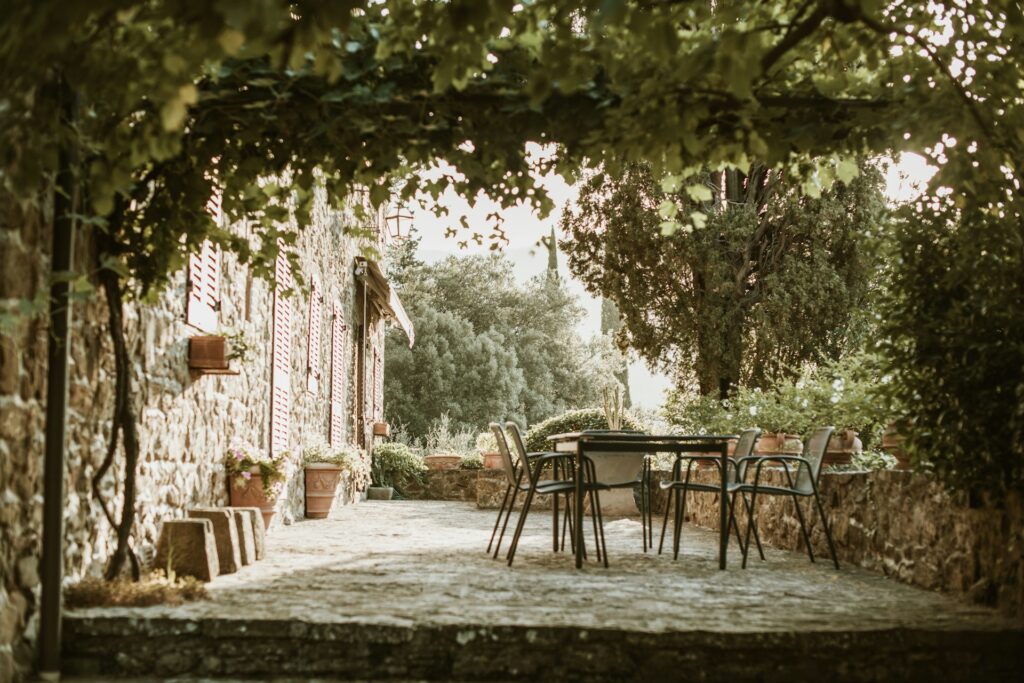
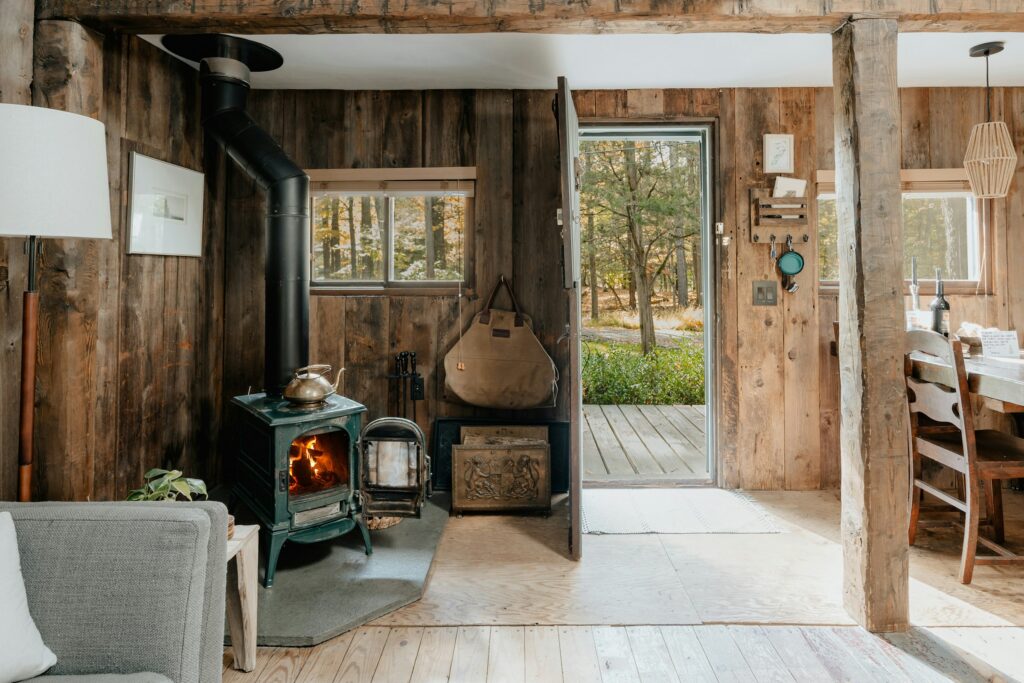
Stand in a Florentine piazza at dusk, and you might notice something subtle yet profound: the cadence of conversation, the particular way a vendor wraps a package, the almost imperceptible nod between longtime residents passing in the street. These aren’t simply ‘Italian’ moments but distinctly Tuscan ones – cultural expressions that would be recognised as regionally distinctive even in Venice or Rome.
Indeed, Tuscany exists as its own cultural universe within Italy’s rich tapestry of regional identities. Its distinctive character was forged through centuries as a political, artistic and linguistic powerhouse – a place that didn’t just participate in Italian culture but fundamentally shaped it, while jealously guarding its own particular ways of being.
The cypress-lined hills and Renaissance masterpieces that dominate postcards tell only a fraction of the story. The true Tuscany reveals itself in the untranslatable phrases uttered in market squares, the particular rhythm of village festivals that follow ancient agricultural patterns, and the social codes governing everything from bread-making to neighbourhood allegiances.
This isn’t about reinforcing simplistic divisions but illuminating how remarkably diverse Italian regional cultures remain even in our globalised era.
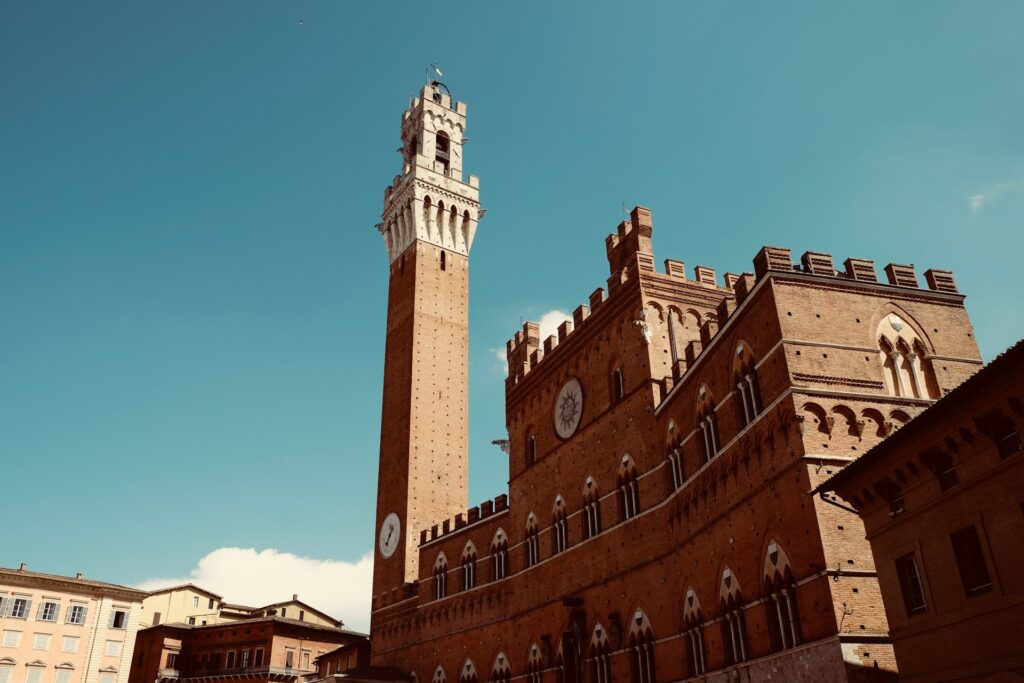
The Contrada System: Siena’s Distinctive Social Structure
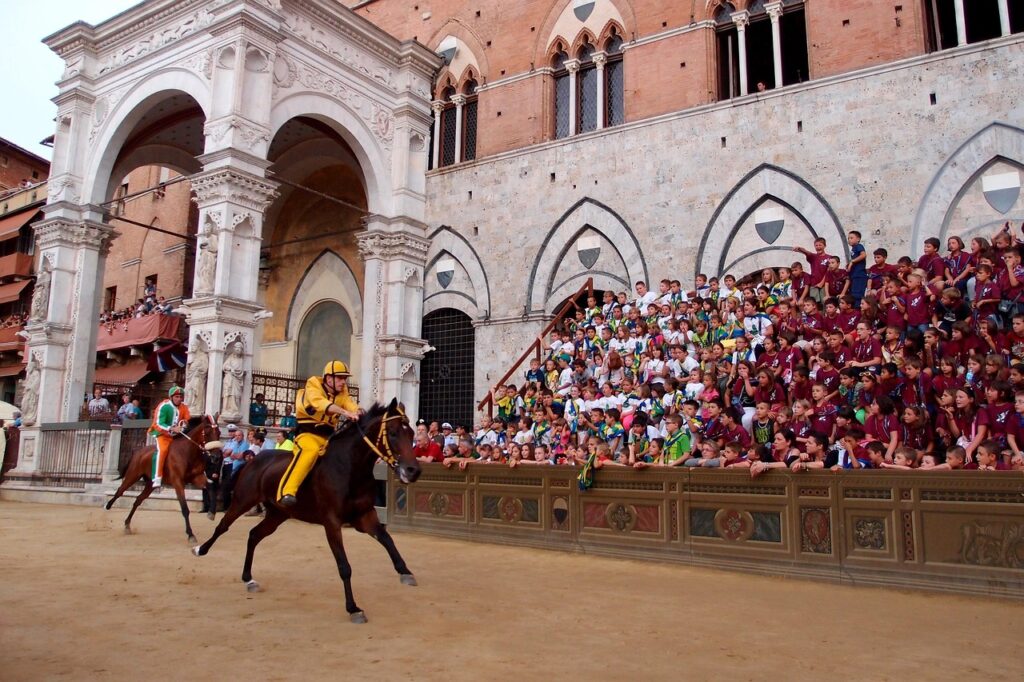
In Siena, the city remains organised into 17 contrade (neighbourhoods) that function as fundamental social units. Each has its own museum, fountain, church, colours, animal symbol, and celebrations. These divisions shape daily life in ways immediately recognisable to Italians but often invisible to visitors.
The contrade originated in the Middle Ages as military companies, evolving into the civic organisations they are today. Each maintains its own cultural heritage preservation committee, youth group, and social calendar. Membership is typically determined by birth location rather than current residence, creating complex social geographies.
During the Palio horse race, these neighbourhood identities reach their most visible expression, but contrada culture operates year-round. Many Sienese identify with their contrada as a primary social allegiance, with complex diplomatic relationships existing between allied and rival districts. The twice-yearly baptismal ceremony at each contrada’s fountain for neighbourhood children represents a social commitment that complements religious practice.
This neighbourhood system differs significantly from other Italian cities’ administrative divisions, existing as cultural entities rather than merely governmental units. The degree of voluntary participation and emotional investment in these neighbourhood identities represents something distinct within Italian urban culture.
Florentine Communication: Directness As Cultural Value
Florence maintains a communication style characterised by concision and directness. Where Venetians might employ diplomatic circumlocution and Romans a certain expressiveness, Florentines typically value clarity over courtesy in a way immediately recognisable to Italians from other regions.
This communication approach manifests in everyday interactions. At Florentine markets, vendors often use abbreviated speech patterns and expect quick, decisive selections from customers. The abbreviated greeting Dica (literally ‘Speak’) used by Florentine shopkeepers represents this efficiency-focused approach, contrasting with more elaborate welcoming rituals in other regions.
Florentine speech typically contains fewer diminutives and terms of endearment than found in central and southern Italian regions. Whilst an Italian tutor might teach students to soften requests with pleasantries and subjunctives, Florentines often dispense with such niceties in favour of clarity. This linguistic pattern reflects historical values developed during Florence’s commercial golden age, when precision in business communication was essential to the banking and textile industries that built the city’s wealth.
This direct communication style extends to feedback and criticism. Where critique might be softened with compliments in other regions, Florentine artistic and academic traditions often embrace forthright assessment. This approach can sometimes create cross-cultural misunderstandings with visitors and Italians from other regions, but represents a distinctive cultural value rather than rudeness.
The True Tuscan Linguistic Heritage
While standard Italian derives from Tuscan literary traditions, contemporary spoken Tuscan contains distinctive features beyond the famous gorgia toscana (the softening of certain consonants). Tuscan speech employs specific grammatical constructions and vocabulary not found in standard Italian.
Particularly distinctive is the Tuscan use of personal pronouns. The insertion of te before verbs (as in Te tu vieni qua – ‘You come here’) creates a doubling effect considered grammatically incorrect in standard Italian but central to Tuscan speech patterns. Similarly, the construction A me mi piace doubles the indirect object in a way specifically associated with Tuscan dialect.
The lexicon includes terms like desinare (to have lunch) instead of the standard pranzare, and punto used to mean ‘not at all’ rather than simply ‘point.’ The adjective ganzo (cool/great) remains distinctly Tuscan, immediately identifying speakers to other Italians.
These linguistic particularities extend to pronunciation, with Tuscan speakers often dropping the final vowel from certain words (saying venir instead of venire). In rural areas particularly, vocabulary relating to agricultural practices often preserves terms from medieval Tuscan that have disappeared from standard Italian.
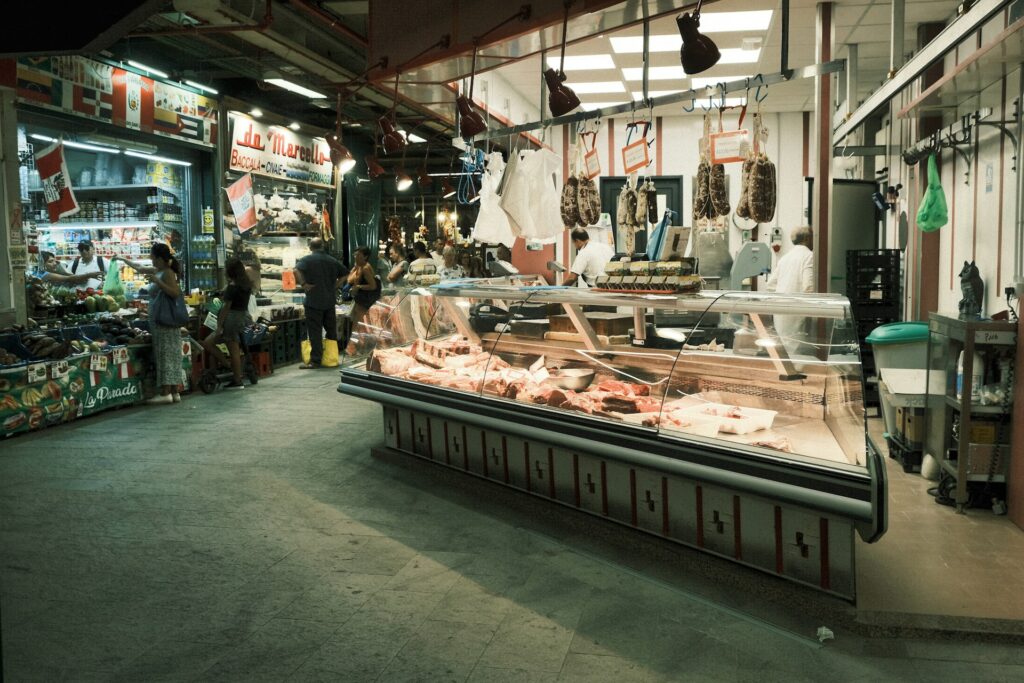
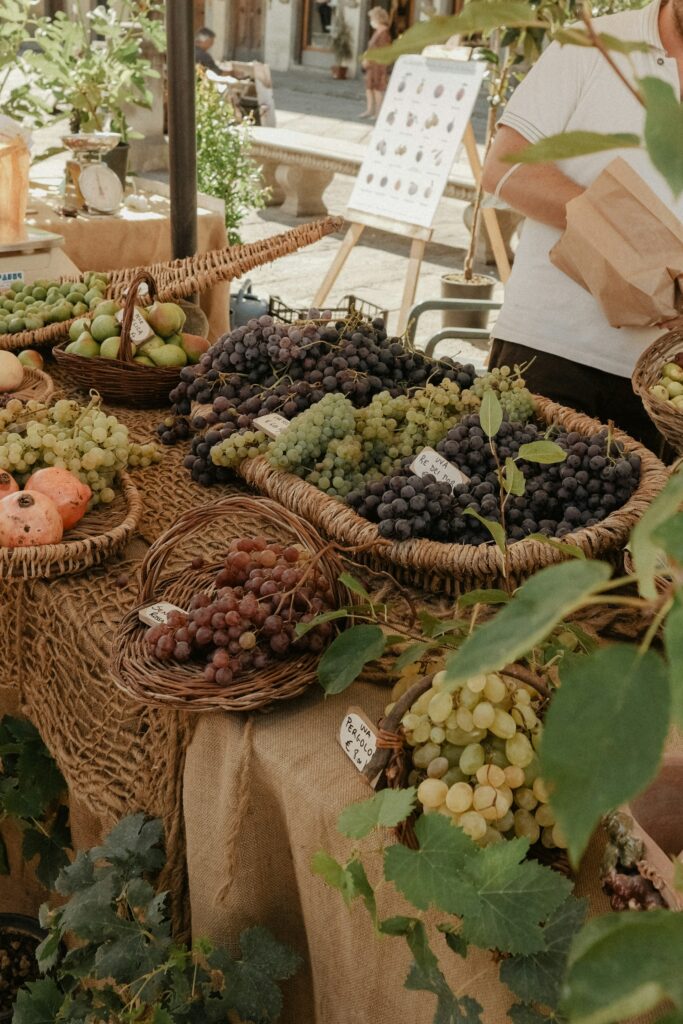
Distinctive Tuscan Culinary Traditions
Tuscan cuisine developed distinct characteristics shaped by the region’s agricultural history. Most emblematic is pane sciocco (unsalted bread), which originated during medieval salt tax disputes. This bread became the foundation for unique preparations like panzanella (bread salad), ribollita (vegetable and bread soup reheated multiple times), and pappa al pomodoro (tomato bread soup).
The prominence of bread-based dishes reflects historical resource conservation in a region that experienced periodic scarcity. Similarly, the Tuscan approach to meat utilises traditionally less-valued cuts. Dishes like lampredotto (made from the fourth stomach of the cow) in Florence represent a waste-minimising philosophy different from the meat preparations of northern Italian regions.
Tuscan olive oil usage differs from other regions in its prominence as a finishing element rather than primarily a cooking medium. The peppery finish of many Tuscan oils determines how they’re incorporated into dishes, often drizzled over food after cooking rather than fully integrated during preparation.
Wine integration into daily life follows distinctive patterns as well. The consumption of vin santo with cantucci (almond biscuits) after meals represents a specifically Tuscan ritual, different from digestive traditions in other regions. In rural areas, the tradition of merenda (afternoon snack) often features specific combinations of bread, oil, and preserved meats unique to Tuscan agricultural cycles.
Rural Tuscan Festival Culture
Tuscany’s countryside maintains celebrations closely tied to agricultural cycles, many dating to pre-Christian times. While seasonal festivals exist throughout Italy, Tuscan rural celebrations often emphasise hyperlocal specialties from remarkably small geographic areas.
Village sagre (food festivals) frequently honor ingredients specific to microclimates within Tuscany itself. The Sagra della Cipolla di Certaldo celebrates red onions grown exclusively in that area, while the Sagra del Zafferano in San Gimignano honors locally produced saffron with culinary traditions specific to that town.
Particularly unique to rural Tuscany are battiture (threshing festivals) marking harvest completion. In villages like Sorano and Sovana, these celebrations maintain elements of agricultural rituals largely disappeared elsewhere. The meals associated with these festivals often follow traditional serving hierarchies based on age and social position, providing insight into rural social structures.
The wine-focused traditions of Tuscany include distinctive competitions like Montepulciano’s Bravio delle Botti, where teams race 80kg wine barrels uphill through medieval streets. This combination of oenological celebration with physical competition represents a distinctive Tuscan approach to wine culture.
The Temporal Rhythm Of Tuscan Life
Tuscany maintains a distinctive relationship with time that differs from both northern Italian efficiency and southern Italian flexibility. The concept of tempo giusto (right timing) reflects an approach where activities receive their appropriate temporal space without arbitrary acceleration or delay.
This manifests in business practices where meetings typically start punctually but aren’t rushed to conclusion. Discussions receive the time they merit rather than adhering to predetermined schedules. This selective time management differs from both Milan’s business efficiency and Sicily’s more elastic approach to appointments.
In small towns, this temporal approach creates social rhythms where certain activities belong to specific times and places. The organisation of the day follows patterns where, for instance, the early morning square belongs to elderly residents discussing current events, while evening brings multi-generational social mixing. These temporal zoning practices create unwritten schedules understood by community members.
The Tuscan approach to modernity reflects this selective relationship with time. Technological adoption tends to occur based on practical value assessment rather than novelty. A workshop might use advanced manufacturing techniques while maintaining traditional management structures, representing a philosophical choice about maintaining quality and community connections.
This distinctive Tuscan relationship with time and progress creates a cultural environment that selectively incorporates change while maintaining certain rhythms and practices. Understanding this approach helps visitors appreciate the region’s distinct cultural identity within Italy’s rich diversity.
The city is a fast paced place to perch; the contrast to the countryside clear and concise. The differences are stark. You don’t even greet your friends in London streets as you pass, but when rural, strangers become soulmates over small chat. Urban boozing is all barging shoulders and elbowing for room, but the country pub is a place of respite and calm. Then there’s the air; oh, the air. The capital’s stays on your skin and in your lungs for longer than is alright. How we long for the fresh stuff.
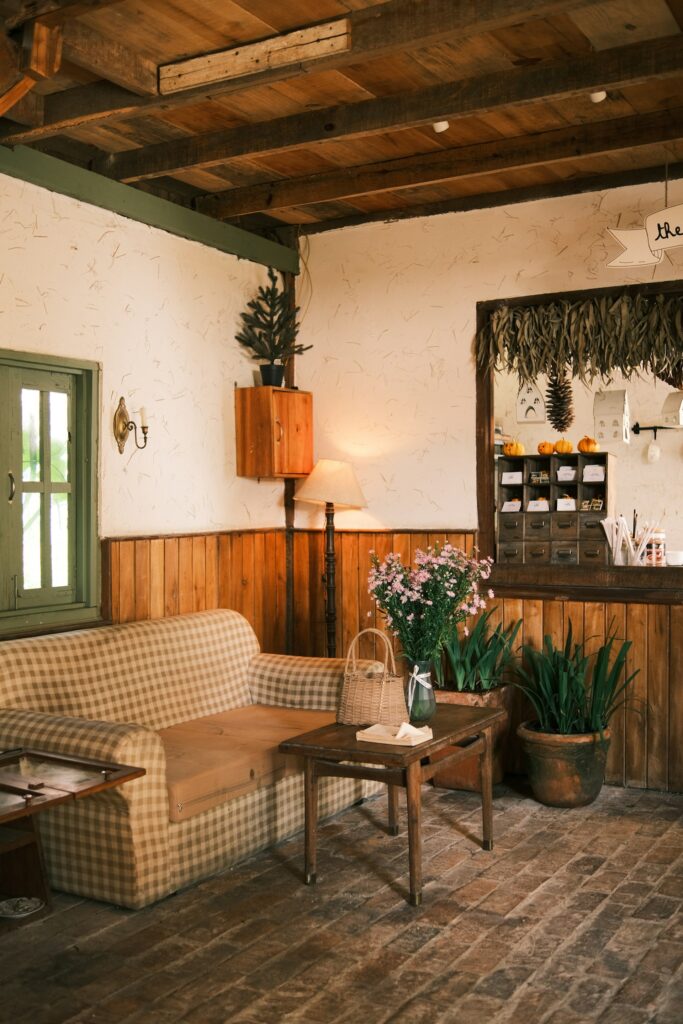
While you may not be able to simply up sticks the moment you crave the joys of the countryside, you can still bring the pastures new to you, by giving your house a rural makeover in a few simple steps. So, here are 5 IDEAL decor ideas for a country chic look.
Carefully Cobbled Together
There’s mix and match, and then there’s mixed and matched with care. While pulling together anything from the charity shop that carries a single digit price tag may serendipitously result in a style in synergy, frankly, it’s a long shot. Having a loosely knit style in mind – such as matching lines, features or motifs – can offer a guideline for your thrifty foraging. Deliberately rustic is great, but a little focus keeps things looking carefully cobbled together.
Consider introducing a ‘through line’ in your eclectic collection—perhaps brass hardware throughout, or a consistent colour palette that ties disparate pieces together. The charm of country homes lies in their storied furnishings; each piece seemingly with its own heritage. Hunt charity shops and car boot sales for wooden side tables with character, mismatched dining chairs that share a similar silhouette, or vintage frames that can be repurposed. Remember, authenticity is paramount—genuine patina trumps manufactured distressing every time.
Texture
What sets houses with designs on being rural apart from their urban cousins is the deployment of texture. Carpets rule the roost in country chic homes, bringing a comfort and colour that one associates with being away from the hectic city. Throws and extra cushions can enliven dull sofas, and outlandishly textured bedspreads feel right at home in the rural. If you want to, too, then add multiple competing and contrasting textures.
Beyond carpets and throws, consider introducing natural materials like rattan, jute, and unfinished wood to create a tactile paradise. Layer textures vertically as well as horizontally – rough-hewn wooden shelves against smooth plaster walls, or heavy linen curtains framing windows with delicate roman blinds. In the bathroom, woven baskets and wooden bath mats introduce warmth and tactility where typically there’s only cold tile. A sheepskin draped over a bedroom chair creates an inviting nook for morning tea that feels quintessentially pastoral.
Wooden Light & Shade
Light and shade is a stylistic guideline that can be applied to most interior design, but we’d like to double down on this perennial favourite when discussing country chic.
More precisely, we’re talking wood. If you’re fortunate enough to have beams, then darken or lighten them with a little varnish to contrast with the surrounding hues. A thick and sturdy kitchen table as a centrepiece for all the home’s comings and goings should also fit this theme – light against darker background shades or vice versa.
Items which are sturdy and satisfying to touch make a worthy focal point for any farmhouse kitchen. We’re thinking a place to eat, drink and socialise here, and we think you’re picturing the same thing, too. You know the type – long, rectangular and wooden, with enough room to accommodate seating a large family; just perfect.
Embrace the natural imperfections in wood for a truly rustic aesthetic. Consider salvaged timber for shelving or mantlepieces, complete with knots, cracks and patina. The kitchen table needn’t be perfectly symmetrical – a live-edge dining table tells a story that mass-produced furniture simply cannot. For a contemporary twist on country chic, mix wooden elements of different epochs – Victorian spindle-back chairs alongside a mid-century sideboard creates delightful tension. If you’re fortunate enough to have original floorboards, consider having them sanded back and finished with a matte oil rather than high-gloss varnish for an authentic farmhouse feel.
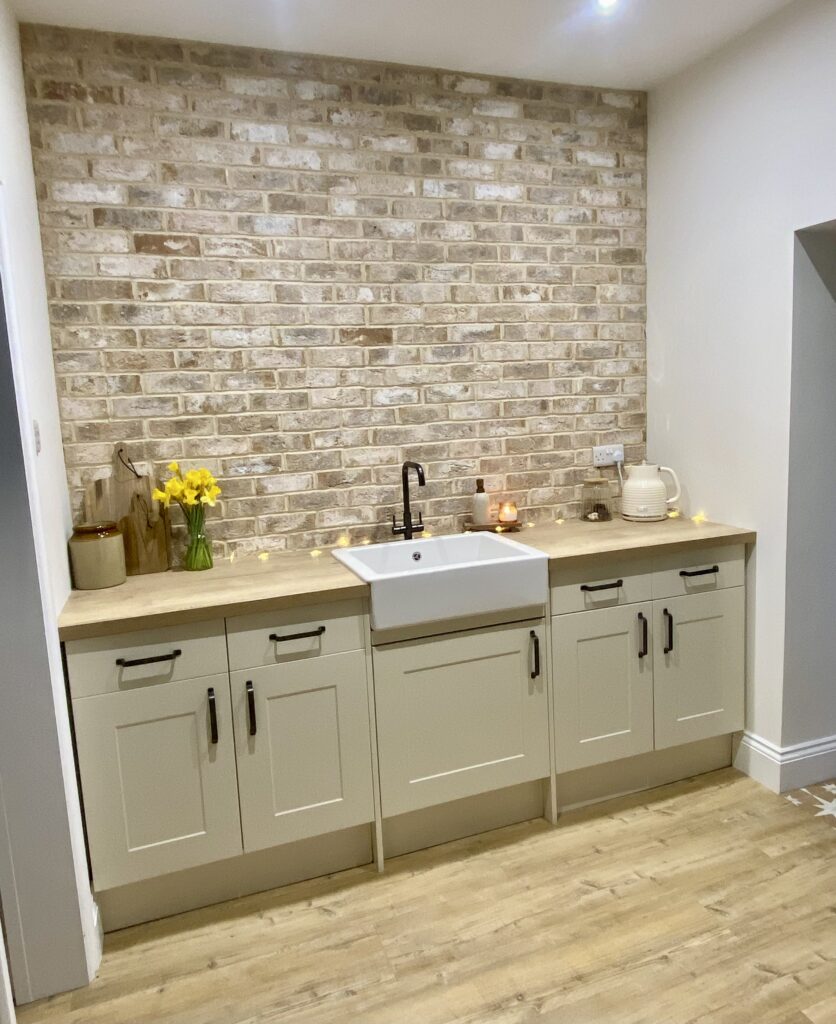
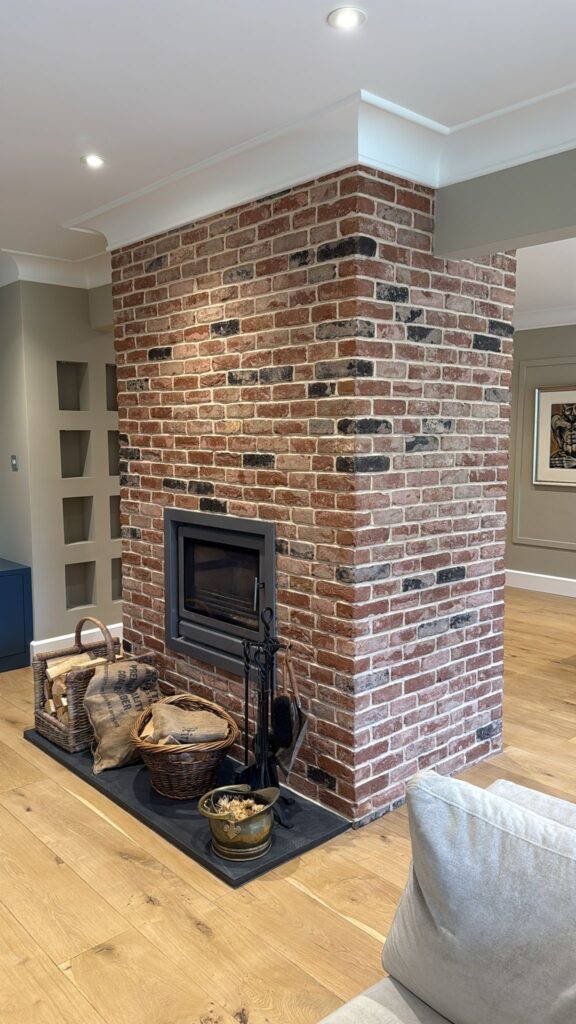
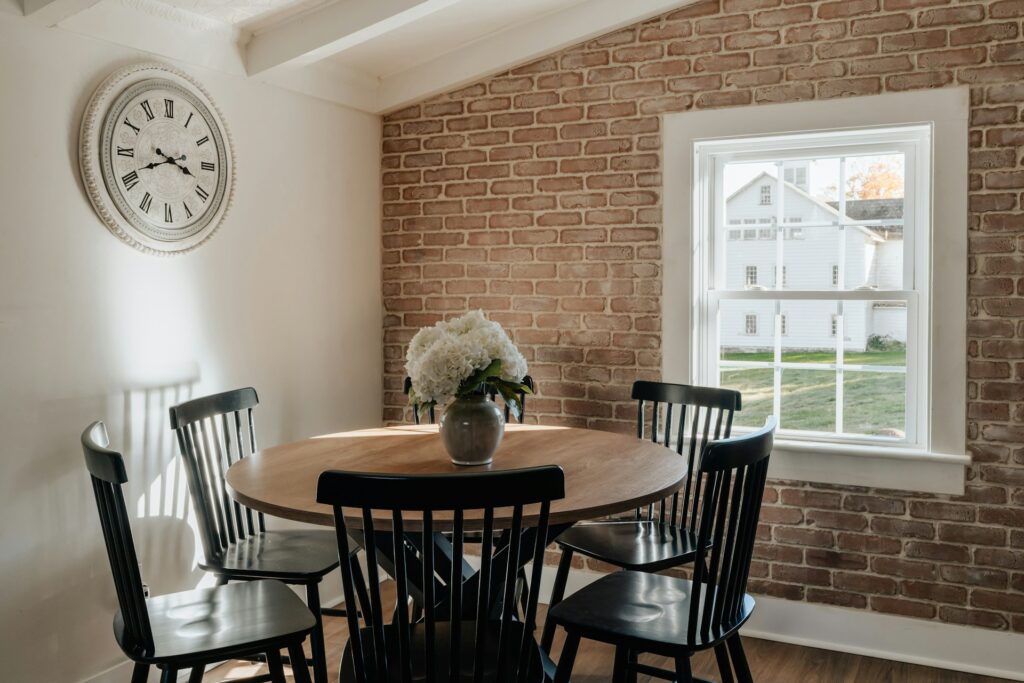
There’s something inherently honest about exposed brickwork that resonates deeply with country aesthetics. If you’re fortunate enough to have original brick walls, consider carefully removing the plaster to reveal the characterful masonry beneath. For those without this luxury, brick slips offer a brilliant alternative. These thin sections of real brick can be applied to ordinary walls, creating the illusion of solid brickwork without structural implications.
When working with brick slips, opt for reclaimed options where possible—the weathered patina and varied colouration of aged bricks brings authentic character impossible to replicate in new materials. Consider whitewashing rather than leaving them raw; this softens the industrial edge whilst maintaining textural interest. A limewash treatment allows the natural variations in the brick to show through, creating a depth that flat paint simply cannot achieve.
For a thoroughly modern take on country living, contrast exposed brick with contemporary elements—a sleek kitchen against a brick wall creates delightful tension between old and new. Remember that less is often more; a single feature wall of exposed brick can have more impact than covering every available surface.
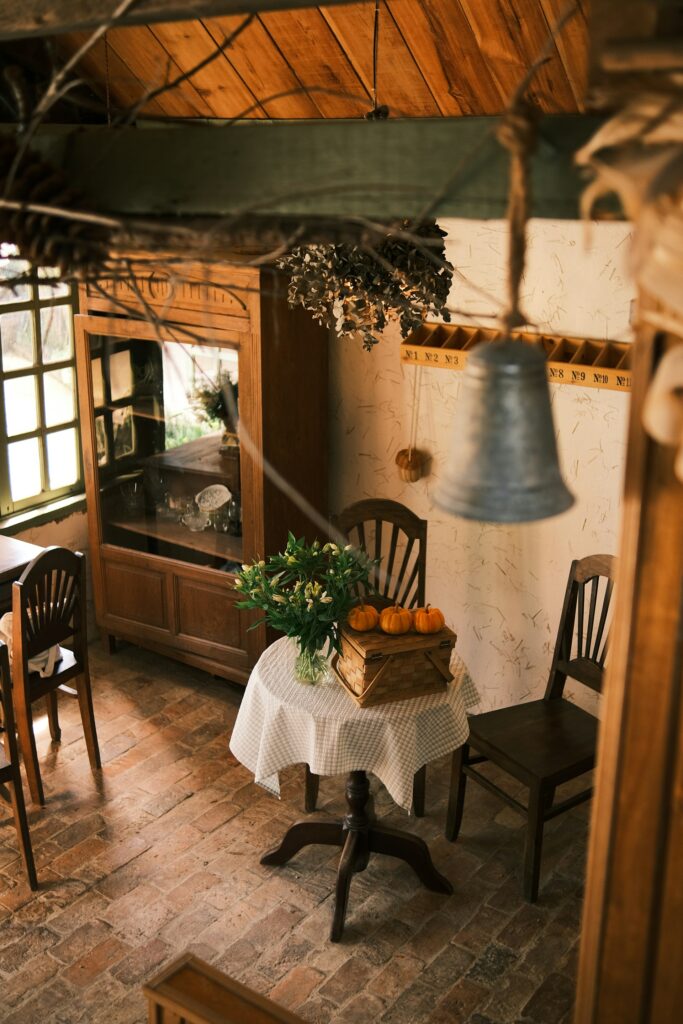
Agricultural Abundance
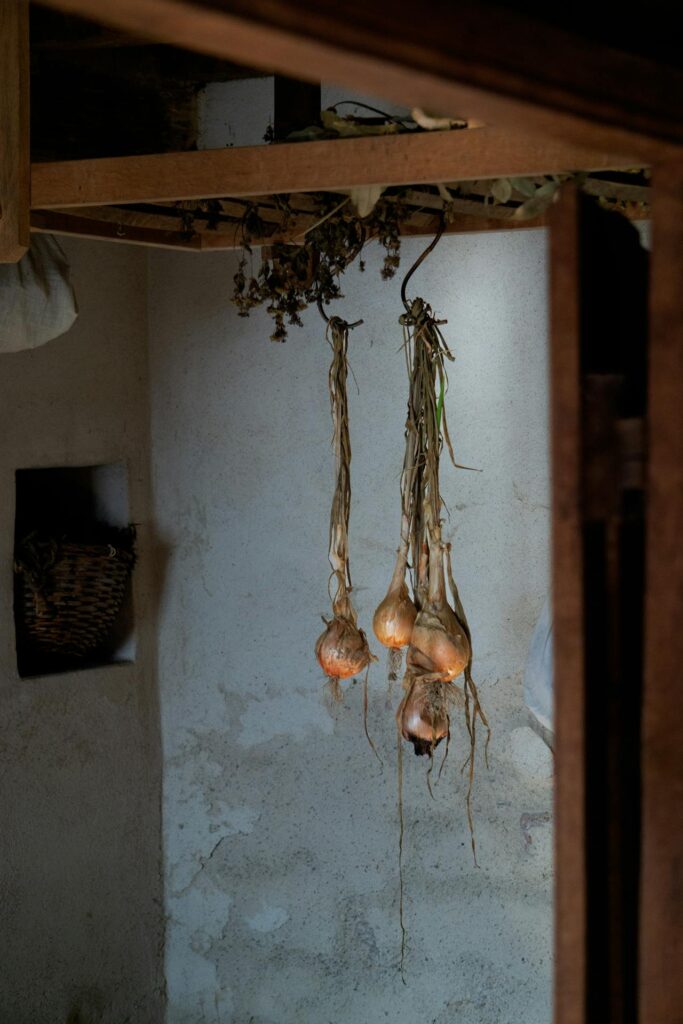
The quintessential country home blurs the boundary between indoors and garden. Embrace this with generous displays of both fresh and dried botanicals throughout your home. Dried lavender bunches and onions hanging from kitchen beams and loosely arranged wildflowers in stoneware jugs all evoke rural charm without trying too hard.
Consider creating a dedicated indoor herb garden on a sunny kitchen windowsill- not only practical for cooking but infusing the space with glorious scent and life. Traditional orangeries and conservatories were designed to bring plants inside year-round; channel this heritage by grouping potted plants in unexpected corners.
For the ultimate country flourish, forage seasonally – bringing in branches of spring blossom, summer meadow flowers, autumn leaves, and winter berries. These ephemeral displays connect your home to the natural rhythms outside in a way artificial decorations never could. Vintage botanical prints and pressed flowers in frames extend the theme to your walls, whilst floral fabrics (used judiciously) can add warmth without veering into chintzy territory.
A Warm Statement Piece
Whilst we’re on the subject of centrepieces, the heating and cooking in your house should not be viewed purely from a functional perspective. While certainly an investment – both in money and prime kitchen real estate – an aga brings a real sense of the rural living. It also provides heat; a triple win, then.
Heat and a statement piece also marry together happily in the form of wood burning stoves; a wonderful focal point for those craving the countryside. Having a nicely appointed pile of firewood in the living room can really hammer the point home. Just remember to have a carbon monoxide detector installed.
Beyond the Aga and wood-burning stove, consider how other heating elements might become focal points. A striking radiator in cast iron or brass can add period charm whilst keeping you toasty. Traditional heated towel rails in bathrooms bring both function and flair. For those without the space or budget for an Aga, a vintage bread bin or ceramic canisters in heritage colours can evoke country kitchen charm. Don’t overlook the power of a traditional Welsh dresser – not only practical for displaying your favourite crockery but a magnificent statement piece that instantly transports one to rural living.
The Force Of Floor
Flooring in country houses is a very different beast to the functional, wipe clean variety so often found in the homes of Britain’s bigger cities. Channel your inner bohemian with a patterned tile, juxtaposed with a simple, blonde wood in an adjacent room. Consider concrete to harden up those soft edges; a proud, cool material for a floor which works best when softened up by the room’s other country style furnishings like kitchen rugs.
Consider reclaimed terracotta tiles for an instantly aged, authentic feel underfoot. In bedrooms, painted floorboards with a few strategically placed rugs offer a perfect balance of practicality and comfort. For those seeking authentic character, encaustic tiles in hallways and bathrooms provide a heritage feel that improves with age and wear. Remember that in country homes, floors needn’t match throughout—different rooms can showcase different materials, creating natural transitions between spaces. In utility spaces, traditional quarry tiles in deep red or forest green offer both durability and timeless appeal. Whatever you go for, view the floor as a canvas, not merely something to step on.
And with that, we’re stepping on, too. We can’t wait to be invited round to see what you’ve done with the place!
So many discussions of home improvements seem to focus on the functional. And that’s just fine; some simply want a liveable space which gains in value as the years progress, rather than depreciates. But such a utilitarian approach can sometimes jeopardise the aesthetics of a house, an equally important aspect to contentment and continued life satisfaction, we think.
Time away from thinking about the faucet, insulation foam and the rest can be very liberating, indeed. Fortunately, the key interior design trends of 2025 tend to support this way of thinking; minimalism is on its way out, and in its place, natural elements, playful curves, and art that displays your frivolous – and even shambolic – side.
With that in mind, it’s all about the cosmetic today; here’s how to give your home’s aesthetic a makeover in 7 simple steps.
Spruce Up Your Exterior
All this focus on ‘interior design’ while our house’s facade lies derelict and unloved…
But first impressions count, and the initial judgements on your place’s aesthetic will be made from on the street, so we’re starting outside today.
Indeed, the appearance of your home’s exterior creates a lasting impression and sets the expectation for the rest of your home. For that reason, don’t neglect your front garden, driveway, any window boxes…even your front door deserves love. Luckily, there are plenty of easy and low-cost ways to spruce up your home’s exterior and boost its kerb appeal. Here are a few ideas:
Keep your front and back yard tidy by cutting the grass, removing weeds and debris, and trimming trees and hedges.
Plant some attractive flowers to add colour to your outdoor space.
Repaint your garage door, front door, and window frames in a bold, matching hue.
Add window boxes with colourful flowers and plants.
Inspect your home exterior regularly and repair any damage such as missing tiles or cracked bricks.
Change Up Your Flooring
Ever wondered why something at home just feels off, even after you invested in the best furniture, introduced some gorgeous potplants, and hung your artwork just right?
Often, the enigmatic effect of some carefully considered flooring is what’s missing. Damaged tiles, scuffed and faded wooden floors, and carpets that have picked up a certain aroma can all reduce your house’s visual appeal.
Not only that, but there’s something oh-so satisfying about a newly installed floor, offering a certain look, feel, sound and even smell that can bring your whole home’s energy to life.
Hardwood is perhaps our favourite for providing that multi-sensory effect. Whilst it’s certainly on the more expensive end of the scale, you’ll find flooring deals on offer if you’re buying a large amount – perhaps you could re-floor several rooms, reducing the accumulated cost in the process?
Get Creative With Wall Art
Wall art can be used to add a splash of colour, texture, and vibrancy to a room, just as much as it’s able to represent a statement of your exquisite taste and grasp of the zeitgeist. The best part, perhaps, is that wall art is super easy to introduce to a room (usually by hanging), which makes it a quick and low-cost way to upgrade your interior design. There is a fantastic selection of wall art available; think outside the box and be creative, though do ensure that you find something that will complement your decor and suit your style and taste.
Gallery walls have also become increasingly visible in modern day home design as they allow homeowners to show off their sense of positioning, framing, and curation in a way that a single picture doesn’t.
You can easily create a gallery wall in your bedroom, the living room, or in the stairway; all you need is a variety of prints, appropriate picture frames, and a bit of creativity to position them in a way that looks visually appealing and cohesive. That said, this thing doesn’t have to be overly abstract or artistic; you can also create a gallery wall using family photographs for a more sentimental touch.
Introducing more mirrors to your property can also help increase its aesthetics. The more mirrors, the more light will reflect in your home, which will make your house seem more bright and will also create the illusion of more space.
Mirrors can be used to create the illusion of space within a room, which gives the overall aesthetic of your place a huge lift, reflecting light around and helping make things appear larger and brighter.
There is a huge selection of mirrors available in various sizes and styles, with large, decorative mirrors best at creating a statement, and smaller mirrors offering a more contemporary feel, as well as being perfect at hiding flaws in rooms, i.e., to cover cosmetic wall damage.
Of course, installing too many would be a mistake; you don’t want to be living in a literal ‘house of mirrors’, after all, crashing into your own reflection and freaking yourself out.
Add Some Natural Elements
Bringing nature into your home can be an affordable way to create a more soothing aesthetic. The added (though admittedly, negligible) bonus of a houseplant’s air purifying capabilities shouldn’t be sniffed at either. Unless, of course, you’re allergic to them.
Plants and flowers can instantly breathe life into your home and give its overall aesthetic a huge lift. There is an excellent variety of low-maintenance indoor plants out there that are easy to look after, some of the best of which include Chinese Evergreen, Yucca, Spider Plant, Aloe Vera, and Peace Lily.
You can also buy high-quality artificial plants and flowers that will remain looking beautiful without the need to water or trim them. Another easy way to bring some greenery into your home is by starting a herb garden or keeping freshly cut bunches of flowers in vases around your home. So many options!
Play With Texture & Fabrics
The days of sleek, flat surfaces are behind us in 2025. Texture now reigns supreme, adding depth and interest to any space without major renovations. Try layering different fabrics and materials throughout your home to create a rich, tactile experience.
Velvet cushions, bouclé throws, woven wall hangings, and ribbed ceramics are all excellent ways to introduce texture. Even something as simple as swapping out your smooth bedding for a chunky knit or waffle-weave can transform the feel of your bedroom.
Don’t be afraid to mix materials either – contrast rough jute rugs with silky curtains, or pair rustic wooden furniture with plush upholstery. These juxtapositions create visual interest and invite touch, making your space feel more dynamic and lived-in.
Embrace Playful Curves & Unexpected Shapes
As we mentioned in the introduction, playful curves are definitely in for 2025. Moving away from the rigid lines of minimalism, curved furniture and rounded architectural elements create a more welcoming, organic feel in your home.
Look for statement pieces with swooping silhouettes – perhaps a curved sofa, rounded coffee table, or an arched floor lamp. Even smaller accessories like curved vases, circular mirrors, or scalloped edge textiles can help soften the overall look of your space.
For the truly adventurous, consider adding unexpected architectural details like arched doorways or curved wall niches. If permanent changes aren’t an option, try curved room dividers or shelving units that can add that sinuous quality without the commitment.
Remember, the goal is to create a space that feels less rigid and more playful – perfectly in line with 2025’s move away from austere minimalism toward more expressive, personal interiors.
The Bottom Line
We’ve all been spending a little more time than usual at home recently, and this looks set to continue for a while longer yet. Rather than staring at beige, unadorned walls and lamenting the lack of visual stimulation in your gaff, why not focus on improving your home’s aesthetic to make it a more pleasurable space to spend time? We’re right there with you!
Liverpool has always been a city that punches above its weight. From its musical legacy to its architectural treasures, this UNESCO City of Music offers students a wealth of experiences that won’t drain your maintenance loan.
In 2025, Liverpool continues to welcome students with its unique blend of culture, character and free attractions. Home to world-class galleries, breathtaking views, and vibrant social spaces, the city proves that enjoying student life doesn’t require deep pockets. Whether you’re new to the city or a seasoned local, we’re here to help you get the most out of Liverpool’s cultural highlights without spending a pretty penny.
Crosby Beach: Iron Men By The Sea
Location: Crosby Beach, Waterloo, Liverpool, L22 6QQ
Hours: Accessible 24/7, but tide times affect visibility of sculptures
Transportation: Take Merseyrail from Liverpool Central to Blundellsands & Crosby station (10-15 minute walk to beach) or Route 53 bus from Queens Square bus station
What makes it special: Standing tall until September of this year, Anthony Gormley’s ‘Another Place’ installation features 100 cast iron figures spread across 2 miles of beach, creating an otherworldly landscape perfect for photography, especially at sunset. The figures have recently received maintenance with stronger plinths to prevent sinking into the sand. This permanent installation continues to be one of Liverpool’s most distinctive outdoor art experiences.
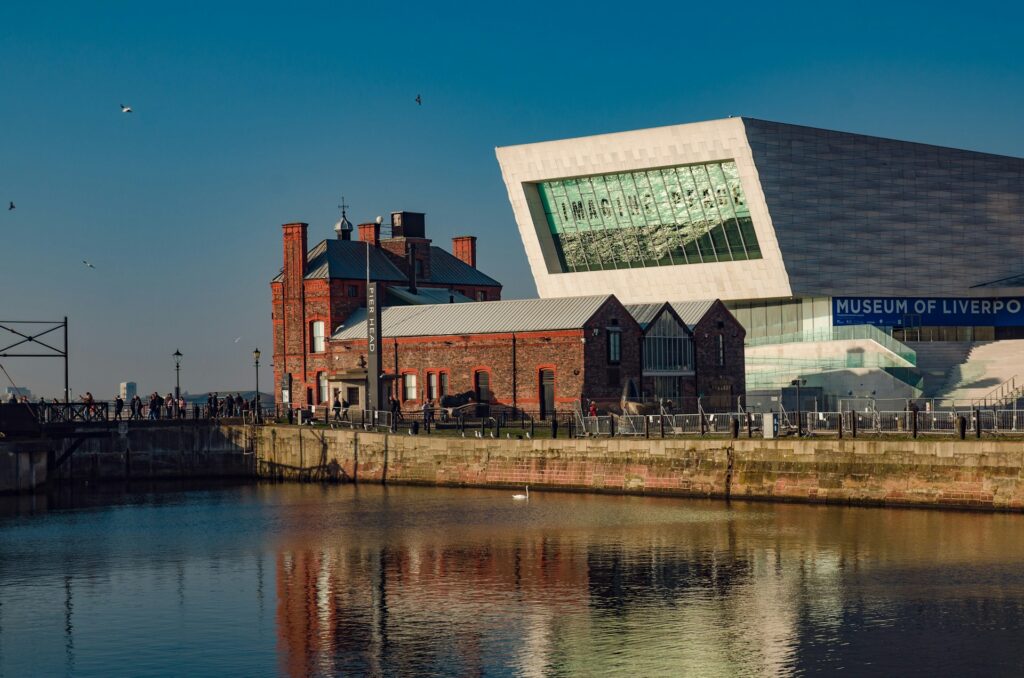
Victoria Gallery & Museum: The Original ‘Red Brick’ University
Location: University of Liverpool, Ashton Street, Liverpool, L69 3DR
Hours: Tuesday to Saturday, 10am – 5pm (last entry 4:30pm)
Transportation: 10-minute walk from Liverpool Lime Street Station
What makes it special: Housed in the distinctive red-brick Victorian building that gave ‘redbrick universities’ their name, this free museum houses significant art collections alongside scientific and medical exhibits. The building itself is an architectural marvel with a beautiful tiled entrance hall and Gothic features. The Waterhouse Café offers a pleasant study spot on campus, and regular free guided tours reveal the building’s fascinating history.
FACT: Cutting-Edge Art & Cinema
Location: 88 Wood Street, Liverpool, L1 4DQ
Hours: 11:00am – 6:00pm, Wednesday to Sunday
Transportation: 5-minute walk from Liverpool Central Station
What makes it special: The Foundation for Art and Creative Technology offers free entry to galleries showcasing contemporary and digital art. The centre’s 2025 programme features collaborative projects and immersive experiences, including hosting Liverpool Biennial 2025 from June to September. While exhibitions are free, the cinema also offers student discounts (£9.00, or £7.00 for members) for those wanting to catch independent and international films.
Free Liverpool Walking Tours: See The City With Locals
Location: Start at Steble Fountain (near the Walker Art Gallery)
Hours: Multiple tours daily: 10:30am-1pm and 2:30pm-5pm (schedule varies by day)
Transportation: Starting point in city centre, easily accessible by all public transport
What makes it special:These donation-based tours (pay what you feel is appropriate) are run by knowledgeable local guides in multiple languages. Perfect for new students wanting to get their bearings, these tours cover Liverpool’s fascinating history, architecture, and cultural significance.
Transportation: 5-minute walk from Liverpool Lime Street Station
What makes it special:This impressive gallery houses one of the UK’s most important art collections outside London, including works by Turner, Rembrandt, and Freud. Completely free to enter, it offers regular student events and workshops. From September 2025 to March 2026, the gallery will host the prestigious John Moores Painting Prize, showcasing the best in contemporary painting.
Everton Park: Liverpool’s Finest Viewpoint
Location: North Liverpool, accessed via Heyworth Street, Northumberland Terrace, and several other entrances
Hours: Open 24/7, year-round
Transportation: Bus routes from city centre to Everton/Anfield area; approximately 15-20 minutes from central Liverpool
What makes it special: Featuring what is quite possibly the greatest view in Liverpool from the Brow, Everton Park offers panoramic vistas of the city skyline, the Mersey River and even the Welsh mountains on clear days. The nature garden includes two small lakes for pond dipping and bird watching, while outdoor fitness equipment and a 3k walking/running route appeal to active students. It’s a favourite spot for photography enthusiasts looking to capture the city skyline.
Liverpool Central Library: Beautiful Space To Work & Explore
Transportation: 2-minute walk from Liverpool Lime Street Station
What makes it special: The Liverpool Central Library is a beautiful historic building with modern facilities, offering free Wi-Fi, computers, and quiet study spaces—perfect during exam periods. The rooftop terrace provides stunning views across the city, while regular events including ‘Open Minds’ discussion groups and workshops offer cultural enrichment. The Game Room hosts regular community events that are free to attend, making this much more than just a library.
The Jacaranda: Historic Music Venue With Beatles Heritage
Location: 21-23 Slater Street, Liverpool L1 4BW
Hours: Open daily, with live music primarily Thursday through Sunday
Transportation: 10-minute walk from Liverpool Central Station
What makes it special: This historic venue with connections to The Beatles offers free entry for open mic nights on Sundays. Spread across three floors with a bar, café, record store, and gig room, it’s a hub for Liverpool’s music scene. The unique tables with built-in vinyl record players let you listen to albums while you chat, and emerging artist showcases provide a glimpse of tomorrow’s musical talent.
Open Eye Gallery: Liverpool’s Photographic Hub
Location: 19 Mann Island, Liverpool, L3 1BP
Hours: Tuesday to Sunday, 10am – 5pm (Closed Mondays)
Transportation: 15-minute walk from Liverpool Lime Street Station; James Street station 4-minute walk; multiple bus routes stop at Liverpool ONE Bus Station nearby
What makes it special: As the only gallery dedicated to photography in Northwest England, Open Eye Gallery offers free entry to all its exhibitions. Located on Liverpool’s waterfront, the gallery hosts rotating displays of contemporary photography from both local and international artists.
Photography students will appreciate the gallery’s focus on socially engaged projects, while all visitors can enjoy free workshops and talks that regularly take place here. Its prime location makes it easy to combine with other waterfront attractions for a full day of cultural exploration.
Rice Lane City Farm: Urban Oasis Away From The Bustle
Location: Rice Lane City Farm, Rawcliffe Road, Liverpool, L9 1AW
Hours: Open daily, 10am – 3:30pm, 365 days a year
Transportation: Bus routes 21 and 345 stop near the farm entrance; 15-minute walk from Rice Lane train station; free parking available on site
What makes it special:This 24-acre urban farm and woodland offers a surprising rural experience within the city. Completely free to enter, the farm is home to various friendly animals including rare breeds like Ryeland sheep and Berkshire pigs.
The woodland walks provide a chance to experience wildlife not typically found elsewhere in Liverpool, making it a perfect stress-relief setting away from academic pressures. All paths are accessible for wheelchairs, and students interested in farming, conservation or community work can take advantage of volunteer opportunities throughout the year.
The Bottom Line
Liverpool remains one of the UK’s best cities for students on a budget. Its unique combination of cultural heritage, artistic innovation, and natural beauty means you can enjoy a rich student experience without emptying your bank account.
Popular student areas in Liverpool—from Smithdown Road to the Georgian Quarter, from the Baltic Triangle to Sefton Park—all offer spaces to socialise, study and explore without spending a fortune. The city’s free museums, libraries, beaches and parks provide the perfect backdrop to student life, delivering experiences that will shape your university years more than any expensive night out.
So take this list and discover why Liverpool continues to be one of the UK’s most student-friendly cities. With its blend of history, culture and community spirit, Liverpool shows that the best student experiences often come without a price tag attached.
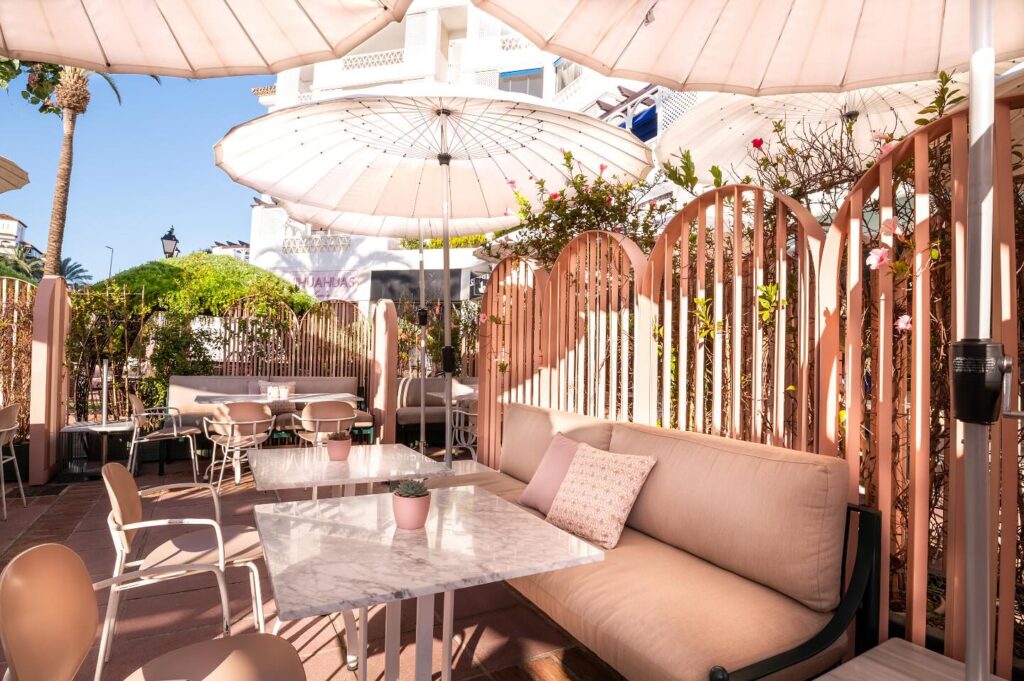
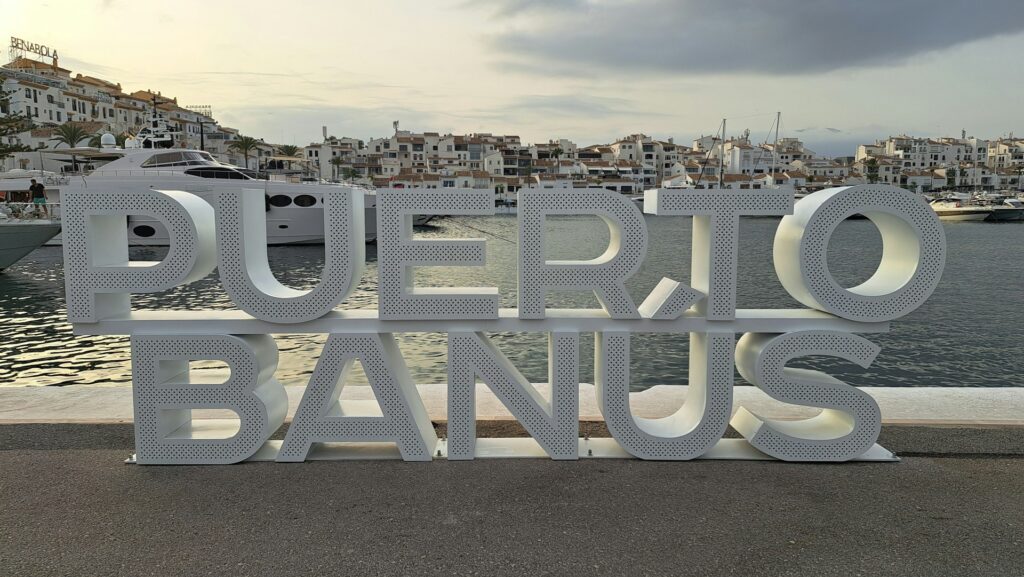
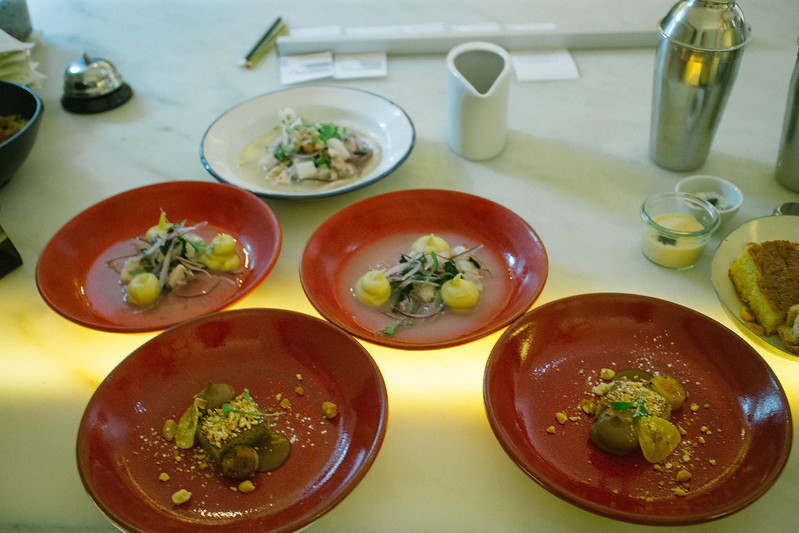
One of the most glittering jewels along Spain’s Costa del Sol, Puerto Banús has long captivated visitors with its intoxicating blend of Mediterranean glamour, luxury yachts, and see-and-be-seen entertainment. This exclusive marina west of Marbella proper has earned its reputation as the playground for the well-heeled, where Ferraris purr along the palm-lined boulevards and champagne flows as freely as the Mediterranean waves lapping against multimillion-euro vessels.
Photo by Tatiana SemenkovaPhoto by Tatiana Semenkova
Yet beyond the obvious displays of wealth and the famous Golden Mile that connects it to Marbella, Puerto Banús offers unexpected pockets of authentic charm, culinary excellence, and experiences that don’t necessarily require a platinum credit card (though it certainly doesn’t hurt). Whether you’re a first-time visitor or a seasoned Banús regular, this enclave delivers a seductive mix of Andalusian spirit and international luxury that’s hard to resist. Here’s our ideal guide on where to stay, dine and play in Puerto Banús…
Where To Stay In Puerto Banús
Located along the prestigious Golden Mile between Puerto Banús and Marbella, Hotel Don Pepe Gran Meliá offers an elevated luxury experience that combines classic Mediterranean elegance with contemporary amenities. This iconic five-star property sits directly on the beachfront, with expansive gardens creating a serene escape from the buzzing energy of Puerto Banús just a short drive away.
The hotel’s recently renovated rooms and suites feature sophisticated décor with warm wood tones and crisp linens, many offering sweeping balconies with panoramic Mediterranean views. The exclusive RedLevel service—their premium adults-only concept—provides an additional layer of luxury with private check-in, dedicated butler service, and access to a separate lounge serving complimentary refreshments throughout the day. Though located slightly outside Puerto Banús proper, the hotel’s proximity to both the marina and Marbella’s Old Town offers the perfect balance of accessibility and tranquillity.
For those seeking a more vibrant, entertainment-focused stay, the Hard Rock Hotel Marbella brings the brand’s signature rock-and-roll lifestyle to Puerto Banús with unmistakable flair. This relatively new addition to Marbella’s hotel scene occupies a prime position just minutes from the marina, blending Andalusian architectural elements with the brand’s iconic music-centric design and memorabilia displays featuring legendary artists.
Guests gravitate to the hotel’s expansive outdoor complex featuring three swimming pools, including the main “Eden Pool” where DJ sessions and live performances create an energetic atmosphere throughout the day. The rooftop “Sun Society” bar and lounge offers panoramic views stretching from the Mediterranean to the Sierra Blanca mountains, with signature cocktails and light bites served alongside DJ sets that transform the space after sunset.
Image via Hard Rock Hotel Marbella
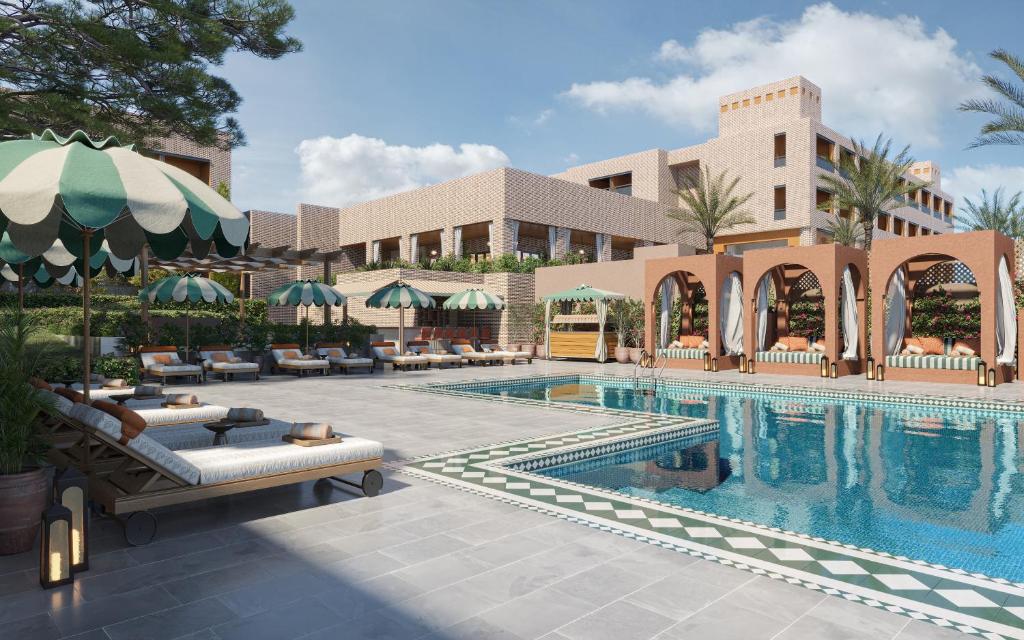
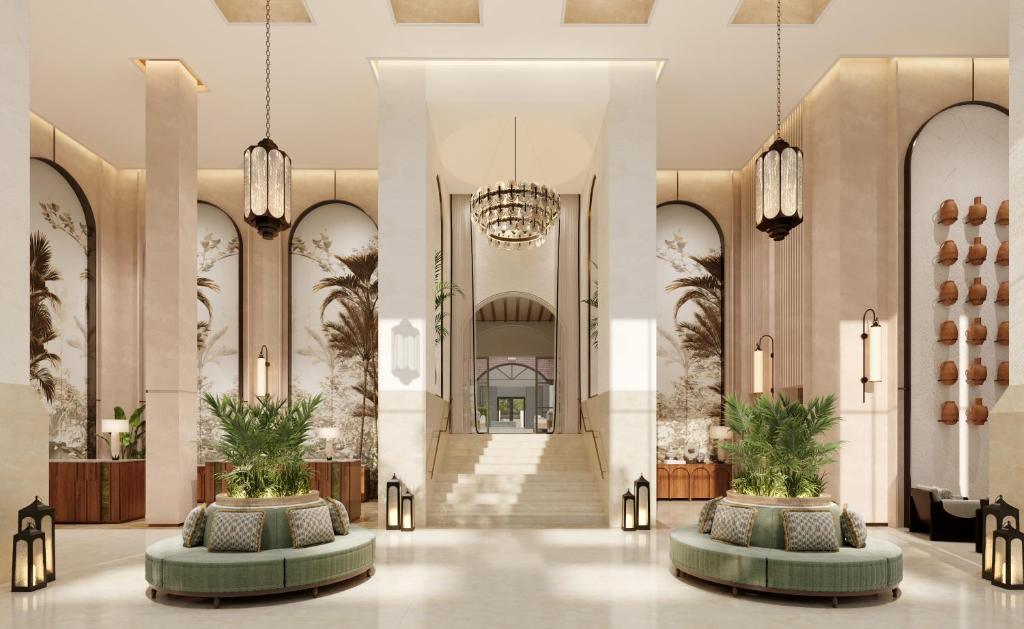
Situated along the tranquil sands of Playa del Real de Zaragoza, one of Marbella’s most beautiful beaches, the recently renovated Hotel Gran Marbella Resort & Beach Club offers a perfect blend of traditional Andalusian architecture and contemporary luxury.
Sprawling across five hectares of manicured gardens that tumble down to a private beach, it’s perhaps the most beautiful hotel in town. The resort’s palatial lobby sets the tone with its marble columns and intricate Moorish-inspired tilework, while guest rooms and suites feature private balconies with Mediterranean views.
Hotel Gran Marbella is home to a beach club, where cabana service, infinity pools, and a resident DJ create an atmosphere of refined hedonism. Though slightly removed from Puerto Banús’ centre, the hotel provides complimentary shuttle service to the marina, allowing guests to enjoy both tranquillity and easy access to the action.
For those who want to be in the heart of Puerto Banús with front-row seats to the marina spectacle, Benabola Hotel & Suites delivers with its prime waterfront location. These apartment-style accommodations offer generous living spaces, fully-equipped kitchens, and panoramic terraces overlooking the yachts and Mediterranean beyond.
The rooftop Sky Lounge offers some of the best views in all of Puerto Banús, serving craft cocktails against a backdrop of mountains, sea, and the twinkling lights of moored superyachts. The hotel’s central position means you’re just a lift ride away from the designer shops, restaurants, and nightlife that define the Puerto Banús experience.
Where To Drink Coffee In Puerto Banús
When it comes to morning coffee in Puerto Banús, there are two distinct camps. The see-and-be-seen crowd gravitates toward Rosas, strategically positioned at the edge of the marina where the fashionable set perch on sleek outdoor seating to watch the world go by. With its crisp white awnings, meticulously arranged flowers, and staff that looks plucked from fashion magazines, Rosas offers the quintessential Puerto Banús people-watching experience. Designer sunglasses are practically mandatory as you sip their admittedly good, if somewhat overpriced, coffee creations—often accompanied by picture-perfect pastries that taste nearly as good as they look on Instagram.
Image via Rosas
However, if you’re looking for a truly superior cup of coffee away from the posturing, follow the locals to Dezentral. This unassuming coffee shop tucked just a few streets back from the marina with a lovely little garden, has developed a devoted following among residents and in-the-know visitors seeking specialty coffee that rivals the best urban cafés in Madrid or Barcelona. The minimalist interior with its concrete floors, pale wood furnishings, and abundant natural light creates a calming counterpoint to Puerto Banús’ more extravagant establishments.
A must try is their “coffee meets ginger” – it’s delicious. Beyond coffee, Dezentral offers a small but thoughtful selection of house-made pastries and light and healthy plates.
Where To Dine In Puerto Banús
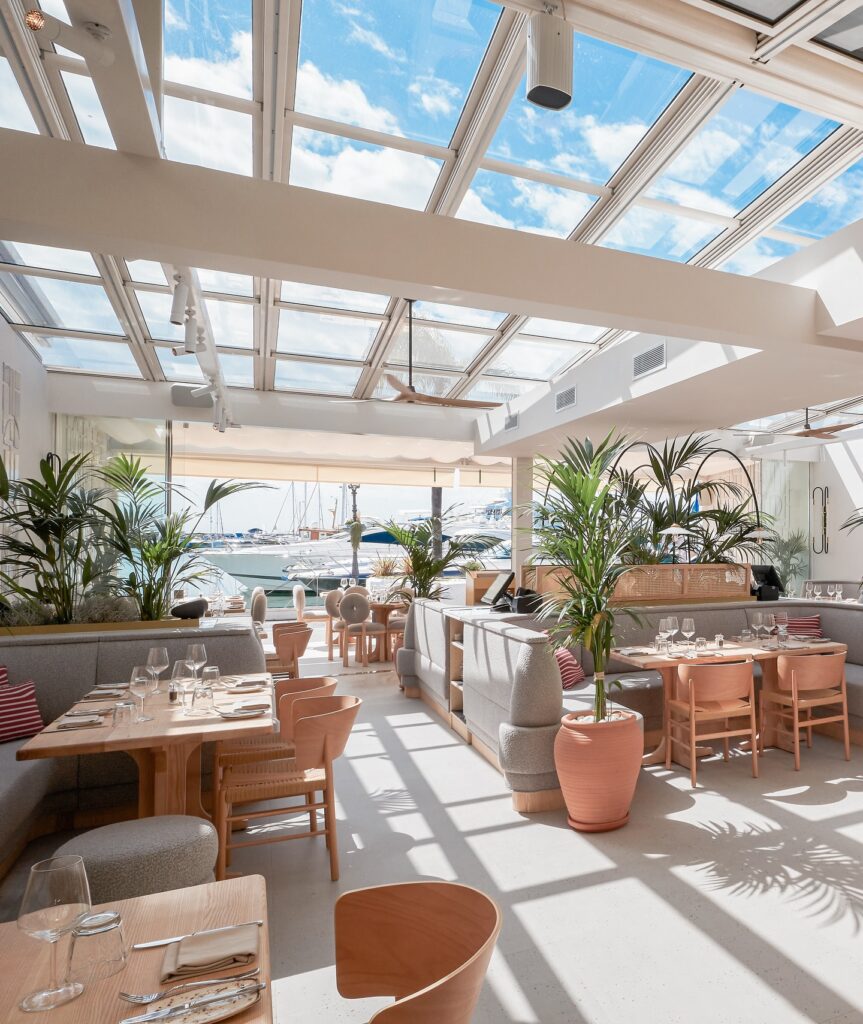
Our favourite place to eat in Puerto Banús? More than just a restaurant, La Sala Puerto Banús is a Banús institution. The multi-level venue offers distinct spaces including a piano lounge, terrace restaurant, and vibrant bar area that collectively create one of the most atmospheric dining destinations in the marina.
Their signature seafood paella arrives at the table fragrant with saffron and studded with locally caught prawns and mussels, while the Galician beef fillet—cooked over an open flame—satisfies carnivorous cravings. Live music most evenings transitions seamlessly from acoustic background melodies to more upbeat performances as the night progresses, making La Sala the kind of place where lunch can effortlessly stretch into dinner and beyond.
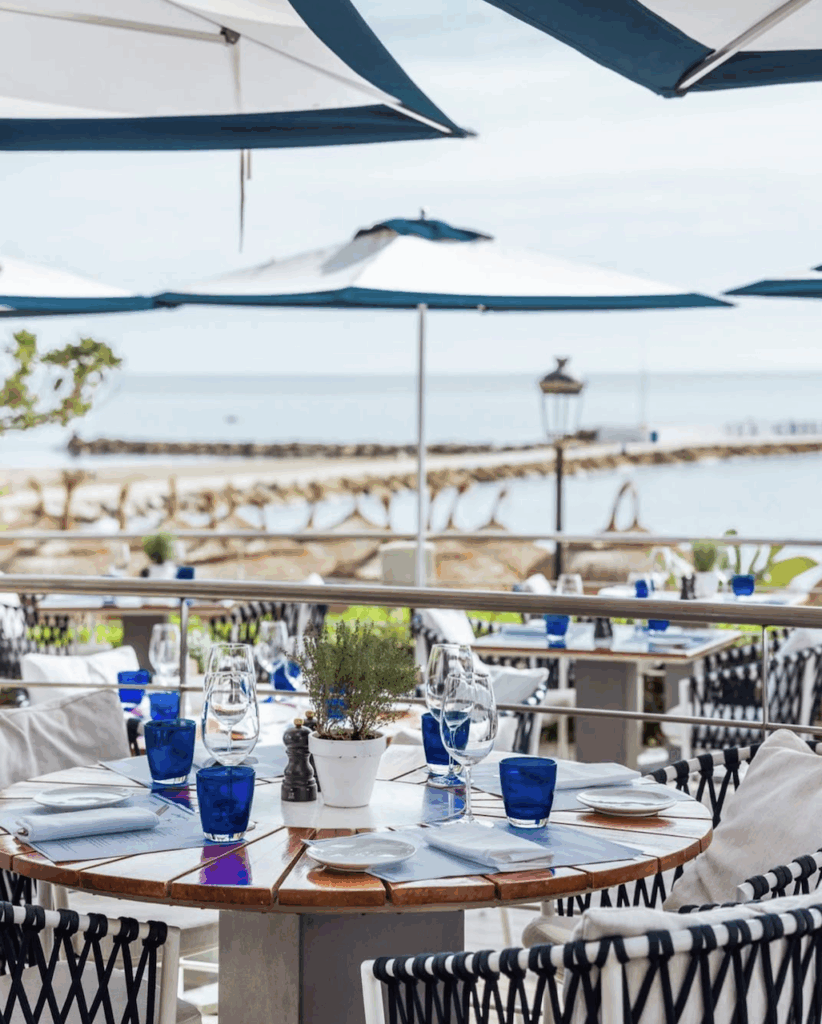
If you’re looking for seafood, while technically situated at the midpoint between Marbella and Puerto Banús on the Golden Mile, Sea Grill merits inclusion for its exceptional beachfront dining experience. This elegant restaurant serves Mediterranean cuisine with a particularly strong emphasis on impeccably fresh fish.
The salt-baked sea bass, dramatically presented and filleted tableside, has become something of a signature, while the raw bar offers the day’s freshest oysters, clams, and ceviches. With your toes nearly in the sand and the gentle soundtrack of waves breaking nearby, Sea Grill captures the essence of refined coastal dining. Reserve well in advance for sunset tables, which offer magical views and frequently sell out during high season.
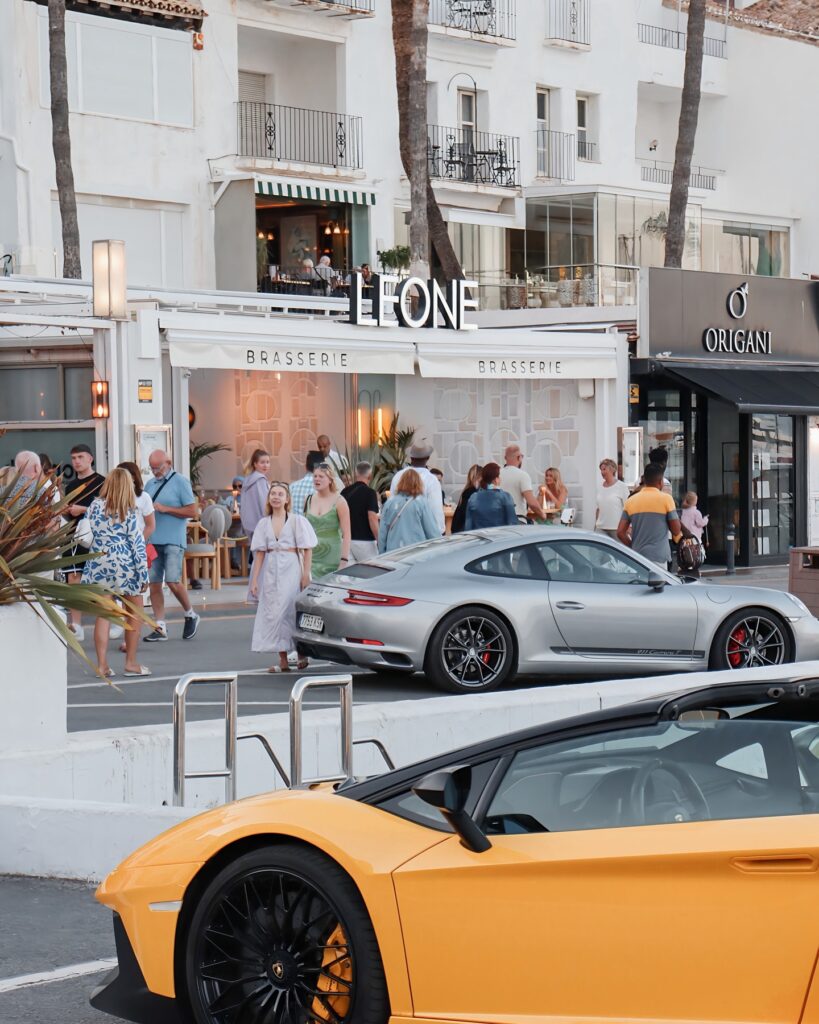
Among the newcomers making a splash on Puerto Banús’ dining scene, Leone Brasserie has quickly established itself as a sophisticated yet approachable option in the heart of the marina. Occupying a prime corner location with expansive terraces, this elegant brasserie balances refined aesthetics with a menu designed for broad appeal. Leone’s culinary approach marries Mediterranean sensibilities with international influences. The kitchen excels at elevated comfort classics—think perfectly executed steak frites with house-made béarnaise, or linguine with local clams laced with Albariño wine. A thoughtfully curated wine list heavily favours Spanish producers while offering carefully selected international options.
Bringing an entirely different energy to Puerto Banús is BREATHE Marbella, a verdant sanctuary where culinary innovation meets environmental consciousness. Set slightly back from the marina’s bustling waterfront, this multi-concept venue feels like discovering a secret garden oasis. Natural materials, soaring ceilings, and cascading greenery create a space where the boundaries between indoors and outdoors dissolve. The menu places plant-forward cuisine at its heart without being strictly vegetarian. Think heirloom tomato carpaccio with fermented almond cream and basil oil, and charred cauliflower with preserved lemon and tahini.
For an evening that seamlessly transitions from fine dining to nightlife, OCCO Marbella has masterfully captured the essence of contemporary Lebanese cuisine within a setting that pulses with energy as the night progresses. OCCO’s menu excels at modernising traditional Lebanese dishes without sacrificing authenticity. Hot and cold mezze are designed for sharing—the house-made labneh with zaatar and olive oil and perfectly crisp falafel with tahini sauce are standouts. Main courses are all about expertly grilled meats and fresh seafood.
As dinner service winds down, the venue’s energy shifts as the sound system’s volume increases and the space transforms into one of Puerto Banús’ most sophisticated nightlife destinations. With expert mixologists crafting Lebanese-inspired cocktails and a rotating roster of DJs, OCCO provides a seamless evening experience that reflects the cosmopolitan character of contemporary Puerto Banús.
What To Do In Puerto Banús
The beating heart of Puerto Banús is undoubtedly its marina, where some of the world’s most impressive private vessels create a floating display of nautical luxury. A leisurely stroll along the waterfront promenade offers prime viewing of these maritime marvels, alongside some of the most exclusive shopping in southern Spain.
The marina front hosts flagship stores from fashion powerhouses including Dior, Louis Vuitton, and Versace, while El Corte Inglés department store houses virtually every luxury brand under one roof across its multiple floors. Even if serious shopping isn’t on your agenda, the people-watching and yacht-gazing make for an entertaining pastime, especially during the evening paseo when locals and visitors dress to impress for their nightly promenade.
For visitors travelling with family or simply seeking a break from the marina’s adult-oriented entertainment, Selwo Marina offers close encounters with dolphins, sea lions, exotic birds, and penguins. The park’s commitment to conservation and education provides welcome substance amid Puerto Banús’ more superficial attractions, making it a worthwhile excursion particularly during the heat of midday when the beaches and marina can become uncomfortably warm.
For those seeking a more active pursuit that combines exercise with sightseeing, the coastal walk connecting Puerto Banús to Marbella’s Old Town offers one of the most scenic promenades along the Costa del Sol. This flat, well-maintained pathway—officially named the Paseo Marítimo but often referred to simply as “the boardwalk”—stretches approximately 7 kilometres along the Mediterranean shoreline.
Starting near the eastern edge of Puerto Banús, the route takes you past some of the coast’s most exclusive beach clubs and restaurants, with the sea consistently on one side and a changing tableau of luxury developments, lush gardens, and glimpses of the Sierra Blanca mountains on the other. The walk culminates at Marbella’s picturesque Old Town, where narrow, flower-filled streets and historic Plaza de los Naranjos offer a charming contrast to Puerto Banús’ modern glamour. Many visitors opt to time this walk for late afternoon, finishing with dinner in the Old Town before taking a taxi back to Puerto Banús.
There’s perhaps no better way to appreciate Puerto Banús than from the water looking back toward its picturesque harbour and the dramatic mountain backdrop beyond. Numerous companies offer sunset sailing experiences ranging from shared catamarans with swimming stops and flowing sangria to private yacht charters with personal chefs and premium champagne.
These two-to-three-hour excursions typically cruise along the coastline toward Marbella, offering unique perspectives on landmark properties and hidden coves accessible only by boat. The return journey as the sun dips below the horizon casts Puerto Banús in golden light, creating postcard-perfect photo opportunities and a serene conclusion to a day in Spain’s most glamorous marina.
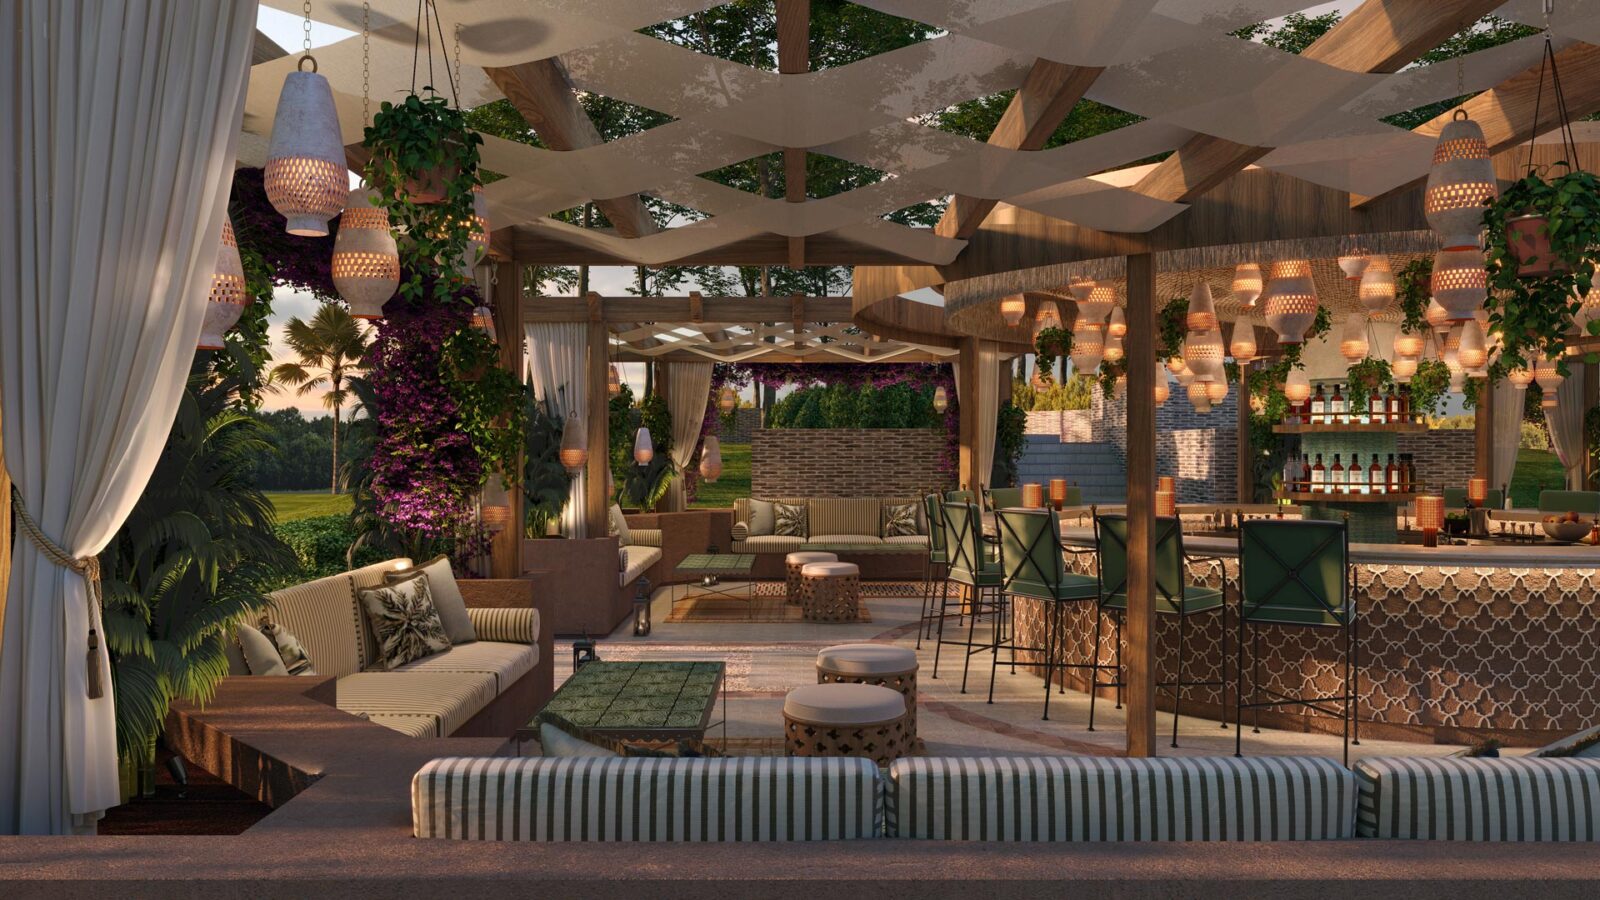
Puerto Banús’ beach clubs have earned legendary status for transforming daytime sunbathing into stylish social experiences. Ocean Club stands as perhaps the most famous, with its massive circular pool surrounded by plush white loungers and regular champagne spray parties during high season. The club’s restaurant serves surprisingly good cuisine, with fresh seafood and creative salads that rise well above typical beach fare.
For the ultimate daytime beach experience, La Sala by the Sea reigns supreme as Puerto Banús’ most vibrant beachfront venue. This Thai-inspired paradise combines the glamour of a premium beach club with outstanding food and expertly crafted cocktails. White day beds cascade toward the shoreline, while the expansive pool area becomes the centre of the action during the legendary pool parties featuring international DJs, live saxophonists, and impossibly beautiful people sipping champagne in the Mediterranean sun.
For a more laid-back vibe, Playa Padre offers a bohemian-chic atmosphere with bamboo structures, hanging lanterns, and relaxed dining just steps from the sea. Their Sunday sessions featuring guest DJs and live percussion create a barefoot luxury experience that captures Puerto Banús at its carefree best.
No guide to Puerto Banús would be complete without acknowledging its legendary after-dark scene. While the port’s reputation for excess and exclusivity is well-deserved, there’s actually a surprisingly diverse range of nightlife experiences available beyond the velvet ropes.
Sinatra Bar offers classic cocktails in an intimate setting with occasional live jazz, while News Café transforms from casual daytime eatery to vibrant nightspot as evening progresses. For those seeking Puerto Banús’ signature high-energy clubbing experience, TIBU and Pangea compete for the title of the marina’s most exclusive nightclub, with international DJs, bottle service, and dance floors pulsing until sunrise.
The Bottom Line
Puerto Banús manages to be both exactly what you expect—flashy, indulgent, and unapologetically luxurious—and full of surprising moments of authentic charm, natural beauty, and laid-back Andalusian spirit.
Whether you come for the people-watching, the Mediterranean cuisine, the shopping, or simply to soak up the uniquely glamorous atmosphere, this jewel of the Costa del Sol delivers a concentrated dose of the good life that can be adapted to suit virtually any travel style and budget.
Let’s be honest, airports aren’t exactly the highlight of any trip, are they? But when it comes to Bangkok’s behemoth of an aviation hub, a little savvy know-how can make all the difference between a smooth start to your Thai adventure and a sweaty, frustrated mess.
Bangkok is served by two international airports: Suvarnabhumi Airport (often informally called Bangkok Airport) and Don Mueang International Airport. Suvarnabhumi Airport (BKK) serves as the city’s primary international terminal, welcoming the majority of overseas carriers and also accommodating select domestic routes. Meanwhile, Don Mueang Airport (DMK) has carved out its niche as the preferred base for budget carriers and domestic operations.
The name Suvarnabhumi (pronounced ‘su-wan-na-poom’) was chosen by King Bhumibol Adulyadej and translates to ‘The Golden Land.’ This name traditionally refers to the continental Indochina region encompassing Thailand, Cambodia, Laos, and Burma.
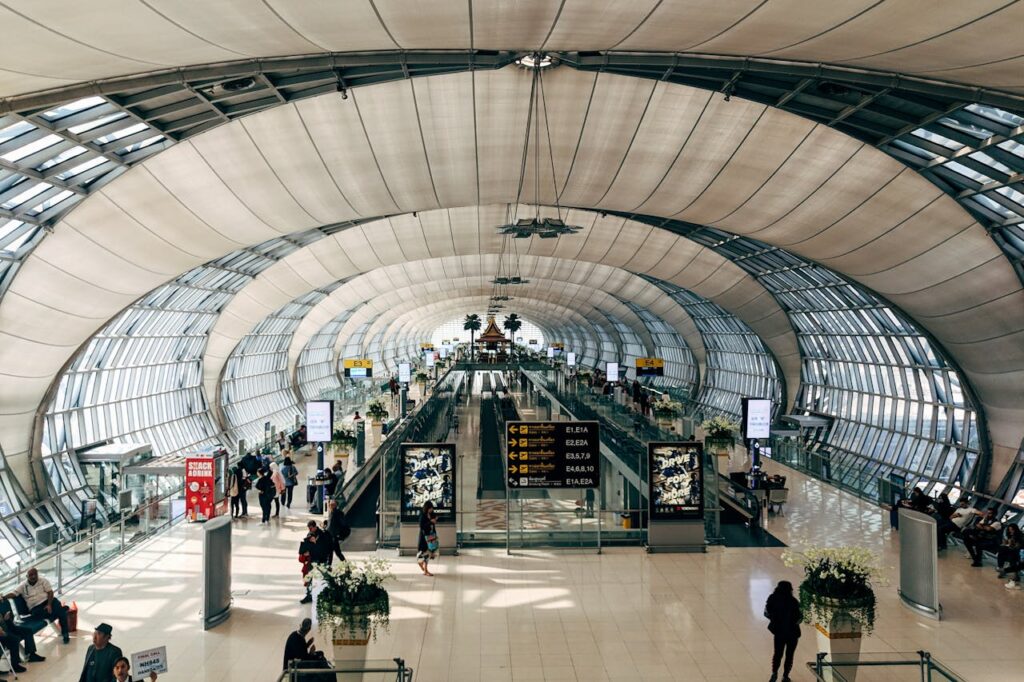
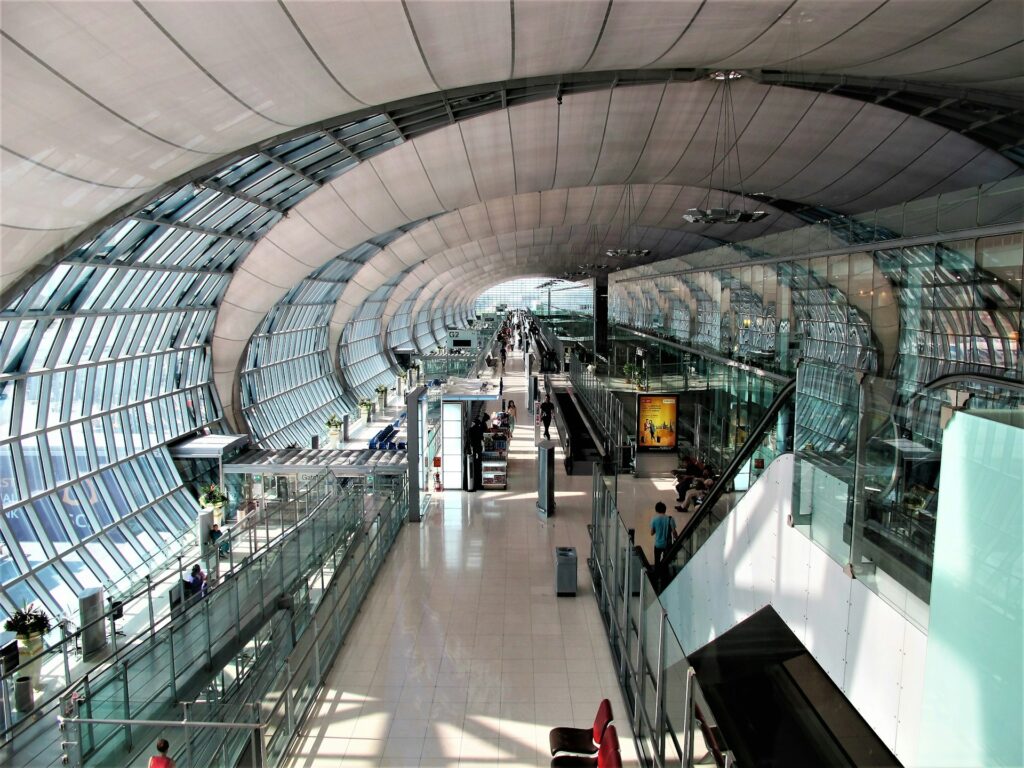
Opened in 2006 after decades of planning and construction, Suvarnabhumi is a proper juggernaut of modern architecture – all soaring glass ceilings, sweeping curved roofs and gleaming steel. With its annual capacity of 60 million passengers, it’s not just Thailand’s largest airport but one of Asia’s major aviation hubs. The main terminal building alone covers a staggering 563,000 square meters (making it one of the largest in the world), and with its 132 operating aircraft gates and parking bays, you’d be forgiven for feeling a tad overwhelmed on your first visit.
The airport sits about 30km east of central Bangkok – close enough to the city to be convenient but far enough away that the journey in can still take anywhere from 30 minutes to 2 hours depending on Bangkok’s notoriously fickle traffic.
There’s nothing quite like landing in Bangkok. The warmth hits you like opening an oven door. The first thing you’ll want to do is get your bags and dash off. However, take a breath – your holiday starts and ends right here at the airport, and these insider tips will make all the difference.
Get A Local Sim With Internet Right Away
Listen, we can’t stress this enough. Before you dash off to hail a taxi or chase down that Airport Rail Link, take five minutes to sort your connectivity. There are stands at the airport where you can get a sim card, and they’ll set it up for you on the spot.
The AIS Traveller SIM is absolutely brilliant value. Running for 8, 15, or 30 days, for just 299 Baht (around £7), 599 Baht (around £14), or 1,250 Baht (around £30) respectively, you get either 15 GB, 30 GB, or a whopping 300 GB of high-speed internet access.
Better still, if you’re feeling particularly tech-savvy, consider grabbing an eSIM before you even leave home. Companies like Airalo, Nomad, and Maya Mobile offer competitive eSIM packages specifically designed for Thailand. The process takes mere minutes—simply purchase online, scan a QR code, and your phone is ready to connect the moment you land at Suvarnabhumi.
We’ve found getting an eSIM in advance to be a proper game-changer – no more fumbling with tiny SIM cards or queuing at counters when all you want to do is get out of the airport and start your holiday. Plus, you can set everything up days before your trip while sitting comfortably on your sofa at home, rather than battling jet lag at the airport.
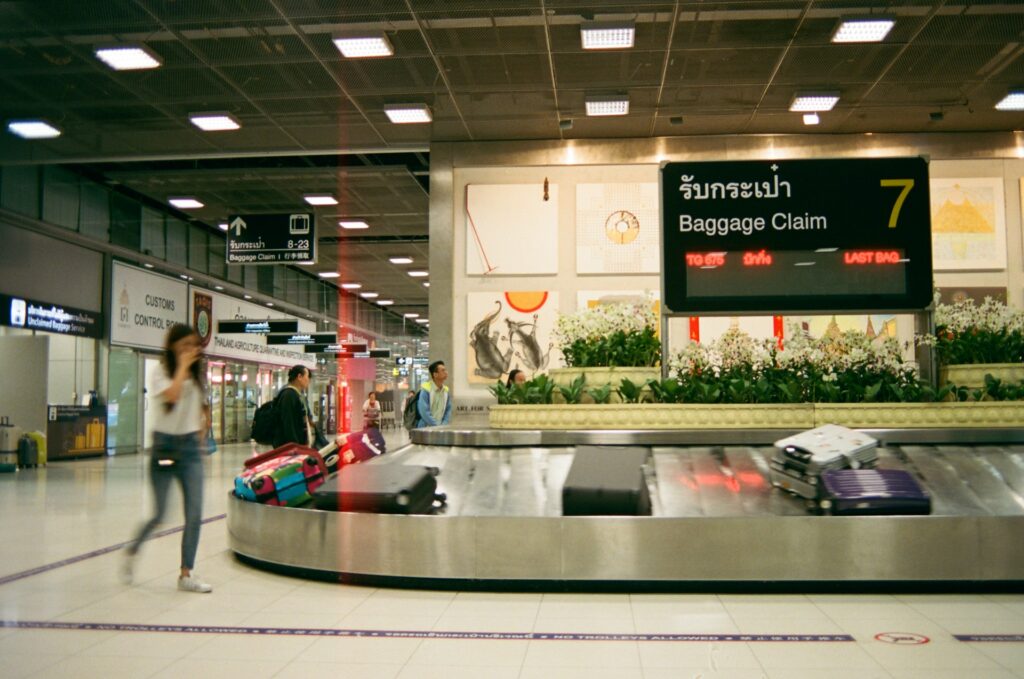
Sometimes plane food just doesn’t cut it, does it? If you’re starving after getting off the plane, make a beeline to Magic Food Point, the airport’s 24-hour food court, which is located on the 1st floor. Serving authentic Thai dishes at reasonable prices, it’s a proper introduction to the food scene you’ve come for.
The food court operates on a coupon system that might seem a bit confusing at first, but it’s actually dead simple. Here’s how it works: first, you’ll need to exchange your cash for a prepaid card at the cashier counter (look for the ‘Coupon Counter’ sign). You can load it with however much you think you’ll spend – 200-300 baht should be plenty for one person. Then simply wander around the various food stalls, point at what you fancy, hand over your card to be debited, and voilà – food is yours! If you’ve got any credit left on the card after your meal, just take it back to the cashier counter for a refund.
Magic Food Point hosts about 15-20 different food stalls offering everything from classic pad thai and green curry to more adventurous regional specialties. Zeed Zaad does a cracking som tam (papaya salad) and grilled chicken combo that’s nothing short of well, magic after a long-haul flight. It will reinvigorate you that’s for sure. There’s also an excellent Hainanese Chicken Rice stall, a dish that is wonderfully soothing after being on a plane for hours.
For those with less adventurous palates, you’ll find stalls selling fried rice and fresh fruit smoothies.
There are three terminals in total: Terminal 1 and Terminal 2 handle the international flights, while the third is just for domestic flights.
If you’re transferring between these terminals, the airport provides free shuttle buses that run every 10-15 minutes. You’ll find the shuttle bus stops clearly marked with blue signs on the ground floor of each terminal – specifically at Gates 1 and 5 in Terminal 1, Gates 2 and 6 in Terminal 2, and at the main entrance of the Domestic Terminal. Just look for the ‘Terminal Shuttle Bus’ signs and the queue of slightly confused-looking travellers.
The shuttles themselves are surprisingly comfortable air-conditioned minibuses, and they’re an absolute godsend given the sprawling nature of the airport complex. Don’t attempt to walk between the terminals unless you fancy a sweltering hike (trust us, we’ve made that mistake before). Even what looks like a short distance on the airport map can turn into a 20-minute trek through humid corridors. The shuttle journey, by contrast, typically takes just 5-7 minutes between terminals, even during the busiest times.
The Taxi Stand is Easy Peasy
While we’d definitely recommend booking a Grab taxi if you’re flying from Don Mueang airport (which is a bit of a free-for-all when it comes to transportation), getting a taxi at Suvarnabhumi is relatively straightforward.
To catch a public taxi, you need to go down to Level 1. Once you arrive, there are a number of different options for taxis. However, the metered taxi is the cheapest and best option.
Politely decline any taxi drivers hailing you down inside the airport and make straight for the ‘Public Taxi Service’ line. The system is wonderfully organised, with numbered queues and a ticket system that matches you with your driver.
Simply go outside and enter a lane where you’ll use a multi-language touch-screen to print out your queue ticket. The number on your ticket corresponds to the number of the bay where your taxi is parked. The ticket details the driver’s name, plate and operating licence number—quite handy if you happen to leave something behind.
Just be sure the driver turns on the meter (which starts at 35 baht) when you get in, and you’ll avoid any vocal figure surprises when you reach your destination.
Be sure to keep important directions and addresses in your phone so you can show the driver. Even with your perfect pronunciation of “Sukhumvit,” your driver might look at you blankly – a visual aid works wonders.
Airport Rail Link Need To Know
Bangkok Airport Rail Link is a commuter rail line connecting Suvarnabhumi Airport to Phaya Thai (BTS) station via Makkasan Station (MRT Phetchaburi) and it’s a brilliant way to avoid Bangkok’s notorious traffic.
To catch the train from the airport into town, head to the basement level (B floor) of the terminal building. Follow the prominent blue ‘Train to City’ signs—they’re everywhere, so you can’t miss them. Once you reach the station, you’ll find ticket machines with English language options and manned ticket counters if you prefer the human touch.
Purchase your ticket from the machines (they accept coins and bills), tap it on the gate to enter, and keep it for your exit. Trains are clean, air-conditioned, and have dedicated spaces for luggage—a godsend after a long flight.
Coming back the Airport Rail Link operates a train from Sukhumvit MRT to Suvarnabhumi Airport (BKK) hourly, and it’s a brilliant way to avoid Bangkok’s notorious traffic. Alternatively, you can go from either Nana or Asok station to Phaya Thai station, where you transfer to the Airport Rail Link, which operates daily from 6am to midnight.
The Commuter City Line trains depart every 10 minutes during peak hours (06:00-09:00 and 16:00-20:00) and every 15 minutes off-peak and weekends.
The journey takes about 30 minutes and costs a fraction of what you’d pay for a taxi. It’s particularly handy if you’re travelling during Bangkok’s rush hour, when the roads transform into slow-moving car parks.
Leave Your Luggage
If you’re only staying in Bangkok for a couple of days and moving on, or have an extended layover, the airport offers several left luggage services. This is perfect for travellers who want to pop into the city without dragging their suitcase around in the sweltering heat.
You’ll find luggage storage facilities at the following locations:
Basement Level (B Floor): The main luggage storage service is located on the basement level near the transport centre. Look for signs pointing to ‘Left Luggage’ or follow directions to the Airport Rail Link, then look for the storage counter nearby.
Arrivals Hall (Level 2): There’s another storage service on the second floor in the arrivals area, near entrance 3. This one’s particularly handy if you’ve just landed and want to explore Bangkok without your bags.
Departures Level (Level 4): For those already checked in but with time to kill, there’s a storage facility on the fourth floor near the east entrance of the departures hall.
Prices are calculated per piece per day, with rates starting at around 100 baht for small items and going up to 250 baht for large suitcases. Most locations accept both cash and card payments. Just bring your passport along as ID, and they’ll issue you a claim ticket.
The service is available 24/7 and is incredibly secure, giving you peace of mind while you explore. Some locations even offer additional services like luggage wrapping and bag repairs – proper handy if your trusty suitcase took a beating in transit.
Need to refuel, refresh and reconnect before the flight?
There are several airport lounges to choose from. However, we’ve found the Miracle Lounge really good value for money. Starting from just £23.77 the service is available for passengers on international departure flights only.
You get 3-hour lounge access and all you can eat and drink (including alcoholic drinks). The food is suprisingly good – last time we had a make your own miang that would stand up to most. The buffet spread is extensive for an airport lounge, with a decent selection of hot Thai dishes, fresh fruits, salads, and some international options for the less adventurous. They keep everything well-stocked, and the staff are quick to replenish anything running low. You can also use the shower room – perfect for freshening up after a long flight.
While Suvarnabhumi does offer free WiFi throughout the terminal, despite reports that say the opposite, we’ve found that it can be painfully slow at times. Also, the general terminal areas are woefully lacking in spots that are actually conducive to working with your laptop. That’s another reason the Miracle Lounge is worth every baht – not only do you get significantly faster and more reliable WiFi, but they also provide proper work stations with comfortable seating, power outlets, and enough space to spread out your gear. If you need to catch up on emails or get some work done before your flight, this is absolutely the place to do it.
For those with a longer layover, this is actually more economical than venturing into the city, especially when you factor in transport costs and the energy expended navigating Bangkok’s heat.
It’s Hot Inside
While the airport has air conditioning blowing, sometimes it can get awfully hot inside, especially during peak hours when the system struggles to cool the vast terminal spaces filled with travellers.
Dress in light, breathable layers so you can adjust to the fluctuating temperatures. A light shawl or cardigan can also come in handy for the opposite problem – some areas, particularly near the gates, can suddenly blast you with arctic-level cooling.
Bring Your Own Food
Any seasoned traveller knows that dining at Suvarnabhumi comes with a hefty premium. The moment you pass through security, prepare for your wallet to feel considerably lighter. That Starbucks latte? The identical Mango Tree noodle bowl? Even the familiar Burger King Whopper? All command significantly inflated prices compared to their street-side counterparts.
Why, you ask? Well, as a case study that looked into the pricing explains: “A retail outlet is opened in an airport on a premium. Airport authorities also ask for inordinately high rent for retail spaces. So, in order to make profit, they do what is most obvious – hike the price.”
The excessive prices have caused an outcry amongst some travellers, and the state had to investigate. The conclusion reached? There are cheaper food courts operating there, should people not want to eat in a name-brand restaurant. The other conclusion? You can avoid paying over the odds by eating before you travel to the airport, or waiting until you board the plane.
Unfortunately, that food court we spoke about earlier does not operate airside, and since it doesn’t look like the price of airport dining is coming down anytime soon, it’s best to eat before or pick up something to bring with you.
Don’t Forget A Water Bottle
Want to pay nearly ฿200.00 for a bottle of water? We didn’t think so. Don’t forget to bring an empty water bottle through customs to fill up. There are water refill stations dotted around the airport. There are also free refill stations outside the toilets near the gates.
This tiny bit of preparation will save you cash and keep you hydrated in the often stuffy terminal environment.
Buy Some Mango Sticky Rice For The Plane
Forget buying souvenirs here – they are expensive too. There is one thing, however, we have been known to buy for our plane journey at the airport: mango sticky rice. This delightful Thai dessert travels surprisingly well and makes for a perfect mid-flight treat that’s a million times better than whatever the airline is serving up as pudding. It’s exactly the comfort food you need when you’re feeling sad about leaving Thailand behind.
King Power Duty Free store at Suvarnabhumi Airport sells boxes of freshly made mango sticky rice. They also sell freeze-dried mango sticky rice. We have no idea what the later is, but it sounds like it travels well.
The Bottom Line
Remember, the airport experience is part of your journey – approach it with a smile and the same sense of adventure you’re bringing to the rest of your Thai experience.
Safe travels, and enjoy Bangkok’s Golden Land, starting right from the airport gates.
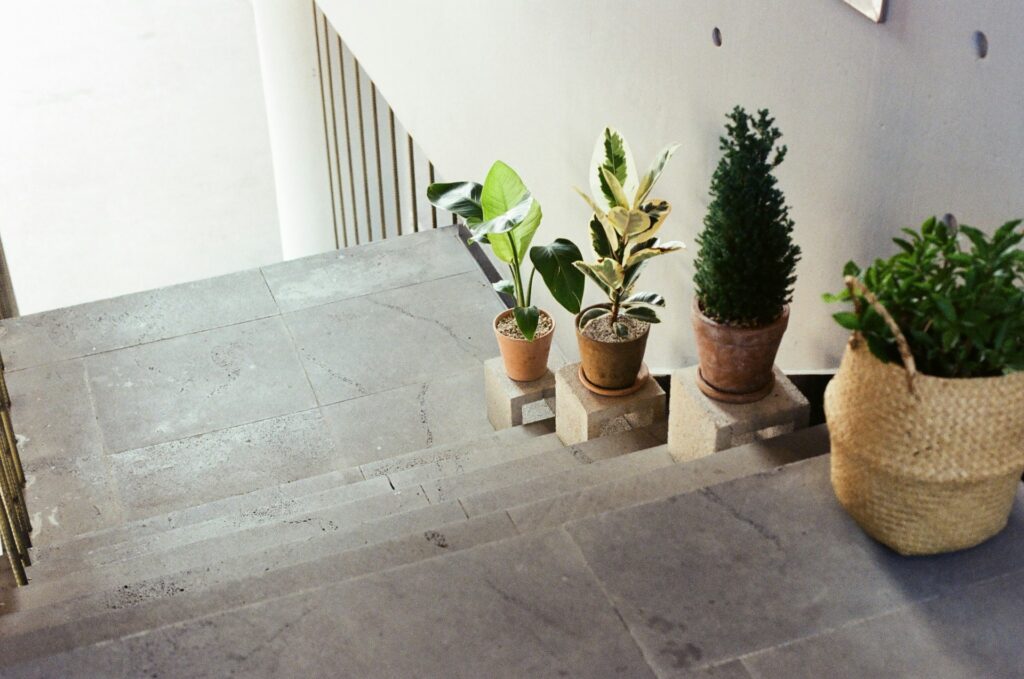
We tend to hurry up and down them without a second thought, yet staircases occupy prime real estate in our homes. Far from being just functional transitions between floors, they’re untapped canvases of design potential.
Most homeowners pour their decorating budget into kitchens and bathrooms, completely overlooking the staircase. This represents a missed opportunity—this architectural element is often the first thing visitors see when they step through the front door. The staircase essentially functions as the spine of your home, connecting spaces and creating that crucial first impression that sets the tone for the entire property. By neglecting this central feature, homeowners miss the chance to make a powerful design statement that can elevate their entire interior scheme.
Whether you’re renovating a Victorian terrace or putting your stamp on a new-build, reimagining your staircase can utterly transform your interior. With thoughtful design, these everyday structures become jaw-dropping focal points that set the tone for your entire home. The magic lies in their versatility—they can whisper understated elegance or boldly announce your design confidence, depending on your personal style and the character of your property.
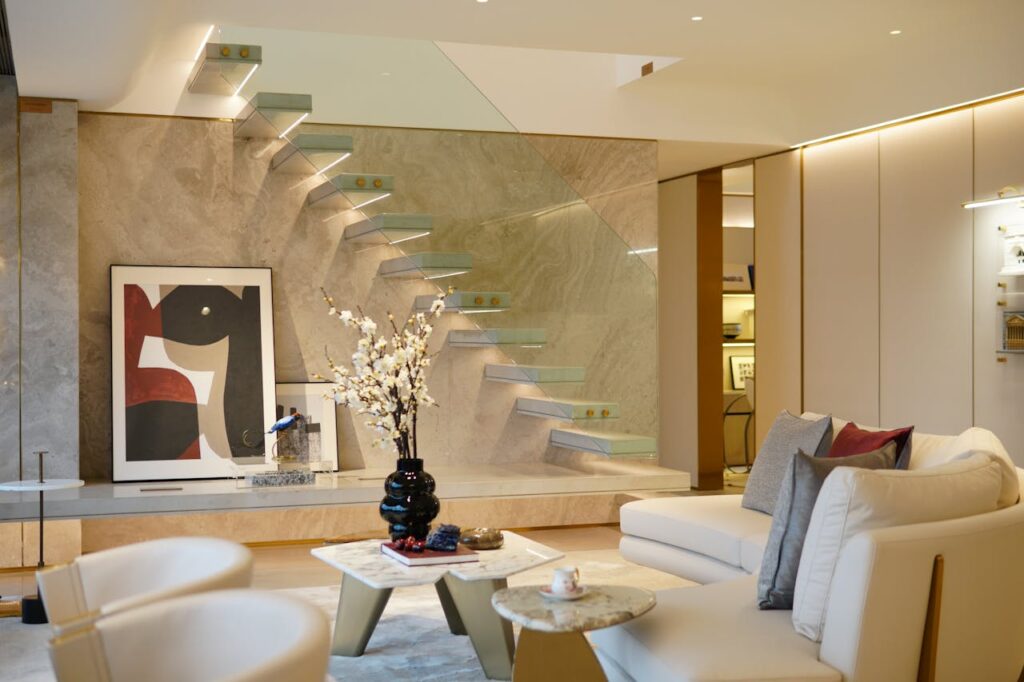
Embrace The Elegance Of Glass
Nothing dates a hallway faster than chunky wooden banisters and dated spindles. Enter glass balustrades—the contemporary solution that instantly refreshes tired staircases while allowing light to flow freely throughout your space.
Glass balustrades can make even the most modest hallway feel twice the size. This transformative effect comes from the way glass eliminates visual barriers, creating an uninterrupted line of sight that enhances spatial perception. The material’s transparency also allows decorative elements beyond the staircase to remain visible, effectively turning your entire hallway into a cohesive design statement rather than compartmentalising the space.
Paired with rich oak or walnut treads, glass creates that perfect balance between clean modernity and timeless warmth. The reflective quality amplifies natural light too, brightening gloomy entranceways and creating a welcoming atmosphere from the moment you cross the threshold. For the truly adventurous, structural glass treads supported by minimalist fixings create a genuinely breathtaking feature—though perhaps not for the faint-hearted!
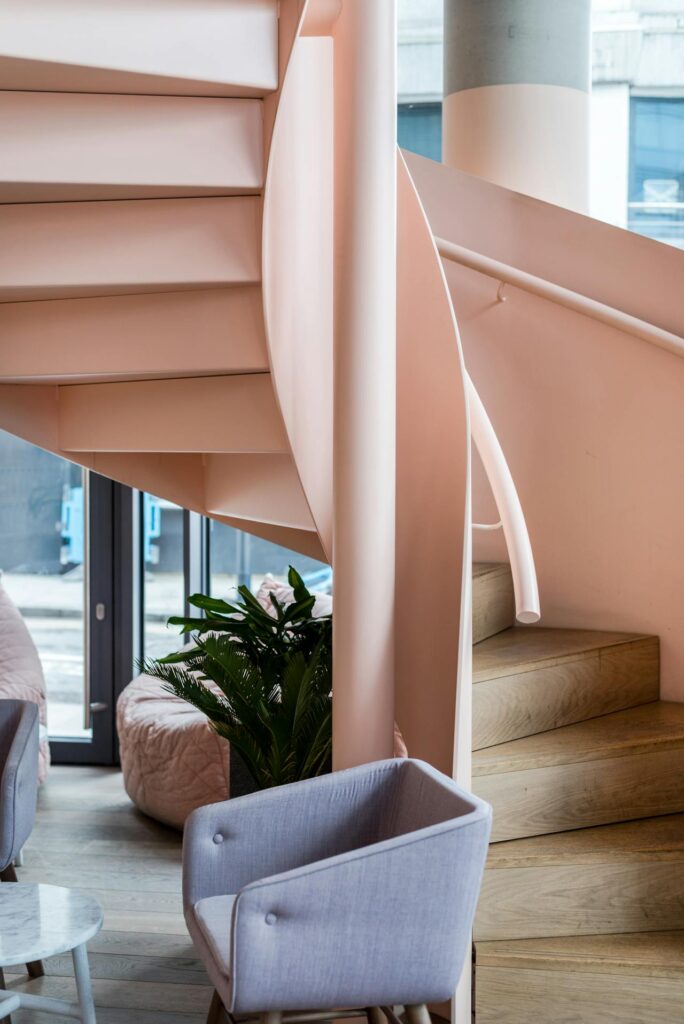
Make A Statement With Spiral Designs
When square footage comes at a premium (and when doesn’t it these days?), spiral staircases offer both clever space-saving and undeniable drama. Their sweeping curves create a sculptural element that draws the eye upward, whilst occupying minimal floor space.
The think we love most about spiral staircase? They function essentially as a piece of functional art that completely transforms the energy of a room. The sculptural quality introduces an element of movement and visual intrigue that static architecture often lacks.
From classic wrought iron to sleek contemporary steel-and-wood combinations, spiral staircases work brilliantly in both period properties and modern homes. The helix shape introduces movement and dynamism to static spaces—essentially a kinetic sculpture at the heart of your home. They’ve long been the darling of Instagram for good reason; spiral staircases inevitably become conversation starters, architectural talking points that leave lasting impressions whilst serving your daily needs with panache.
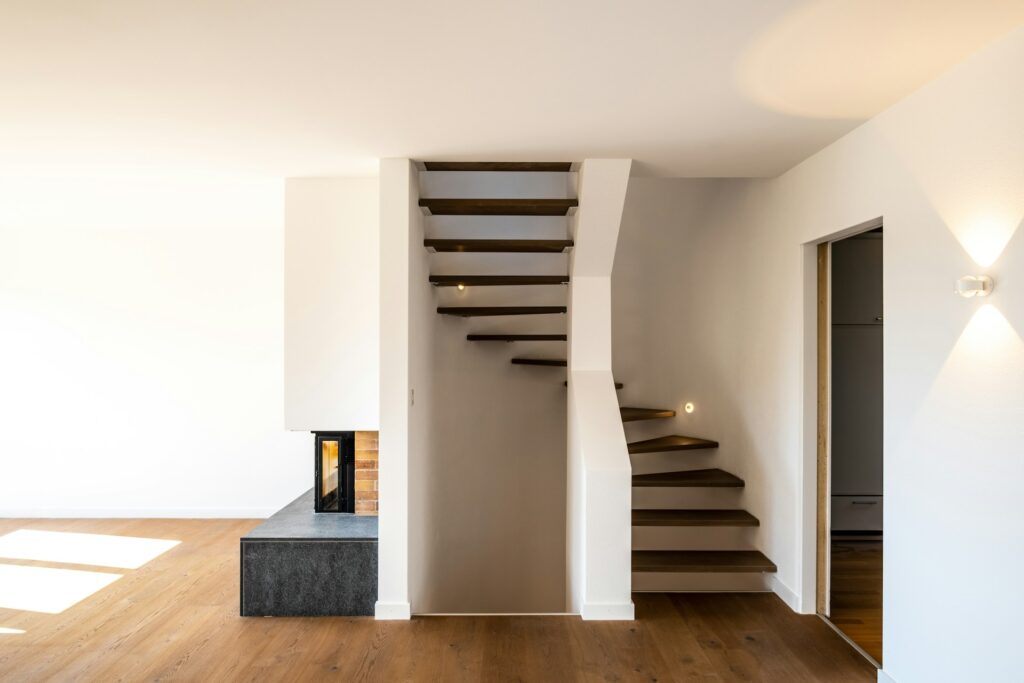
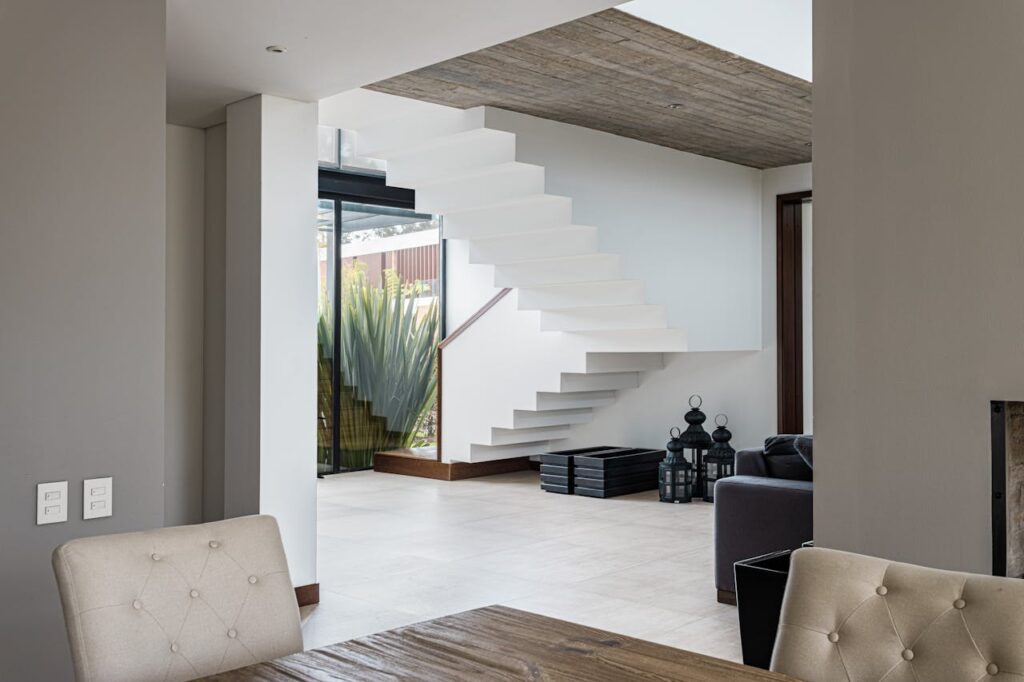
Floating Treads For Minimalist Charm
Nothing says architectural confidence quite like stairs that appear to float in mid-air. These cantilevered marvels seem to defy gravity, with treads projecting from the wall without visible support—a show-stopping feature for lovers of clean, minimalist aesthetics.
Visitors invariably ask how floating treads manage to stay up. The magic happens inside the wall with serious reinforcement and precision installation that enables this gravity-defying effect. Each tread typically anchors to a concealed steel structure embedded within the supporting wall, requiring meticulous engineering calculations to ensure stability and safety. This invisible structural support system is what allows the treads to project outward with such dramatic visual lightness, creating the illusion that they’re suspended in mid-air.
The beauty of floating treads lies in their chameleon-like versatility. From blonde engineered oak that brightens contemporary spaces to brooding wenge or concrete for industrial-inspired interiors, the material options are endless. Leave the space beneath completely open to enhance that coveted sense of space and light, or use it cleverly for streamlined storage that maintains the minimalist vibe.
Under-Stair Storage Solutions
That awkward space beneath your staircase represents some of the most underutilised square footage in British homes. Rather than relegating it to the dumping ground for wellies and winter coats, consider its glorious potential.
Under-stair spaces have been successfully transformed into everything from home offices to wine cellars. The key is seeing possibilities rather than problems in these unique spaces. This triangular footprint, often dismissed as awkward, actually offers a perfectly shaped niche for specialised functions that might otherwise compete for valuable floor area elsewhere in the home. With thoughtful planning, what was once dead space becomes one of the most efficient and characterful features of the property.
Sleek drawers that blend seamlessly with your staircase design offer discreet storage without the visual clutter. Alternatively, a built-in reading nook with comfortable cushions and clever shelving creates a cosy retreat that makes use of every inch. For busy households, consider dedicated zones—pull-out wine racks for evening entertainers, specialised shoe storage for footwear enthusiasts, or even a secret den for little ones that would make Harry Potter green with envy. The key to success? Bespoke joinery that looks intentional rather than afterthought, creating storage that appears perfectly integrated with your staircase design.
Bold Colour Choices
Today’s most striking staircases throw caution to the wind with glorious colour. A deep navy blue or forest green painted along the staircase wall creates a sophisticated backdrop for white-painted spindles—instantly elevating a tired hallway.
Staircases can handle much bolder colour choices than most people realise. As transitional spaces, they present the perfect opportunity to be braver with your palette choices. Unlike rooms where you spend extended periods, staircases are experienced in motion, allowing for more dramatic visual impact without becoming overwhelming or tiresome. This transient quality makes them ideal testing grounds for vibrant hues or striking colour combinations that might feel too intense in living spaces where you linger longer.
For truly dramatic impact, consider richly coloured carpet in jewel tones like emerald or sapphire. Far from the beige berbers of yesteryear, today’s colourful carpet options introduce personality while providing sound insulation and comfort underfoot. Herringbone patterns or subtle geometrics disguise everyday wear and tear—particularly important in high-traffic areas like staircases.
Alternatively, mosaic tiles on risers offer unlimited creative potential that can utterly transform your entrance hall. From subtle Victorian-style patterns that honour period properties to bold Mediterranean-inspired designs in vibrant colour combinations, these intricate mosaics turn your staircase into a genuine work of art. Heritage colours like terracotta and cobalt create timeless appeal, while contemporary shades such as teal and burnt orange make an unmistakably modern statement.
Mix & Match Materials
Gone are the days when staircases needed to be constructed entirely from a single material. Today’s most striking designs boldly combine elements for textural interest that feels distinctly bespoke.
The most compelling contemporary designs focus on unexpected combinations. Industrial steel against warm timber, or concrete steps with brass detailing—these juxtapositions create visual tension that’s incredibly sophisticated and distinctive. The intentional contrast between seemingly opposing materials challenges conventional design expectations, resulting in a custom appearance that mass-produced staircases simply cannot replicate. These material dialogues tell a more complex design story, revealing a thoughtful approach that elevates your staircase beyond the merely functional into something truly bespoke.
The contrast between differing textures—smooth against rough, matte against glossy—adds depth and character that can’t be achieved with monotonous materials. Think weathered wood treads paired with powder-coated metal balustrades, or sleek marble steps offset by a tactile rope handrail.
When planning these material marriages, consider how they’ll age. Some materials, like brass and copper, develop a beautiful patina that tells the story of daily use, while others maintain their pristine appearance with minimal maintenance. Remember, you’ll interact with your staircase multiple times daily—the cool touch of metal beneath your palm or the warmth of wood underfoot becomes part of your home’s sensory experience.
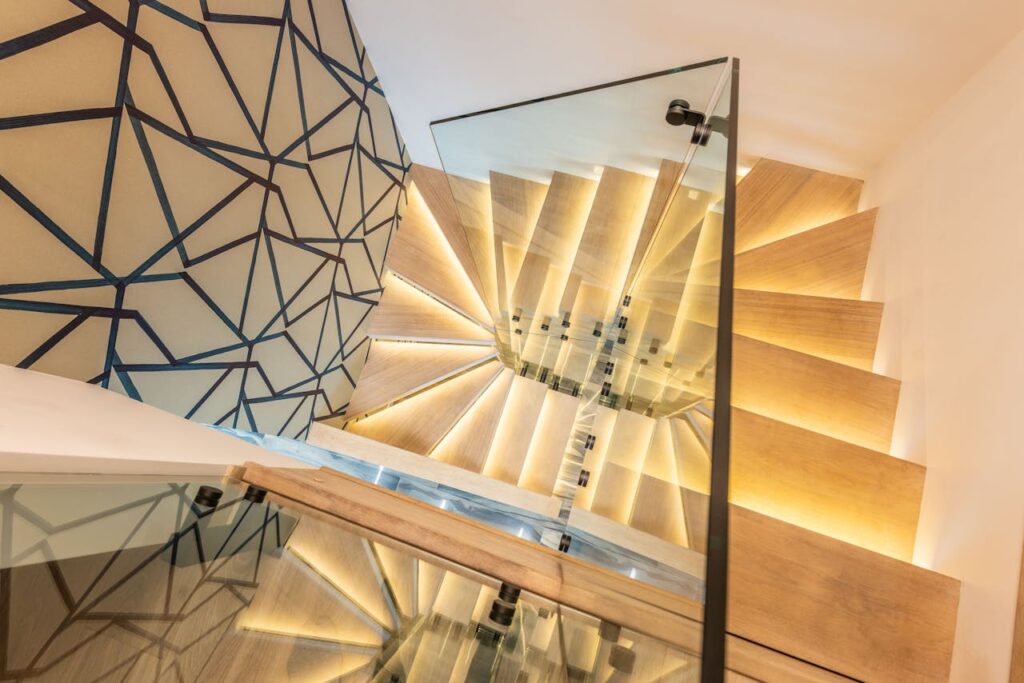
Lighting That Leads The Way
A poorly lit staircase isn’t just unwelcoming—it’s potentially hazardous. Yet with clever illumination, this practical concern becomes an opportunity for atmospheric design that transforms your staircase from merely functional to genuinely magical.
Staircase lights should never be relegated to an afterthought but instead integrated into the initial design conversations. Thoughtful lighting completely transforms how the space is experienced on a daily basis. Depending on the style of your home, consider an elaborate chandelier or an unusual feature light.
Recessed LED strips tucked beneath treads create that coveted floating effect while providing practical illumination for nighttime navigation. Wall-mounted fixtures can highlight architectural details or artwork displayed along staircase walls, while dramatic pendant lights suspended through the centre of a spiral staircase define the vertical space spectacularly.
Smart lighting takes convenience to another level—motion-activated systems illuminate your path when needed and switch off when the staircase is unoccupied, combining safety with energy efficiency. Pay attention to how your artificial lighting will interact with natural light throughout the day; those momentary patterns of sunshine sweeping across your staircase create an ever-changing visual experience that can be enhanced or diminished by your lighting choices.
The Natural Touch
Our increasing disconnection from nature has sparked a counter-trend in British interiors—bringing the outside in wherever possible, including staircases.
There’s something inherently and instantly calming about incorporating natural materials in the home. This approach represents biophilic design principles at their most practical and accessible. The tactile qualities of natural materials—the subtle grain variations in timber, the organic imperfections in stone—provide a sensory richness that manufactured alternatives simply cannot replicate. These elements forge a subtle but meaningful connection to the natural world, offering a daily reminder of nature’s presence even within the most urban of environments.
Choose sustainable timber for your staircase renovation; native species like oak and ash offer tremendous durability alongside beautiful grain patterns that improve with age. FSC-certified exotic woods can provide striking visual impact for handrails or feature treads without environmental guilt.
Plants deserve consideration in your staircase design too—particularly in urban homes starved of greenery. A carefully positioned monstera or kentia palm beneath a floating staircase creates breathing space, while trailing ivy or string-of-pearls cascading from a first-floor landing transforms an ordinary staircase into a living feature. The natural light so often present in hallways and stairwells creates ideal growing conditions for many houseplants, establishing a symbiotic relationship between architecture and nature.
The Minimalist Power Of Concrete Stairs
Concrete has transcended its utilitarian origins to become one of the most sought-after materials in contemporary interior design. When applied to staircases, concrete offers an unparalleled combination of sculptural beauty and architectural strength that few other materials can match.
For those concerned about concrete’s cool industrial associations, fear not—the material pairs surprisingly well with softer elements. A concrete staircase flanked by white walls creates a perfect canvas for the play of natural light.
Indeed, the beauty of concrete lies in its chameleon-like versatility. In its most minimalist form, as seen in high-end architectural projects, a monolithic concrete staircase with smoothly curved treads creates a seamless flow between levels. The material’s natural pale palette complements bright, white walls perfectly, creating an almost gallery-like atmosphere that allows other design elements to shine. The soft, rounded edges of curved concrete stairs introduce an unexpected organic quality to what might otherwise be a stark, angular space.
While polished concrete finishes create a sleek, contemporary look, more rustic treatment methods like hand-troweling produce subtly textured surfaces with greater character and depth. Concrete can also be tinted during mixing to achieve various tones from warm beige to sophisticated charcoal, allowing for seamless integration with your home’s colour palette.
The Bottom Line
Whether you opt for a dramatic overhaul or subtle cosmetic updates, your staircase holds tremendous potential to elevate your home’s interior. Far more than just steps between floors, a thoughtfully designed staircase becomes a design statement that sets the tone for your entire property. When properties come to market, a beautiful staircase often emerges as a major selling point for prospective buyers. It represents an investment that pays dividends both aesthetically and financially.
So next time you’re dashing up those stairs without a second glance, pause and consider the possibilities. That everyday structure you take for granted might just be your home’s next design triumph waiting to happen.
Mention the words ‘ring road’ to a Brit, and the image of a very specific type of soul-destroying suburban drudgery will likely come to mind.
But Iceland’s Route 1 Ring Road is a very different beast entirely. Encircling the majority of the island nations’ near 1300 mile perimeter, to traverse its scenic stretches is to reveal vista after vista of otherworldly landscapes that are as far removed from Sheffield’s Outer A6102 as night is from day.
The ring road’s entirety can be driven in around 16 hours, but to do so would be to miss the point of Iceland’s Route 1; the sites along the way are what make the drive one of the most iconic stretches of road in the world.
Instead, it’s advised that you take a week or two to tackle Route 1, in summer and winter respectively, owing to the more treacherous terrain of the colder months (Route 1 is the only road in Iceland that’s consistently cleared of snow).
However you’re tackling it and whatever pace you’re going at, there are several places along the way you mustn’t miss. These are those; together with Zero Car Rental, here are 9 of the best places to stop on Iceland’s Route 1 Ring Road.
Getting There
Because of the nature of Iceland’s somewhat inhospitable terrain, particularly in the island’s central regions, there are no public railways in the country. Conversely, there are a surprising number of airports, with upwards of 15 airports running commercial airlines and scheduled passenger services. The main international airport and your destination when flying from the UK will be Keflavik Airport, a half hour’s drive south of the capital Reykjavik.
Interestingly, whilst you can fly from Reykjavik to Akureyri airport in just 45 minutes, it will take you five hours to make the same journey by car.
Hence why we’re driving the perimeter of the country, where the roads are well maintained, less perilous and (generally) free from snow.
Most visitors planning to drive Route 1 choose to hire a 4×4 at Keflavik Airport; nearly all of the car rentals in Iceland operate here. From Keflavik Airport, it’s just a 15 minute drive to Blue Lagoon, the first stop on our road trip of Iceland’s Route 1…
The Blue Lagoon
In Iceland’s southwest, on the country’s Reykjanes Peninsula, is The Blue Lagoon, a geothermal hot spring and one of the country’s most popular tourist attractions.
The lagoon, surrounded by lava fields, is a stretch of milky blue water which maintains a constant and perfect bathing temperature of 102°F (39°C) all year round. Locals and tourists alike come to bathe in these relaxing waters.
And come in their numbers they do. In fact, it’s been named as one of the top 25 Wonders of the World by National Geographic and, accordingly, you shouldn’t expect a serene swim in privacy; celebrities such as Beyoncé, Bjork, and even our very own Rick Stein have even been spotted taking a dip here.
That said, the Blue Lagoon represents a wonderful way to get refreshed and reinvigorated post-flight and before you start your road trip proper.
Now, about escaping those crowds…
The Waterfalls Of Seljalandsfoss & Skogafoss
Head 160km’s drive southeast of the Blue Lagoon and you’ll find yourself at two of Iceland’s most spectacular waterfalls, Seljalandsfoss and Skogafoss. Though visible from the main road, it’s worth taking the time to get out of your car (there’s a parking lot here, though you do have to pay) and enjoy the waterfall up close and personal; the former is one of the only waterfalls in Iceland with a path leading behind the cascading water. Make sure you pack your raincoat!
Should you be visiting in winter, do note that the paths get incredibly slippery, and spike shoes may be required. That said, visitors in the darker months, when there are just four hours of daylight, will be rewarded with the spectacle of the waterfalls illuminated by gorgeous floodlights, creating a mystical and magical visual treat.
While you’re here, make sure you visit the smaller Gljufrabui waterfall, considered a hidden gem by some.
A further three hour’s drive heading east, passing Iceland’s southernmost village Vik before heading north along the coast, and you’ll arrive at Jokulsarlon. Translating as ‘glacial river lagoon’ the prosaic description doesn’t quite do this incredible place justice.
This gorgeous coastline is so atmospheric, in fact, that it has been used as the set of world famous productions and films including Tomb Raider and Die Another Day. The Jokulsarlon itself was formed by Europe’s second largest ice cap, Vatnajokull, which sees blocks of ice break away from the glacier and float into the lagoon before melting or drifting out to sea.
Interestingly for animal lovers, it’s not just people that come to see the lake but wildlife too, with seals and birds drawn to the waters in droves. The lagoon and glacier are both part of the Vatnajokull National Park, which is well worth exploring if you’ve got the time.
Us, though? We don’t have the time, so we’re heading north to Iceland’s sprawling East Fjords, which begin just an hour’s drive from Jokulsarlon, just after the town of Hofn. Shaped by the glaciers of the ice age, the East Fjords are defined by snow-capped mountains, fishing villages, puffins aplenty and, of course, the fjords themselves, those narrow strips of sea that cut into Iceland’s east coast between its cliffs and mountains.
The road here is spectacular, with vast, barren expanses offering myth and mystique and the drive bringing moments of high drama amongst the rugged surrounds. In the East Fjords, it’s all about the journey, not the destination; simply follow Route 1 for 250km’s scenic driving from Hofn to the town of Egilsstadir, which signifies the end of the ring road’s dalliance with the East Fjords.
If you’ve got the time, consider a short diversion from Route 1, taking Route 93 northeast for 30km to the picturesque town of Seydisfjordur. Or, drive an hour north from Egilsstadir along Route 94 and check out Borgarfjordur Eystri, a remote village that’s famous for its resident puffins and the accepted end of the East Fjords.
Dettifoss Waterfall
We know what you’re thinking; you’ve had your fill of waterfalls by now. But the waterfall at Dettifoss, another two hour’s drive northwest as the ring road turns inland, simply has to be seen to be believed.
After the Rhine Falls in Switzerland, Dettifoss is the most powerful waterfall in Europe, and you’ll hear its waters crashing from miles away. Located just north of Route 1, the roads (862 and 864) that serve the waterfall are usually only traversable in summer. In the winter, you may have to give this spectacular waterfall a miss, as the roads become undrivable. If you are able to get up close and personal, however, Dettifoss, translating as the ‘collapsing waterfall’, is a must-see.
Whale Watching In Husavik
Dettifoss is part of a popular collection of attractions in North Iceland collectively known as the Diamond Circle. Another must-visit within the region is Husavik, a town on Iceland’s north coast that’s so famous for its whale watching that it’s often referred to as ‘the whale capital of the world’.
You’ll have to deviate from Route 1 by a couple of hours here, taking the 864 for Dettifoss and then the 85 onwards to Husavik, but you’ll be rewarded with a near-guarantee of whale pod sightings. Though minke and humpback whales are most commonly sighted, blue whales have also been spotted here several times in recent years. The town also houses a whale museum, should you not be fortunate enough to see any in the flesh!
As you continue your journey along Route 1’s northern stretch, approximately an hour’s drive east from Husavik, you’ll discover one of Iceland’s best-kept secrets: the Myvatn Nature Baths. Often referred to as the “Blue Lagoon of the North,” these geothermal baths offer a similarly ethereal experience to their more famous counterpart, but with significantly smaller crowds.
Set against the otherworldly backdrop of Lake Myvatn’s volcanic landscape, these mineral-rich waters maintain a pleasant temperature between 36°C and 40°C year-round. The silica and minerals in the water create the same milky blue appearance that has made the Blue Lagoon so iconic, yet here you can enjoy a more tranquil, authentic Icelandic bathing experience.
The surrounding area is equally worth exploring, with peculiar lava formations, bubbling mud pools and steaming fumaroles dotting the landscape. Bird enthusiasts will be particularly delighted, as Lake Myvatn hosts one of the most diverse collections of waterfowl in Europe.
For those who’ve begun to feel the strain of many hours behind the wheel, the Myvatn Nature Baths provide the perfect opportunity to unwind, soothe tired muscles, and rejuvenate before completing the final leg of your Route 1 adventure. Unlike its southern sibling, pre-booking isn’t always essential, particularly during off-peak seasons—though it’s still advised during summer months.
Take A Volcanic Crater Hike In Grabrok
Phew, we feel like we’ve strayed too far from Route 1 there, even if we did catch a glimpse of the largest mammal in the world and had a wonderfully pleasant warm bath. So, from Husavik and Myvatn, rejoin the ring road and head south in a symbolic descent that will have you feeling like you’re heading home as the capital Reykjavik draws closer.
But before we pull up in Iceland’s major city for a final feast, there’s time to stop in Grabrok, four hour’s south of Husavik and the last major stop on Route 1 before you hit Reykjavik.
A protected natural monument, Grabrok is a crater formed by a volcanic eruption some 3000 years ago, and sits just off Route 1’s western leg. Here there are footpaths that take in views of the crater, as well as longer hiking trails if time is on your side. After which, we’re heading home…
End Your Adventure With A Feast In Reykjavik
Iceland’s capital Reykjavik has a thriving foodie scene that belies its relative small size and remote location, with cutting edge ‘New Nordic’ restaurants rubbing shoulders with more old fashioned Icelandic delicacies like Hakarl – that’s fermented shark – or Svio (half a sheep’s head). Whether you choose to go traditional and explore the history of Icelandic cuisine at Matur og Drykkur, or you’re keen on the sound of innovative, Michelin starred fare at Dill, you’ll be spoilt for choice for fine dining in Reykjavik.
With its elegant 19th-century mansions and leafy squares, Príncipe Real offers a more sophisticated alternative to Lisbon’s tourist-heavy Bairro Alto. Named after Queen Maria II’s firstborn son, this hilltop neighbourhood balances bourgeois respectability with bohemian flair. Up there with the gods, it’s a match made in heaven.
The area has transformed over the past decade from a quiet residential district to one of Lisbon’s most coveted postcodes, yet it has managed this evolution without sacrificing a keen sense of local pride and tradition. Unlike the riverside Chiado or the nightlife-focused Bairro Alto, Príncipe Real seems to exude a more relaxed confidence—a place where Lisboetas and visitors mingle in gardens, concept stores, and innovative restaurants without the feeling that you’re merely moving through a tourist circuit.
What makes Príncipe Real particularly special is its dual personality—by day, it’s a haven for design enthusiasts and slow-paced café culture; by night, it hosts some of the city’s most interesting dining experiences and laid-back nightlife options. The neighbourhood sits at the perfect sweet spot between accessibility and discovery—central enough to reach Lisbon’s major sights easily, yet removed enough to feel like you’ve uncovered something beyond the well-trodden path.
Where To Eat
A Cevicheria on Rua Dom Pedro V serves remarkable Peruvian-Portuguese fusion dishes that draw both residents and visitors. Look for the giant octopus sculpture hanging from the ceiling—you can’t miss it. Be prepared to wait; they don’t take bookings but will text when your table’s ready.
For those who find a hankering for Italian cuisine at some point while they’re on holiday (it’s only natural), ZeroZero on Rua da Escola Politécnica slings agreeable Neapolitan-adjacent pizzas cooked in a wood-fired oven. Their garden seating makes for a pleasant retreat on warm evenings, and their wine list showcases small Italian producers alongside Portuguese options.
Sweet tooth? Pastelaria Bénard has been perfecting pastries since 1868. Their pastel de nata might not be as famous as Belém’s, but paired with a bica (Portuguese espresso) on their vintage-tiled terrace, it’s hard to beat.
For modern Portuguese cuisine that respects tradition while embracing innovation, book well in advance for Tapisco. This popular restaurant on Rua Dom Pedro V is run by chef Kiko Martins (the same talent behind A Cevicheria) and brilliantly combines Portuguese petiscos (small plates) with Spanish tapas in a space defined by its striking red bar counter. The prawn croquettes and pork cheeks are particularly memorable.
The neighbourhood’s most unique watering hole must be Pavilhão Chinês on Rua Dom Pedro V, a former 19th-century grocery store transformed into a cabinet of curiosities. Navigate five rooms crammed with military memorabilia, toy soldiers and vintage advertisements while sipping meticulously crafted cocktails. It’s like drinking in an eccentric collector’s private museum.
Head to Quiosque Príncipe Real when the day winds down. Locals call it ‘O Oliveira’ and it’s the perfect spot to catch Lisbon’s golden hour. You won’t find it in many guidebooks, which keeps it authentic. Grab a drink, order a small bite, and watch local life unfold – this place is nothing fancy, just genuine Lisbon charm.
For daytime refreshment, Copenhagen Coffee Lab brings Scandinavian minimalism and serious brewing techniques to Rua Nova da Piedade. Their courtyard catches the afternoon sun perfectly.
For a truly local experience, Gin Lovers & Less occupies the grand ballroom of the Embaixada palace on Praça do Príncipe Real. With over 80 different gins and a regularly updated cocktail menu that showcases seasonal ingredients, it’s the perfect spot to unwind after exploring the shopping galleries in the same building. During summer months, their garden bar becomes one of the neighbourhood’s most enchanting evening spots.
Lost In Esplanada Bar on top of a residential building on Rua Dom Pedro V offers panoramic views across the city from its rooftop terrace. It’s particularly magical at sunset, when the warm light washes over the terracotta rooftops stretching toward the Tagus River.
Just steps away lies the Jardim Botânico (Botanical Garden), a tranquil 10-acre oasis established in 1878. Its tropical glasshouses and dragon trees provide welcome respite from the city’s hills.
Architecture buffs should wander the surrounding streets to admire the district’s pastel-coloured mansions with their wrought-iron balconies and azulejo tilework. The pink Embaixada on Praça do Príncipe Real houses independent Portuguese designers and brands within a restored 19th-century Arabian-inspired palace.
The Reservatório da Patriarcal (Patriarchal Reservoir) beneath Príncipe Real garden offers an unexpected perspective on Lisbon’s history. This underground cathedral-like space supported by 31 pillars once stored water for the surrounding area and now hosts occasional art installations and concerts. The acoustics are remarkable, and the cool underground temperature provides perfect relief on hot summer days.
For a different kind of cultural exploration, visit the São Roque Church at the edge of Príncipe Real. Though unassuming from the outside, the interior is considered one of the most beautiful in Lisbon, featuring exquisite baroque chapels and intricate gilded woodwork that showcases the wealth of Portuguese imperial days.
Just north east of Príncipe Real, art enthusiasts should visit Galeria FOCO on Rua Antero de Quental 55A, a contemporary art space showcasing both Portuguese and international artists in a minimalist setting that allows the works to speak for themselves. Back in the district proper, Galeria São Mamede on Rua Escola Politécnica exhibits established Portuguese contemporary artists in a more traditional gallery environment. Both spaces offer a glimpse into Lisbon’s vibrant art scene beyond the major museums.
Things To Do
Príncipe Real excels in one-off shops that reward unhurried browsing. The aforementioned Embaixada Shopping Gallery houses multiple independent Portuguese designers and craftspeople under one ornate roof. The neo-Arabian palace building itself is worth visiting, with its grand staircase and stained glass, but the carefully curated shops selling Portuguese-made clothing, jewellery, and homewares make it a necessary stop for those seeking unique souvenirs.
For quintessential Portuguese products, it’s worth taking a ten-minute walk south of Príncipe Real to Conserveira de Lisboa Combro on Largo Dr. António de Sousa Macedo 5. This iconic store specialises in Portugal’s finest tinned fish—a culinary tradition elevated to an art form (you’ll want to frame these tins and hang them up!). Their beautifully packaged sardines, mackerel, and tuna make perfect gifts, while their selection of Portuguese olive oils, preserves, and specialty foods showcases the country’s gastronomic heritage. The knowledgeable staff are happy to explain the differences between various preserves and regions.
As evening approaches, catch a performance at Teatro do Bairro, a small theatre at the edge of Príncipe Real that stages contemporary Portuguese plays and occasional English-subtitled productions.
For a hands-on cultural experience, check the schedule at Cozinha Popular da Mouraria just a short walk from Príncipe Real. This cooking school offers workshops where visitors can learn to prepare traditional Portuguese dishes alongside locals. It’s a convivial way to gain deeper insight into Portuguese food culture while creating a meal you’ll enjoy together at the communal table.
Príncipe Real sits atop one of Lisbon’s seven hills, which means spectacular views but challenging climbs. The area itself is compact enough to explore on foot, though sensible shoes are essential on the cobbled streets.
Tram 24 connects to the downtown Baixa district, while the Rato metro station sits at the neighbourhood’s northern edge. For the authentic Lisbon experience, flag down a tuk-tuk for the steep ascent from Bairro Alto—your legs will thank you.
Cycling enthusiasts might be intimidated by Lisbon’s topography, but electric bike rentals have revolutionised this experience. Lisbon Bike Rentals offers e-bikes that make even the steepest inclines manageable, and there’s something deeply satisfying about breezing uphill past struggling pedestrians. The lack of dedicated cycle lanes in much of the city means you’ll need to share roads with cars, but traffic tends to move slowly enough around Príncipe Real to make this less daunting than it might sound.
For those preferring rideshares, both Uber and Bolt operate extensively throughout Lisbon. The narrow streets of Príncipe Real can sometimes make pickup points tricky, so it’s worth walking to main roads like Rua da Escola Politécnica or Rua Dom Pedro V when summoning a car. Alternatively, traditional taxis are readily available and often quicker to navigate the labyrinthine shortcuts through the neighbourhood’s backstreets.
Where To Stay
Let’s be blunt here; Airbnbs are pretty compact in Lisbon, and hotels often prohibitively expensive. Fortunately, for those seeking an immersive local experience, Príncipe Real boasts some of the best accommodation in Lisbon in terms of its rental offerings. The neighbourhood excels in stylishly renovated flats within traditional buildings, where each apartment retains distinctive architectural elements—whether original hardwood floors, decorative ceilings, or azulejo tile panels—while providing modern amenities.
The benefit here is access to your own kitchen, perfect for experimenting with finds from the farmers’ market. The neighbourhood’s rental properties consistently outshine those in other districts thanks to their blend of period features and tasteful contemporary design.
The Bottom Line
Unlike Lisbon’s more tourist-heavy quarters, staying in Príncipe Real means living amongst locals who’ve witnessed their neighbourhood transform whilst preserving its distinctive character. You might arrive as a visitor, but you’ll leave feeling like a temporary resident—surely the greatest achievement of any city break.
Indeed, while other parts of Lisbon may boast more famous attractions or wilder nightlife, few neighbourhoods offer such a perfect microcosm of contemporary Portuguese culture in such a digestible, walkable form. It’s the ideal base for those who prefer to experience a city through immersion rather than checklists.
The enchanting Brera district, sitting pretty in the heart of Milan, is an absolute must-visit for any traveller to Italy’s fashion capital. Taking its name from the Lombard word ‘braida’ meaning ‘green space’, this sophisticated quarter lives up to its etymology with colourful residential buildings sporting balconies overflowing with lush greenery and vibrant flowers. Often called Milan’s artistic soul, Brera offers a delightful blend of cultural heritage and contemporary chic.
The district boasts a rich bohemian history dating back to the late 18th century when Empress Maria Theresa of Austria established the Academy of Fine Arts here in 1776. Throughout the 19th century, the area became a haven for artists, writers and intellectuals who flocked to its affordable studios and atmospheric cafés, infusing the neighbourhood with a creative spirit that persists to this day. This artistic legacy is now celebrated through the prominent Brera Design District project, Italy’s most influential hub for design promotion.
While today’s Brera has evolved to embrace a more upmarket atmosphere, it still maintains its artistic essence beneath the polished façade. The charming cobblestone streets, framed by elegant architecture and those characteristic verdant balconies, provide the perfect backdrop for a truly memorable Italian getaway. Just a short journey from Milan’s iconic Duomo, this compact cultural hub represents the perfect place to spend a leisurely day or two. So, here are 9 IDEAL things to do in Milan’s captivating Brera district.
How To Get There & Where To Stay
The charming Brera district is conveniently accessible from either Lanza or Moscova metro stops. However, to truly absorb the neighbourhood’s distinctive character, walking is highly recommended. For the most rewarding approach, begin at Piazza Scala (near Duomo or Montenapoleone stations) and stroll along Via Verdi, which elegantly transitions into Via Brera, unveiling the district’s treasures at a pace that allows you to appreciate every architectural detail and hidden corner.
Staying for a weekend? Offering an intimate boutique retreat with just four exquisitely appointed rooms, Locanda Pandenus is a good choice. It’s a place that perfectly captures the artistic essence that defines Milan’s dynamic Brera neighbourhood. Each room showcases impeccable art deco styling – think 1930s glamour meets modern Milanese flair. The inn sits above a lively bistro which is open daily from 8am to 11.45pm, creating a seamless connection between your accommodation and the creative heartbeat of Milan’s most artistic quarter.
Looking to settle in Milan’s stylish Brera district for a while and planning to rent a luxury flat in Brera (this is Milan after all)? The carefully curated Nativo collection presents a portfolio of upscale apartment residences with both long and short term rentals, ranging from one to twelve months. Whether you need a sophisticated home base for just a few weeks or plan to immerse yourself in Milanese living for up to a year, this flexibility transforms the typically rigid rental market into something that actually works around your schedule, not the other way around.
Start your exploration of the neighborhood by meandering down Via Fiori Chiari which embodies the essence of Brera’s distinctive character. This picturesque street, whose name translates to ‘Street of Light Flowers’, features a captivating blend of independent boutiques, art galleries, and inviting cafés (more on all of those later) housed within beautifully preserved historic buildings.
By day, the street buzzes with shoppers exploring unique fashion finds and artisanal treasures. As evening falls, the atmosphere transforms as locals and visitors alike fill the outdoor seating areas of restaurants and wine bars.
For a truly special experience, visit on the third Sunday of the month when the street hosts Brera’s famed antique market Mercatino di Brera. Dozens of vendors display an eclectic mix of vintage items, from jewellery and furniture to rare books and curiosities – perfect for sourcing a one-of-a-kind souvenir.
Visit The Basilica Of San Simpliciano
Often overshadowed by Milan’s magnificent Duomo, the Basilica of San Simpliciano offers a more intimate glimpse into the city’s rich religious heritage. Dating back to the 4th century, this ancient church is one of Milan’s oldest and most historically significant religious sites, associated with the venerated St Ambrose.
The basilica’s unassuming exterior gives little hint to the treasures within – most notably the remarkable 15th-century frescoes adorning the apse. The peaceful interior, with its soaring columns and soft lighting, provides a contemplative space away from the district’s livelier spots. Architectural enthusiasts will appreciate the church’s unique blend of Romanesque and early Christian elements, whilst history buffs will value its significance in Milan’s religious development.
Explore The Galleries
A trip to Brera wouldn’t be complete without immersing yourself in its remarkable art scene, starting with the district’s namesake gallery, the Pinacoteca di Brera, the city’s main public gallery. Housing Italy’s second-largest collection of fine art, this magnificent gallery showcases masterpieces from Italian and European artists spanning centuries. Marvel at works by Mantegna, Caravaggio, Raphael and Titian, amongst countless other treasures. For art enthusiasts, the collection’s crown jewel is perhaps Mantegna’s ‘Lamentation over the Dead Christ’, with its remarkable perspective and emotional depth.
Yet Brera’s artistic offerings extend far beyond this prestigious institution. The district is peppered with galleries catering to diverse artistic tastes. Massimo De Carlo represents a pinnacle of contemporary art in Milan, showcasing cutting-edge works by international artists in a beautifully restored historic building. The gallery’s thought-provoking exhibitions rotate regularly, ensuring something fresh awaits each visit.
For those intrigued by modern Italian art with a distinctly unconventional flair, Antonio Colombo Arte Contemporanea presents works that often incorporate elements of pop culture, comics, and street art. The gallery’s carefully curated exhibitions challenge traditional boundaries whilst remaining accessible to art lovers of all levels.
Sculpture enthusiasts should not miss Gipsoteca Fumagalli & Dossi, a hidden gem housing an impressive collection of plaster casts and original sculptural works. The hushed atmosphere and dramatic lighting create an almost sacred space for contemplating three-dimensional artistry in various forms.
Studio Zecchillo offers a more intimate gallery experience, specialising in works on paper including etchings, lithographs, and drawings by both established and emerging artists. The knowledgeable staff are particularly welcoming to visitors curious about printmaking techniques and processes.
Complete your artistic tour at Casa Degli Artisti, a recently revitalised creative hub that serves as both exhibition space and working studios. This cultural centre fosters artistic development through residency programmes and public events, offering visitors a glimpse into the creative process itself rather than merely displaying finished works.
Wander Through The Orto Botanico
After immersing yourself in artistic masterpieces, take a refreshing pause at the enchanting Orto Botanico di Brera. This secret garden, established in 1775 by Empress Maria Theresa of Austria, offers a tranquil sanctuary away from Milan’s bustling streets. Tucked behind Palazzo Brera, this botanical haven features carefully cultivated beds of medicinal herbs, rare plants and seasonal blooms.
The garden’s symmetrical design, enhanced by elegant sculptures and the historic architecture of the surrounding palace, creates a peaceful atmosphere perfect for contemplation. It’s a delightful spot to catch your breath whilst enjoying nature’s artistry. Better still, entry is complimentary, making it one of Brera’s most charming hidden gems.
The garden is open all year round and it’s free to enter.
Indulge In Aperitivo Culture
The Italian tradition of aperitivo was born in the bustling city of Milan in the 19th century. As such, no visit to Milan would be complete without experiencing this beloved ritual, and Brera offers some of the city’s finest establishments for this quintessentially Italian tradition.
Of course, there’s Bar Brea which is in the very heart of the district. Score a table outside and you’ll find that it’s one of the best spots for people watching in the entire city.
Bar Jamaica stands as a living piece of Brera’s bohemian history. Once the preferred watering hole of artists and intellectuals, this historic establishment maintains its authentic charm whilst serving perfectly crafted cocktails and an impressive selection of spirits. The walls adorned with photographs of its famous patrons tell the story of Brera’s artistic legacy, making it as much a cultural experience as a drinking venue.
Wine enthusiasts should not miss N’Ombra de Vin, housed in a 16th-century monastery cellar, offering an extraordinary selection of Italian and international wines alongside superb charcuterie and cheese. Their aperitivo spread is particularly generous, featuring high-quality ingredients that perfectly complement their extensive wine list. The atmospheric stone-walled interior creates an enchanting backdrop for early evening refreshments.
For those with a passion for natural wines, Associazione Salumi e Vini Naturali presents a carefully curated selection of organic and biodynamic offerings in a convivial atmosphere that encourages conversation with fellow oenophiles. Their knowledgeable staff can guide you through unfamiliar varietals and producers, making this an educational as well as pleasurable experience.
The traditional aperitivo hours run between 6 and 9 pm. Order a classic Aperol Spritz or Negroni, then help yourself to the spread of cheeses, cured meats, olives, and various small dishes. The tradition perfectly embodies the Italian approach to dining — unhurried, social, and focused on quality ingredients. It’s also an excellent opportunity to people-watch and absorb Brera’s sophisticated ambiance.
Discover Independent Boutiques
Whilst Milan is globally renowned for its high-fashion credentials, Brera offers a more distinctive shopping experience through its wealth of independent boutiques and concept stores. Fashion enthusiasts will delight in discovering unique pieces from emerging designers alongside carefully curated vintage collections that reflect Italy’s impeccable style heritage.
For those seeking truly special souvenirs, Pettinaroli is an absolute must-visit. Founded in 1881 and still run by the same family, this charming cartoleria stocks exquisite handmade stationery, leather-bound journals, vintage maps, and bespoke printed materials. Its wooden shelves and glass cabinets house treasures that combine artisanal craftsmanship with practical elegance – the perfect memento of your time in Milan’s most artistic district.
Another Brera gem is Il Segno Del Tempo tucked away on Via Fiori Chiari. Step inside and you’re transported into what feels like a collector’s fever dream. It’s full of antiques selected by founders Piero Luigi Carboni and Pierangelo Marengo. What began as their personal gallery of beloved discoveries has evolved into a gorgeous shop full of remarkable pieces.
Il Cirmolo offers a nostalgic journey through 20th century design and ephemera, featuring an eclectic collection of treasures ranging from vintage enamel signs from the mid-1900s to illuminated letters and signage from the latter half of the century.
Beyond these standouts, Brera houses specialist shops selling everything from handcrafted jewellery and artisanal homewares to rare books and locally produced gourmet foods. The district’s shopping experience feels worlds away from the glitzy international brands dominating Milan’s Quadrilatero della Moda. Instead, Brera offers thoughtfully selected merchandise with personal service – often from the shop owners themselves. For design aficionados, the annual Brera Design Week transforms the district into a showcase of innovative Italian craftsmanship and contemporary design.
Eat, Eat, Eat
Brera’s culinary scene beautifully reflects its artistic soul, with establishments ranging from historic trattorias to Michelin-recommended dining destinations. There are many neighbourhood stalwarts serving regional specialities like risotto alla Milanese (saffron risotto), ossobuco (braised veal shanks), and cotoletta alla Milanese (breaded veal cutlet), but it’s worth being picky.
Trattoria Torre di Pisa, a beloved local institution since 1952, offers time-honoured Milanese recipes in an unpretentious setting adorned with vintage photographs. Meanwhile, Al Matarel serves exceptional regional dishes with a focus on fresh, seasonal ingredients – their risotto is particularly noteworthy.
For a taste of classic Lombardy fare, Rosso Brera presents beautifully plated dishes with the warmth and authenticity of a typical Milanese trattoria. The vitello tonnato is particularly good here.
Those seeking more refined culinary experiences should book well in advance for Michelin recommended Locanda Perbellini, where Chef Giancarlo Perbellini’s innovative approach to traditional cuisine has earned critical acclaim. Equally impressive is Daniel Canzian, where the eponymous chef creates sophisticated interpretations of regional classics with meticulous attention to detail and presentation.
Complete your meal in true Milanese fashion with a digestivo – perhaps a local amaro or grappa – whilst watching the sophisticated Brera nightlife unfold around you.
If you indulged a little too much in the aperitivo culture earlier, stop at Crema Alta Gelateria on Via Fiori Chiari for some gelato. This spot has been awarded with 3 Gambero Rosso cones, the highest recognition dedicated to the art of Italian ice cream making. Can’t decide what flavour to have? A scoop of their saffron, lemon and almond gelato always goes down well.
Browse The Mercato Di Via San Marco
For a glimpse into the Brera of yesteryear, make time for the bustling mercato along Via San Marco. While much of the district has embraced an upscale transformation, this weekly outdoor market retains the unpretentious charm and lively atmosphere that characterised Brera during its bohemian heyday.
Every Monday and Thursday, local vendors set up their colourful stalls along this historic street, creating a vibrant tapestry of sights, sounds and aromas. Unlike the curated boutiques elsewhere in the district, the mercato offers an eclectic mix of affordable treasures – from seasonal produce and artisanal cheeses to vintage clothing, handcrafted jewellery and household goods. The market’s diverse offerings attract a wonderfully mixed crowd, with stylish Milanese professionals rubbing shoulders with elderly neighbourhood residents who have shopped here for decades.
Arrive early to enjoy the market at its liveliest and to secure the freshest produce. Take your time wandering between stalls, practise your Italian with the friendly vendors, and perhaps pick up ingredients for an impromptu picnic in one of Brera’s charming squares. The mercato provides not just shopping opportunities but a genuine cultural experience that connects visitors to the district’s more accessible, community-oriented roots – a refreshing counterpoint to the refined galleries and upmarket boutiques that now dominate the area.
Savour Café Culture
No Italian experience would be complete without partaking in the nation’s beloved café culture, and Brera offers some of Milan’s most charming establishments to enjoy a perfectly crafted coffee. Beyond mere refreshment, these cafés represent the district’s artistic soul and provide perfect vantage points for observing local life.
Caffè Fernanda, situated within the Pinacoteca di Brera, offers a uniquely artistic coffee break amidst your cultural explorations. Named after Fernanda Wittgens, the gallery’s first female director, this elegantly designed café features a striking blue velvet banquette beneath Francesco Hayez’s famous painting ‘The Kiss’. More than just a place to rest tired feet, the café itself is an extension of the gallery experience, with carefully considered design elements that complement the artistic surroundings. The coffee is exceptional, and the pastries – particularly the pistachio croissants – are worthy of their artistic setting.
For a café experience that embodies Brera’s creative spirit, Fioraio Bianchi is up there with the best. What began as a florist’s shop has transformed into a café-restaurant. It still has maintained its botanical roots with plants adorning the space, creating a whimsical atmosphere that captivates visitors. The mint-green furniture and delicate floral arrangements provide a perfect backdrop for enjoying their superb coffee and homemade pastries.
The Bottom Line
This charming district offers visitors a perfect distillation of Milan’s finest qualities – artistic legacy, culinary excellence, design innovation and effortless style – all concentrated within a few walkable streets.
Unlike Milan’s more commercial districts, Brera rewards the unhurried visitor. Take time to notice the details – the plant-filled balconies overhead, the artisan at work in a small studio, the elderly locals playing cards in a quiet piazza. These authentic moments, as much as the district’s more famous attractions, are what transform a tourist visit into a genuine Milanese experience.
So, you’ve found the love of your life, and you’re ready to get married? Congratulations! Now comes the hard part; choosing an engagement ring.
Buying an engagement ring can be a daunting task and, let’s face it, although the easiest choice, a classic diamond engagement ring isn’t for everyone. Honestly; it’s just a little obvious. Yep, we hate to break the news but that solitaire setting with a centre stone and a simple band has been done to death – or should that be divorce?
If you’re looking for a way to make this special moment even more memorable, unique, personal and thoughtful, why not personalise your engagement ring instead of getting a style straight out of the Argos catalogue?
With this in mind, here are 8 quirky and unique ways to make that piece of jewellery as one-of-a-kind as your love story. So get that ring size ready because we’re about to dive into a world of creativity and customisation…
Birthstones Galore
News just in; many marrying millennials are giving the finger to diamond rings and opting for previously under-appreciated and undervalued gemstone rings instead. This, of course, makes total sense; why spend many months worth of your salary on a ring, just because it has a diamond in it?
When it comes to choosing a gemstone, what better way to symbolise your union than by incorporating both you and your partner’s birthstones into the engagement ring? This creative twist adds a splash of colour and personal significance to the ring.
Consider having both stones set side by side; we adore the toi et moi style (French for “you and me”), which features two stones instead of one, both in different settings. Or perhaps you’d prefer for a main stone surrounded by smaller accent stones representing your partner’s birth month? It’s up to you!
While gemstones may not be as glittery or as glamorous as a diamond ring, choosing a birthstone ring is way more personal. Moreover, it’s much better than showing everyone how big your diamond ring is – an egotistical move if ever there was one.
Engraving is a timeless way to add a personal message to your engagement ring. Whether it’s a simple “I love you”, the date you met, or a cheeky inside joke, engraving can be a beautiful reminder of your unique bond.
Indeed, an engraved message can add that extra sentimental meaning to your engagement ring, capturing your personal connection as a couple. Plus, every time your partner looks at their ring, they’ll be reminded of that special message, making it all the more meaningful. Find a pre-made piece and have it engraved or get a bespoke piece engraved. The choice is yours.
A Ring That Reflects Your Proposal Or Something Personal
Looking for a unique way to commemorate your proposal? Why not design a ring that reflects the date itself? If you’re proposing in autumn, how about a ring with leaves or other autumnal motifs?Alternatively you could choose a gemstone that marks the month you had your first date .
You could incorporate the place your proposing into the rings design. If you’re planning a beach proposal or beach wedding, consider incorporating shells into the motif of the band. Or perhaps you’re proposing in a garden? Then you might be interested to hear that the imperfections in emeralds are called ‘jardin’ – French for ‘garden’.
Or, what about something even more personal? A couple familiar to this writer who got engaged recently chose a ring with a salt and pepper diamond because they love to cook together. How sweet is that? Oh, and who says engagement rings have to have diamonds or gemstones? If you and your partner love nature, why not consider an engagement ring made of wood – wood rings are said to represent continuous growth and strength, both of which a successful marriage needs.
The possibilities are endless, and the result is a ring that tells the story of your love.
Re-Purpose Heirloom Jewellery
Want to infuse tradition into a modern celebration of love? Then why not repurpose an heirloom piece? Using heirloom jewellery to create a one-of-a-kind engagement ring isn’t only sentimental, but it’s eco-friendly, too.
By re-purposing an existing piece, you’re giving new life to a family treasure while also adding your own unique twist. You can use the original stones in a new setting or melt down the metal to create a brand-new design. Either way, you’ll have a beautiful, meaningful ring with a rich history.
If you’re looking for a ring with more pizzazz than a solitaire but still want something with meaningful symbolism, then a three stone engagement ring (also known as a trilogy ring) might be right up your street. These stunning pieces feature, you guessed it, three stones set alongside each other, typically with a larger centre stone flanked by two smaller ones.
What makes trilogy rings so special is their beautiful symbolism. The three stones are often said to represent your past, present, and future together—a rather lovely sentiment, don’t you think? Others interpret the trilogy as symbolising friendship, love, and fidelity, which, let’s be honest, are the cornerstones of any successful marriage.
The beauty of three stone rings is their versatility. You can mix and match different gemstones to create something truly unique. Perhaps the centre stone could be a diamond (if you must), with your and your partner’s birthstones on either side? Or how about three gradually-sized stones in the same gem for a more cohesive look? The combinations are endless.
A Secret Message Or Symbol
For those who prefer a more subtle form of personalisation, consider incorporating a secret message or symbol into the ring’s design. This could be anything from a hidden engraving on the inside of the band to a small gemstone set in a discreet spot. This way, your partner will always carry a reminder of your love, but it’ll something intimate to just the two of you.
Mix & Match Metals
Who says you have to stick to just one type of metal for your engagement ring? Mixing and matching different metals can create a truly unique and eye-catching design. For example, you could opt for a rose gold band with a platinum setting or combine yellow gold with white gold accents. This modern approach allows you to play with colour and texture, creating a ring that reflects your partner’s individual style.
If you’re feeling particularly adventurous, why not design your own custom engagement ring from scratch? Collaborate with a skilled jeweller to create a one-of-a-kind piece that incorporates all the elements that are meaningful to you and your partner. This might include specific gemstones, metal choices, or even a completely unconventional shape. The sky’s the limit when it comes to custom designs, so let your imagination run wild!
The Bottom Line
Personalising your engagement ring is a fantastic way to make this already special piece of jewellery even more meaningful. By incorporating elements like birthstones, engravings, or custom designs, you can create a ring that tells the story of your love and sets the stage for a lifetime of happiness together.
So go ahead, break away from tradition, and let your creativity shine as you embark on this exciting journey towards marital bliss!
Gone are the days when the only option for wedding catering was a formal, three-course sit-down meal. Today, food stations are no longer an optional extra, but a must have. Indeed, food stations can transform the dining experience of your wedding from the predictable to the memorable. But for connoisseurs of all things culinary, choosing the right food stations for your wedding can be a wonderful opportunity to show off not only your exquisite taste in food, but also your way with presentation and even your personality as a couple.
Before diving into the delicious possibilities, take a moment to consider several practical factors that will influence your food station selections. First and foremost, draw inspiration from your wedding location—a coastal wedding might call for seafood stations, while a vineyard celebration could incorporate local wine and cheese pairings. The season and weather conditions are equally crucial; outdoor summer weddings demand refreshing, heat-stable options like chilled seafood or ice cream stations, while autumn or winter celebrations benefit from warming comfort foods like pie stations or hot chocolate bars.
Consider your venue’s facilities and restrictions—some historic venues have limited kitchen capabilities or restrictions on open flames, which may impact certain food station concepts. Equally important is your guest demographic; consider age ranges, cultural backgrounds, and known dietary requirements when planning. A wedding with many young families might benefit from child-friendly stations alongside more sophisticated adult offerings. Finally, contemplate the flow of your event—strategically position stations to avoid bottlenecks, and consider how they’ll integrate with other elements of your celebration. Selecting food stations that align with these considerations ensures not just delicious cuisine, but a seamless, enjoyable experience for everyone involved.
If you’re contemplating which delectable offerings to include on your special day, read on; here are 15 IDEAL food station ideas for your wedding that will leave your guests talking for years to come.
The Grazing TableCharcuterie & Cheese Station
A lavish spread of cured meats, artisanal cheeses, crusty breads, and accompaniments is a surefire crowd-pleaser. This station works beautifully as a welcome option during drinks reception, encouraging guests to mingle whilst savouring delectable morsels.
For true foodie credentials, consider including a selection of both local and international offerings. Think prosciutto di Parma, Serrano ham, nduja and chorizo alongside a carefully curated cheese board featuring soft, blue, and hard varieties. Rather than simply throwing things onto a board, take time with the aesthetics – create height with slate platforms, use fresh herbs as garnish, and add pops of colour with seasonal fruits.
Accompany your selection with artisan breads, crackers of varying textures, and small bowls of accompaniments – honey drizzled with truffle oil, homemade chutneys, cornichons, and marinated olives. Labels indicating the provenance of each cheese and meat add an educational element that food enthusiasts will appreciate.
For an extra touch of luxury, consider including a station attendant who can shave aged Parmesan or carve wafer-thin slices of Ibérico ham to order, adding theatre and ensuring your guests receive the perfect portion.
Interactive Pizza Station
For a touch of theatre and irresistible aroma, a pizza station with fresh dough being stretched and topped before your guests’ eyes is a winner. The visual spectacle of stretching dough and the satisfying sight of bubbling cheese adds a convivial, casual element to even the most formal of weddings.
Set up a portable stone oven (many catering companies now offer these) and have a pizzaiolo crafting small, individual-sized pizzas to order. Offer guests a choice of bases – classic, wholemeal, or even gluten-free – and an array of toppings from the traditional to the more adventurous.
Consider creating signature pizzas that reflect your story as a couple – perhaps a topping combination from your first date restaurant, or flavours inspired by a memorable holiday destination. Provide small cards explaining these personal touches, turning a simple pizza into a talking point.
To elevate this station further, serve each pizza on a wooden paddle with a pairing suggestion of Italian wine or craft beer. For a truly impressive display, consider flaming pizzas drizzled with grappa or limoncello – a spectacular finish that adds both flavour and flair.
Help Yourself Canapé Stand
Elevate the traditional passed canapés by creating a station where guests can browse and select their own miniature masterpieces. This approach allows for more variety and gives guests the freedom to choose based on their personal preferences. It also means that your guests won’t congregate in one area, waiting for the canapés to be served. Moreover, more canapés means people will likely get less drunk.
Present a selection of hot and cold options on varying heights of platters – perhaps tiered cake stands for sweet items and slate boards for savoury. Include shot glasses of seasonal soup, delicate tartlets, skewers of marinated seafood or meat, and bite-sized versions of classic dishes.
The key to a successful canapé station is meticulous presentation. Each item should be a perfectly formed, one-bite morsel, garnished beautifully and arranged with precision. Consider a colour theme that complements your wedding décor, or organise the display to create an ombré effect – a visual treat before the first bite is taken.
For a luxurious touch, include some premium offerings – perhaps a spoonful of Oscietra caviar on a blini with crème fraîche, or a sliver of wagyu beef with truffle shavings. These special morsels add an element of indulgence without the cost of serving such ingredients as a main course.
A Nostalgic Sweet Station
Channel childhood nostalgia with a candy bar offering an array of sweets, chocolates, and confections. This option doubles as both dessert and favour, giving guests something sweet to take home as a reminder of your special day.
Fill glass jars of various shapes and sizes with colourful treats, chosen to complement your wedding colour scheme. Include a mix of retro classics – rhubarb and custards, sherbet lemons, cola bottles – and more sophisticated offerings like artisan nougat, hand-made truffles, or French macarons. For the best price, visit an online shop like Zippy Sweets, otherwise you’ll find yourself forking out a lot of money on the high street.
Provide small bags or customised boxes for guests to fill, perhaps customised with your names and wedding date. Add scoops, tongs, and other serving implements to keep things hygienic, and consider having an attendant for younger guests to ensure they don’t overindulge before the dancing begins.
Enhance the visual impact with levels and lighting – place some containers on cake stands or vintage books, and use fairy lights or small spot lights to make the sweets glitter enticingly. Add decorative elements that tie in with your overall wedding theme – fresh flowers, organza ribbons, or sparkly accents can all elevate a simple sweet table to a stunning focal point.
For a sophisticated twist on this playful concept, consider including some boozy options for the adults – perhaps champagne truffles, gin and tonic gummies, or rum-soaked chocolates – alongside the traditional favourites.
Gourmet Burger Bar
Nothing says crowd-pleasing quite like a gourmet burger station. This versatile option can be dressed up or down depending on your wedding style, making it suitable for everything from festival-themed celebrations to elegant evening receptions.
Offer a selection of patties—beef, chicken, fish, and vegetarian/vegan options—alongside an array of artisanal breads and accompaniments. From classic cheese and pickle to more exotic toppings like truffle mayo or kimchi, the possibilities are endless.
For maximum impact, have chefs cooking patties to order on a visible grill, filling the air with tempting aromas. Provide guests with a ‘burger passport’ where they can tick their choices of patty, bun, cheese, sauce, and toppings, ensuring each creation is precisely to their liking.
Elevate the humble burger by offering unexpected gourmet additions – perhaps a foie gras topping option, a spoonful of lobster salad, or shavings of summer truffle. Serve alongside triple-cooked chips in miniature fryer baskets, or sweet potato fries with smoked sea salt for an indulgent accompaniment.
Complete the experience with a selection of craft beers or a flight of cocktails designed to complement the flavours of the burgers. A blackberry and thyme gin fizz or a smoky bourbon-based drink can transform this casual food into a sophisticated gastronomic experience.
Vibrant Taco Station
Transport your guests to the sun-drenched streets of Mexico with a vibrant taco station that delivers both theatrical preparation and personalised flavour combinations. This versatile option works brilliantly for both daytime receptions and evening festivities, offering substantial fare that doesn’t feel overly formal.
Create an authentic experience with a focal point of handmade corn tortillas being pressed and cooked to order on a traditional comal (griddle). The aroma alone will draw guests to this station, while the visual spectacle of seeing the fresh tortillas bubble and brown creates an engaging atmosphere. For larger gatherings, pre-pressed tortillas can be finished on the griddle to maintain the experience without causing delays.
Offer a thoughtfully curated selection of fillings that caters to various preferences. For meat options, consider slow-cooked pulled pork carnitas with crackling edges, tender adobo-marinated chicken, or chargrilled flank steak with a kiss of smoke. Vegetarian and vegan guests will appreciate roasted sweet potato with chipotle, crispy cauliflower with cumin and lime, or traditional rajas (poblano pepper strips with cream). Seafood enthusiasts might enjoy chilli-lime shrimp or grilled white fish with pineapple salsa.
The magic of a taco station lies in the accompaniments. Arrange colourful bowls containing finely diced white onion, fresh coriander, pickled red onions, various salsas ranging from mild pico de gallo to fiery habanero, crumbled queso fresco, lime wedges, sliced avocado or freshly made guacamole, and Mexican crema. The vibrant colours create a feast for the eyes before the first bite is taken.
Enhance the atmosphere with thoughtful styling – perhaps terracotta serving dishes, colourful Mexican blankets as table runners, paper bunting in bright colours, and atmospheric lighting from hurricane lamps or LED-powered paper luminaries. For an extra authentic touch, serve accompanying beverages in traditional Mexican glassware – perhaps horchata (a refreshing rice drink) for non-drinkers and perfectly balanced margaritas for those imbibing.
Staff your station with knowledgeable servers who can guide guests on traditional combinations or suggest pairings based on personal preference. This interactive element transforms a simple meal into a culinary journey and creates natural conversation starters as guests compare their creations.
For an extra flourish, consider adding freshly fried tortilla chips with a selection of dips – guacamole, salsa roja, and queso fundido – as a complementary grazing option alongside the main taco offerings. This thoughtful addition ensures guests can nibble continuously even as they wait for their personally crafted tacos to be prepared.
Luxurious Oyster Bar
Few food stations speak of opulence and indulgence quite like a freshly shucked oyster bar. This sophisticated offering brings a touch of coastal elegance to your wedding celebration, creating a memorable gastronomic experience for seafood enthusiasts.
Position your oyster bar in a prominent location, perhaps atop a table draped in crisp white linen and adorned with crushed ice, seaweed, and maritime decorations – think weathered rope, tiny glass buoys, or delicate shells. The visual presentation should evoke the fresh, briny essence of the sea.
Variety is crucial when selecting your oysters. Consider offering a thoughtfully curated selection from different regions – perhaps briny Atlantic varieties, creamy Pacific options, and some local favourites if available. Each type brings distinct flavour profiles that allow guests to embark on a tasting journey. Small cards describing each variety’s origin and tasting notes add an educational element that sparks conversation.
An expert shucker in smart attire, deftly opening each oyster to order, brings theatrical flair to the proceedings. Not only does this ensure optimal freshness, but the mesmerising skill of a professional oyster shucker becomes a performance in itself. Guests can watch as shells are expertly prised open, revealing their glistening treasures within.
Accompany your oysters with an array of carefully considered garnishes – mignonette sauce with shallots and champagne vinegar, classic cocktail sauce, freshly grated horseradish, lemon wedges, and perhaps some more adventurous options like a passion fruit granita or cucumber relish. Tiny pipettes filled with smoky whisky or vodka allow guests to add a splash directly onto their oyster for an elevated tasting experience.
Complete the presentation with elegant silver trays of complementary nibbles – brown bread with seaweed butter, small shots of chilled cucumber soup, or delicate blinis with caviar. Champagne is the classic pairing, of course, but consider also offering a crisp, mineral-forward white wine or even a dry stout to complement the briny flavours.
For guests less familiar with oysters, having your shucker offer guidance on tasting techniques – the importance of appreciating the liquor, the gentle chew to release flavours, the ideal sipping order from mild to strong – transforms this into more than mere consumption; it becomes a gastronomic education.
An oyster bar creates a moment of refined luxury within your wedding celebration – a talking point that will have guests reminiscing long after the day has passed.
Miang Kham Station
Introduce your guests to one of Thailand’s most elegant finger foods with a Miang Kham station. This traditional Thai delicacy, which translates to “one bite wrap,” offers a perfect blend of sweet, sour, salty, and spicy flavours all contained in a single, beautiful bite.
Set up the station with fresh betel or cha-plu leaves (though collard greens or spinach leaves can substitute) arranged in concentric circles. Surrounding these, place small bowls containing the classic components: roasted peanuts, toasted coconut, small lime wedges (with rind), finely diced ginger, red chillies, tiny dried shrimp, and shallots. At the centre, position a bowl of the star attraction – the special palm sugar-based sauce infused with galangal, shrimp paste, and fish sauce that brings the whole creation together.
The interactive element is what makes this station so special. Guests create their own wraps, placing small amounts of each ingredient onto a leaf before folding it into a small parcel and dipping it into the sauce. The result is an explosion of complementary flavours and textures in a single bite – crunchy, chewy, soft, spicy, sweet, sour, and umami all at once.
For authenticity, decorate the station with orchids and banana leaves, and have attendants in traditional Thai dress explain the cultural significance of this dish, often served at celebrations. Wooden platters and ceramic bowls enhance the presentation and lend an air of rustic elegance.
To elevate the experience further, consider offering a complementary Thai-inspired cocktail – perhaps a lemongrass and ginger martini or a cucumber and basil cooler – that will refresh the palate between bites. This station provides not only a delicious snack but also a cultural conversation starter that will have guests comparing their personal flavour combinations throughout the evening.
Pani Puri Station
For something a little different, a Pani Puri station brings the vibrant street food of India to your wedding. These hollow, crisp balls filled with spiced potato, chickpeas, onions, and tangy tamarind water create an explosion of flavour in each bite.
The interactive nature of this station adds a memorable element to your celebration – guests crack the top of the puri, fill it with their choice of stuffing, then pour over spiced water before popping the entire creation into their mouth in one go. The resulting burst of flavours provides not just sustenance but entertainment.
Have a server demonstrate the technique and then assist guests in creating their own perfect pani puri. Offer different levels of spice in the water, from mild to fiery, ensuring everyone can enjoy this experience regardless of their heat tolerance.
Enhance the authenticity with vibrant decoration – marigold garlands, brass serving vessels, and traditional Indian music playing softly in the background. Provide refreshing mint and cucumber water on the side to cool palates between bites.
For guests less familiar with Indian cuisine, include small cards explaining the cultural significance of this popular street food and the traditional way to enjoy it – a thoughtful touch that adds an educational dimension to the culinary experience.
Decadent Dessert Station
Sweet tooths will be delighted by a dedicated dessert station offering a variety of treats beyond the traditional wedding cake. The dessert course provides an opportunity for real visual impact – think towers of profiteroles, cascading chocolate fountains, and jewel-like tarts glistening under soft lighting.
Consider a selection of miniature classics—crème brûlée, chocolate mousse pots, lemon tarts—alongside more contemporary options like cookie dough or brownie bites. The key is variety in both flavour and texture – something creamy, something crunchy, something fruity, and something chocolate (because there’s always someone who only wants chocolate).
Presentation elevates this station from good to extraordinary. Use antique cake stands, marble slabs, or even illuminated ice blocks as serving platforms. Incorporate edible flowers, gold leaf, or spun sugar for decoration, turning simple desserts into works of art.
For an interactive element, include a ‘finishing station’ where guests can add their own toppings to ice creams or custards – perhaps warm salted caramel sauce poured from silver jugs, clouds of Persian fairy floss (pashmak), or a selection of praline crumbs and brittle.
Don’t forget to consider dietary requirements – ensuring there are vegan, gluten-free, and nut-free options means everyone can indulge in a sweet ending to the meal.
A Homely Sweet Pie Stand
Celebrate British tradition with a table laden with sweet pies in various sizes. This homely, comforting option brings a touch of nostalgia to proceedings and works particularly well for autumn or winter weddings when guests crave something warming.
From individual tartlets to large pies for sharing, offer classics like apple and blackberry, lemon meringue, or banoffee alongside more unusual flavours like rhubarb and ginger or dark chocolate and salted caramel. The key to an impressive display is variety in both size and appearance – some with lattice tops, others with crumble, some glazed to a high shine, others dusted with icing sugar.
Serve with dollops of clotted cream, custard, or ice cream for a truly indulgent experience. For an interactive element, consider offering warm sauces in small copper pans – perhaps a vanilla-flecked crème anglaise or a rich chocolate sauce – that guests can pour over their chosen slice.
Stack your pies on vintage cake stands of varying heights, interspersed with candles in antique holders and seasonal decorations – autumn leaves, spring blossoms, or winter berries depending on your wedding date. A handwritten chalk board listing the various flavours adds a charming, personal touch.
For a final flourish, consider offering small boxes so guests can take a slice home – the perfect midnight snack after a night of celebration.
Artisanal Ice Cream Stand
Nothing delights guests at a summer wedding quite like an artisanal ice cream station. When the temperature rises and dancing feet need cooling down, this refreshing treat provides the perfect sweet interlude to re-energize your celebration.
Set up vintage ice cream carts or create a mock parlour complete with striped awnings and elegant glass dishes. Offer a selection of both classic and innovative flavours – perhaps vanilla bean, strawberry and cream, and chocolate alongside more adventurous options like lavender and honey, salted caramel, or gin and tonic sorbet.
For true luxury, consider including gelato made on-site with liquid nitrogen, creating a spectacular smoking display as each batch is freshly prepared. The rapid freezing creates exceptionally smooth ice cream with intense flavour, and the theatrical element becomes a talking point.
Enhance the experience with a ‘build your own sundae’ section where guests can add their choice of toppings – fresh berries, crushed cookies, toasted nuts, honeycomb pieces, and a selection of sauces from warm chocolate to zingy fruit coulis. Provide waffle cones, sugar cones, and cups to accommodate all preferences.
For an adult twist, offer liqueur pairings or booze-infused flavours – perhaps a champagne sorbet, rum and raisin, or amaretto ice cream. These sophisticated options elevate a childhood treat into an indulgent grown-up experience perfectly suited to your special day.
Instagrammable Doughnut Wall
For a wedding food station that’s as photogenic as it is delicious, consider the ever-popular doughnut wall. This vertical display of sweet treats has become a modern wedding classic for good reason – it combines visual impact with crowd-pleasing indulgence.
Create your doughnut wall using a large wooden board or frame, painted to match your wedding colour scheme. Insert small wooden pegs or decorative hooks in a symmetrical pattern, spacing them appropriately to hold each doughnut without crowding. Position the wall in a well-lit area where it can serve as both refreshment station and photo opportunity for your guests.
The true artistry lies in your selection of doughnuts. Consider commissioning a variety of artisanal offerings in different flavours, sizes, and decorative finishes that complement your wedding palette. Classic ring doughnuts work particularly well for hanging, but don’t feel limited – filled varieties can be displayed on complementary platters at the base of the wall for additional variety.
For a luxury touch, work with a specialist baker to create bespoke flavours that tell your story as a couple – perhaps incorporating your favourite desserts, cocktails, or significant locations into the doughnut designs. Imagine a Pimm’s-infused summer doughnut, a tiramisu-inspired creation, or a citrus offering named after your honeymoon destination.
Elevate the display with thoughtful details – fresh flowers or greenery woven between the doughnuts, subtle fairy lighting, or personalised tags describing each flavour. A hand-lettered sign with a clever phrase like “Donut Ever Let Go” or “Love Is Sweet” adds charm and creates another photo opportunity.
Consider timing this station strategically – perhaps unveiling it after the wedding breakfast as dancing begins, when guests are ready for a sweet energy boost. Alternatively, box up doughnuts as favours for departing guests, providing a delightful reminder of your celebration for the journey home.
For an interactive element, include a selection of dipping sauces – perhaps white and dark chocolate, salted caramel, or fruit coulis – alongside edible toppings like crushed nuts, freeze-dried berries, or gold leaf, allowing guests to customise their chosen doughnut for a bespoke treat.
Refreshing Drinks Station
For a non-alcoholic option that’s far from boring, create a station dedicated to sophisticated soft drinks and mocktails. In the midst of wedding celebrations, a thoughtfully designed refreshment stand offers guests a chance to rehydrate and relax between dance floor sessions.
Include a selection of fresh fruit-infused waters in elegant dispensers—think cucumber and mint, lemon and raspberry, or orange and rosemary—alongside premium sodas and cordials. For a more substantial offering, include mocktails designed to be as visually appealing and complex in flavour as their alcoholic counterparts – perhaps a virgin mojito with muddled lime and mint, or a strawberry and basil smash.
Presentation elevates this station from functional to festive. Use quality glassware, fresh garnishes, and perhaps even edible flowers to add a touch of luxury. Clear signage with descriptions of each drink will help guests navigate the options, and having dedicated staff to assist with any questions ensures a smooth operation.
Consider seasonal adaptations – cooling cucumber and melon in summer, warming spiced apple in winter – and don’t forget practical touches like eco-friendly straws and plenty of napkins. Position this station centrally, perhaps near the dance floor, to ensure guests stay hydrated throughout the celebrations.
DIY Cocktail Bar: Aperol Spritz Station
For those who do indulge, a DIY Aperol Spritz station brings a touch of Italian aperitivo culture to your celebration. The vibrant orange hue of this popular drink adds a splash of colour to proceedings, and the simple preparation makes it ideal for a self-serve station.
Provide bottles of Aperol, prosecco, and soda water, along with slices of orange for garnish. Include clear instructions for the perfect ratio (typically 3 parts prosecco, 2 parts Aperol, 1 part soda water), and perhaps offer variations like a white spritz (using white wine instead of prosecco) or a rosé version for those who prefer something different.
Elegant wine glasses are a must, and ice buckets should be regularly replenished to ensure drinks remain perfectly chilled. Consider including some Italian-inspired snacks alongside—olives, breadsticks, or small pieces of focaccia—to complement the bitter-sweet flavour of the Aperol.
For a truly impressive display, create a backdrop reminiscent of an Italian riviera – perhaps a wall of artificial greenery interspersed with citrus fruits, or vintage Italian travel posters. Position this station to catch the evening light if possible, as the sunset glow through the orange liquid creates a magical effect.
Add a touch of luxury with personalised stirrers or cocktail napkins bearing your names and wedding date – a small detail that shows thought and care in every aspect of your celebration.
The Bottom Line
When planning your wedding food stations, remember that they should reflect your personality as a couple and the atmosphere you wish to create. Whether you opt for sophisticated elegance or playful nostalgia, the key is attention to detail and quality ingredients.
Consider the flow of your wedding day when deciding which stations to include – lighter options during the welcome drinks, more substantial fare for the main meal period, and perhaps something sweet or comforting for later in the evening when dancing has worked up an appetite.
Work closely with your caterers to ensure each station is not just delicious but visually stunning and practically manageable. Remember that the best food stations combine delectable offerings with interactive elements and beautiful presentation, creating a multi-sensory experience that guests will remember long after the last dance.
May your wedding be as delicious as it is memorable, and may your food stations be the talking point of many gatherings to come. Congratulations!
British Muslims are finding that Umrah, one of Islam’s most sacred pilgrimages, is becoming increasingly expensive. In 2024, over 16.9 million people performed Umrah, setting a record for religious tourism. With more than 14,000 Google searches per month from Brits looking for Umrah solutions, there’s clearly a significant interest in making this spiritual journey more accessible and affordable.
Ufuk Seçgin, a travel expert and cofounder and CMO of Halalbooking.com, has shared comprehensive insights on what to consider when planning your trip. Whether you’re a first-time pilgrim or looking to make your next Umrah more cost-effective, these expert recommendations will help you navigate the planning process with confidence.
Understanding The New eVisa System
Since the Saudi Arabian government introduced eVisas for British passport holders, this has transformed the Umrah planning process. This digital innovation has saved travellers thousands of pounds because pilgrims can now apply online within minutes, without relying on travel agents who often charge substantial fees for visa processing.
The eVisa has been a welcome addition for tourists and pilgrims alike, allowing multiple entries within a year and making it the perfect option for those considering an Umrah trip. This system is part of Saudi Arabia’s broader Vision 2030 initiative, which aims to diversify the economy beyond oil dependence and enhance the tourism sector.
To apply for an eVisa, British citizens need only visit the official Saudi visa portal, upload the required documents (including a passport-sized photo, passport details, and travel information), pay the processing fee, and typically receive approval within 24-48 hours. This streamlined process eliminates the need for embassy visits or postal applications, making the first step of your Umrah journey considerably smoother.
Strategic Timing: When To Book Your Umrah
It is always best to book your hotel and flights as early as possible—ideally 4-6 months before your intended travel date. Many pilgrims think that waiting until the last minute will help them snag a better deal, however, this misconception can lead to disappointment and significantly higher costs.
Booking early ensures you get the best possible deals on flights and accommodation while avoiding the risk of missing out on hotels in prime locations. Airlines typically release their lowest fares months in advance, with prices gradually increasing as the departure date approaches. Similarly, hotels near the Haram offer early booking discounts that disappear as occupancy rates rise.
The timing of your visit also matters significantly. While Umrah can be performed year-round (unlike Hajj, which occurs during specific dates), certain periods are considerably more crowded and expensive. Peak seasons include Ramadan, school holidays, and the months immediately before and after Hajj. If flexibility allows, consider travelling during quieter periods such as Muharram or the middle of Sha’ban, when both flights and accommodation are typically more affordable.
Location Matters: Choosing The Right Accommodation
When it comes to accommodation, proximity to the Haram is paramount. On location, it is important to be as close to the Haram as possible. At peak times, the traffic in and around the Haram can be extremely dense, adding potentially hours onto your journey time.
Booking a hotel near the Haram negates the danger of being stuck in traffic and contributes towards a stress-free experience. So when you’re looking for hotels in Madinah or Makkah, location should be your primary consideration. Halalbooking’s unique Umrah filters allow you to find hotels with Haram view rooms, which can enhance your spiritual experience by maintaining visual connection with the sacred sites.
While hotels closest to the Haram command premium prices, they offer significant advantages beyond convenience. They allow you to perform the five daily prayers at the mosque with ease, provide quick access for additional Tawaf (circumambulation of the Kaaba), and reduce the physical exertion of walking long distances in what can be challenging weather conditions.
For those on a tighter budget, consider hotels within a 10-15 minute walking distance, which offer a reasonable compromise between cost and convenience. Some visitors also opt for apartments rather than hotels, particularly for family groups, as these can provide more space and self-catering facilities at a lower cost per person.
Packing Essentials: What To Bring On Your Umrah Journey
When packing for Umrah, it can be difficult to know what to bring, but there are certainly some essentials you shouldn’t forget. For men, the Ihram garments—two simple, seamless white cloths—are the most critical items. These must be worn during the Umrah rituals and should be packed in your hand luggage in case checked baggage is delayed.
Other essentials include:
A light, portable prayer mat for use during travel
Comfortable, durable sandals or slip-on shoes that can be easily removed when entering mosques
A refillable water bottle for Zamzam water, which pilgrims typically collect and consume during their stay
Modest, lightweight clothing suitable for the local climate (which can be extremely hot)
Basic medications, including pain relievers, anti-diarrhoeal medicine, and any prescription medications
A small umbrella or sun hat for protection from the intense sun
Unscented toiletries and hygiene products (as scented products are prohibited while in a state of Ihram)
Make sure you download the Nusuk app, which has become an indispensable tool for pilgrims. This official application allows you to book an Umrah permit, view prayer times, navigate the holy sites, and access emergency services if needed. Some pilgrims also find it helpful to download offline maps of Makkah and Madinah, translation apps, and Quran applications for reference during their journey.
DIY Umrah vs. Package Tours
Whilst some find packages convenient, they can feel impersonal and restrict your freedom to travel when and where you want. If you plan your own DIY Umrah trip, you can make time to discover hidden gems, such as the Cave of Hira, Jannat al-Mu’alla (where many members of the Prophet’s (pbuh) family are buried), and the newly opened museums in Makkah and Madinah.
A DIY approach gives you the flexibility to:
Choose flight times that suit your schedule rather than being constrained by group bookings
Select accommodation based on your specific preferences and budget
Extend your stay or change locations without being tied to a fixed itinerary
Visit additional sites beyond those included in standard package tours
Dine at restaurants of your choosing rather than being limited to hotel buffets
The Bottom Line
Opting for a DIY Umrah experience in Saudi Arabia can save pilgrims hundreds of pounds, but it’s important to make sure everything is planned meticulously so you can travel without stress. The introduction of eVisas has made the process significantly more accessible for British Muslims, opening up opportunities for more frequent and affordable spiritual journeys.
By booking early, choosing accommodations strategically, packing appropriately, and leveraging local travel options, pilgrims can create a more personalised and cost-effective Umrah experience. The spiritual benefits of this sacred journey are immeasurable, and with careful planning, the logistical and financial aspects need not be overwhelming.
As the daffodils begin to bloom and the days grow longer, the unmistakable signs of spring are upon us here in the UK. While the milder weather may tempt you to forget about your central heating system until the leaves start to fall again, spring is actually the perfect time to ensure everything is in working order.
After all, as the old adage goes, “Fix the roof while the sun is shining.” Here are seven central heating issues that you should address now to ensure a cosy home when the chill returns.
1. Unusual Noises From The Boiler
What’s that noise? Do you hear it? A rumbling, spluttering, deeply concerning crescendo coming from the basement? Better go investigate…
Broken. Boiler. Never have two words struck more fear into the careful, conscientious homeowner than these. Nightmare stories about spiralling costs, lengthy repair jobs and cold showers in the depths of winter linger long in the memory, and as such, any unusual sounds or activity from your boiler rings immediate alarm bells.
A boiler should operate with a quiet hum. If yours has started to make banging, whistling, or gurgling noises, it’s trying to tell you something isn’t right. Often, these sounds can indicate air in the system, low water pressure, or limescale build-up. Ignoring these noises can lead to more serious problems, such as a pump failure, which can be both inconvenient and costly to repair.
Simple Check: Listen to your boiler during operation. It should emit a steady, low hum. If you hear banging, whistling, or gurgling, take note of when these sounds occur and their frequency.
The Solution: Call a professional to investigate the cause of the noise. It could be something as simple as air in the system or as complex as a limescale build-up. A certified engineer can diagnose and rectify the issue, often with a system bleed or a chemical flush.
2. Thermostat Issues
Is your thermostat playing up? Perhaps it’s not responding or showing incorrect readings. As Just Service Group, who offer regulation-compliant boiler services in Wandsworth, tell us, a malfunctioning thermostat can lead to over or under-heating your home, resulting in discomfort and wasted energy. It’s essential to address this issue promptly, as it can also be a sign of electrical problems within your heating system.
Simple Check: Check if your thermostat responds when you adjust the settings. Also, compare its temperature reading with a separate room thermometer to see if they match.
The Solution: If the thermostat is unresponsive or inaccurate, it may need recalibrating, new batteries, or replacing. A heating engineer can provide a precise diagnosis and solution, ensuring your heating system responds correctly to your adjustments.
Leaks from your boiler or heating system should never be ignored. Not only can they lead to water damage in your home, but they can also be symptomatic of internal issues, such as corrosion or a faulty pressure valve. Small leaks can quickly become big problems, so it’s best to get them fixed while they’re manageable.
Simple Check: Regularly inspect around your boiler and radiators for any signs of water leakage. Even small, consistent drips should be taken seriously.
The Solution: Identify the source of the leak and have it repaired by a professional. Leaks can be a sign of wear and tear or a faulty component, which will need replacing to prevent further damage.
4. Pilot Light Problems
If your boiler’s pilot light is frequently going out or appears yellow instead of blue, it could be a sign of a carbon monoxide leak. This is a serious safety concern, as carbon monoxide is a deadly, odourless gas. Ensure you have a working carbon monoxide detector in your home and get a Gas Safe registered engineer to do a boiler emergency call out immediately.
Simple Check:
Observe the colour of your boiler’s pilot light. It should be a strong blue flame. If it’s yellow or orange, this could indicate incomplete combustion.
The Solution:
A discoloured pilot light requires immediate attention from a Gas Safe registered engineer, as it could be a sign of carbon monoxide. Do not attempt to fix this yourself.
5. Rising Energy Bills
Whilst of course we should caveat this one quite substantially as energy bills have been rising significantly in recent years through no fault of your boilers, if your energy bills are shooting up without a corresponding increase in usage, your central heating system may be losing efficiency. This can be due to a variety of issues, from outdated boilers to poor insulation. Investing in maintenance or upgrades now can save you money in the long run and reduce your carbon footprint.
Simple Check: Compare your current energy bills with those from the same period in previous years. Also, listen to your boiler – if it’s working harder than usual, it may be less efficient.
The Solution: Have a heating engineer conduct a full system inspection. They can recommend actions such as insulating pipes, upgrading your boiler, or installing a more efficient thermostat to help reduce your energy consumption. A smart meter may also help pinpoint the problem.
If you’ve noticed that your radiators aren’t heating up as they should, or there are cold spots even after bleeding them, there could be a build-up of sludge or debris in the system. This can prevent the efficient circulation of hot water. Power flushing the system can clear these blockages and restore your radiators to their full heating glory.
Simple Check: Feel your radiators when the heating is on. They should be evenly warm. If you find cold spots, especially at the bottom, this could indicate sludge build-up.
The Solution: Bleeding your radiators can remove trapped air, which may solve the problem. If cold spots persist, a professional power flush might be necessary to clear out the sludge and get your radiators back to optimal performance.
7. Boiler Pressure Problems
The pressure gauge on your boiler should generally be between 1 and 1.5 bar. If it’s too high or too low, it can affect the performance of your heating system. Low pressure can be caused by leaks or recently bled radiators, while high pressure might be due to overfilling or a fault in the pressure relief valve. Both scenarios warrant a professional inspection and possible maintenance.
Simple Check: Regularly check the pressure gauge on your boiler. It should read between 1 and 1.5 bar. If it’s outside this range, there’s an issue that needs addressing.
The Solution: For low pressure, try repressurising your system according to the manufacturer’s instructions. If the pressure is too high or you’re unsure, call a professional. They can check for leaks or faults and adjust the pressure accordingly.
8. Faulty TRVs (Thermostatic Radiator Valves)
TRVs are essential components that regulate the heat output of individual radiators, allowing you to control the temperature in each room independently. Over time, these valves can become stuck, unresponsive, or develop faults that prevent them from functioning correctly. When TRVs fail, you may notice some rooms becoming uncomfortably hot whilst others remain chilly, leading to inefficient heating and unnecessary energy consumption.
Simple Check: Try rotating your TRVs to different settings and monitor if the radiator temperature changes accordingly. If the valve is stiff, doesn’t rotate smoothly, or the radiator temperature doesn’t respond to adjustments, your TRV may be faulty.
The Solution: In some cases, a stuck TRV can be fixed by fully opening and closing it several times to dislodge any debris. However, if the valve remains unresponsive, it’s best to have a heating engineer replace it. Modern TRVs offer improved efficiency and more precise temperature control, making them a worthwhile upgrade that can enhance your comfort and potentially reduce your heating bills.
The Bottom Line
While the allure of spring may draw your attention away from your central heating system, it’s the ideal season to address any issues. By taking action now, you can ensure that your system is efficient, safe, and ready to keep you warm when you need it most. Remember, maintaining your central heating is not just about comfort; it’s about safety and efficiency too. So, don’t put off those repairs; your future self will thank you when the autumn winds start to blow.
The domestic bathroom takes many forms. From tiny cubicles with carpets which simply shouldn’t be there to elaborate, modern ones you could imagine living in, no room in the house is so prone to divergence. Historically a purely functional space, bathrooms have evolved dramatically over the centuries—from the communal bathing cultures of ancient Rome to the Victorian era’s embrace of indoor plumbing as a hallmark of civilisation. Today, they represent far more than mere utility; they’ve become personal sanctuaries, private retreats where we begin and end our days.
The psychological impact of a well-designed bathroom shouldn’t be underestimated. Studies suggest we spend an average of 416 days of our lives in this intimate space—time that deserves to be experienced in surroundings that elevate rather than merely facilitate. The luxury bathroom movement isn’t merely about status or showing off; it’s about creating an environment that promotes wellbeing, relaxation, and a momentary escape from the outside world.
Though we’re not aiming for a toilet which doubles up as a throne or a bathtub you could take a swim in, there are ways to bring that added sense of sophistication and opulence to your bathroom without feeling like you’re overdoing it. The true art lies in balancing aesthetics with functionality, creating a space that feels indulgent yet remains eminently practical. Here’s how; our 8 luxury alternatives to your traditional bathroom fixtures, IDEAL for those looking to shift from functional to fancy.
Faucets
An eye for elegant yet ergonomic pieces is essential when designing a luxury bathroom. Even something as basic as faucets can channel this sense of sophistication. An impeccably designed tap, burnished, gleaming and standing to perfect attention, will tap into (sorry) that opulent vibe we’re coveting.
For the true connoisseur, consider options with innovative water-saving technology that doesn’t compromise on pressure or performance. Touchless faucets with motion sensors not only add a futuristic element but also enhance hygiene. Available in materials ranging from brushed gold to matte black or hammered copper, today’s luxury faucets serve as jewellery for your basin, making a statement while performing their essential function with whisper-quiet precision.
Water Closets
Sorry for the innuendo, but we thought ‘toilet’ was a bit brusque in such company. The focal point of the bathroom doesn’t have to look plain. Indeed, there are water closets on the market to make your bathroom look – and feel – grand, bringing aesthetic interest and ergonomic functionality to the room, coming replete with features you didn’t know the humble toilet could muster. You needn’t even get your hands dirty; the truly modern automatic water closet offers one-touch rear cleansing, adjustable water pressure and direction, and even a heated seat.
Showers
As Frank Ocean once celebrated, a great shower head feels amazing. Praise indeed. One of the defining features of luxury in the bathroom, then, is a shower which flows strong, hard and hot, making your bathroom an absolute delight. Luxury shower fittings now include smart controls, allowing you to set the temperature and force of your shower digitally and precisely, remembering your settings for next time.
Modern luxury extends beyond basic functionality to create truly immersive experiences. High-end rainfall and waterfall shower designs deliver a soothing, natural sensation, though many homeowners find they need to install a pump to improve water pressure for optimal performance. For the ultimate indulgence, consider a full-body shower system with multiple jets positioned strategically along the walls to massage and invigorate from all angles. Chromotherapy lighting systems that bathe you in mood-enhancing colored light can further transform your daily routine into a therapeutic retreat, proving that luxury isn’t just about aesthetics—it’s about elevating everyday experiences.
In a luxury bathroom, a countertop basin with intricate – even ornamental – design can really lift the aesthetic value of the space. To make one a proper focal point, and a piece of art in the process, consider installing a ceramic, tiled version, seen across Greece, Turkey, and the Middle East, as well as East Asia. Just gorgeous.
The material revolution has brought extraordinary options beyond traditional porcelain. Natural stone basins carved from single blocks of marble, onyx, or granite showcase nature’s artistry with unique veining and color variations that cannot be replicated. For the avant-garde bathroom, glass basins—either transparent or with subtle tints—create an ethereal, floating appearance that seems to defy gravity, especially when paired with wall-mounted fixtures. The right basin doesn’t merely serve a function; it creates an experience every time you wash your hands.
Concealed Cisterns
One of the most important things to consider when it comes to luxury bathrooms is that less is more. Minimalism is in, and users are valuing spaciousness over superfluous features each and every time. The more space the bathroom has, the more luxurious it will feel, make no mistake. Plus, some of our drying routines are pretty flamboyant; the last thing we want is to be knocking things off shelves when we’re doing that between the leg, towel drying manoeuvre.
Concealed cisterns add that sense of extra space, and makes the room look bigger. Their concealed appearance does not take away from their functionality, either, making this a no brainer.
Bathtubs
No luxury bathroom is complete without a bathtub. Who doesn’t enjoy a soak after a long day? Luxury bathtubs come in many forms, and how you add that enhancement to your space depends on your definition of the word ‘luxury’. Visually, you can’t beat a freestanding bath, which naturally becomes the focal point of the space. But if it’s convenience you’re after, a more modern bathtub, with smart features, could be a better choice. A beautiful bathtub, as they, is in the eyes of the beholder.
Heated Flooring
There’s nothing quite like stepping onto a warm floor during those chilly morning routines. Heated bathroom flooring has transitioned from a rare indulgence to an increasingly popular luxury that combines comfort with practicality. Beyond the obvious sensory pleasure, heated floors distribute warmth evenly throughout the room, eliminating cold spots and reducing humidity and condensation.
The technology has advanced significantly too, with smart systems allowing zone control and programmable timers so your floor is perfectly warmed for your morning routine. Available in various materials including ceramic, stone, and even vinyl, heated floors can seamlessly integrate with any bathroom aesthetic while providing that unmistakable feeling of opulence that begins, quite literally, from the ground up.
Bathroom Accessories
Often ignored, but bathroom accessories play a crucial role in adding that extra touch of class to surroundings. When you’re designing a luxury bathroom, even the smallest parts matter so that the entire space looks cohesive. When all the pieces come together, that sense of immaculate is achieved. Focus on the finer details, and you’ll be richly rewarded.
It’s a place where you get to spend some quality time with yourself. Therefore, give your bathroom the attention it deserves today. When you’re done, invite us round to have a look; we promise we’ll flush.