The north of England holds a particular kind of beauty. It’s a landscape that rewards those willing to leave the motorway behind, to follow single-track roads through valleys where the mobile signal drops and the horizon opens up. From the limestone pavements of the Yorkshire Dales to the dark, clear skies of Northumberland, the best rural getaways in the north offer something more than scenery. They offer a feeling of genuine remoteness, even within a few hours’ drive of most major cities.
Whether you’re after a lakeside spa break, a shepherd’s hut beneath the Milky Way, or a country house hotel with a Chatsworth Estate postcode, these five rural getaways represent the best of what the north has to offer. Each one is different in character, catering to a different kind of escape, but they all share one thing: a deep connection to the landscape around them.
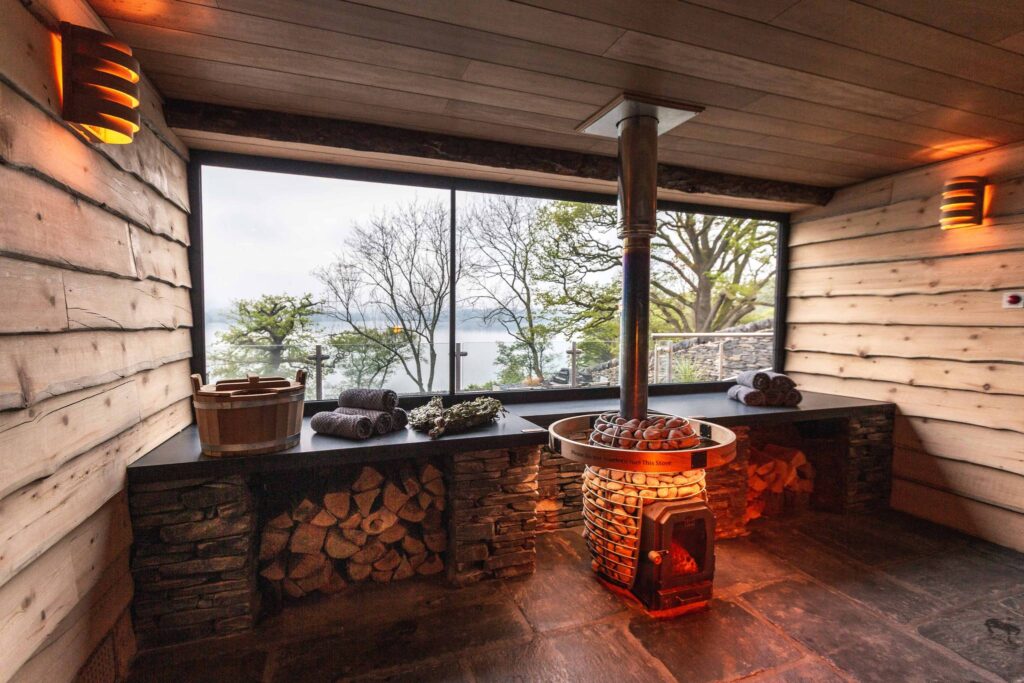
Low Wood Bay Resort & Spa, Lake District
Ideal for a spa session followed by wakesurfing on Windermere before lunch…
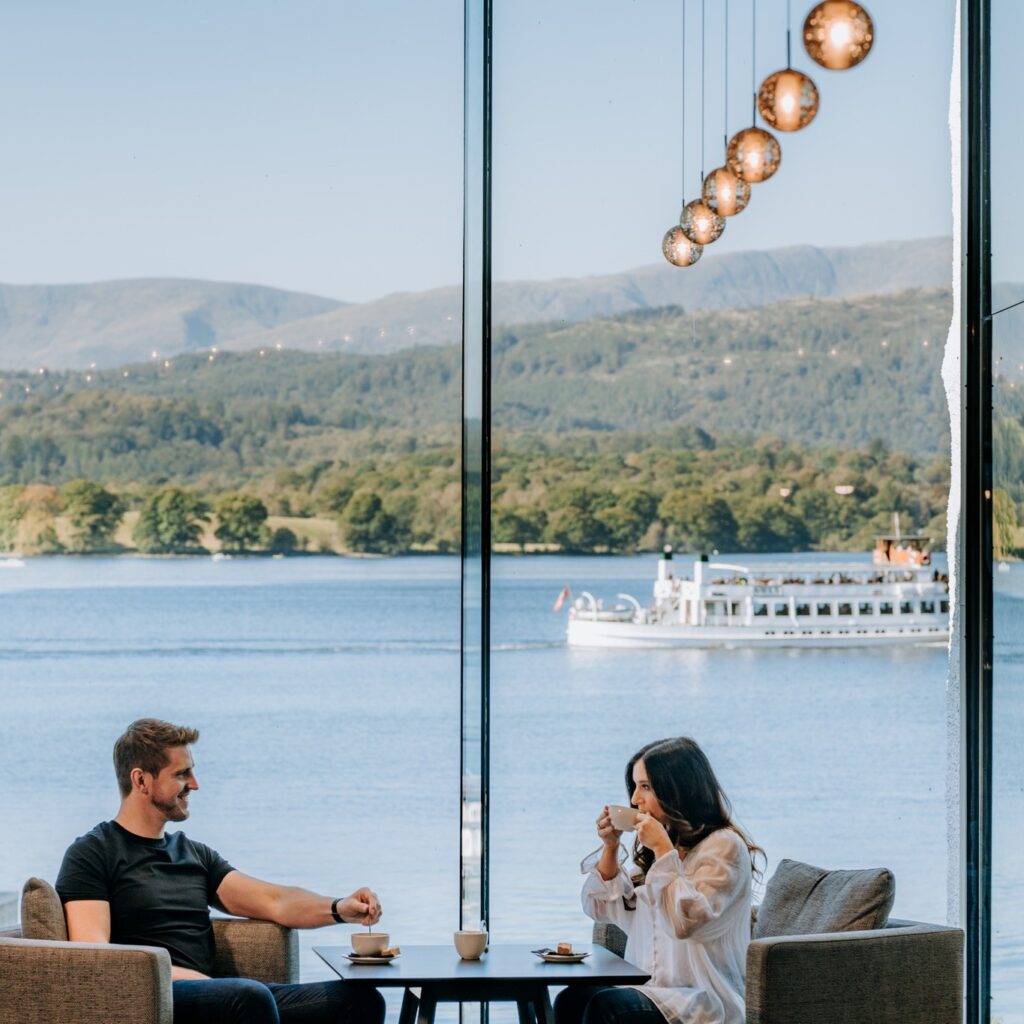
For a peaceful countryside retreat at a Lake District spa hotel, Low Wood Bay is hard to beat. Sitting right on the shore of Lake Windermere between Ambleside and Windermere, it commands the kind of views that make you forget what day of the week it is.
The spa is the main draw here, and with good reason. Last year awarded Best Spa in the North West by the Good Spa Guide, it features both indoor and outdoor thermal experiences, with treatment rooms overlooking the lake. The outdoor thermal pool is particularly special: there are few better ways to spend a winter afternoon than soaking in warm water while watching mist roll across Windermere.
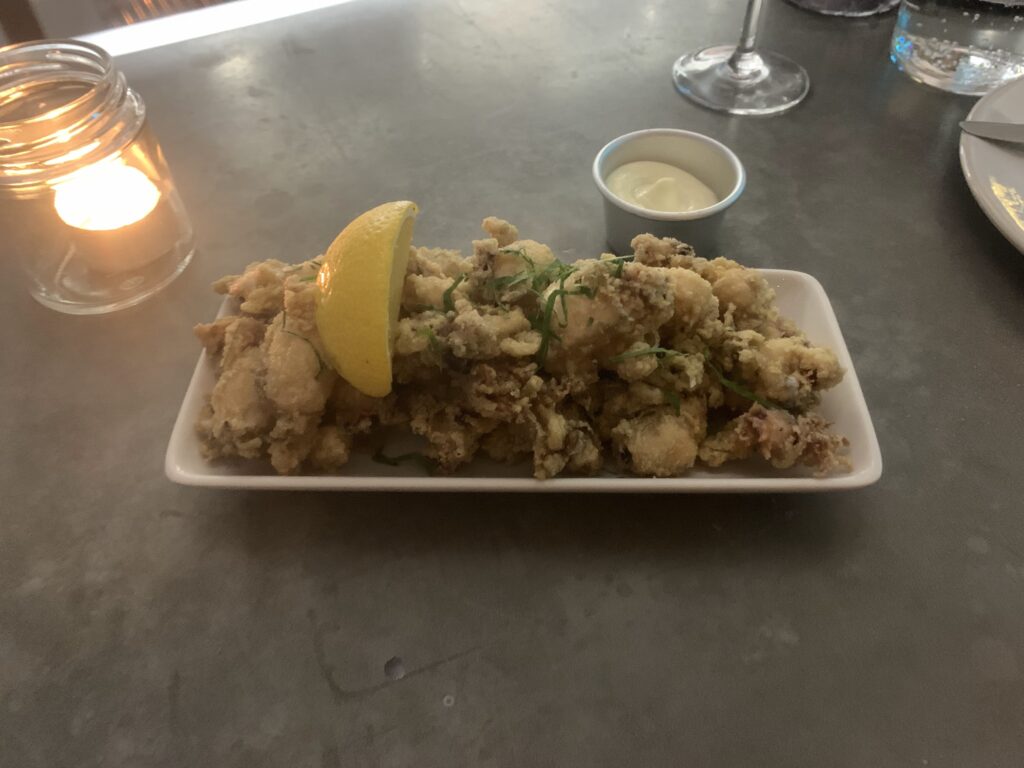
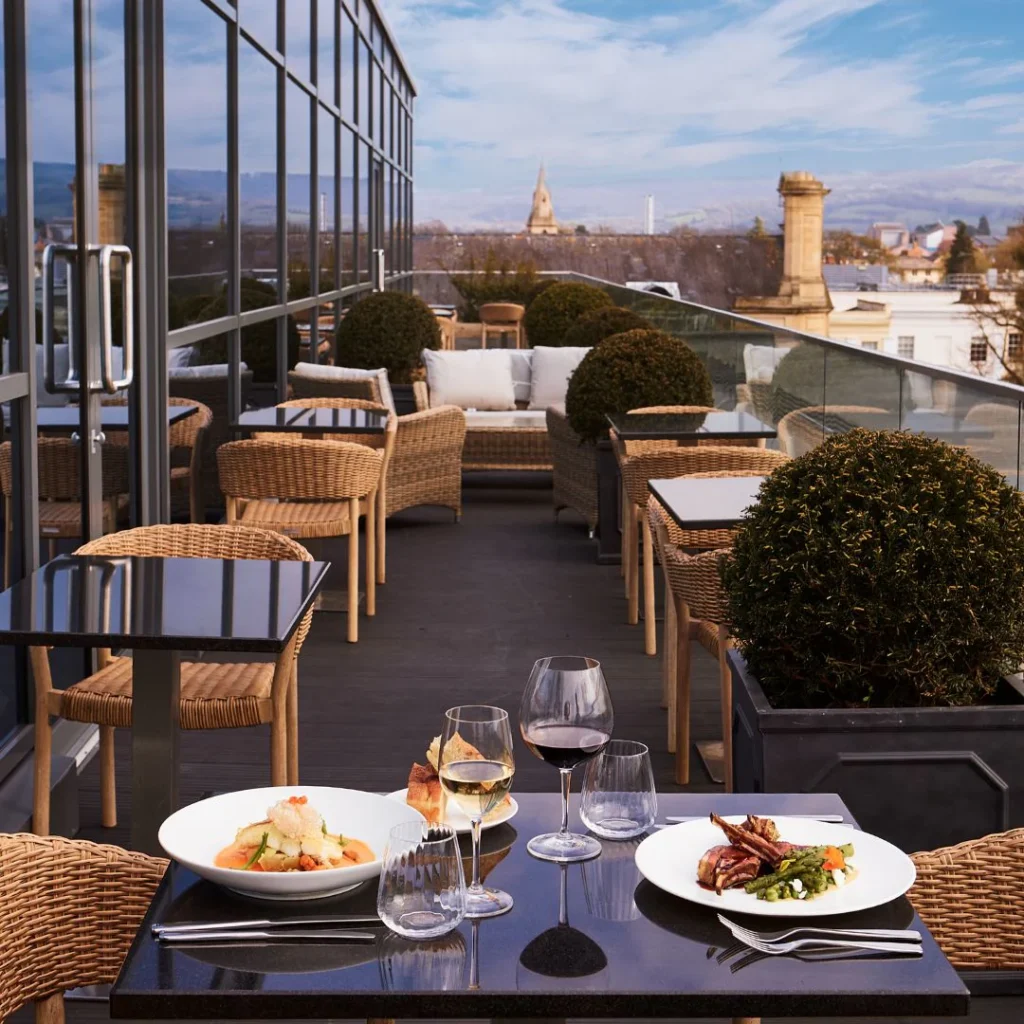
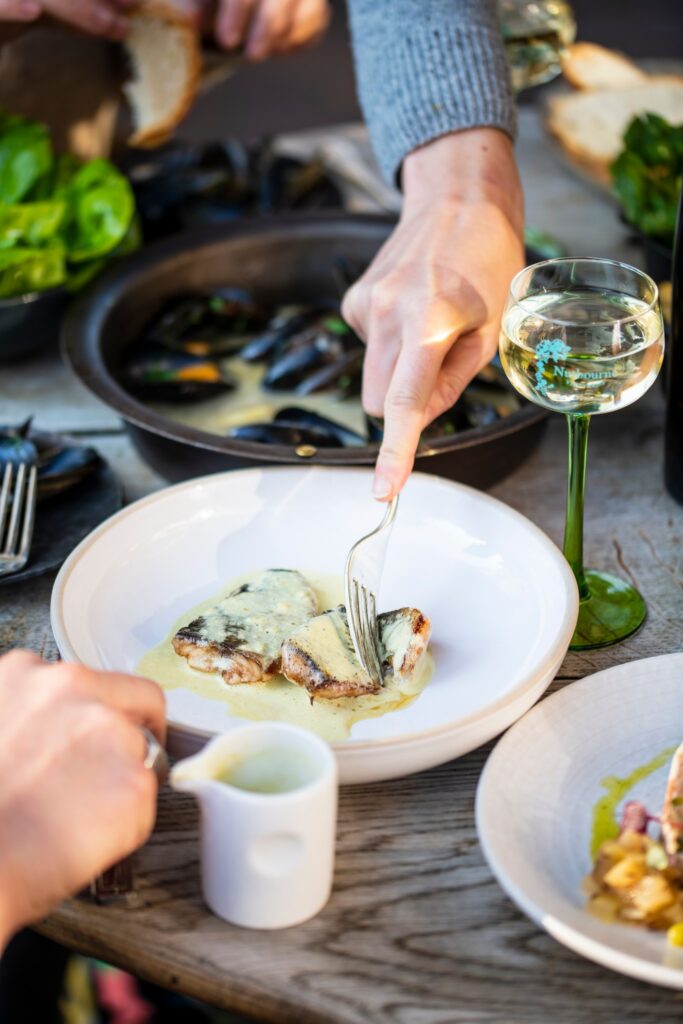
But Low Wood Bay isn’t a one-note operation. The resort’s own watersports centre offers kayaking, paddleboarding, wakesurfing and sailing directly from its marina, making it as much a place for activity as relaxation. The dining options span multiple restaurants, from the seasonal British menu at The W to the more informal, locally focused plates at Blue Smoke. Their wood-fired afternoon tea, meanwhile, puts a distinctive spin on the classic format, swapping finger sandwiches for piri-piri wings and coconut king prawns.
Rooms range from resort-standard doubles to the Winander Club, which operates as a hotel-within-a-hotel, complete with its own dedicated lounge, roof terrace and extended checkout. It’s a level of polish that feels earned rather than excessive, set against a backdrop that does most of the heavy lifting.
Ideal for toasting marshmallows on a 4,000-acre estate while the Milky Way does its thing overhead…
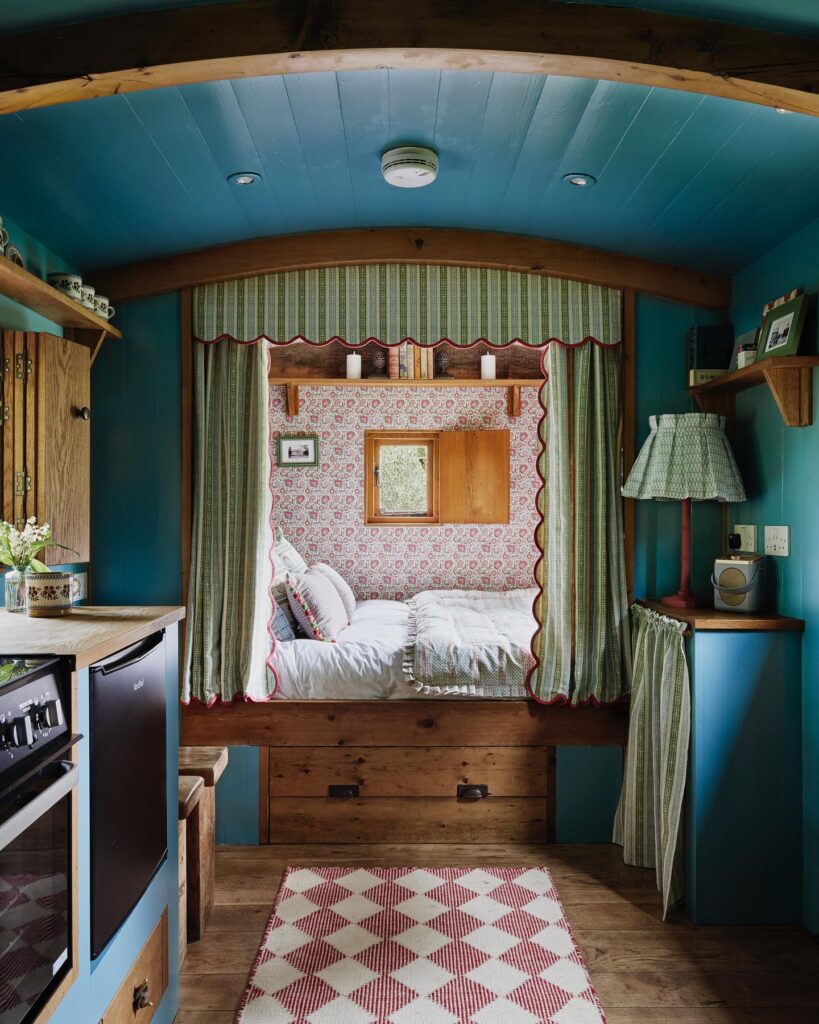
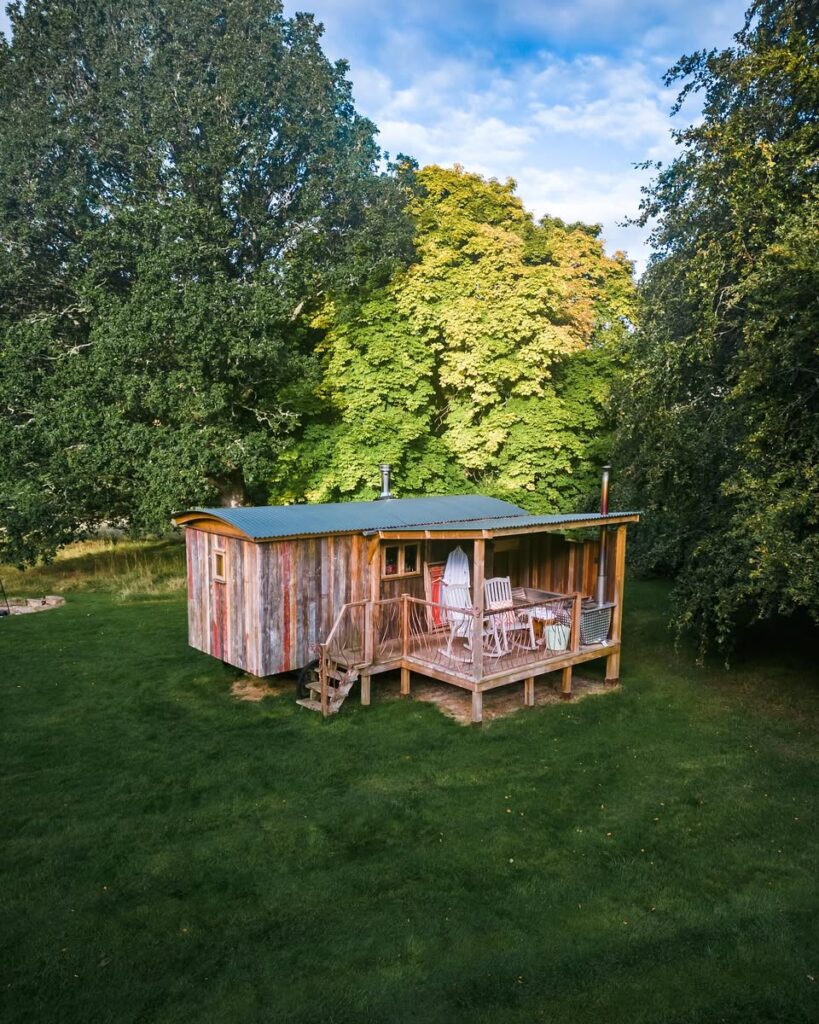
If Low Wood Bay represents the refined end of the Northern escape, Hesleyside Huts is its gloriously untamed counterpart. Tucked into a 4,000-acre private estate in the heart of Northumberland National Park, this is luxury glamping done with real imagination and craft.
The estate belongs to the Charlton family, who have lived at Hesleyside Hall for over 750 years. The gardens were designed by Capability Brown, and the huts and cabins sit within this parkland, each one handcrafted from reclaimed oak and styled with a distinct personality. Heather, a shepherd’s hut featured on George Clarke’s Amazing Spaces, has an outdoor bath and wood-burning stove. Holly is a chapel-on-wheels with a freestanding copper roll-top bath and a wood-burning stove. Skylark is a full-blown treehouse with its own turret and treetop walkways. Raven is a castle-inspired watchtower where you can soak in a huge handcrafted wooden tub while watching deer through the birch and pine.
Each hut comes with an en-suite shower, a fully equipped kitchen area and a fire pit for toasting marshmallows. But the real luxury here is the setting. Hesleyside sits beneath the Northumberland International Dark Sky Park, meaning on a clear night, you can see the Milky Way with the naked eye. They provide stargazing kits and binoculars, and the absence of light pollution is remarkable. Nearby Bellingham has pubs, supplies and the Hareshaw Linn waterfall walk, while Hadrian’s Wall and Kielder Observatory are both within easy reach.
The Cavendish Hotel, Peak District
Ideal for walking to Chatsworth House before a three-Rosette dinner with Frink on the walls…
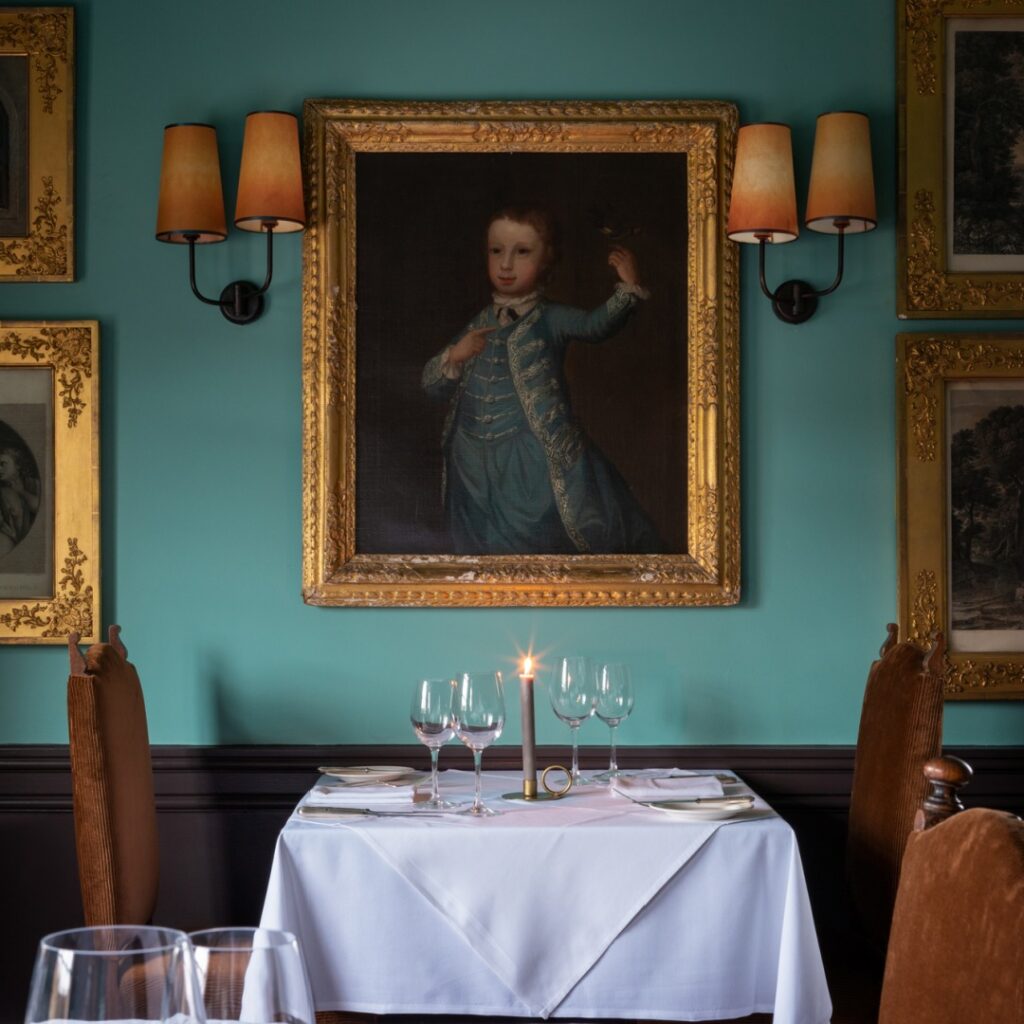
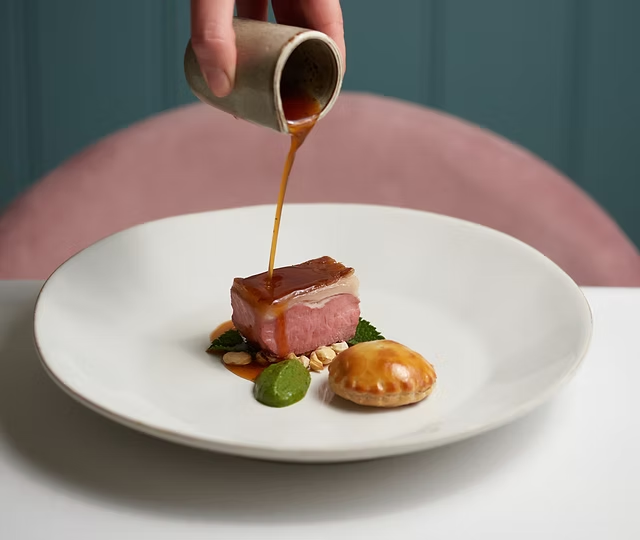
The Cavendish at Baslow has existed in one form or another since the 1700s, first as a public house, then a coaching inn, and now as one of the best country house hotels in England. Its location on the Chatsworth Estate, with doorstep access to the house, gardens and farm shop, gives it a sense of place that most hotels spend years trying to manufacture.
A complete refurbishment in 2024 by interior designer Nicola Harding, working alongside Lady Laura Burlington, has brought new energy without sacrificing the building’s character. The Times named it Hotel of the Year for 2025, and the AA followed suit with their own top award. It’s recognition that feels deserved. The 28 bedrooms feature antique furniture, stone fireplaces and fabrics woven by local Derbyshire and Yorkshire makers, while artwork from the Devonshire family’s private collection hangs throughout, with pieces by Elisabeth Frink and Phyllida Barlow among them.
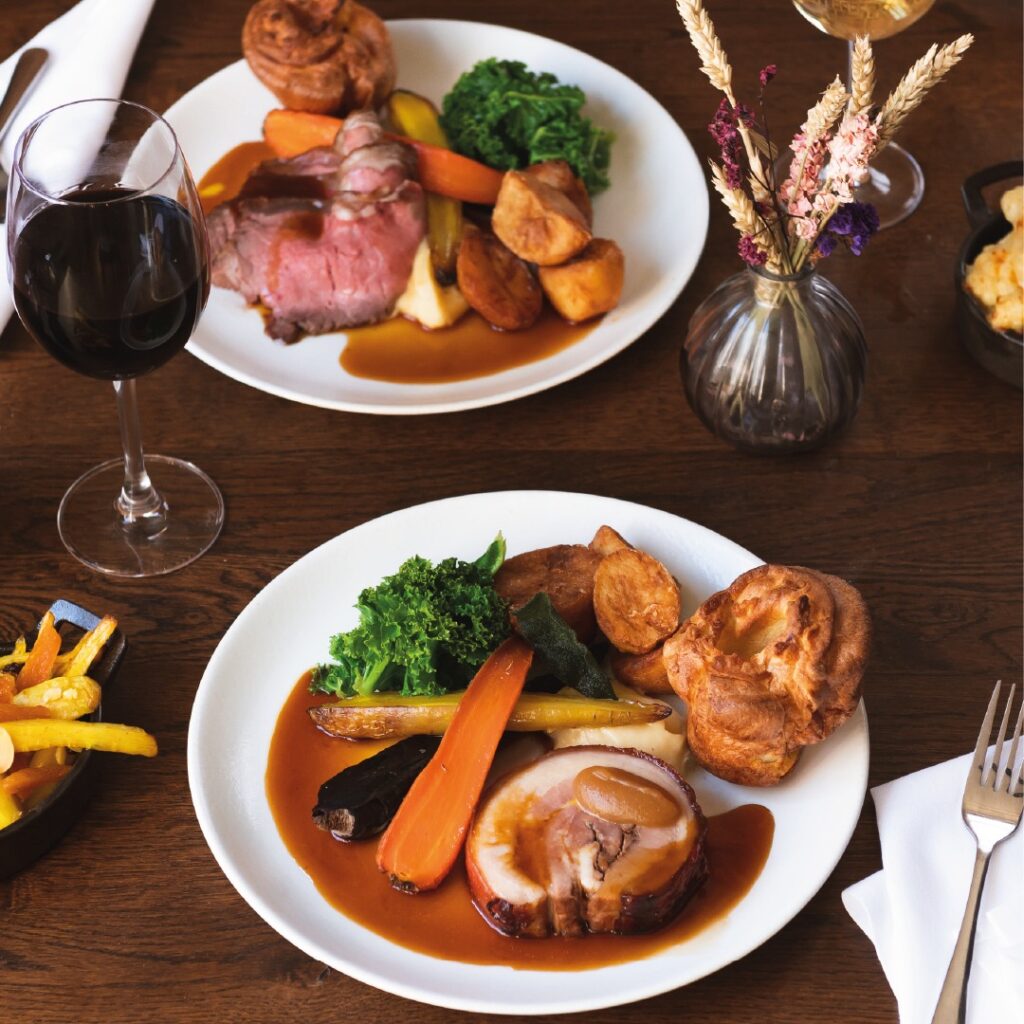
Dining is handled across two restaurants. The Gallery holds three AA Rosettes and a mention in the Michelin Guide and works closely with the Chatsworth Estate’s gardeners and farmers, resulting in a menu where the provenance of each ingredient is genuinely traceable. The Garden Room offers something more relaxed, with estate views and a brasserie-style approach. There is no spa, and it doesn’t need one. The Peak District is the draw here: Chatsworth House is a 20-minute walk from the front door, Bakewell and its legendary pudding shops are a short drive, and the Monsal Trail provides 8.5 miles of traffic-free walking and cycling through the White Peak.
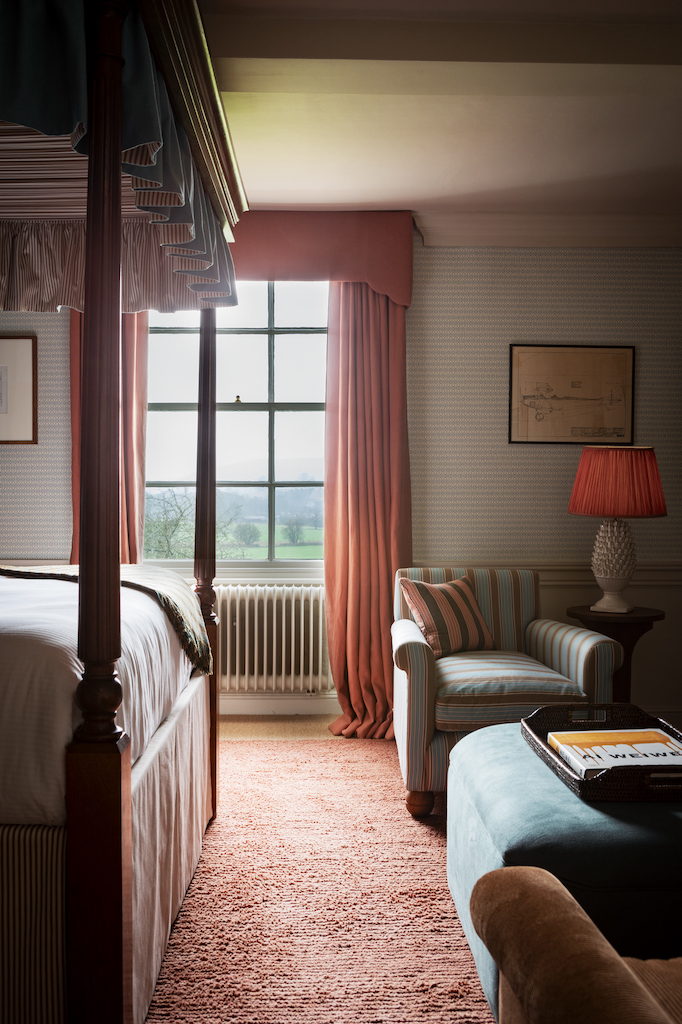
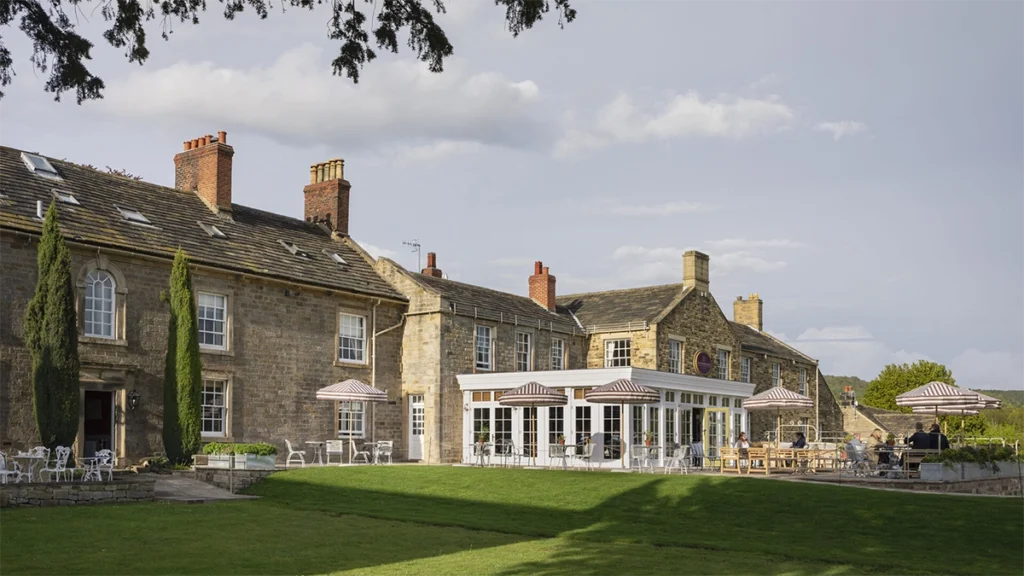
The Fell, Yorkshire Dales
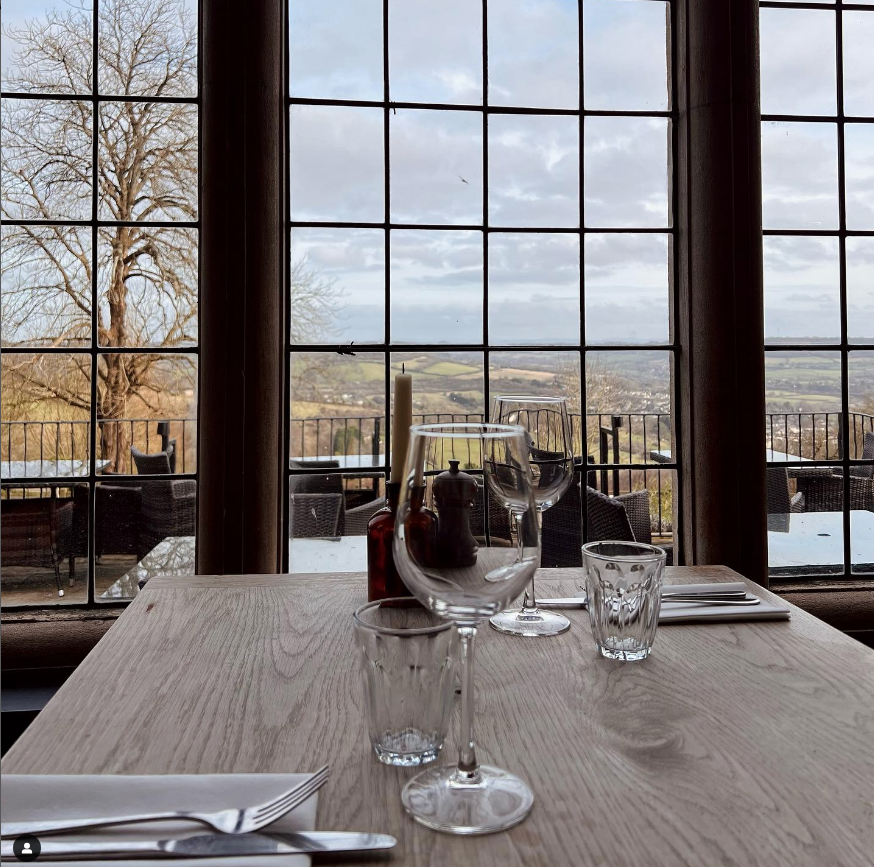
Ideal for muddy boots, the dog and a Wharfedale view that the Calendar Girls would approve of…
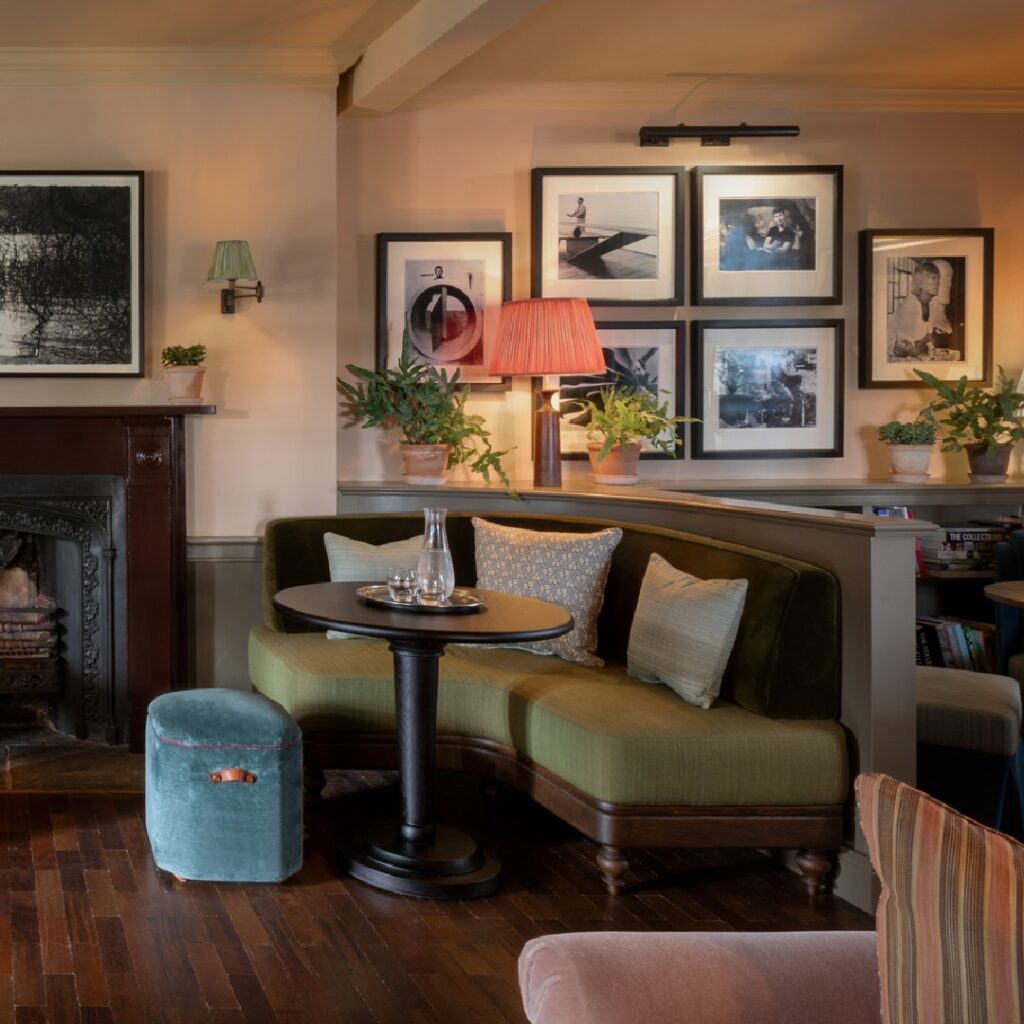
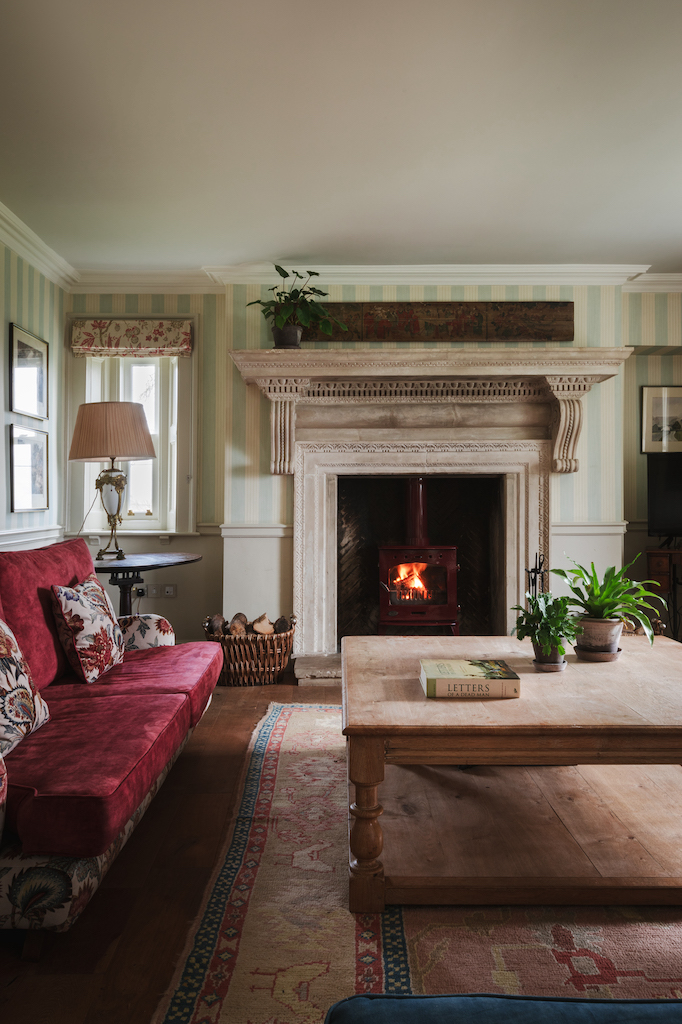
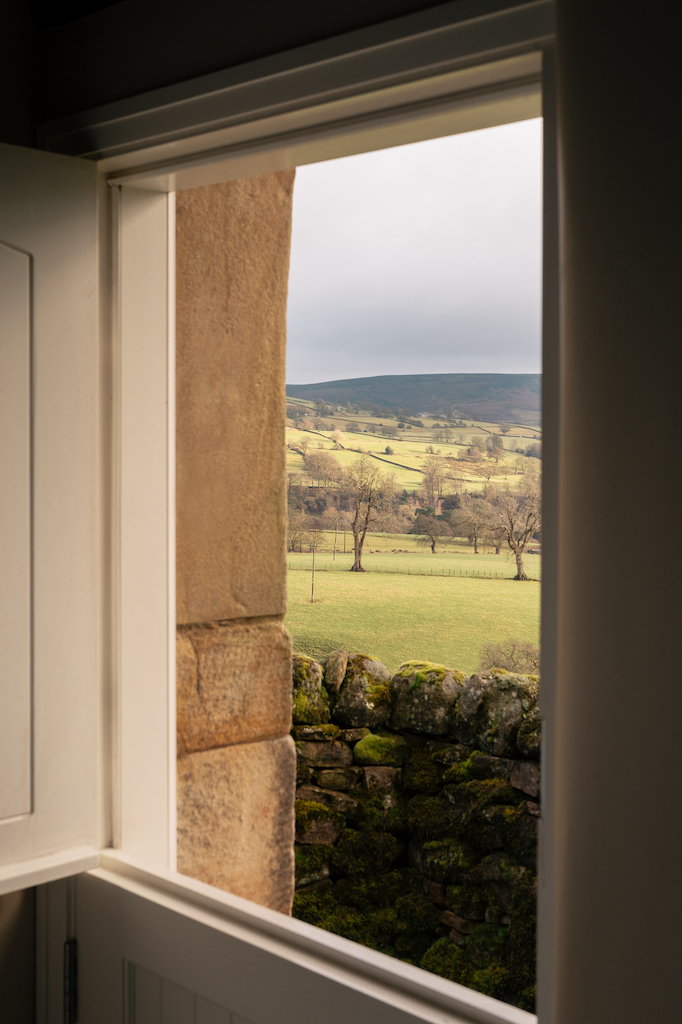
Formerly known as the Devonshire Fell, this 16-room hotel perches above the village of Burnsall in Wharfedale, looking out across one of the Yorkshire Dales’ most photographed landscapes. Burnsall itself is the kind of village that period drama location scouts dream about: a stone bridge over the River Wharfe, a village green, and the Dales rising steeply on all sides. The Calendar Girls producers clearly agreed; they filmed here.
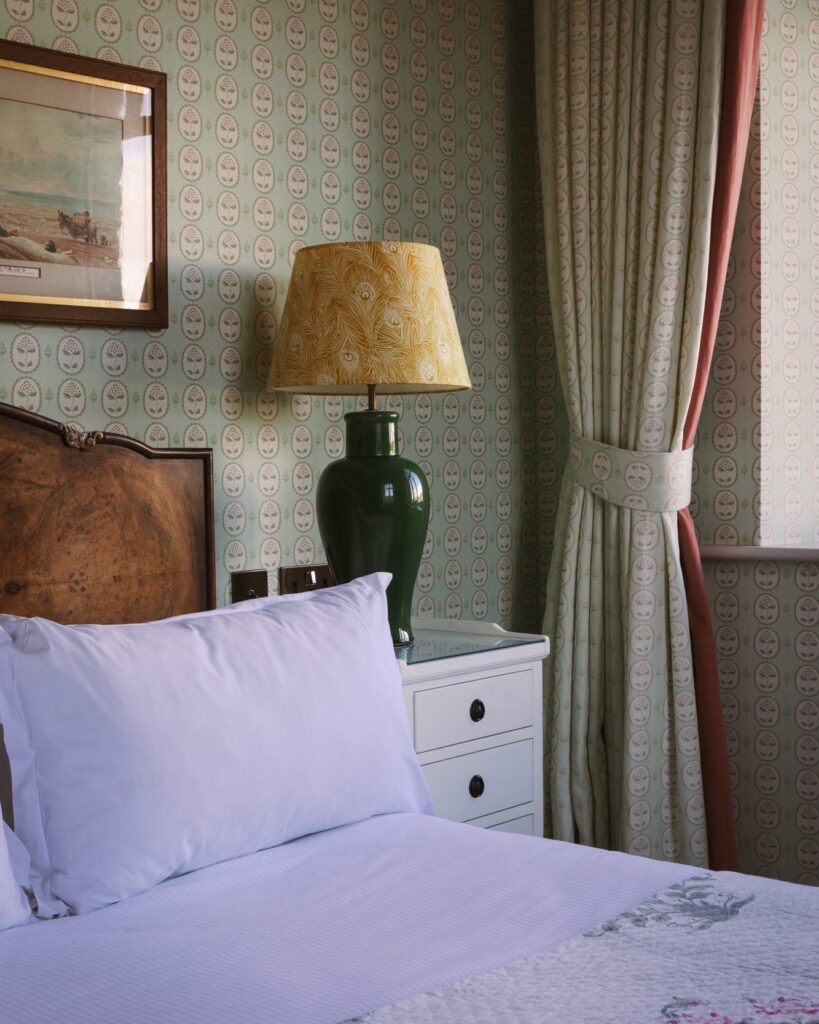
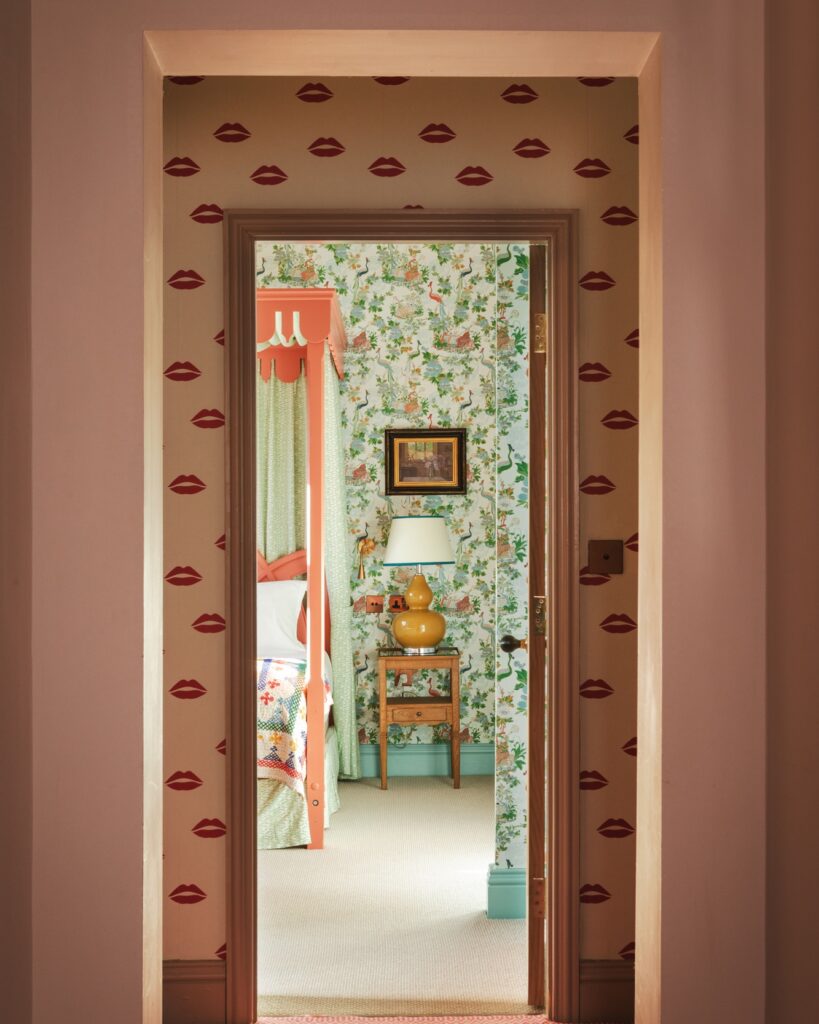
The Fell is part of the Bolton Abbey Estate, and its size is part of its appeal. With just 16 individually furnished rooms, it feels more like a well-run private house than a chain hotel. The Duchess of Devonshire had a hand in the interiors, and the result is a mix of bold colour, contemporary furniture and estate art that feels confident without being overwrought. Rooms look out across the valley, and several have seating areas where you could happily spend a rainy afternoon doing nothing at all.
The restaurant holds two AA Rosettes and sources heavily from the estate and surrounding farms. It’s serious cooking presented without fuss, in a conservatory dining room with those same sweeping Dales views. But the real selling point is the walking. Routes of every length and difficulty leave from the hotel’s front door, including the path down to Bolton Abbey’s ruined priory and its famous stepping stones across the Wharfe. Dogs are welcome in all rooms, which tells you something about the kind of stay this is. It’s a hotel that assumes you’ll arrive in boots.
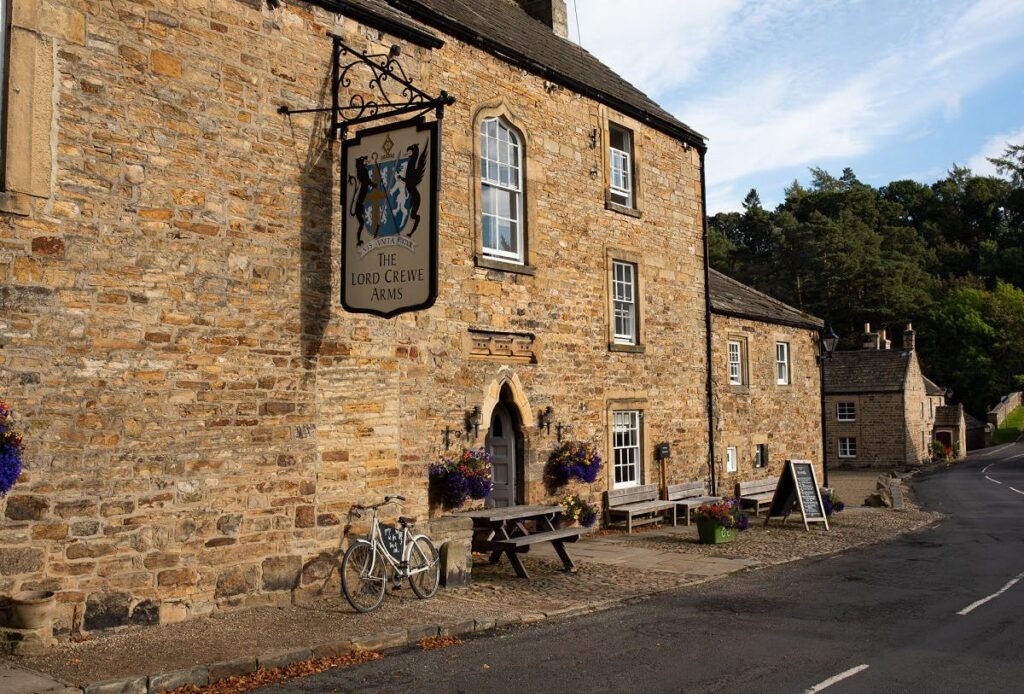
Lord Crewe Arms, Blanchland
Ideal for a pint in a vaulted crypt where Auden once drank, then a moorland walk to nowhere in particular…
Blanchland is one of those villages that barely feels real. A tiny, honey-stone settlement built from the remains of a 12th-century Premonstratensian abbey, it sits in a wooded valley on the North Pennine moors, surrounded by heather and pine forest, with the Derwent Reservoir nearby. The Lord Crewe Arms occupies what was once the abbey’s guest house, and the sense of deep history is everywhere: hidden staircases, stone-flagged floors, a vaulted crypt bar where the ceilings seem to press down with centuries of stories.
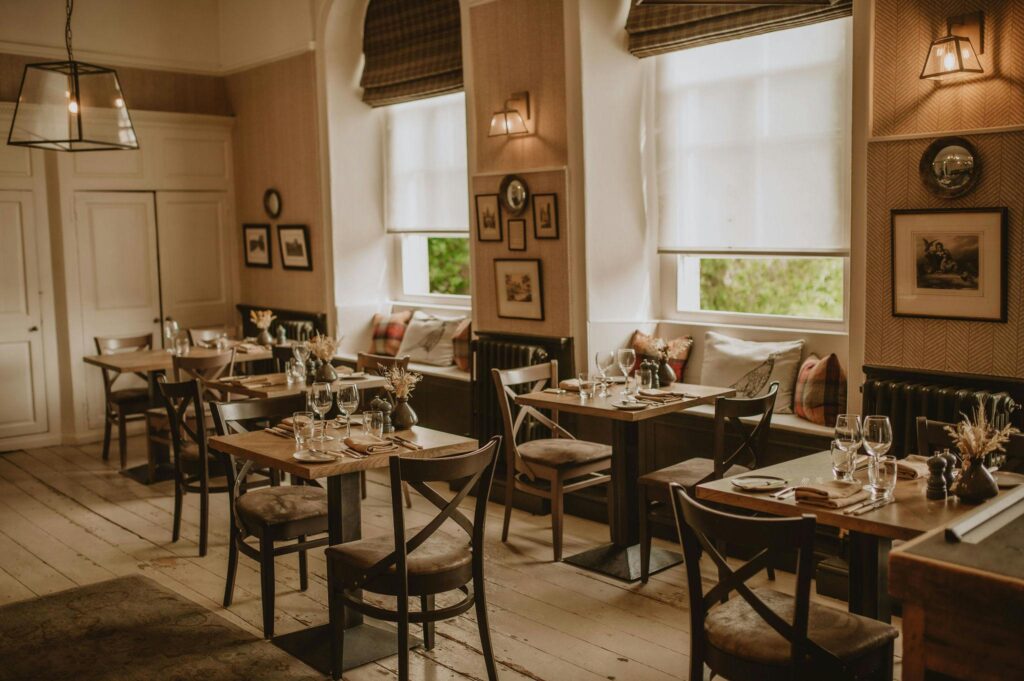
The hotel was sympathetically restored in 2014 by the Calcot Collection and now holds 26 bedrooms, ranging from cosy doubles in the main building to suites in a row of former miners’ cottages with their own front doors, log fires and roll-top baths. The interiors are warm and tartan-tinged without tipping into cliche, and the whole place radiates the kind of comfort that makes you instinctively lower your voice and order another drink.
Food is seasonal and local, prepared by a kitchen that draws from its own garden and smokehouse. The Bishop’s Dining Room handles the more formal end, while The Crypt, set in a vaulted chamber with a roaring fire, pours Northumbrian ales and serves a bar menu of unfussy, well-executed plates. W.H. Auden stayed here in 1930 and later said no place held sweeter memories. Philip Larkin used to dine here too. It is that kind of place: literary, understated and deeply atmospheric, with moorland walks of every distance starting from the front door.
The Bottom Line
The best rural getaways in the north of England span a wider range of styles and landscapes than they’re often given credit for. From the lakeside spa comforts of Ambleside to the wild remoteness of the Northumberland moors, each of these five properties offers a distinct version of the northern escape. What unites them is a commitment to their setting, whether that means sourcing food from the estate next door, building huts from reclaimed oak, or simply positioning a roll-top bath where it can overlook a valley that hasn’t changed in centuries.
The best advice? Don’t try to see them all in one trip. Pick the one that matches your mood, and give it the time it deserves.
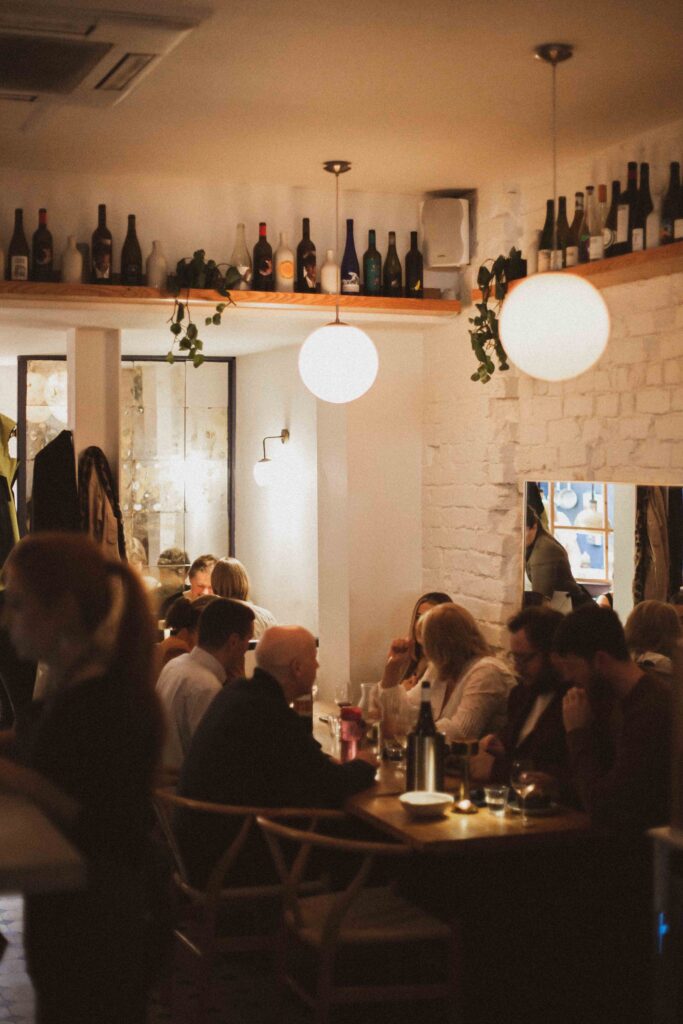
Forget the Beatles, football rivalries and Ferry Cross the Mersey – Liverpool’s food scene is the city’s most exciting cultural export right now. While the rest of the UK was busy looking elsewhere, Scouse chefs have been quietly building a gastronomic powerhouse that punches well above its weight.
Liverpool’s dining renaissance is happening everywhere from transformed dockside warehouses to tucked-away supper clubs on residential streets – and it’s still flying under the radar just enough that you can actually get a table. Not for long, mind.
When the 2026 Michelin Guide was unveiled in Dublin this February, Liverpool was once again passed over for a star – in fact, the city has never held one. It’s a snub that says more about Michelin’s blind spots than Liverpool’s kitchens, because six of the restaurants on this list (8 By Andy Sheridan, Belzan, Manifest, NORD, Vetch and The Art School) all feature in the 2026 Guide. Stars or no stars, the cooking here speaks for itself.
These are the spots worth clearing your calendar for – places serving everything from theatrical tasting menus to plates you’ll be tempted to lick clean (no judgment here). With all that in mind, and with several extra notches added to our belt, here are the best restaurants in Liverpool.
8 By Andy Sheridan, Cook Street
Ideal for theatrical dining that places you at the heart of culinary creation…
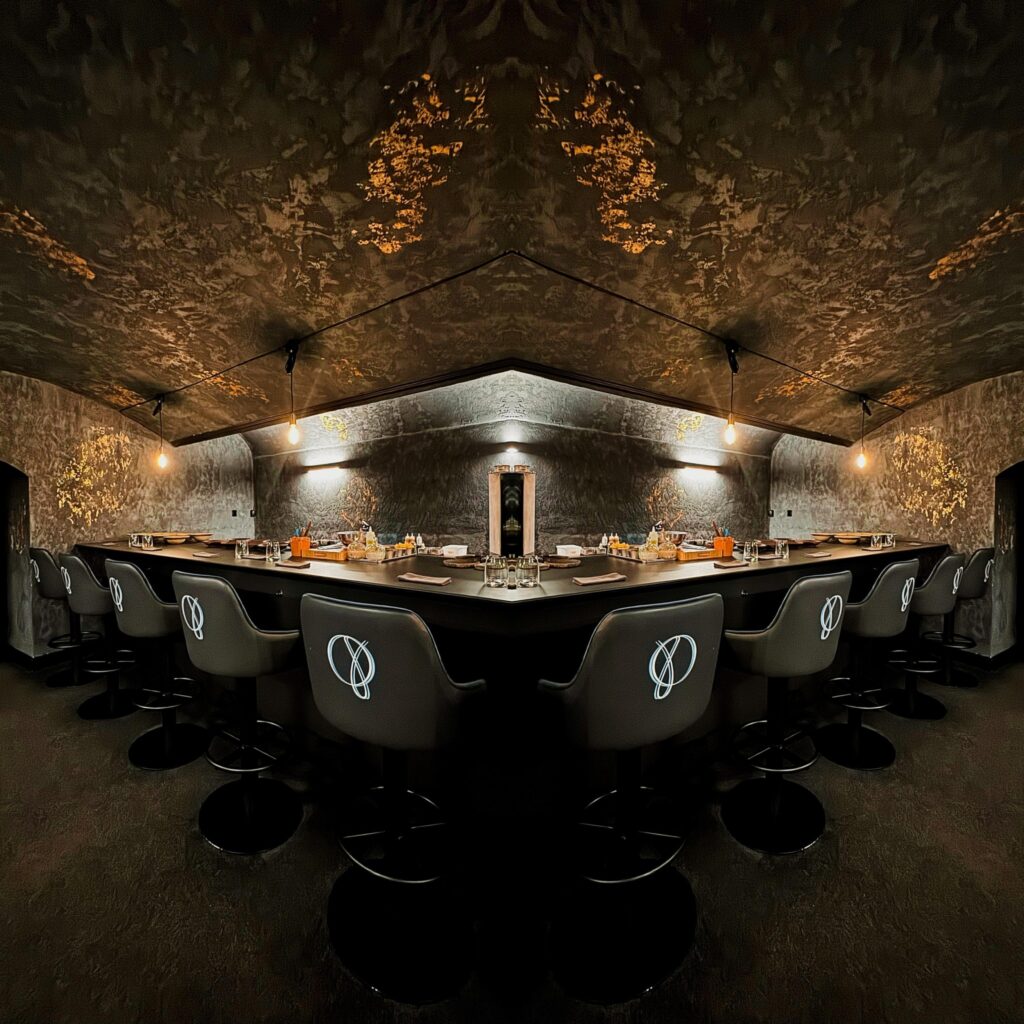
Here at IDEAL, we firmly believe there’s a place for the pretentious, in art, in music, and in food. In the best possible way, 8 by Andy Sheridan proves this to be true. It’s high falutin, sure, but it’s also highly enjoyable…
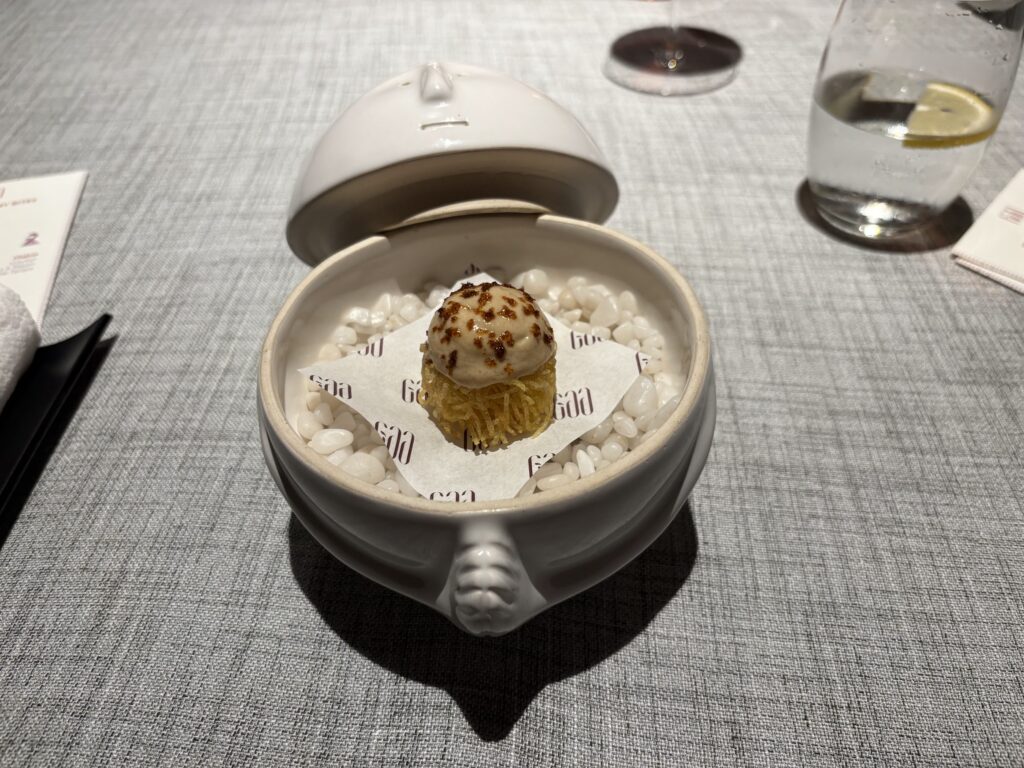
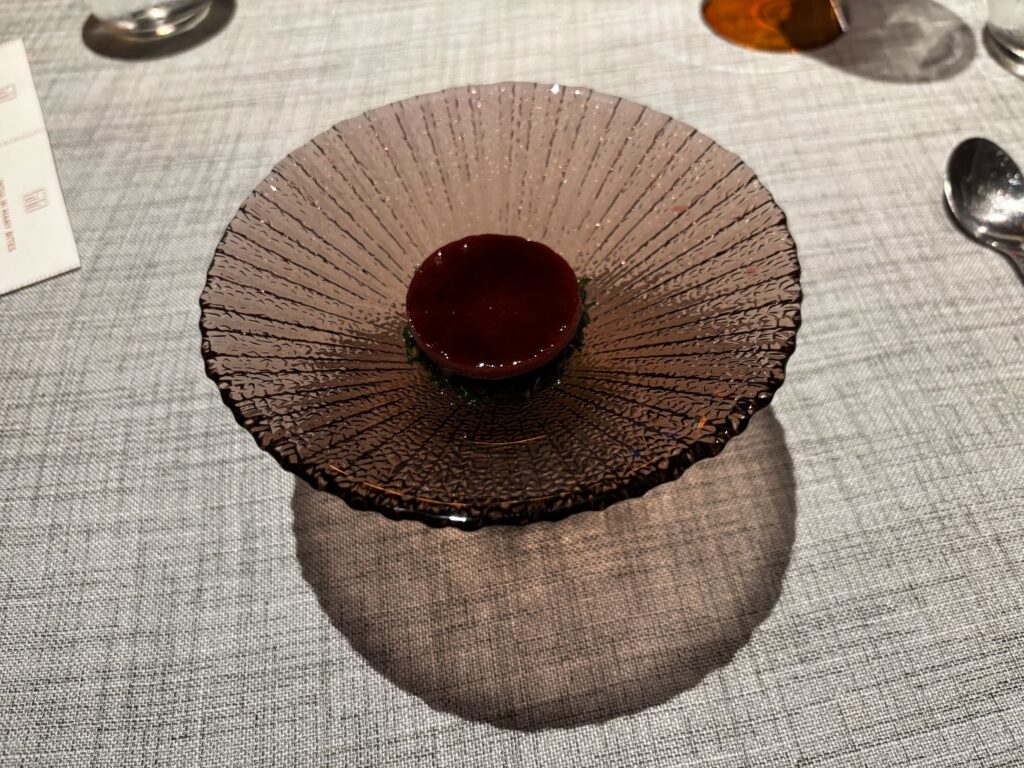
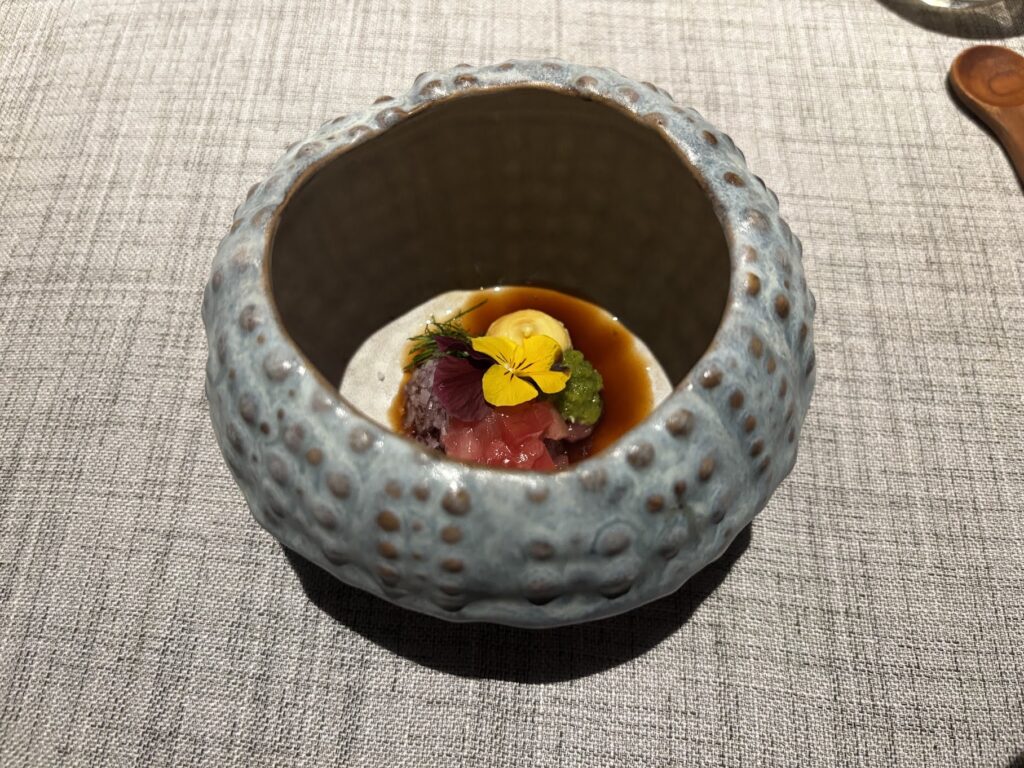
The taut venue elevates dining to a kind of performance art, featuring just 16 seats divided between two counters where chefs craft and narrate each course directly before guests. Sheridan, who came back to his Liverpool roots after making waves in Birmingham, has created something rather special in this Victorian building on Cook Street (a pleasing kind of nominative determinism…kinda).
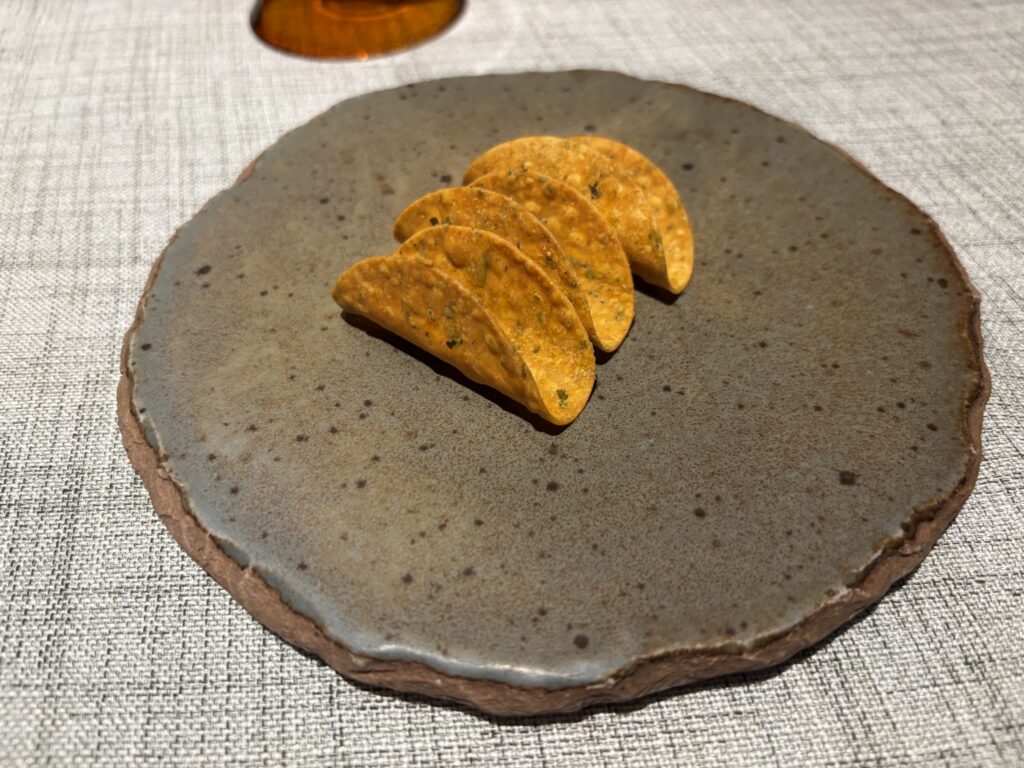
Your evening begins in a dimly lit lounge with aperitifs and crisp, energetic nibbles pulled straight from the opening round of GBM (tuna tostada, crab croustades…you get the picture) before you’re escorted downstairs to claim your spot at one of the 8-seat counters. The tasting menu pulls influences from across the globe while delivering bold, distinctive flavours – all built around top-notch ingredients that help justify the £120 price tag.
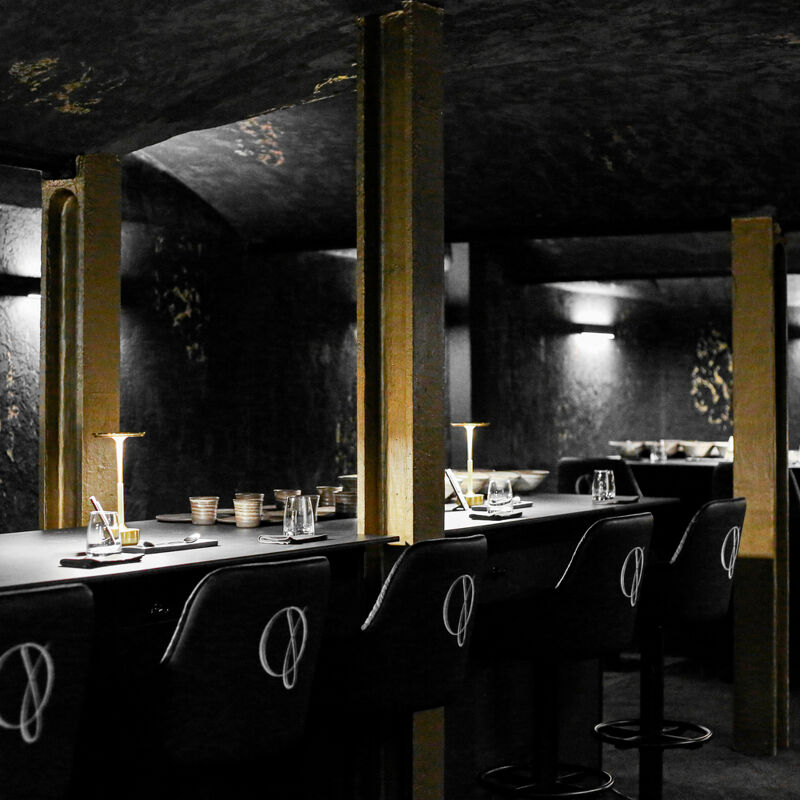
Yes, there’s a lot of stuff presented on stones and moss. And sure, there will be a tuile leaf or two. But fortunately, the clarity of flavour here is convincing and the delivery strangely compelling. The set-up naturally encourages a bit of chat with the chefs, but they’re tactful, knowing when to step back and let you actually engage with your dining companion or, you know, swoon over your last bite. This is Liverpool dining at its most personal and also its most dramatic.
Ideal for honest bistro cooking in a beautifully restored industrial space…
Wreckfish metamorphosed a once-abandoned building into one of Liverpool’s most cherished restaurants. Brought to life by chef Gary Usher following a triumphant crowdfunding campaign, this bistro focuses on straightforward yet flawlessly executed dishes, with the emphasis always on flavour first and foremost, but also on excellent value – something of a signature of any Usher restaurant, and a very commendable one at that.
Step inside and you’ll immediately notice how the space balances its rough-hewn past with genuine comfort. Originally named Wreckfish after the Atlantic wreckfish – a species known for dwelling near shipwrecks – the restaurant has since been renamed Wreck Bistro as too many people mistakenly assumed it was a seafood restaurant.
The converted space retains character in its raw brick walls and lofty ceilings, while a sprawling open kitchen takes centre stage, allowing diners to witness the choreography of a confident brigade at work. There’s an appealing lack of pretension here – like dining in the home of a friend who happens to be an excellent cook.
The menu shifts with the seasons but might include starters like chicken liver parfait with farmhouse chutney, hearty mains such as braised featherblade of beef with beetroot ketchup and red wine sauce, or a shawarma-spiced chicken schnitzel. Their truffle and Parmesan chips have amassed an enthusiastic following of their own across all of the Elite Bistro’s restaurants, and they make an appearance on both bistro and special menus at Wreck for good reason; they’re as good as they sound, and there’s no much higher compliment than that.
On weekends, the breakfasts deserve your attention – from the Full Wreck-fast (complete with all the traditional fixings) to our go-to order, the smoked ‘Nduja beans on toast with a fried egg and sour cream. Whichever way you play it, have a Port of Liverpool (Irish whiskey, cherry liqueur, lemon and Ruby Port) or two, and luxuriate in a place where that implicit sense of hospitality is apparent in every gesture.
Despite the quality of both produce and cooking, prices remain accessible – their ‘bistro’ menu is laughably good value at just £23 for three courses. This reflects Usher’s philosophy that excellent food shouldn’t be exclusive, making Wreckfish a place you can return to regularly rather than saving for special occasions only.
Ideal for neighbourhood conviviality and culinary innovation away from the city centre…
Slightly off the typical tourist route in one of Liverpool’s student-dominated suburbs, Belzan merits seeking out for its inventive small plates and impressive natural wine collection. This neighbourhood bistro balances casual chic with culinary aspiration – all polished concrete and white brick, with seasonal dishes presented on elegant ceramics.
Opened in 2017 by friends Chris Edwards, Owain Williams, and Sam Grainger (the latter now executive chef ), this once-hidden gem has accumulated serious accolades, featuring in the Michelin Guide and named among the UK’s 100 best local restaurants by The Good Food Guide.
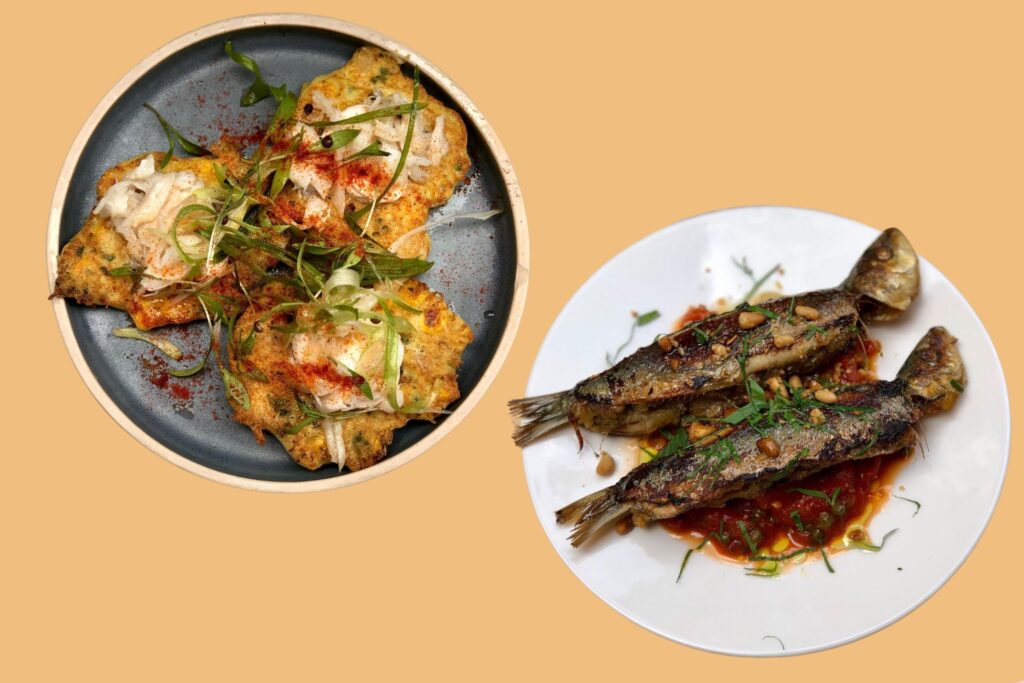
The constantly evolving menu showcases hyperlocal ingredients – Grainger ambitiously sources from within 30 miles wherever possible, even incorporating pumpkins from customers’ allotments and wild garlic foraged from nearby Sefton Park. Current standouts include a beautifully balanced smoked beetroot with goat’s curd and blood orange, mushroom and chestnut dashi with butterbeans and cavolo nero, and the exquisite, positively pastoral-tasting barbecued lamb Barnsley chop with artichoke purée and pinenuts.
Don’t overlook (it’s impossible to miss, to be fair, as it’s being ordered by pretty much every table) their renowned Guinness rarebit potato – a humble-sounding creation elevated to something extraordinary through the marriage of Anna potatoes, Guinness-infused cheese, and a Bois Boudran-style sauce. The dish has become so iconic that it’s now a permanent fixture on their otherwise seasonal menu, with good reason. End with the comforting parkin cake with custard and crème fraîche ice cream – proof that northern classics can shine when given a contemporary twist.
Service is self-assured and straightforward, with staff well-versed in both the cuisine and the eclectic wine selection. The restaurant has developed such a reputation that it’s become an unlikely celebrity hotspot – Will Ferrell dined here during Eurovision 2023, while the entire fellowship from The Lord of the Rings (minus Gandalf, presumably) nearly “ate the whole menu” during a 2024 Comic Con visit.
For natural wine enthusiasts, Belzan offers one of the most exciting collections in the city. The prix fixe represents great value; three courses and a glass of wine is £45.
Madre, Albert Dock *temporarily closed – news coming soon*
Ideal for faithful Mexican flavours against Liverpool’s historic waterfront…
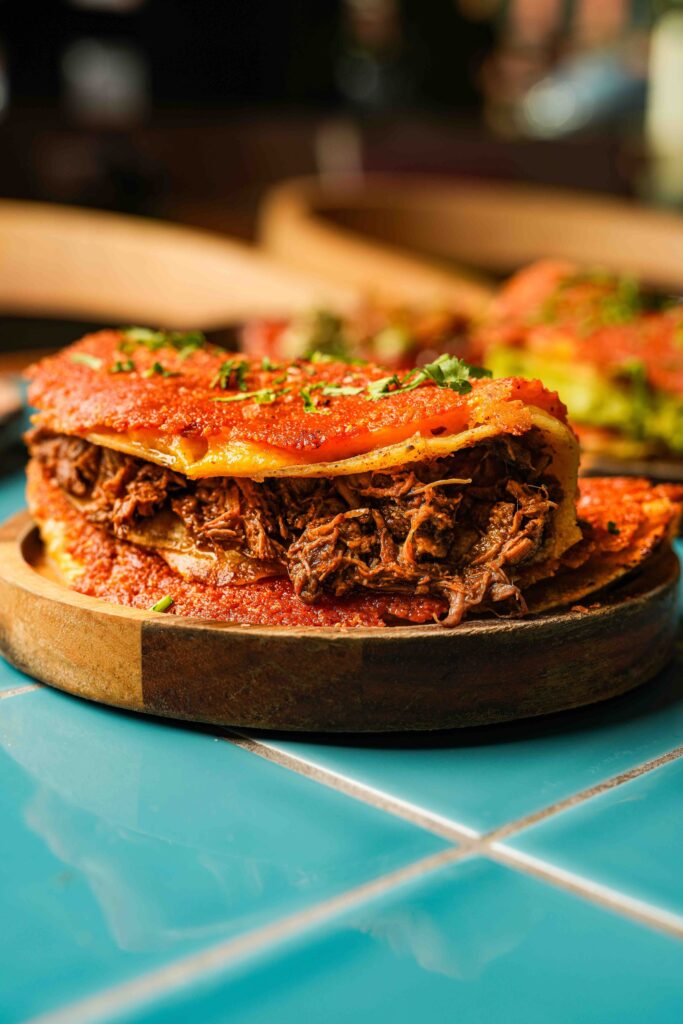
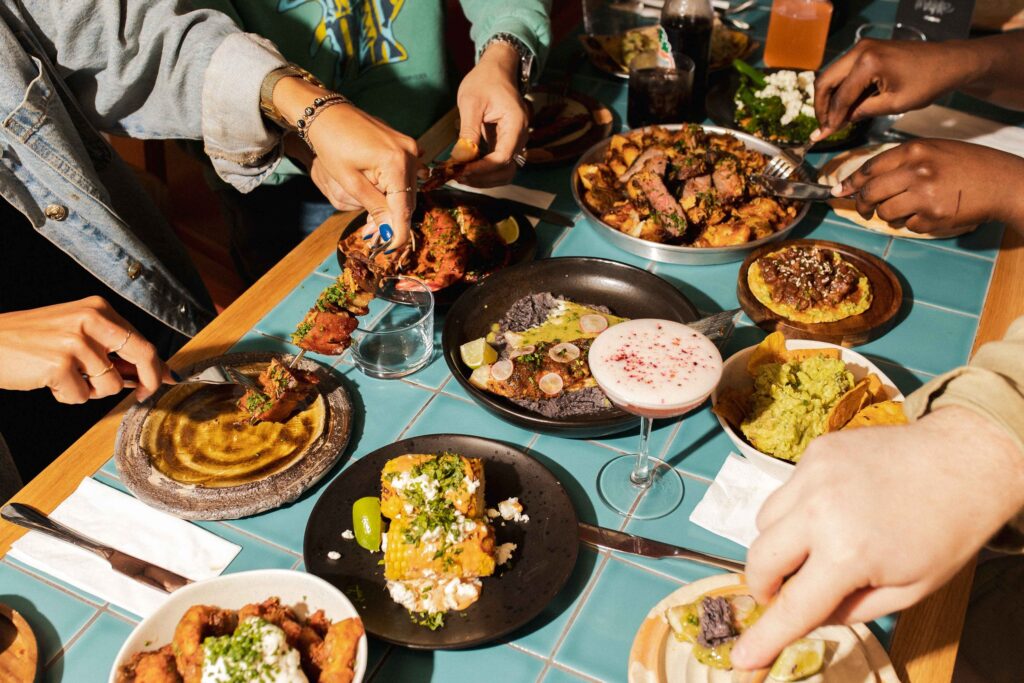
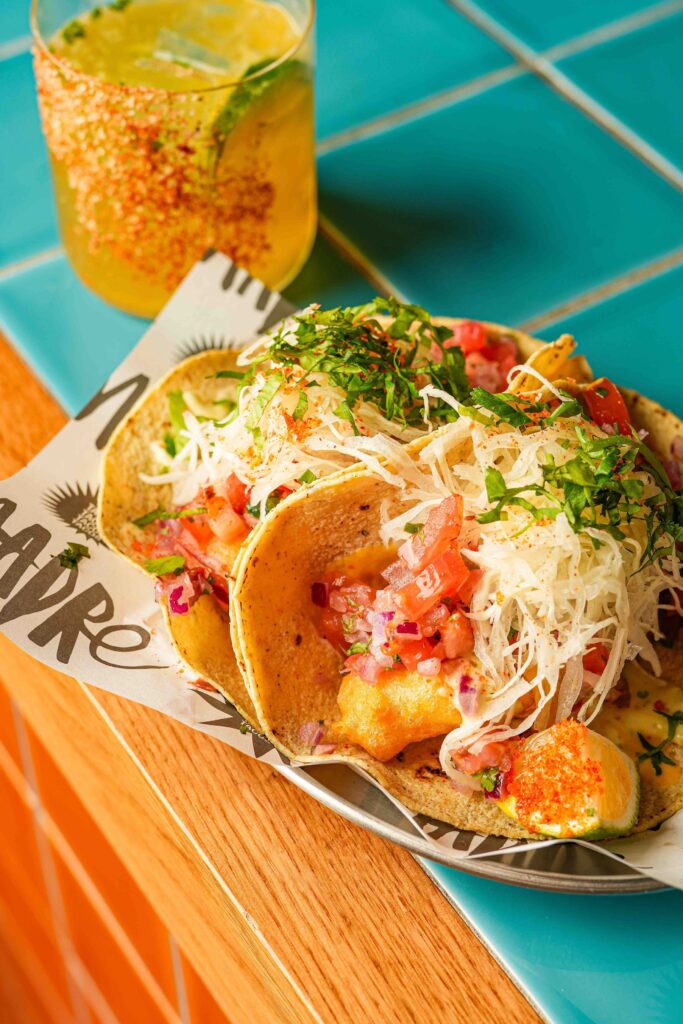
Born in 2019 from a collaboration between the culinary minds behind (just mentioned) Belzan and London’s Breddos Tacos, this waterfront gem delivers an immersive taste of Mexican hospitality. Transplanting the soul of Mexico City, Guadalajara, and Oaxaca to Liverpool’s historic Albert Dock, Madre (Spanish for ‘mother’) serves up Mexican dishes in a spirited, colourful space with an extensive outdoor seating area that springs to life in summer with DJ sets and flowing margaritas (the latter dependent on the sunnier season, it should be said).
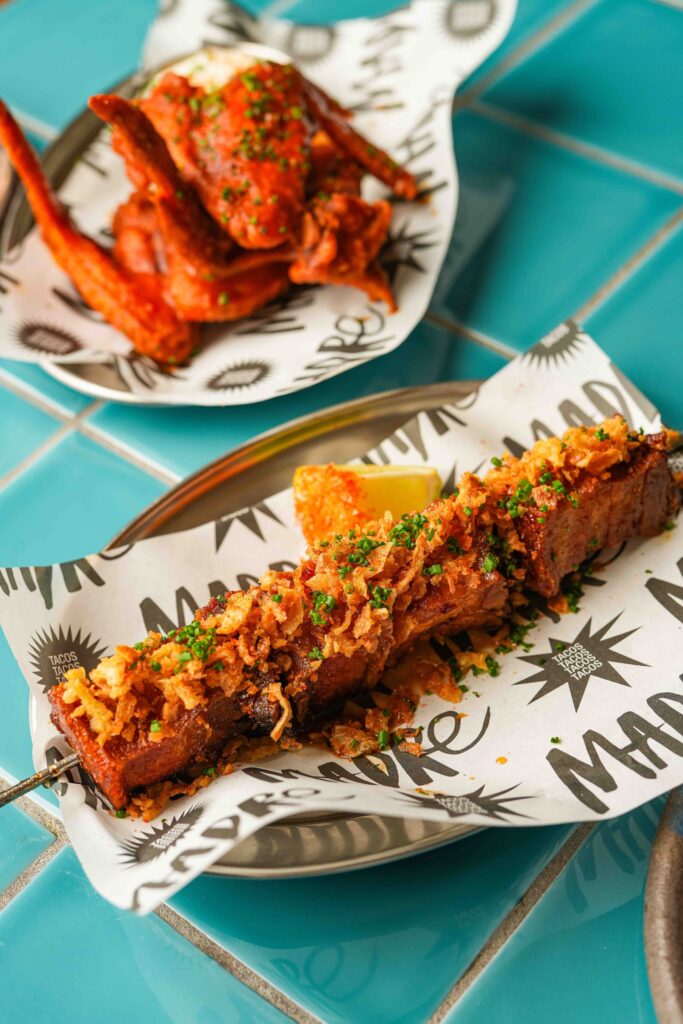
The menu centres on traditional – rather than ‘elevated’ or ‘refined’ – taco recipes, with standouts including the Tijuana-style carne asada with skirt steak, smoked mozzarella and grilled onions, the Baja fish tacos with tempura-battered Atlantic pollock, and the crab tostada featuring picked picked white crab with brown crab mayonnaise. God it’s good.
Beyond tacos, there’s plenty of antojitos (Mexican snacks) to pick over with a drink, while the restaurant’s wood-fired parrilla (grill) turns out impressive larger plates – the barbecued pistachio-crusted lamb breast with avocado salsa makes a compelling case for casting covetous glances beyond the taco section.
What truly brings Madre to life is its formidable bar program. Their margaritas are the stuff of slurred, eulogising legend, especially the ‘green wasp’ variation with Tapatio tequila, cucumber, coriander, habanero and agave that packs a memorable (well, perhaps less so after the third one) punch.
The restaurant’s Madre’s Table option (£30 per person) offers a keenly priced introduction to the fine cuisine here – a curated selection of their favourite dishes that ensures you experience the menu’s highlights. Located just a five-minute stroll from the city’s central museums and cultural attractions, Madre offers the city’s most perfect refuel and refresh after a day of cultural exploration.
*Update, March 2026: Madre’s Albert Dock location is currently temporarily closed, with news on its future expected soon. In the meantime, the team have launched Salón Madre on Hanover Street – a tequila-fuelled pool hall and taqueria serving al pastor tacos, gringas and frozen margaritas in a 4,400 sq ft space that’s more late-night rowdiness than waterfront refinement. It’s a different beast entirely, but if you’re after a taste of the Madre spirit while the mothership sorts itself out, it’ll scratch the itch.*
Ideal for seasonal British cuisine in Liverpool’s most creative quarter…
Housed in a repurposed warehouse in the rejuvenated Baltic Triangle, Manifest has swiftly established itself among Liverpool’s best restaurants since its 2022 opening.
The restaurant’s curved archway entrance, set within the original warehouse brickwork, makes for an impressive first impression – maintaining the raw, industrial character of the Baltic Triangle while adding just enough polish to signal that something special awaits inside.
Proprietors Paul and Charlotte Durand have fashioned a space that strikes a delicate balance between casual and sophisticated, allowing the cuisine to command attention via a central open kitchen with counter seating for those eager to observe the culinary craft up close. The dishes shift with the seasons, featuring meticulously composed small and larger plates that honour exceptional British produce, much sourced from the neighbouring countryside.
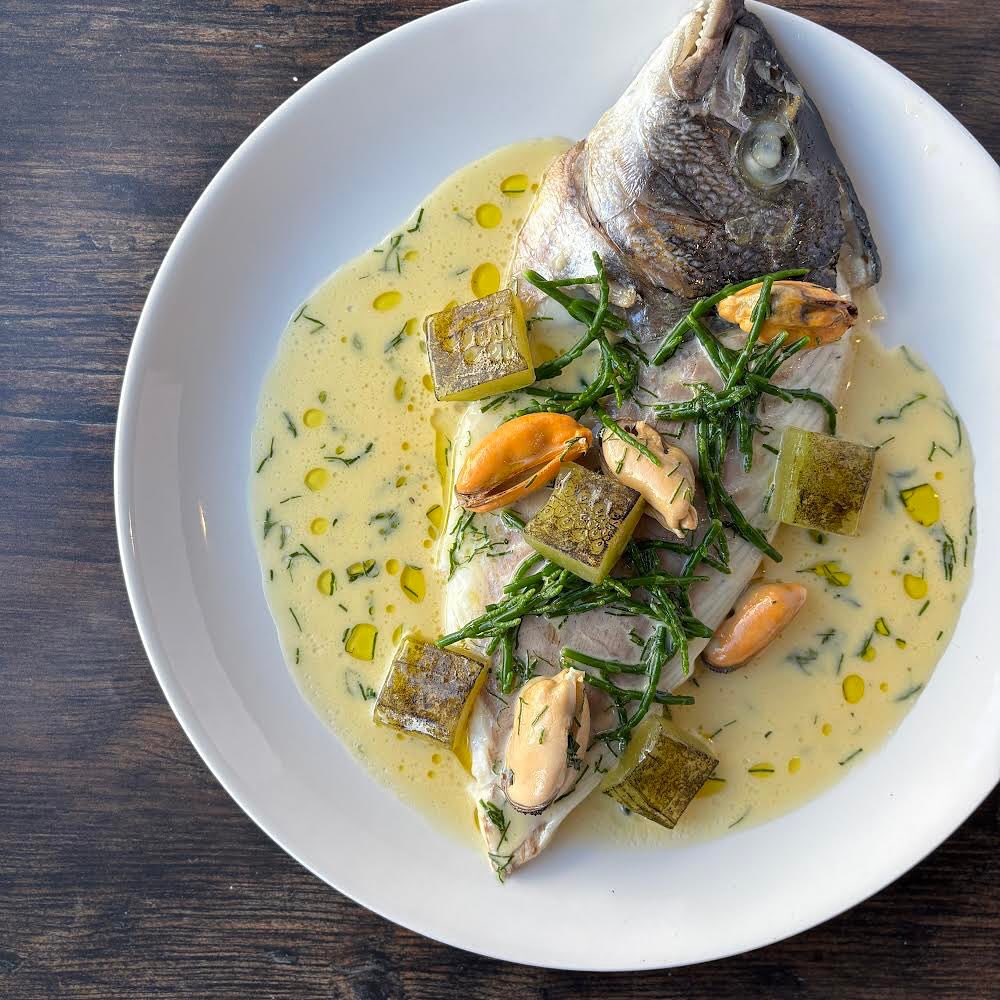
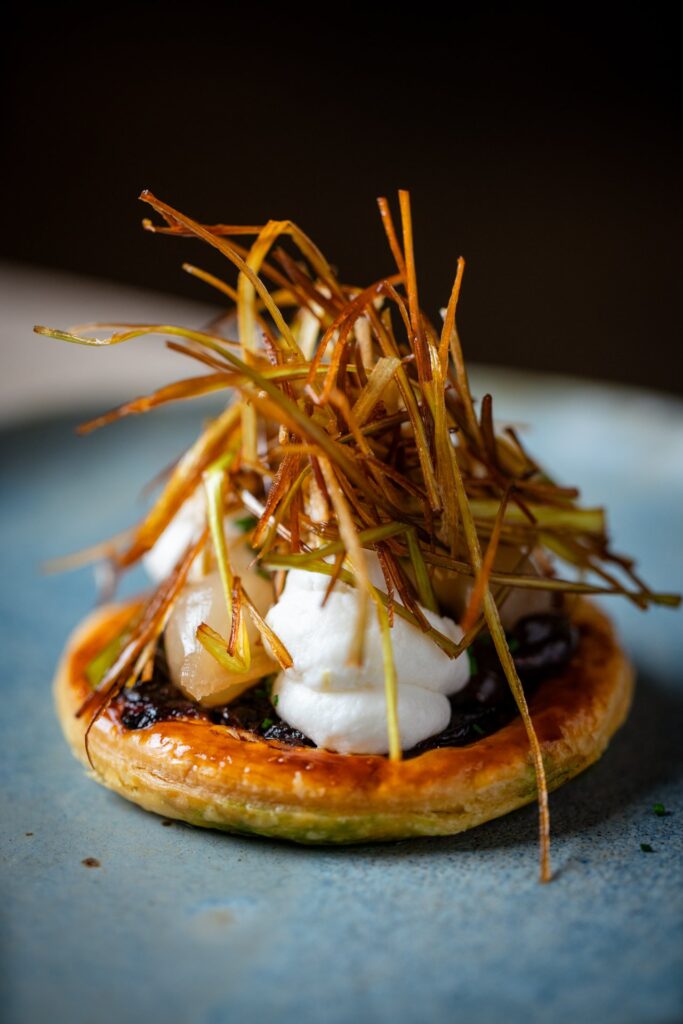
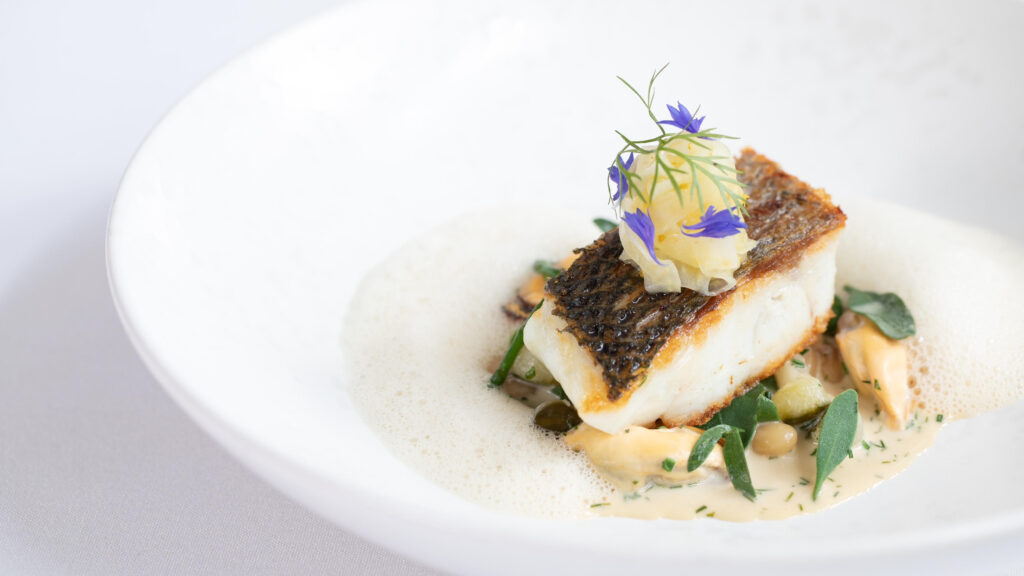
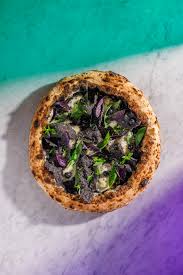
If it’s on, order the sweet onion tart which incorporates several members of the allium family plus a very cleansing whipped ricotta, or the masterfully executed cod with sea buckthorn and smoked mussels – both dishes that highlight technique without unnecessary embellishment, the latter an impressive balancing act between bracingly sour and pleasingly salty.
The thoughtfully assembled wine selection includes numerous options by the glass, featuring several intriguing natural varieties. There’s also a 3-glass wine flight, pitched at £45 per person – the size and pricing a welcome relief from those jarring, lengthy wine pairings that leave you too pissed by the ninth glass.
Admittedly, a little like 8 above, Manifest is a restaurant that suffers a little from enthusiastically low lighting in the evenings. Better to book in for lunch, when the light streams through the large industrial windows that dominate the brick façade just right.
Ideal for Northern hospitality delivered with Scandinavian precision…
NORD celebrates Northern soul (no, not Do I Love You?, but rather, the energy of this part of England) through a distinctly Nordic lens, carving out its own category in Liverpool’s buzzing food scene.
It’s the baby of local lad Daniel Heffy, who cut his teeth in Stockholm’s starred kitchens before bringing his skills back home in 2023. In fact, this sense of recent homecoming is something of a theme in the city, with several of the restaurants on our list following this narrative arc.
Heffy describes his approach as “Travelled British,” a nod to his local roots filtered through time spent in Scandinavia. The sprawling, space-age interior feels like dining in tomorrow – all sleek surfaces and egg-shaped booths that cocoon you while you eat. It’s the perfect backdrop for Heffy’s boundary-pushing cooking, which draws heavily on an impressive network of hyper-local suppliers. The menu reads like a love letter to the North West, with everything from Ward’s Fish (a fourth-generation family business in Birkenhead that’s supplied Heffy since the beginning of his career) to award-winning Edge & Sons Butchers in Wirral (just 6 miles away) who work with rare and native breeds.
Dishes roam from the simple to the utterly sublime. Start with oysters au natural or the quail scotch egg with roasted garlic aioli before moving on to standouts like scallop with potato cream, chive and black truffle, or the jaw-dropping chawanmushi with king crab, smoked eel and dashi.
The lamb rack with squash hot sauce and crispy sprouts is probably the most ‘talked about’ dish here, however, and it’s easy to see why; the lamb is cooked to a perfect pink, and the hot sauce is complex, and acidic enough to cut through the fattiness of the meat. Crispy sprouts need no explaining. For something a little more humble, the charcuterie selection here comes from North by Sud-Ouest (run by Andrew Rogers, who trained in the foothills of the Pyrenees) and shows just how seriously they take their sourcing.
And because it’s not all about the wine, all the time, we can’t speak highly enough of the non-alcoholic options here. Billed as ‘Temperates’, the burnt citrus and winter spiced Chinotto is such a satisfying drop, and one recommended to us by the charming front-of-house team, who add real warmth to the atmosphere, quickly making this newcomer one of the city’s most talked-about dining spots.
Ideal for culinary artistry within elegant Victorian architecture…
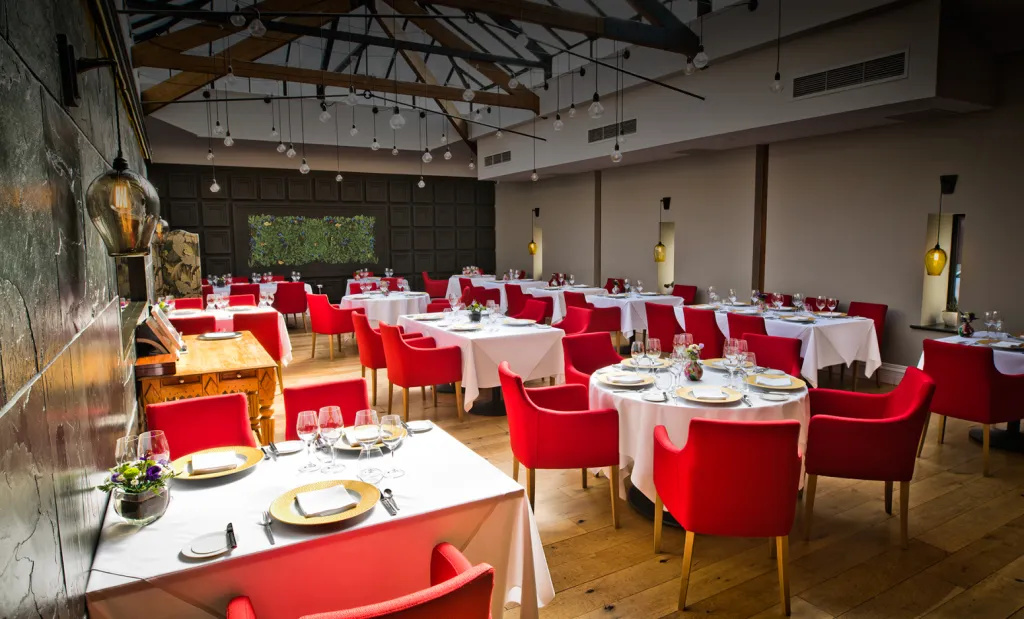
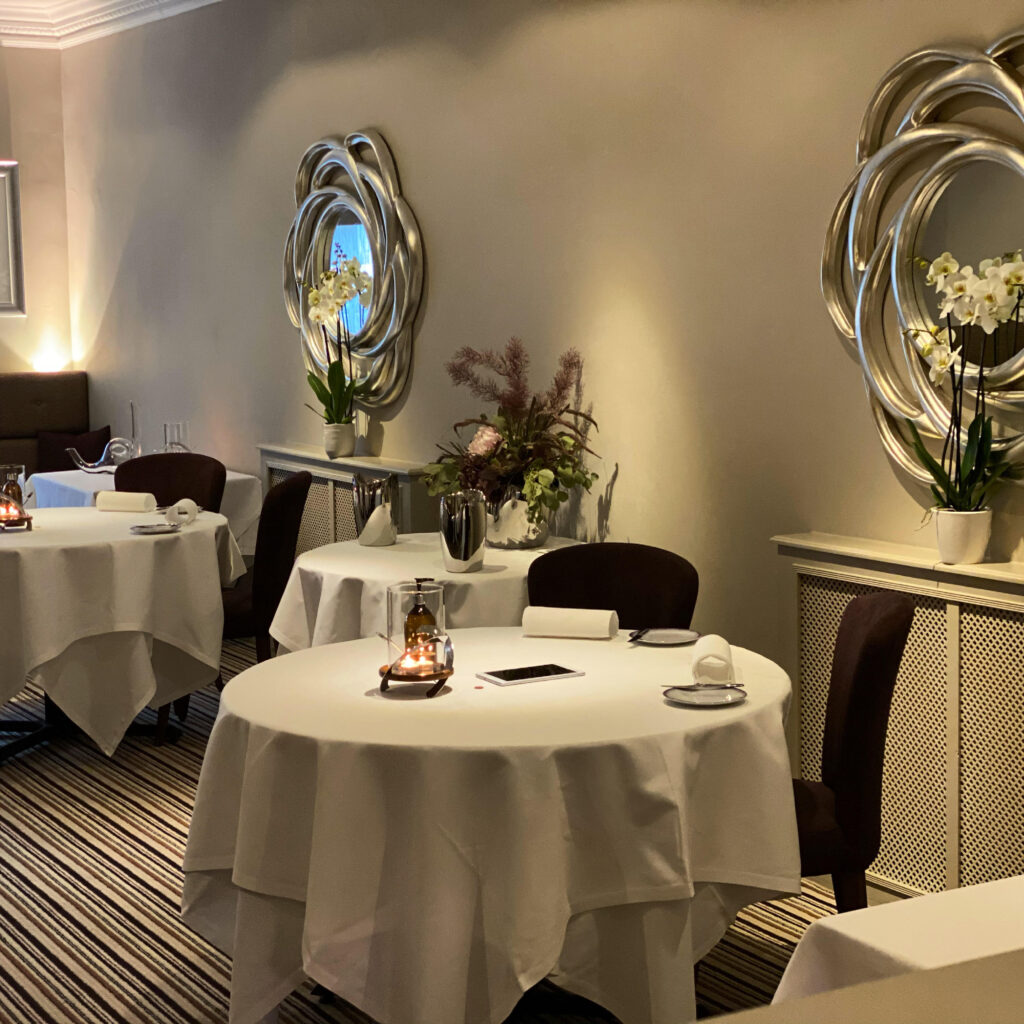
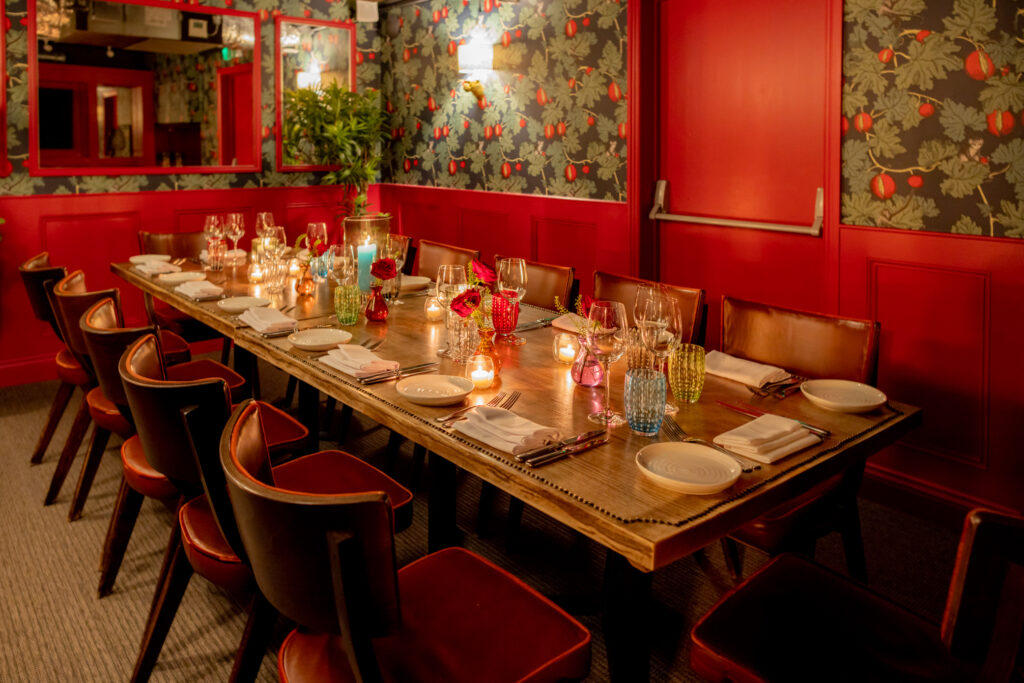
Housed in what was once a Victorian ‘home for destitute children’, The Art School now stands as one of Liverpool’s most celebrated dining spots. Chef Patron Paul Askew – Liverpool’s unofficial culinary ambassador and master of the white tablecloth experience – has created a restaurant so heartily committed to fine dining traditions that it makes the Titanic’s first-class restaurant look like a greasy spoon.
The elegantly restored space, with its striking red chairs against pristine white tablecloths, provides the backdrop for one of the city’s most unashamedly classical dining experiences. Askew is a chef who knows exactly what he is – you won’t find edible soil or food served on an iPad here – but that doesn’t mean he’s stuck in the past.
The menus read like a roll call of the North West’s finest producers. There’s Edge & Son’s Belted Galloway beef (the same supplier that NORD uses), Dunham Massey venison, and Loch Fyne scallops served caramelised and proud in the half shell. Askew’s fish game is strong, that’s for sure.
While the Prix Fixe (£55 for three courses) offers brilliant value with dishes like twice-baked three cheese soufflé with leek and Dijon mustard cream sauce, the Menu Excellence (a less humble name would be hard to imagine) is where Askew really flexes his grasp of classical tekkers. At £95 per person, you’ll get Charles Heidsieck champagne on arrival, and dishes like game terrine, pan roast sirloin with potato mille-feuille, and the ‘Art School S’mores’ – a grown-up version of the campfire classic featuring salted caramel, dark chocolate crémeux and Italian meringue that’ll have you feeling all nostalgic and just a little bit sick.
Don’t stop there. For those with a sweeter tooth than sense, don’t overlook the desserts featuring honey from the restaurant’s own local hives – a testament to Askew’s sustainability credentials long before it became fashionable to mention food miles in hushed, reverential tones. And if the two-hour table limit for early diners seems tight, remember this is a restaurant that measures soufflé rise with scientific precision – they’ve timed your chewing too.
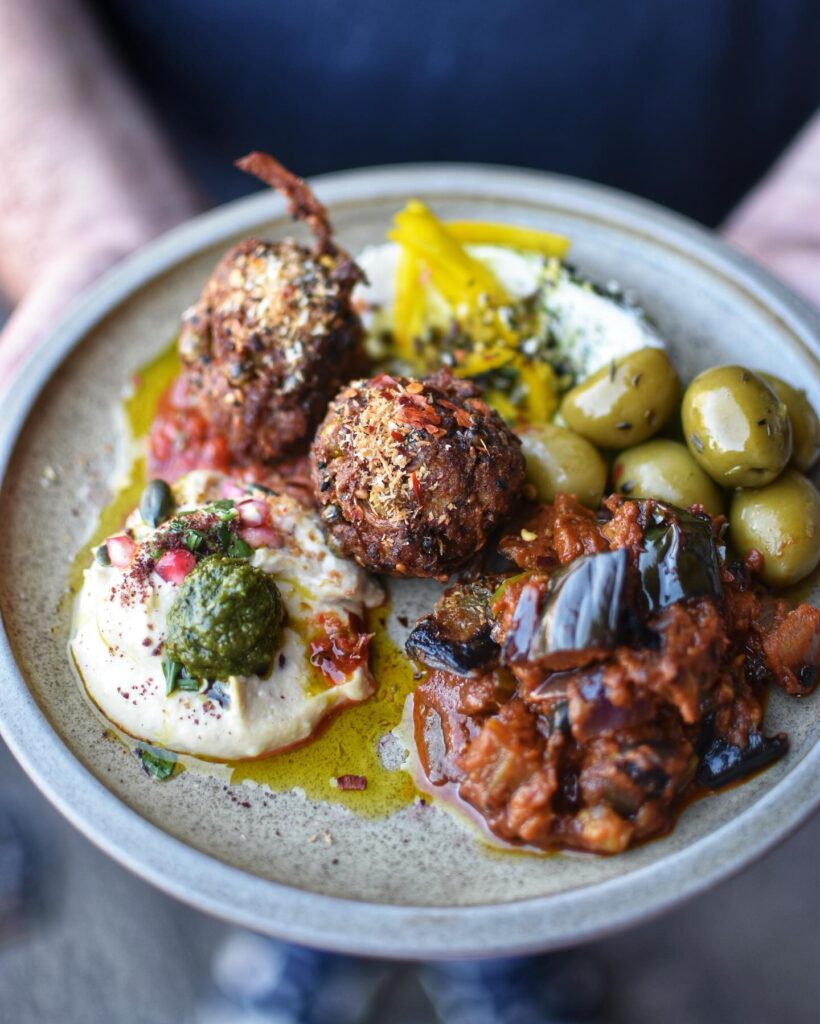
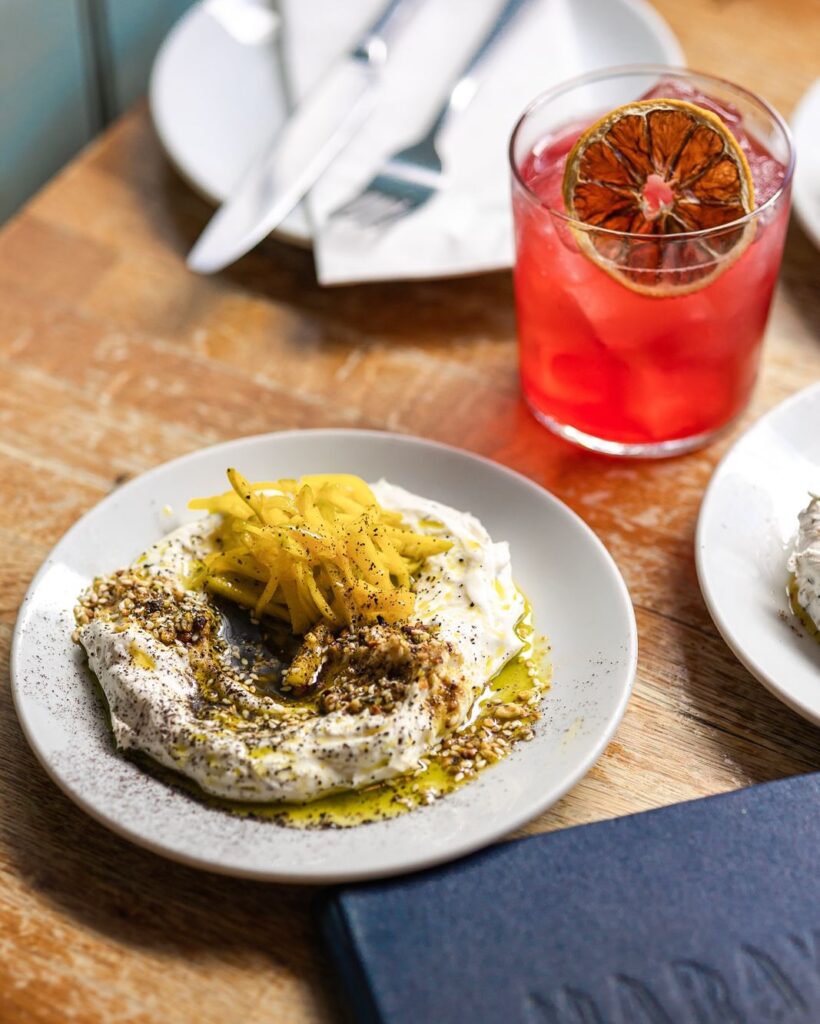
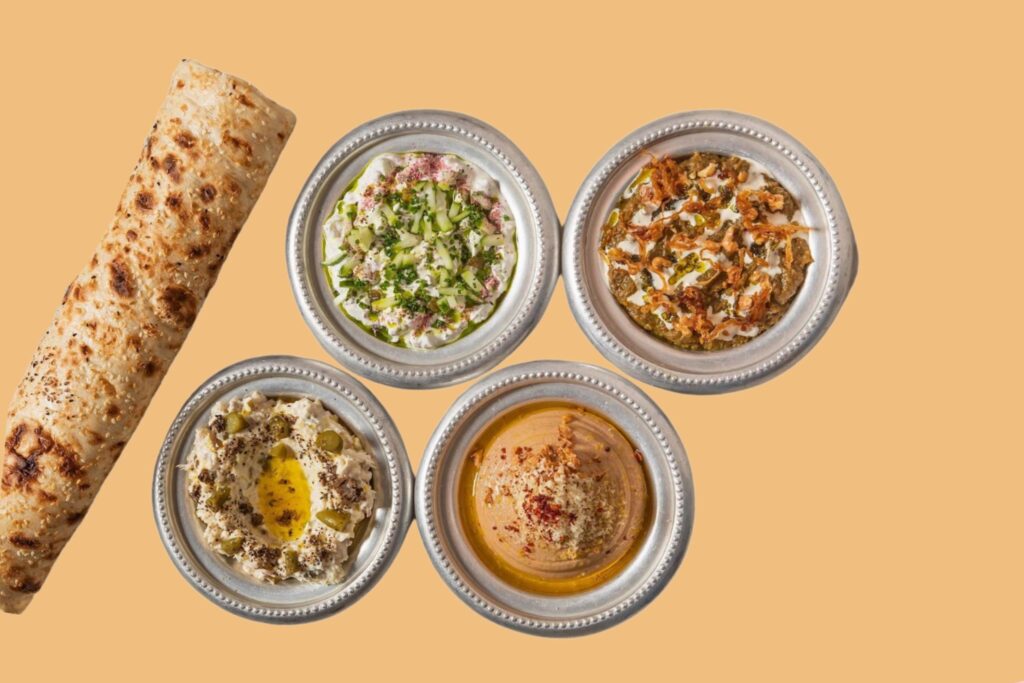
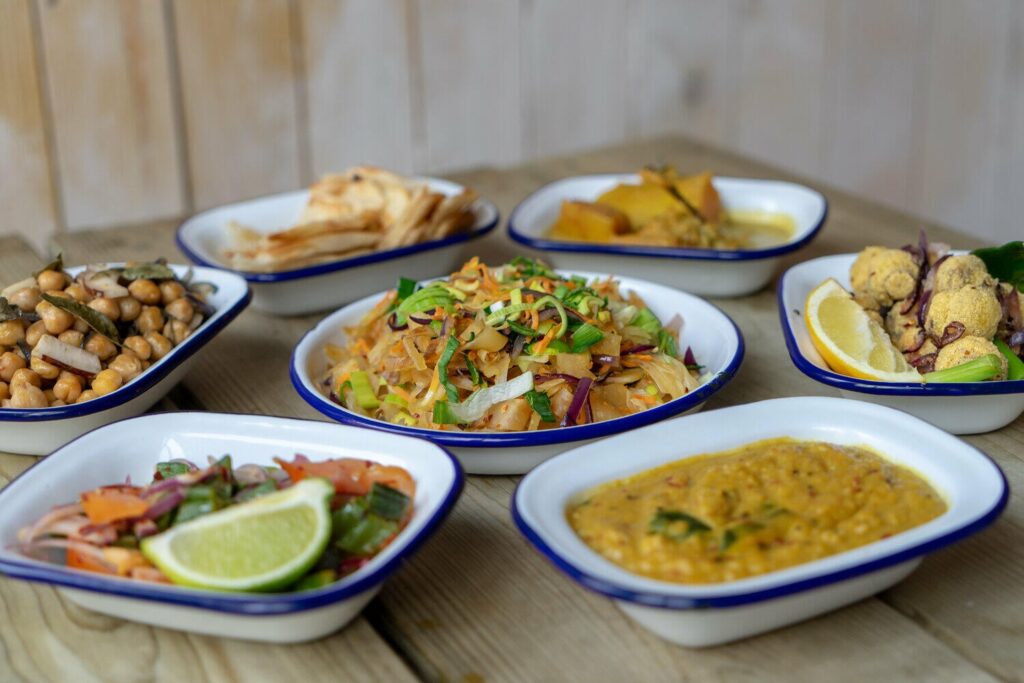
Ideal for Middle Eastern vibrancy and Liverpool’s creative spirit…
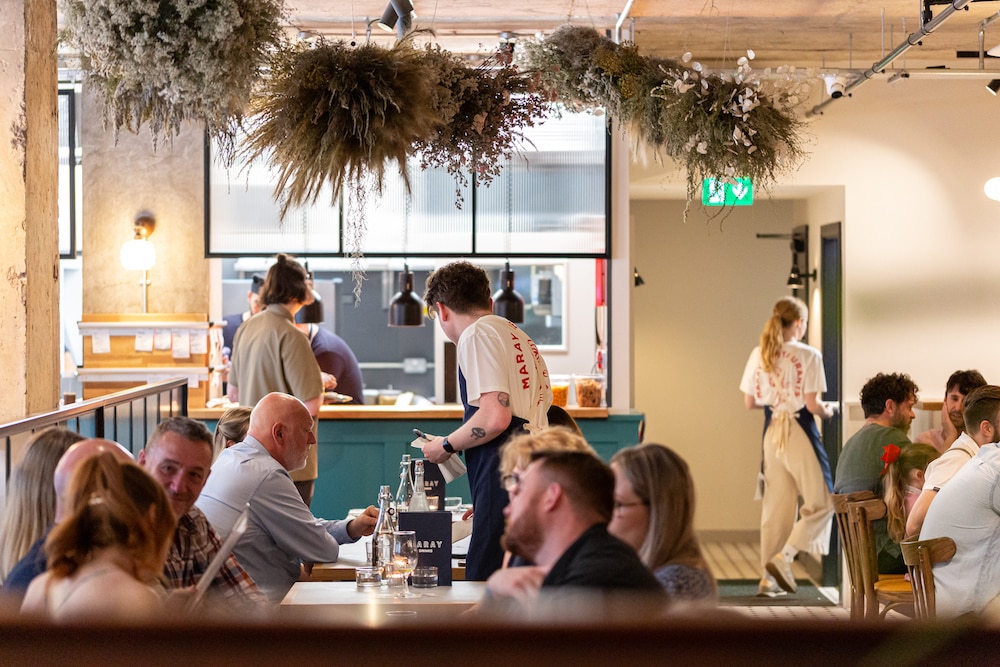
Named after Paris’ Le Marais district, Maray began life in a former charity shop on Bold Street before expanding to additional venues including the Albert Dock and, more recently, Manchester. The original remains the heart of the operation and the optimal place to savour their vivacious Middle Eastern-inspired food.
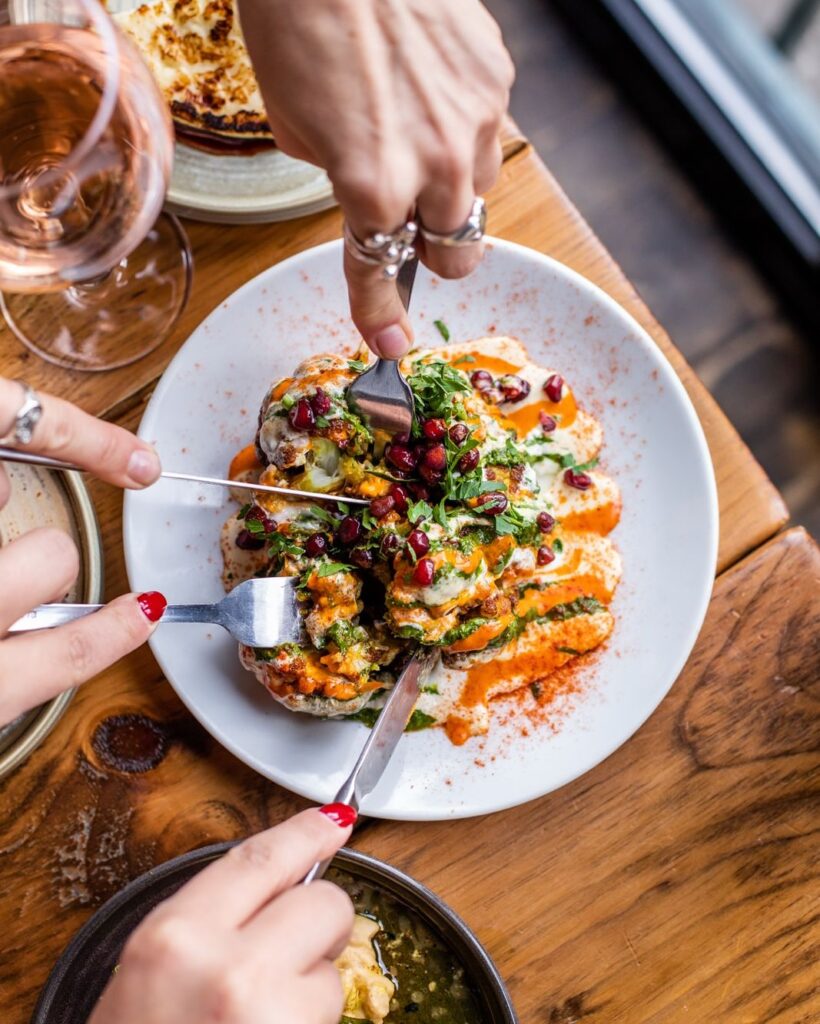
The menu comprises exquisitely crafted small plates intended for sharing, with a particular excellence in vegetable dishes that propel plant-based cooking to the heights it deserves. The celebrated disco cauliflower – florets roasted until golden and lavished with chermoula, tahini, yogurt, harissa, and pomegranate seeds – has earned its Liverpudlian legendary status deservedly. We’ll always order at least two. You should too.
During busy evenings, you might find yourself at a communal table, actively contributing to a lively, convivial mood that perfectly complements the food. You might also find yourself dragging your warm pitta through a stranger’s hummus (don’t think that’s a euphemism), but that’s all part of the fun here. The drinks selection showcases imaginative cocktails infused with Middle Eastern aromas. For an ideal meal, select an assortment of mezze, the signature flatbread, and several larger plates to share, taking into account a dish or two for your new friends at the neighbouring table.
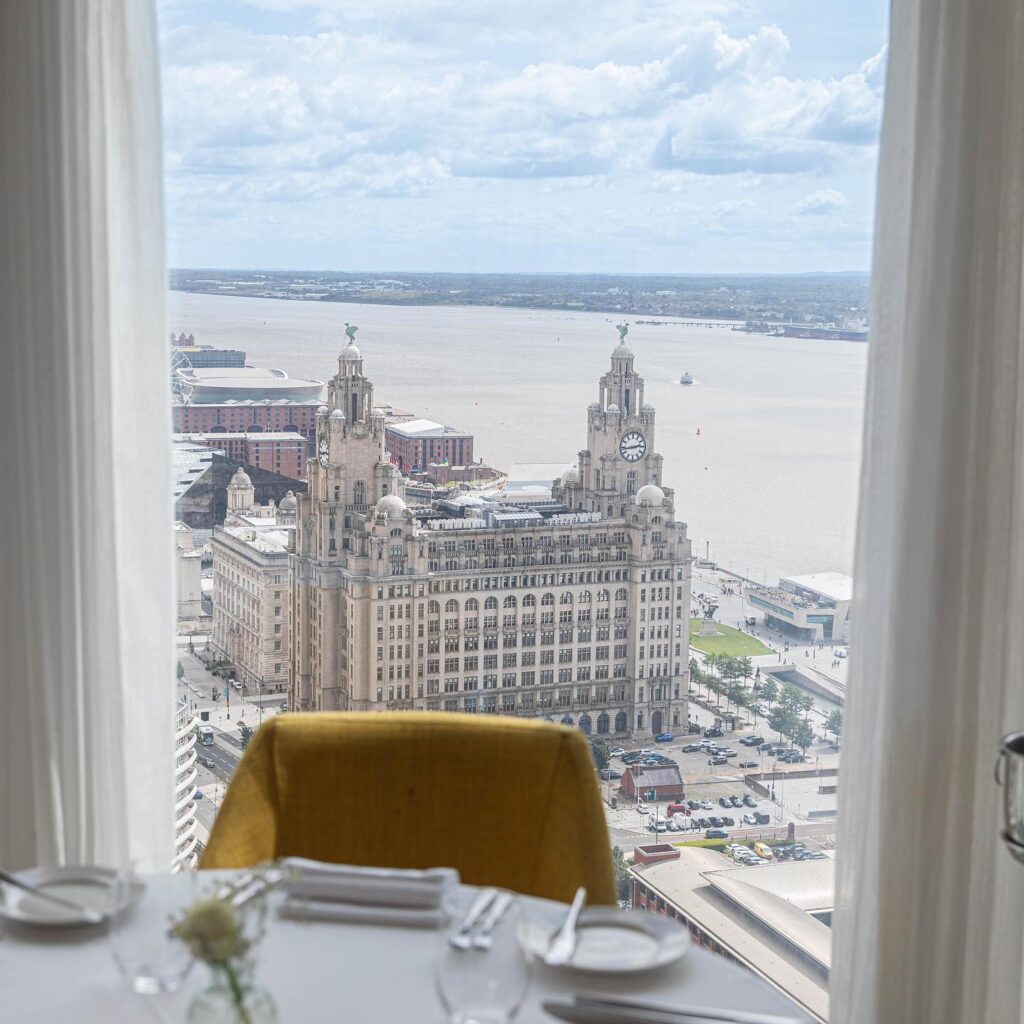
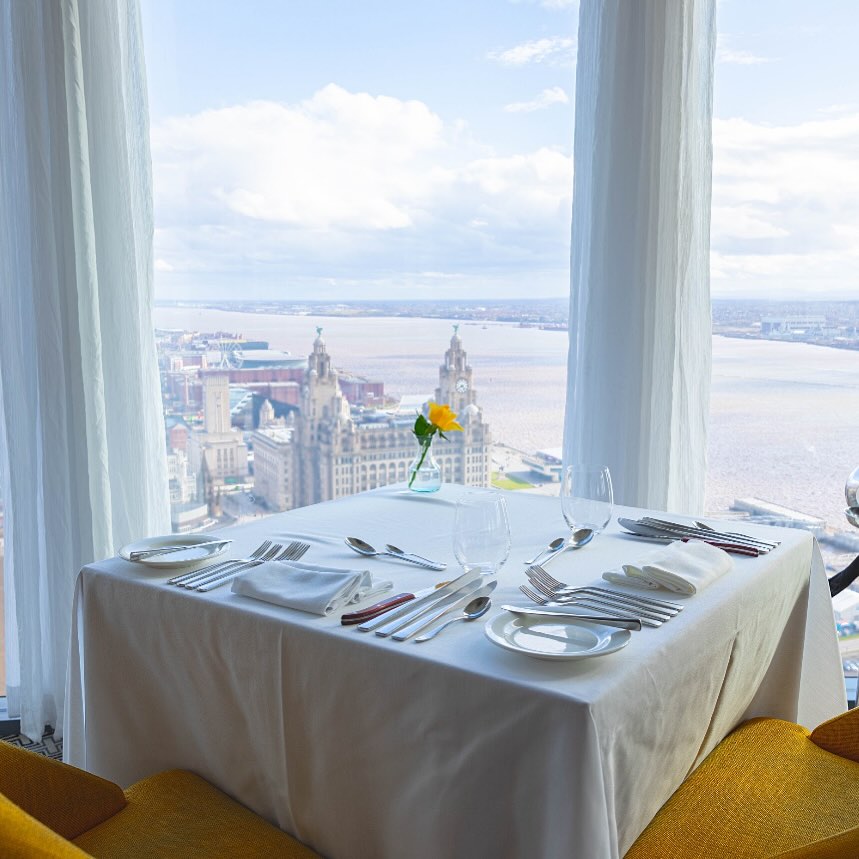
Ideal for gastronomic heights that aim to match Liverpool’s most breathtaking vistas…
Situated on the 34th floor of West Tower, Panoramic 34 until recently held the debatable honour of being Britain’s tallest restaurant. Though Gordon Ramsay’s Lucky Cat at 22 Bishopgate has recently usurped this glamorous Liverpool destination, we can only assume (haven’t been to LC, and probably won’t) the food here is better.
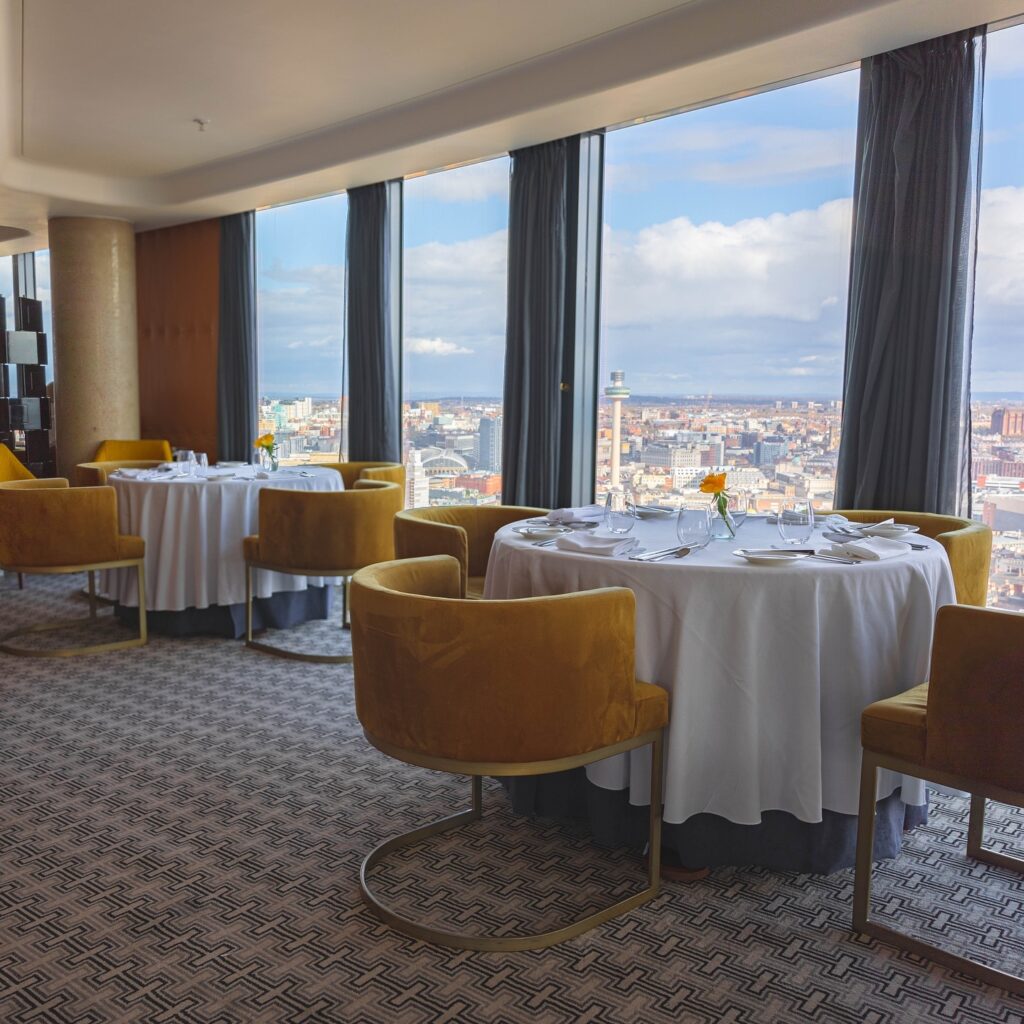
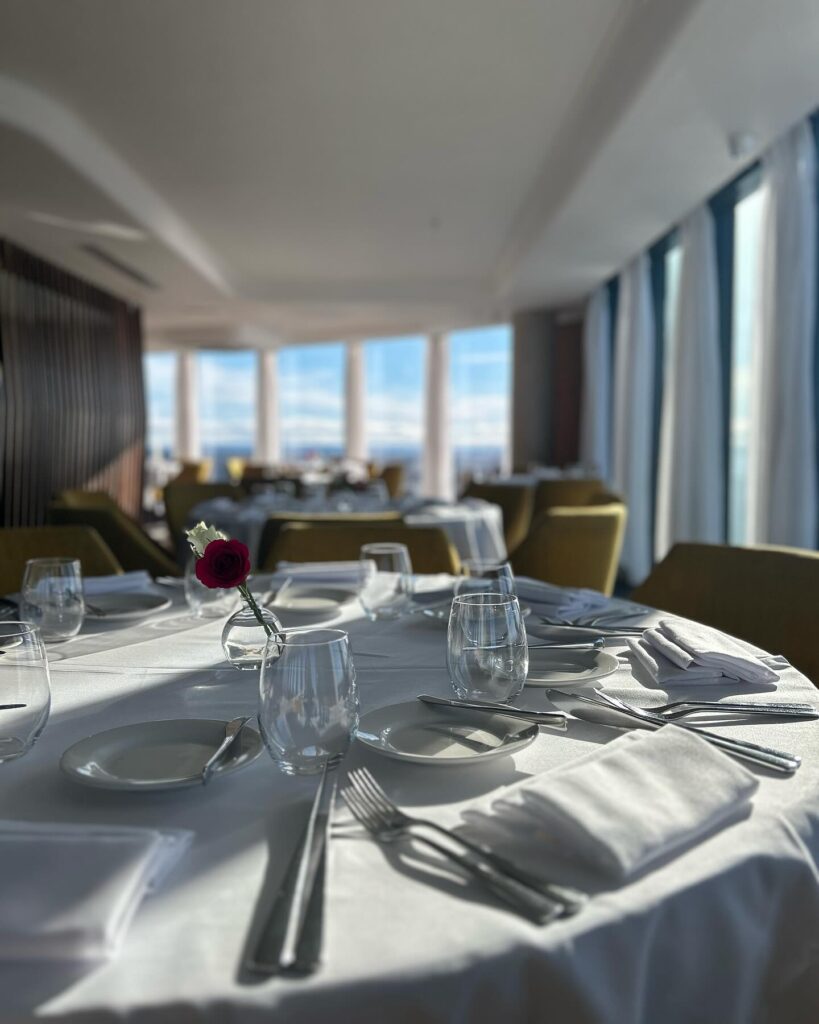
Floor-to-ceiling windows deliver stunning 360-degree panoramas across Liverpool, the Mersey, and beyond—making it the choice of many Liverpudlians for celebrating momentous occasions or impressing the pants off first dates (metaphorically, we hope – those windows are rather exposing).
The kitchen demonstrates equally lofty ambition with their tasting menu (£99), which parades luxurious combinations like hand-dived scallop and langoustine tortellini with XO butter sauce that might not make your nonna happy, but will hit the spot nonetheless. Their venison treatment—complete with haunch lasagne, salsify, and the unexpected delight of pickled walnut ketchup – proves this kitchen isn’t just coasting on its view-based laurels. This is a genuinely great plate of food, that haunch lasagne not in the least bit dry, which is the obvious risk here.
For dessert devotees, the Black Forest creation arrives dressed to impress with dark chocolate mousse, Amarena cherries, and a mirror glaze so reflective you might catch your own expression of anticipation in it. Those with more modest appetites (or wallets) can opt for the Prix Fixe at a still-special-occasion £59 for two courses.
From the drinks menu, the ‘mouthwatering’ cocktails (bit of a weird term for a drink guys) are capably mixed with a little theatricality thrown in for good measure – the Pornstar Martini comes with its champagne sidecar, and the devilishly named Honey, You’re So Old Fashioned! (Maker’s Mark, honey, Angostura bitters, smoked salt) offers a refreshing twist on the classic.
Is it wallet-busting? Absolutely. But then again, you’re essentially renting Liverpool’s finest view along with dinner. Approach your meal with this mindset, and you won’t be disappointed.
Ideal for Great British Menu excellence with Far Eastern influences…
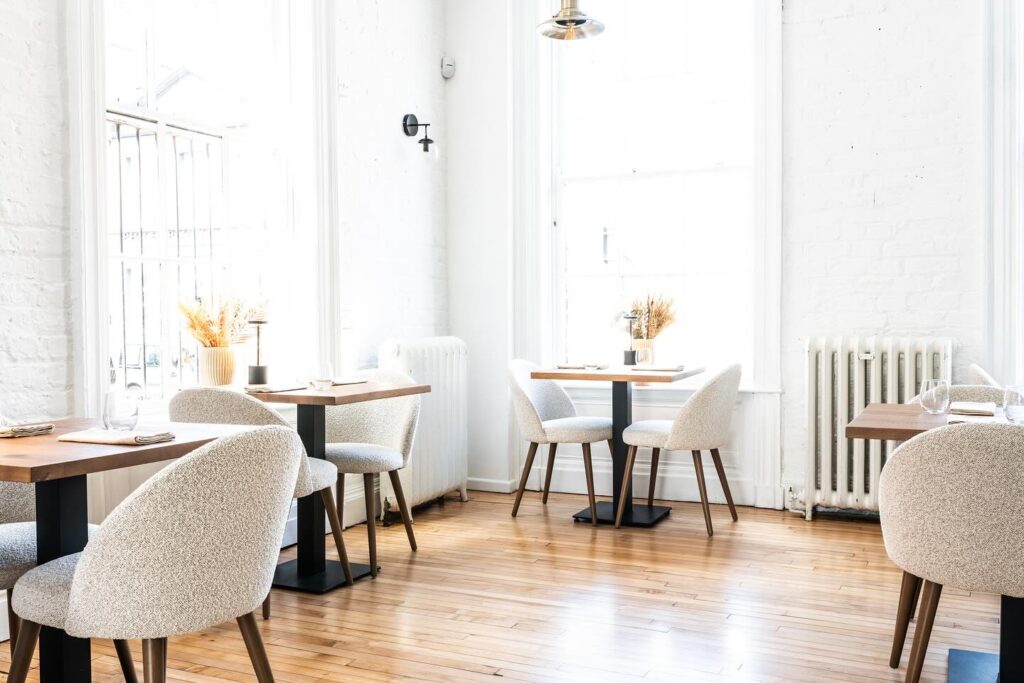
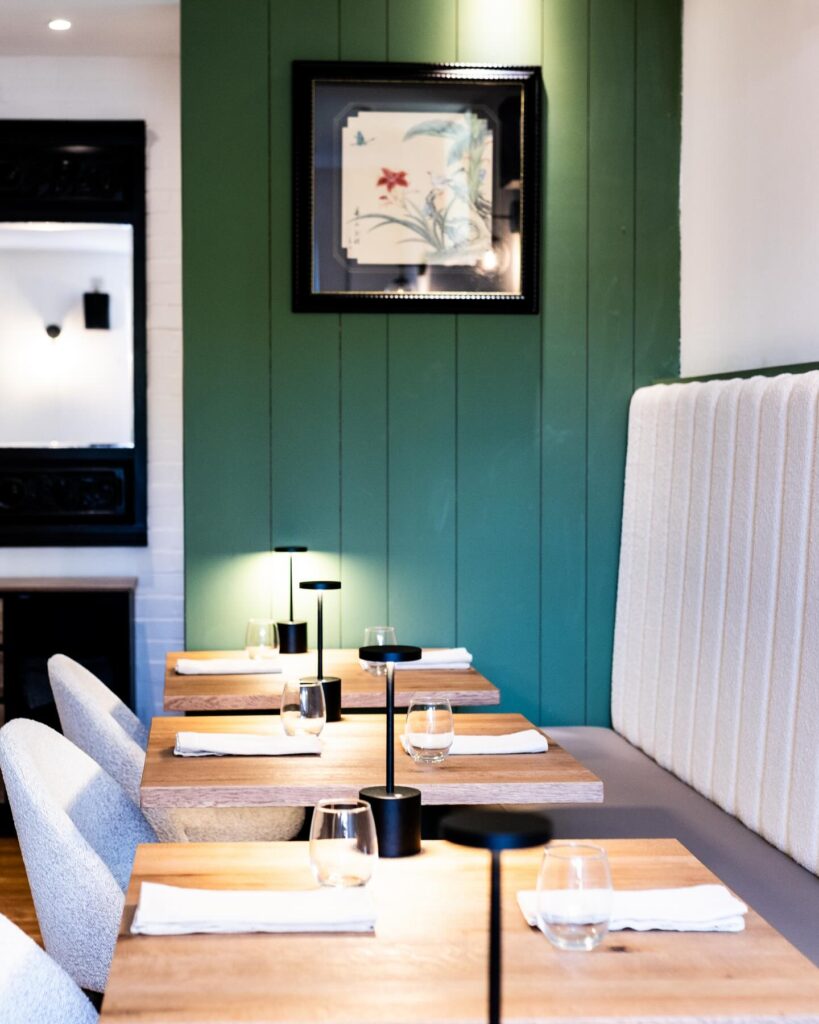
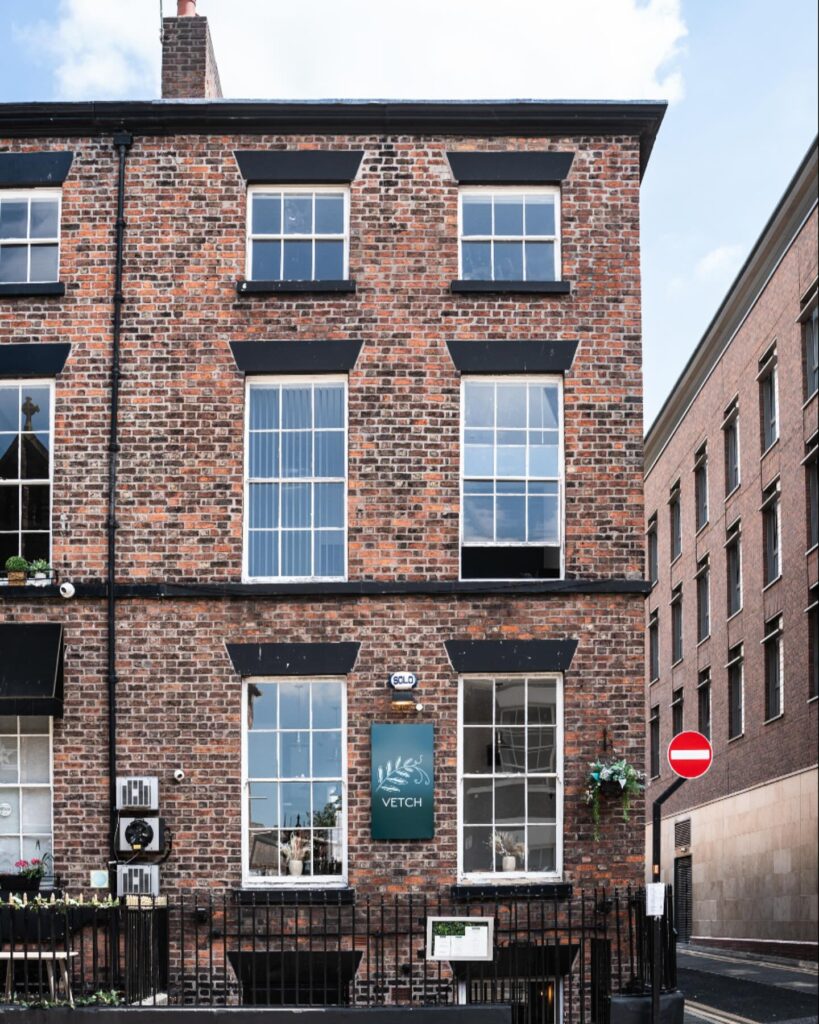
After a successful tenure as head chef at Rothay Manor in the Lake District, Dan McGeorge (crowned Champion of Champions on Great British Menu 2021) has returned to his native Liverpool (there’s that arc again) to launch his debut solo venture. Situated in a handsome Georgian townhouse on Hope Street, Vetch offers a snug, elegantly mellow dining space where McGeorge’s delicate, Japanese-influenced cooking truly shines.
Let’s abandon any pretence here: Vetch isn’t for the “I just fancy a quick bite” crowd. This is tasting menu territory, where the illusion of ‘choice’ is boiled down to whether you’re having five courses (£85) or seven (£105), with an optional drinks pairing that will facilitate both an enlightened palate and a lighter wallet. For the less committed, the lunch and early bird menu offers three courses for a relatively gentle £45, which in fine-dining currency is practically a bargain.
The menu showcases McGeorge’s talent for harmonising classic techniques with unexpected, globetrotting flavour combinations. Dishes change with the seasons but might include the show-stopping cauliflower chawanmushi with parmesan and truffle (think of the finest cauliflower cheese elevated to celestial heights via Japanese egg custard), or the transformative monkfish with leek and XO dashi.
Each dish arrives on ceramics that look custom-crafted for their specific contents, accompanied by cutlery so exquisite you might be tempted to slip it into your pocket (please don’t). Even the glassware has been selected to produce a tuning-fork resonance when clinked – a detail that tells you everything about the forensic level of attention being paid to every aspect of the experience.
Service walks that perfect line between informed and informal, with staff who can talk you through the intricacies of the Scandi-Japanese-Brit menu fusion while making you feel like you’re in on the joke.
Vetch represents Liverpool dining at its most ambitious and accomplished; a place where aesthetics and remarkable flavours coalesce into an experience that fully justifies its three-hour duration.
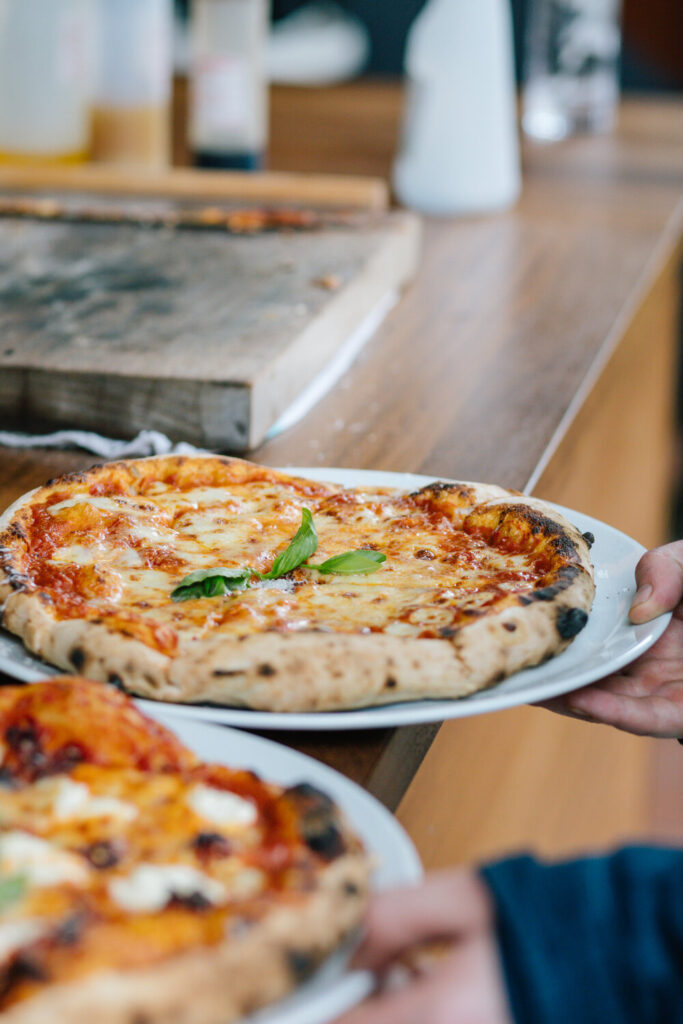
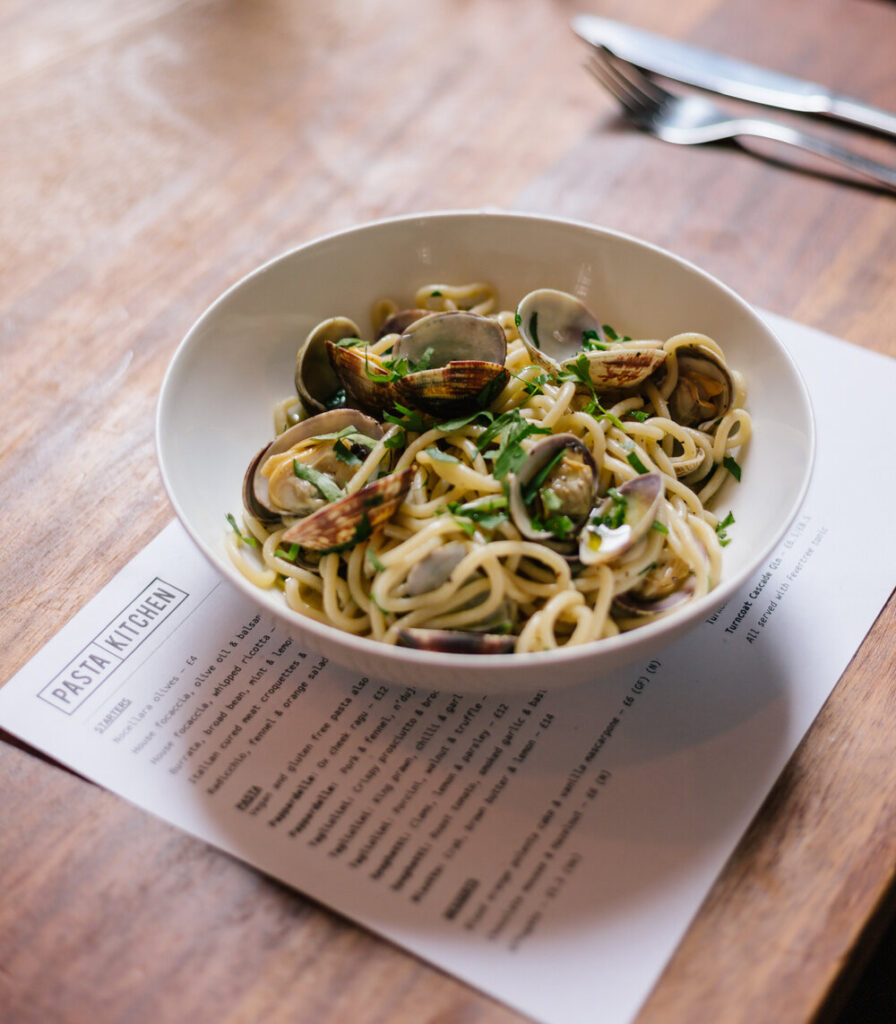
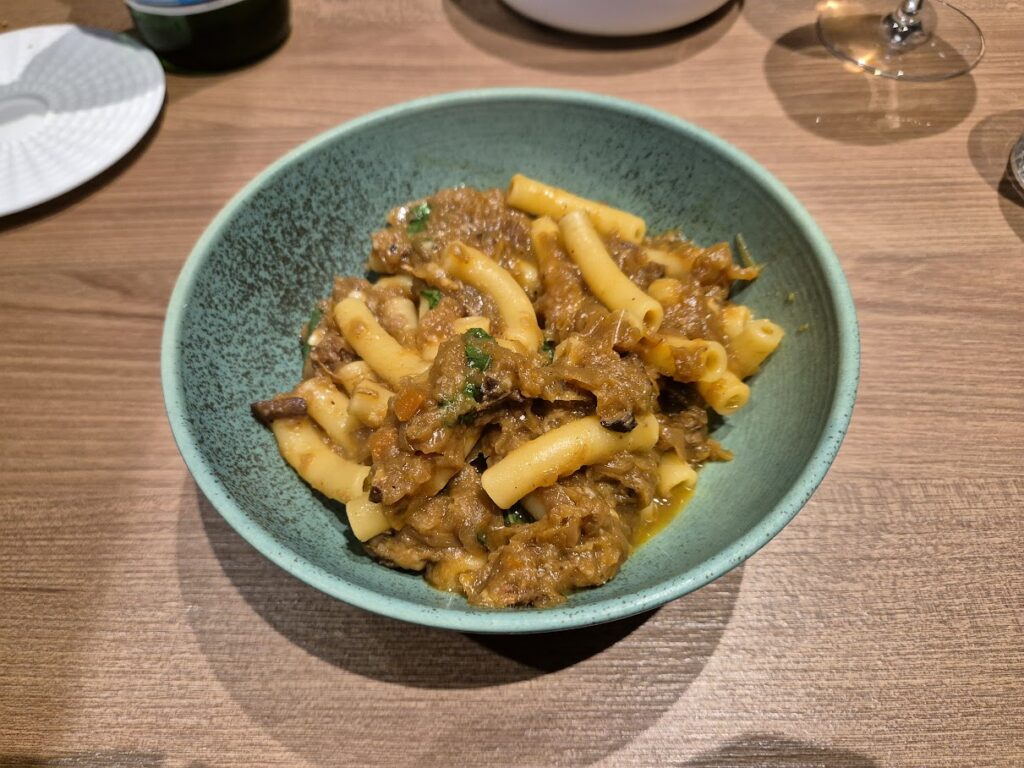
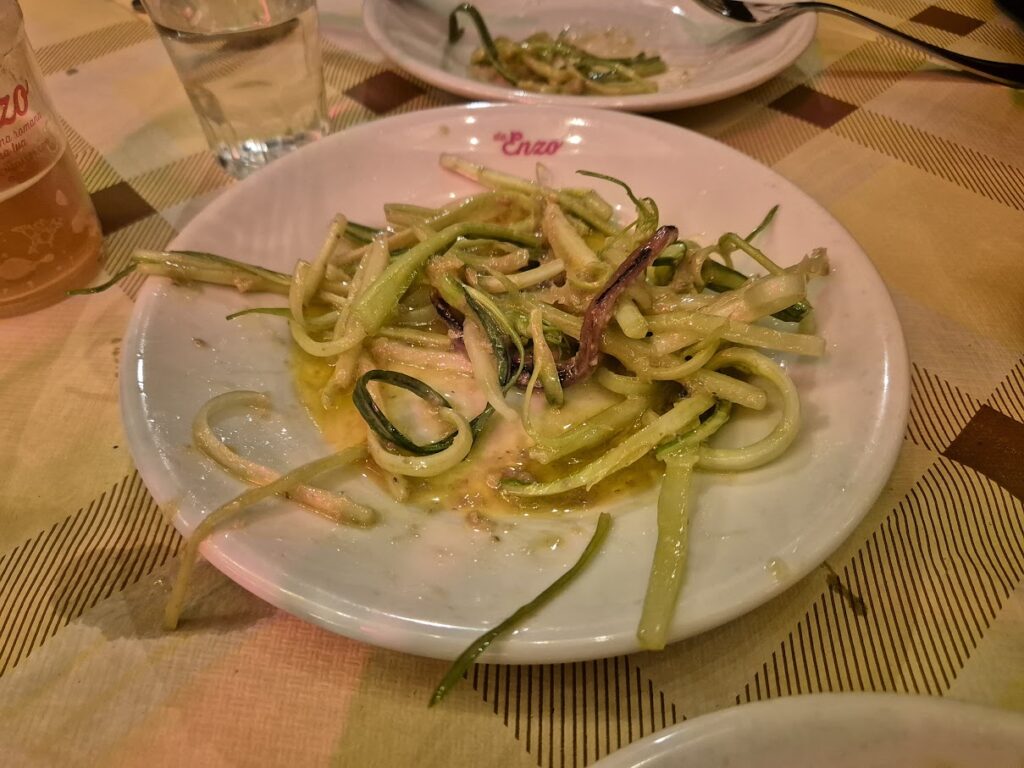
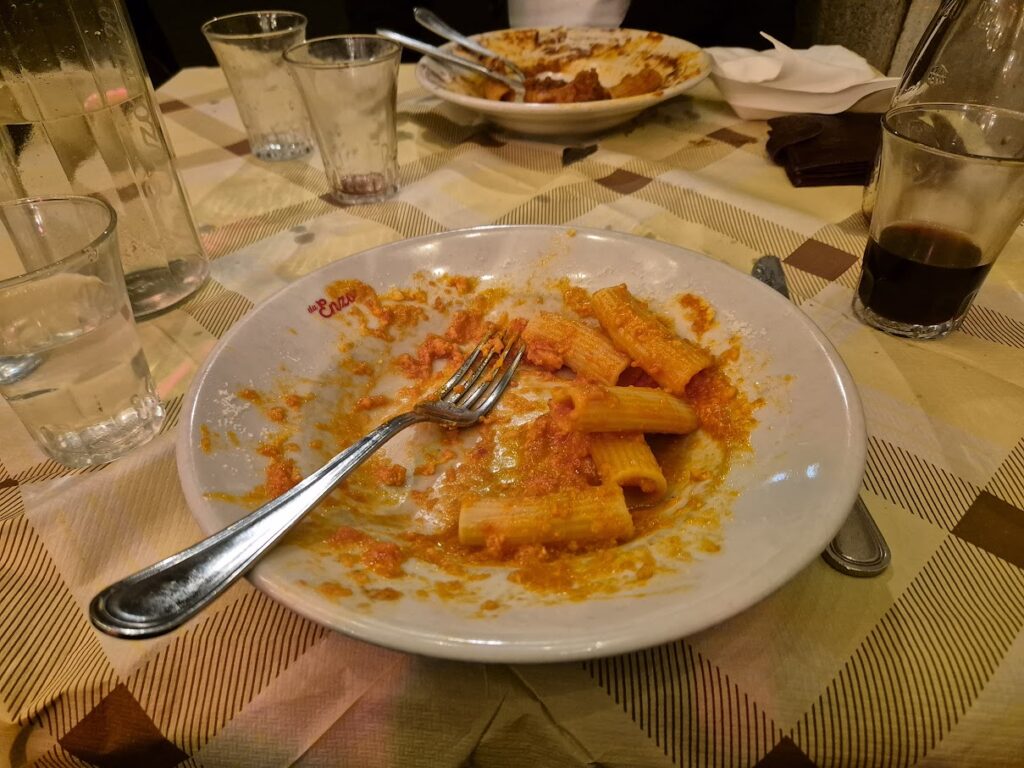
Ideal for hidden courtyard charm, handcrafted pasta and natural wines…
Concealed off Hardman Street, down an alleyway, in a location likely to perplex first-time visitors, Buyers Club is a bohemian bar-restaurant producing some of the finest Italian-inspired cuisine in Liverpool. Pass through the archway into Hardman Yard and you’ll discover a welcoming haven that feels like a cherished secret among locals.
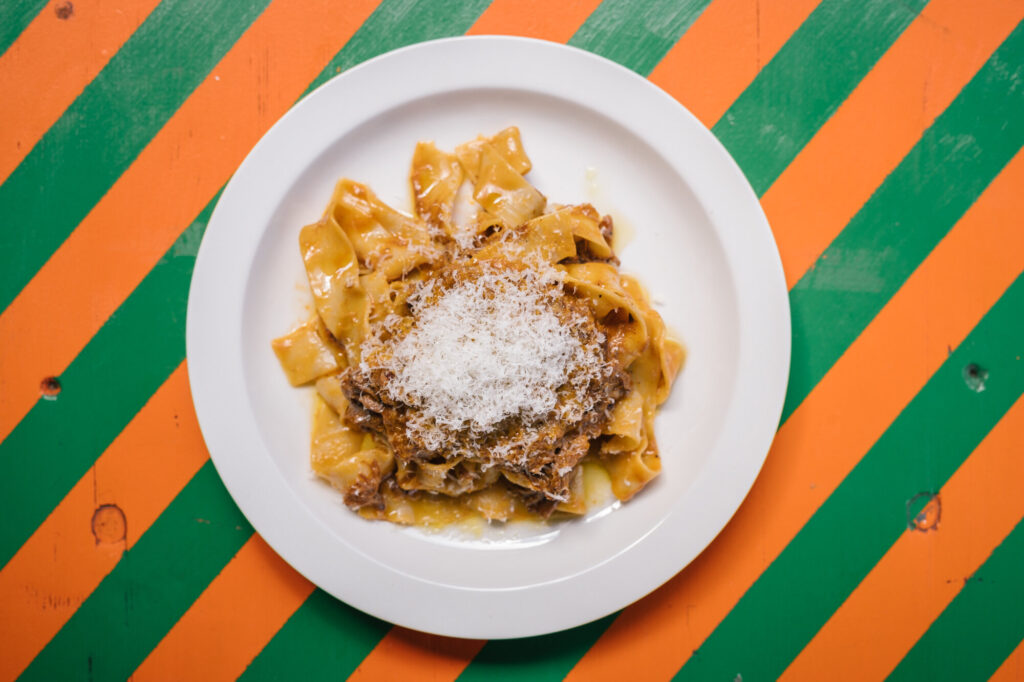
The menu revolves around fresh, handmade pasta dishes that thrum with flavour—think pappardelle with pork and fennel sausage, squash, sage and pumpkin seeds, or porcini and walnut tagliolini. Begin with their signature beef shin arancini or the cacio e pepe butter beans, or, you know, both; you’re a consenting adult and you’ve come here for a good time, after all.
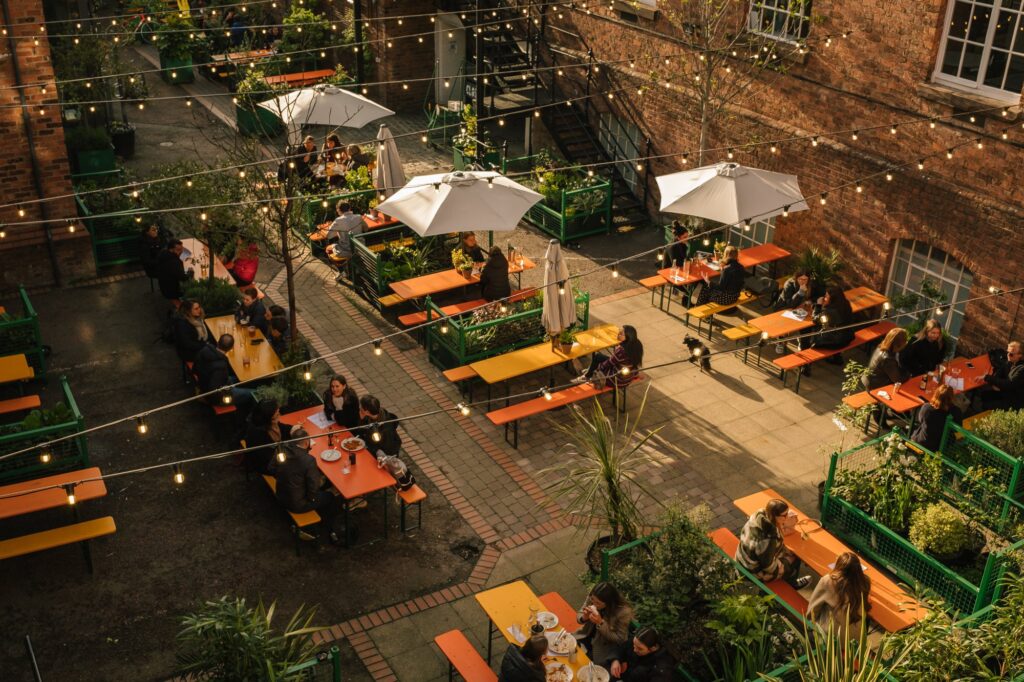
The natural wine selection ticks all the right boxes for this kind of joint, with staff eager to guide you through unfamiliar territory. In summer, the beer garden metamorphoses into one of Liverpool’s best outdoor dining locations, perfect for lingering over a bottle of wine and multiple courses as twilight descends. You know what? We might just stay here a while, and pretend that outside isn’t happening…
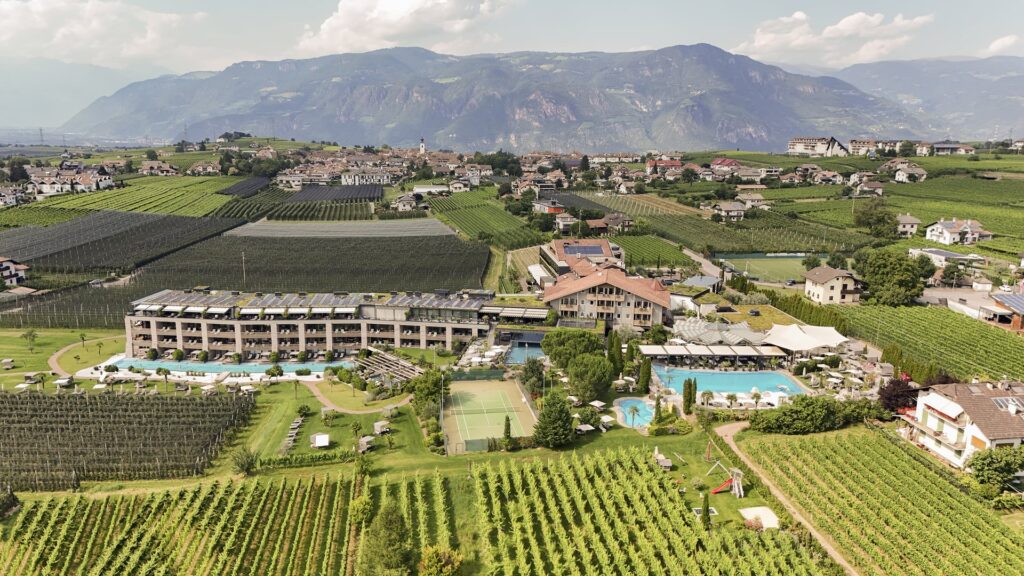
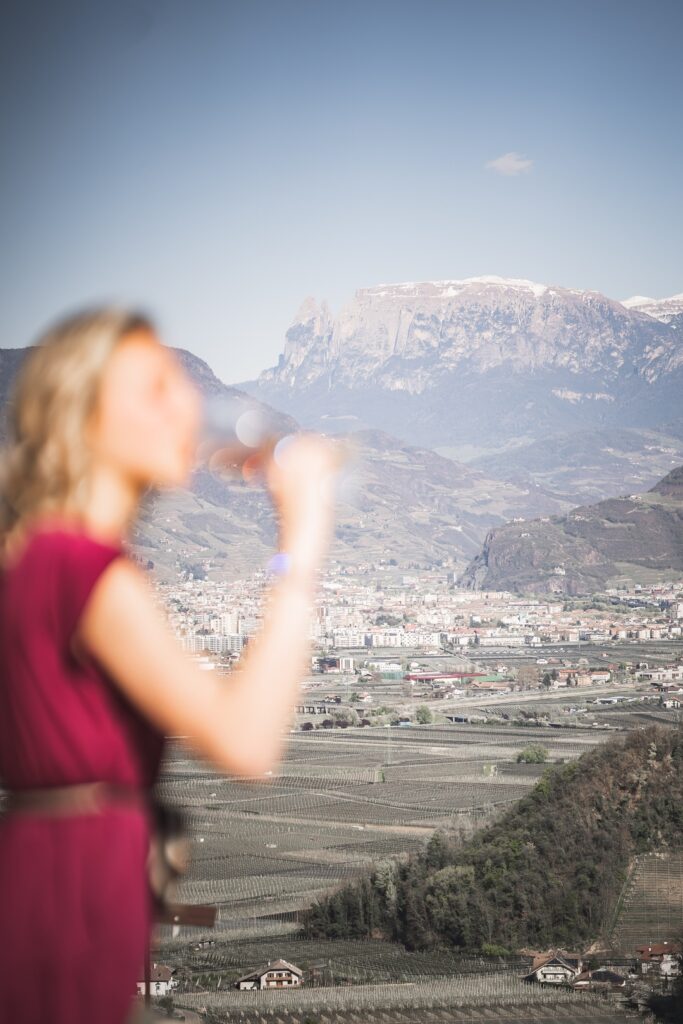
The region of South Tyrol occupies a sliver of northern Italy where the Alps meet the Mediterranean, and the result is a place that feels like neither and both at once. German is spoken as often as Italian, the food swings between dumplings and risotto depending on altitude, and the vineyards that climb the valley slopes produce some of Italy’s most respected whites. It’s also become one of Europe’s foremost destinations for spa culture, with a concentration of high-end wellness hotels that rivals anywhere in the Alpine arc.
The combination of these two strengths makes South Tyrol particularly well suited to a certain kind of trip: one where the days involve vineyard walks, mountain air and long lunches, and the evenings end in a sauna with views of the Dolomites.
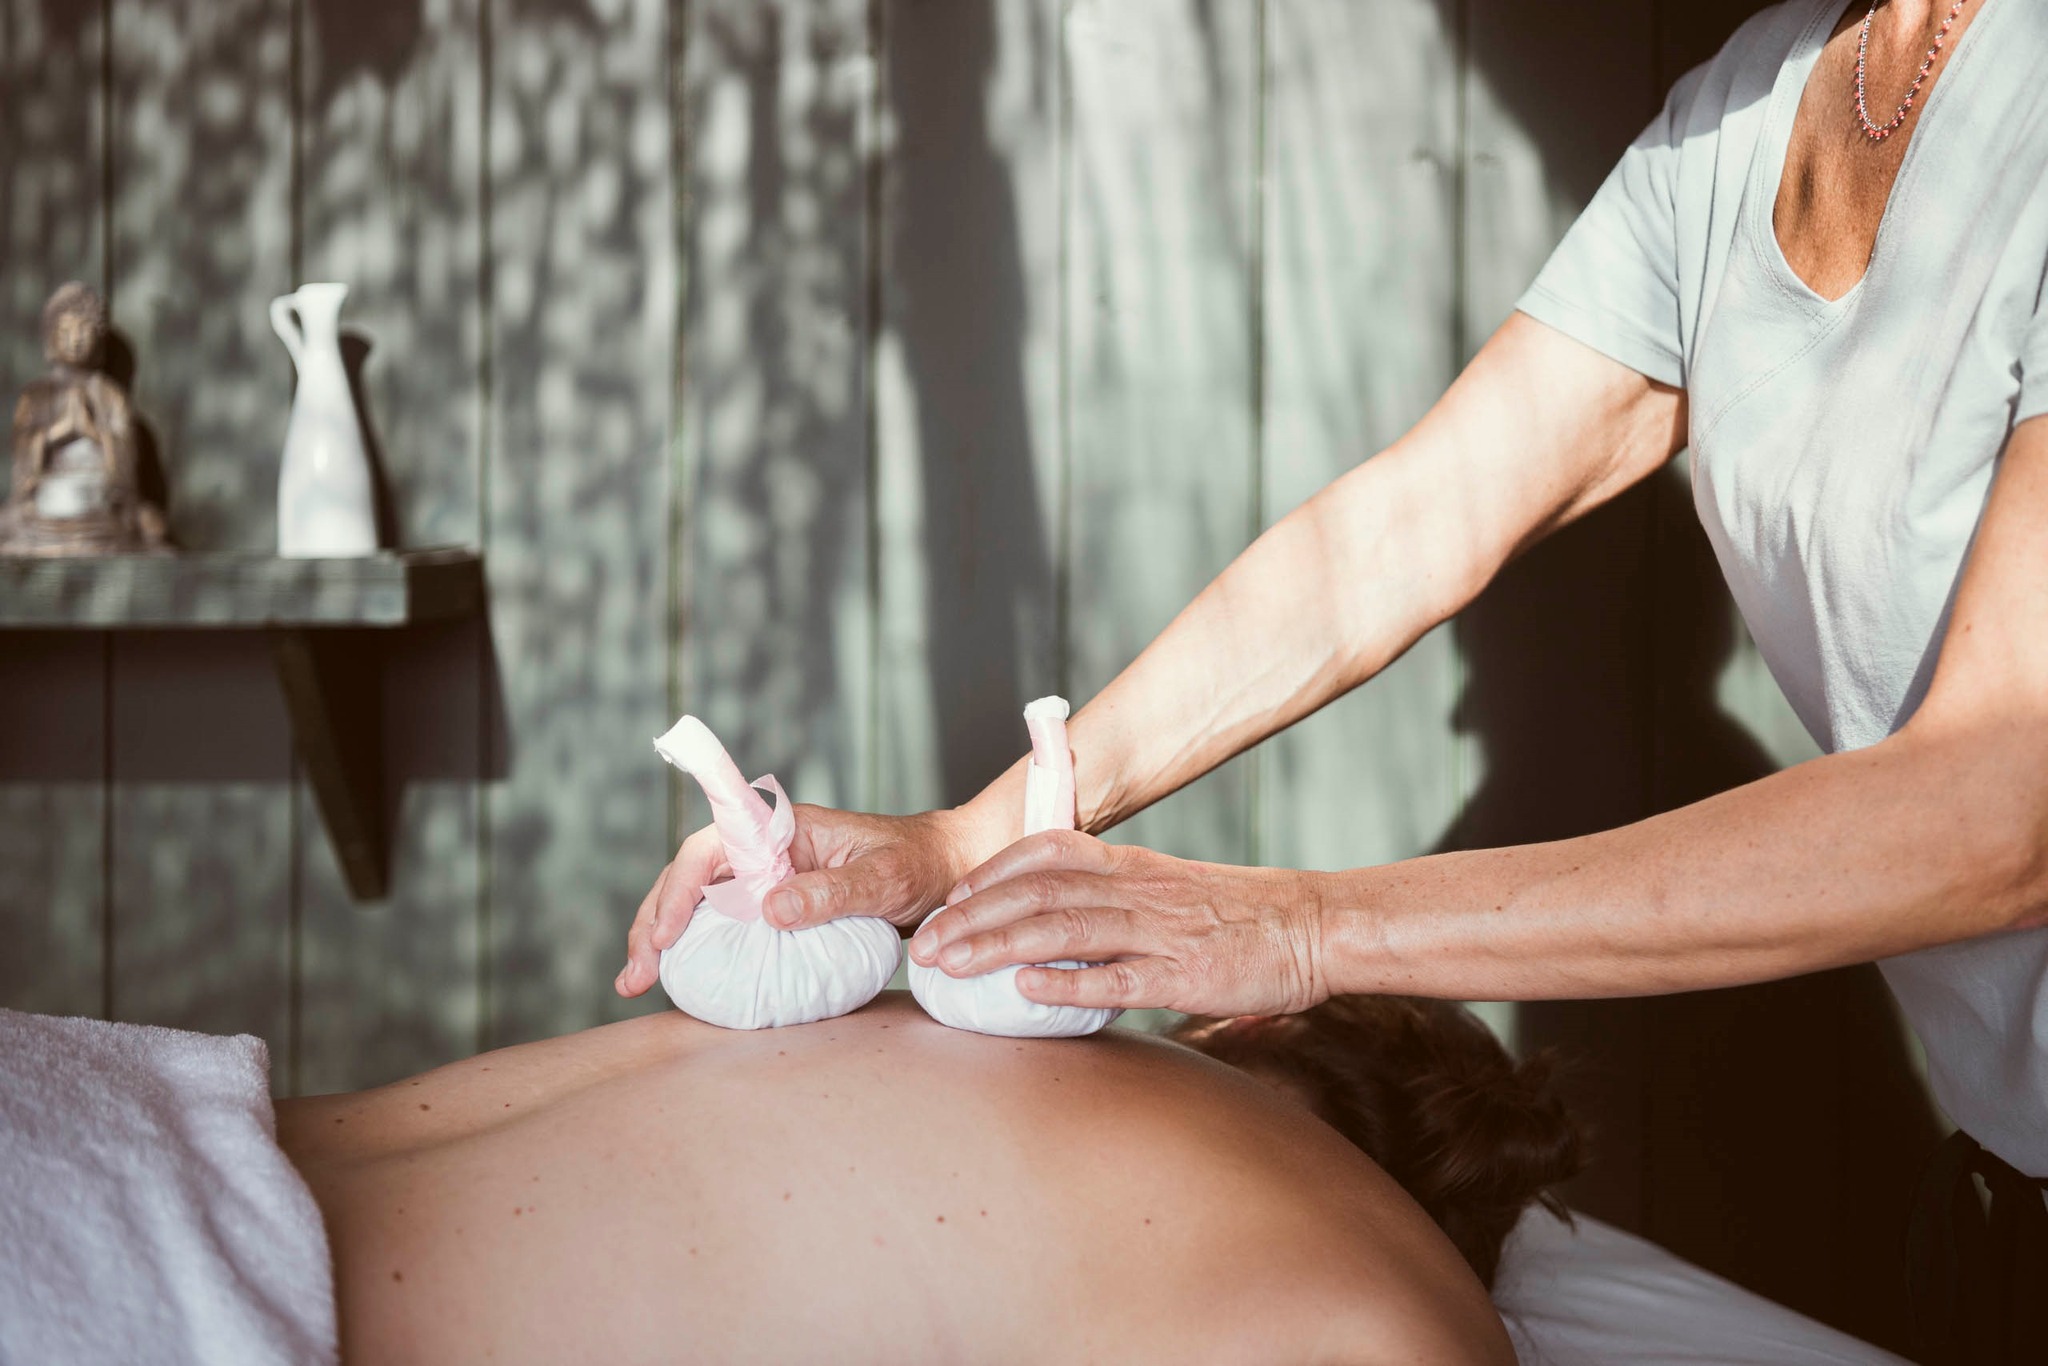
Wine and wellness, far from being contradictions, have become genuine companions. The moderate consumption of red wine, particularly its antioxidant compound resveratrol, has been associated with cardiovascular benefits and stress reduction, while “vinotherapy” spa treatments – think grape-extract facials and polyphenol body wraps – have moved firmly into the mainstream.
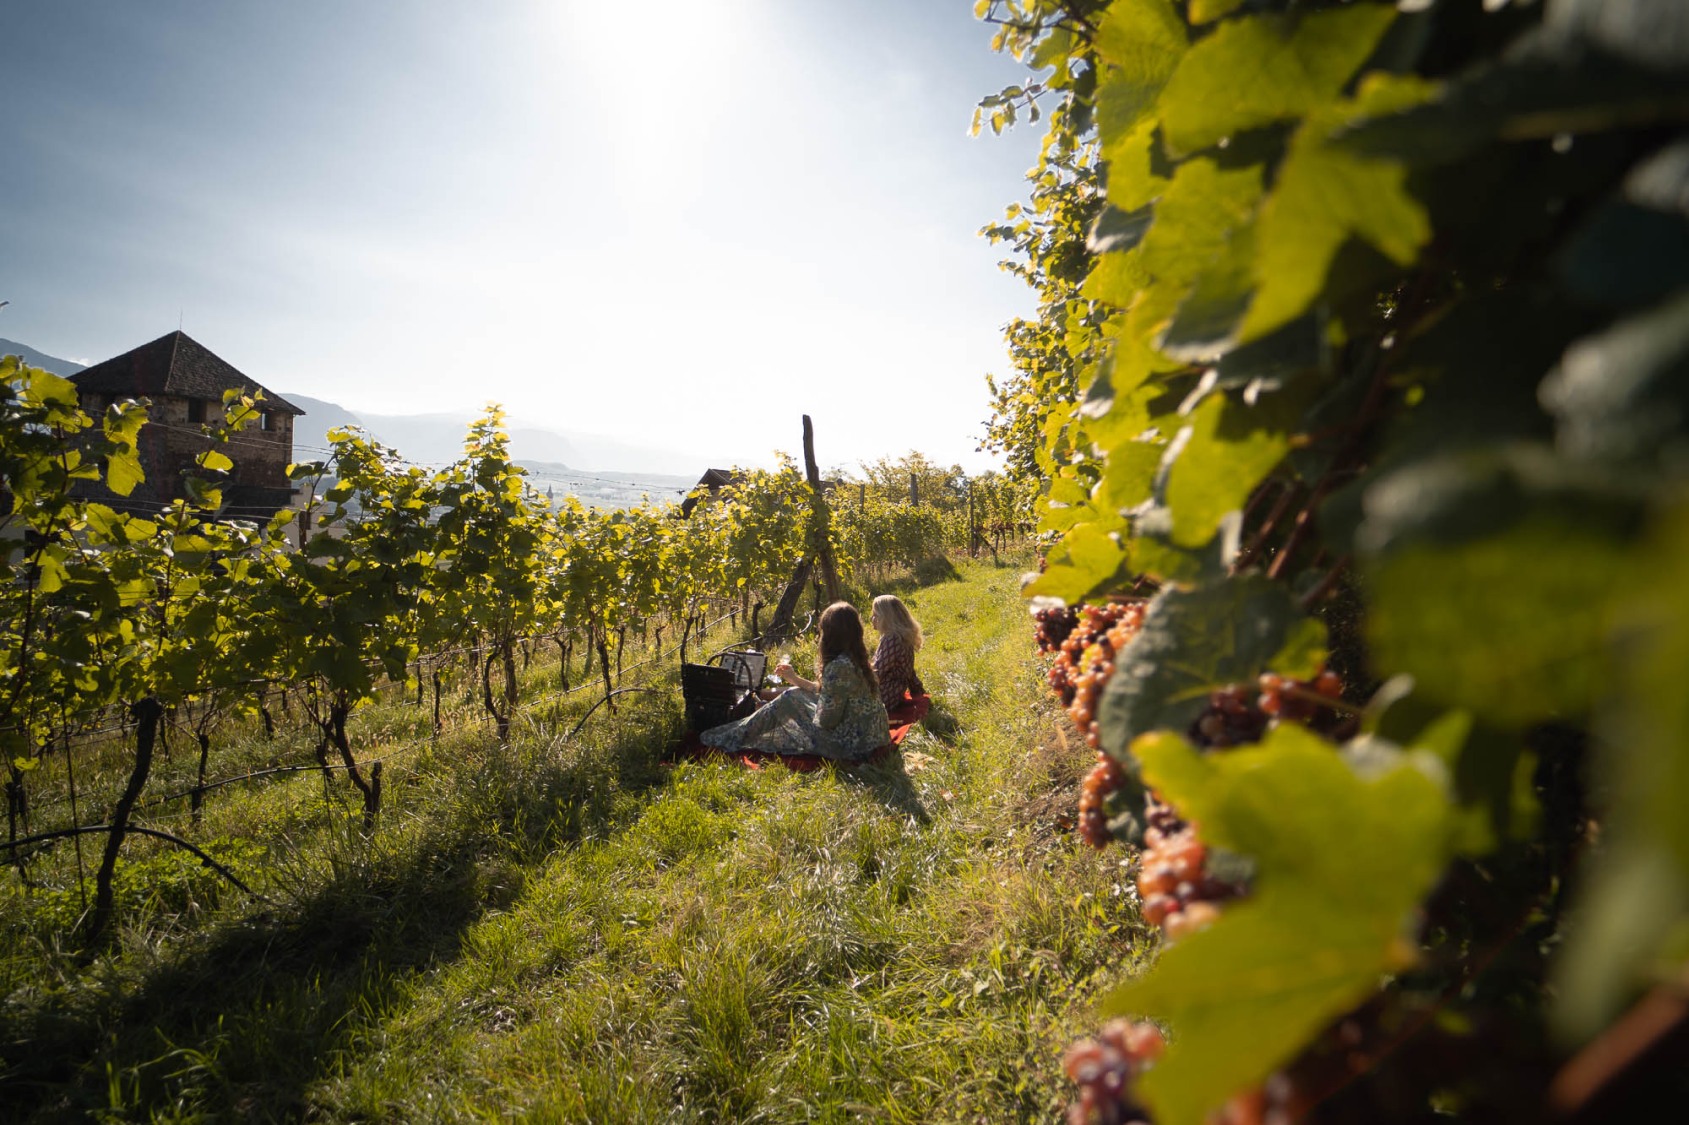
Vineyard yoga, mindful tasting, and the broader philosophy of slow, terroir-connected living have turned the wine-and-wellness pairing into a recognised genre of travel. Which means you can book a week in South Tyrol, spend your days between the vines and the steam rooms, and call the whole thing a health retreat. Honestly.
These five retreats each offer their own version of that formula, from a five-star vineyard resort on the Wine Road to a 17th-century hunting lodge perched above Merano. Here we go…
Weinegg Wellviva Resort, Cornaiano
Ideal for drinking the hotel’s own wine in a sand-fringed pool…
Set among the vineyards of Cornaiano, a wine village in the Appiano commune on the South Tyrolean Wine Road, the Weinegg Wellviva Resort is a five-star property where the connection between wine and wellbeing feels entirely organic. The Moser family, who own and run the hotel, also operate Tenuta Moser, their own wine estate, and the wines produced there feature prominently at dinner, included in the room rate alongside a six-to-eight-course evening menu.
The 1,700m² Wellviva SPA is built around what the resort calls its four elements of regeneration. In practice, that translates into a Finnish panoramic sauna, a bio-herb sauna, a steam room, a SnowRoom and a series of relaxation spaces, alongside an indoor-outdoor infinity pool and a 25-metre heated outdoor pool with a white sand beach terrace. Suites at the higher end come with private saunas and freestanding bathtubs on south-facing balconies, which overlook the vine-covered slopes below.
The food deserves particular mention. The hotel restaurant serves regional and Mediterranean dishes built around local produce, and the ¾ board arrangement means guests eat well throughout the day without needing to leave the grounds. Bolzano is a 15-minute drive for those who do want to explore, and the surrounding wine country offers walking and cycling routes through some of the most scenic agricultural land in the Alps.
Castel Fragsburg, Merano
Ideal for Michelin-starred dinners and foraging hikes from a 20-suite hunting lodge…
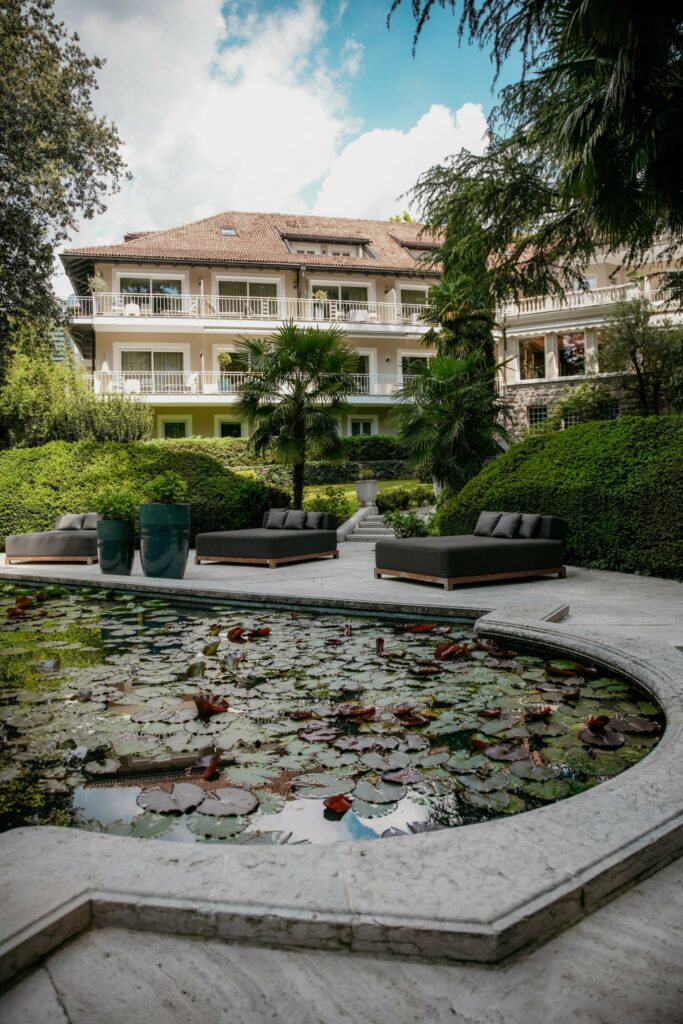
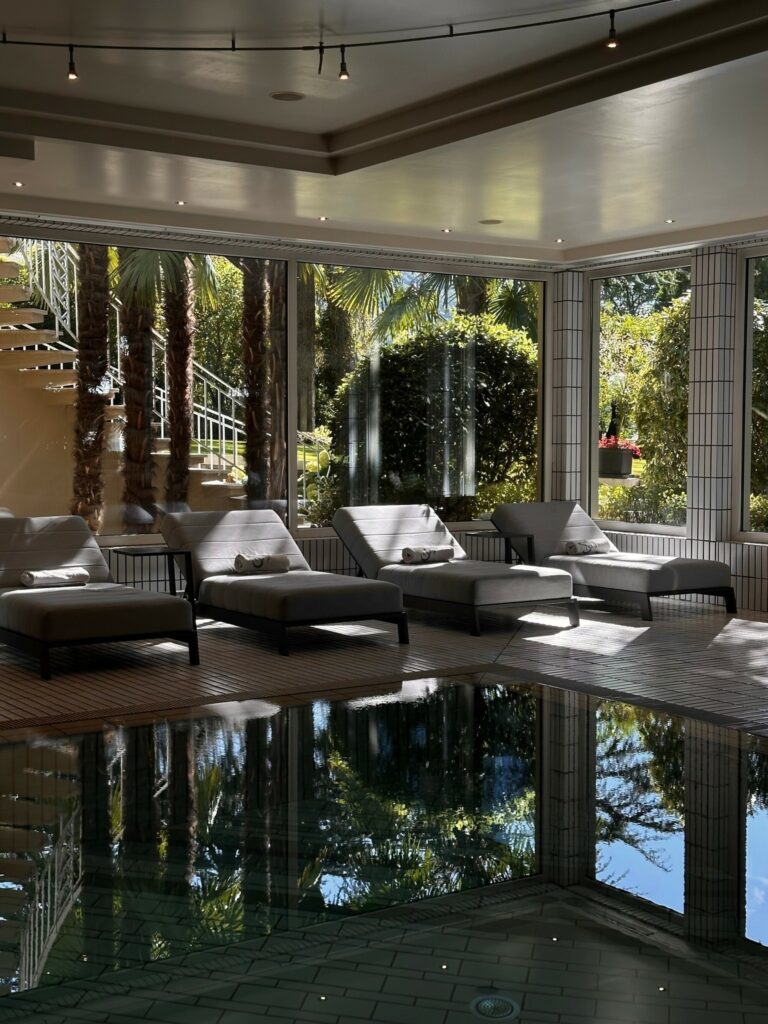
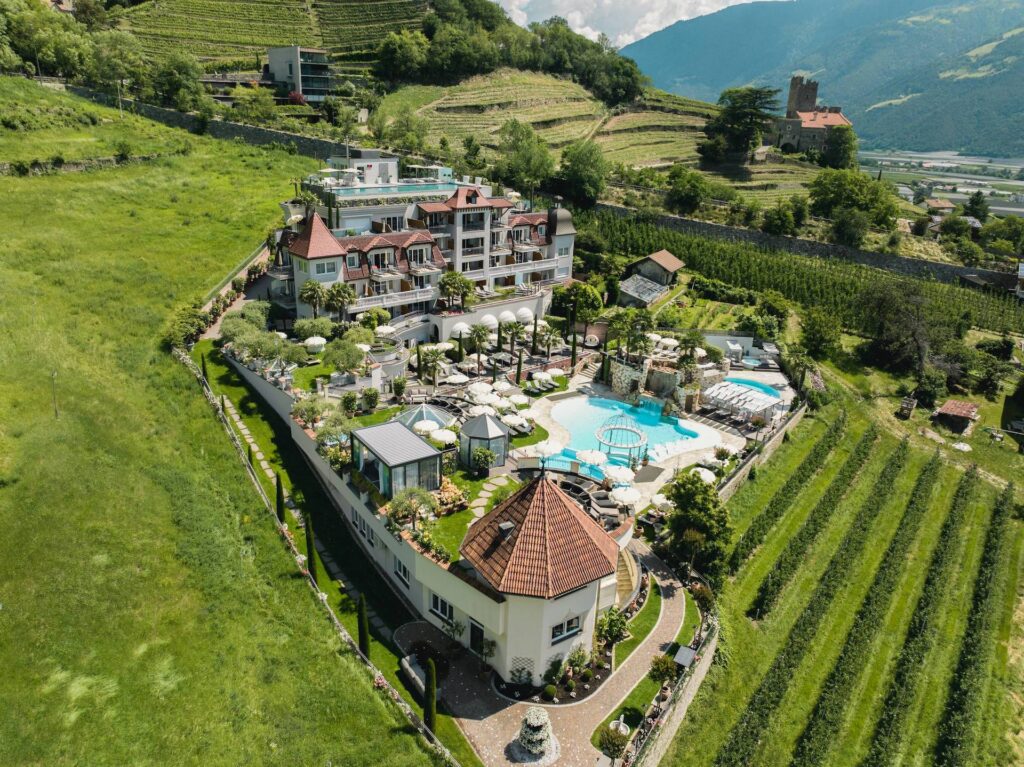
High above Merano, at the end of a winding mountain road lined with orchards and vineyards, sits Castel Fragsburg: a 17th-century hunting lodge turned five-star Relais & Châteaux hotel, and one of the most distinctive properties in the region. With just 20 suites, it is South Tyrol’s smallest luxury hotel, and the intimacy of the place is central to its appeal. The Ortner family have owned it since 1955, and it still feels more like a private estate than a commercial operation.
The wellness offering here is unlike anything else in the region. The Alchemistic Spa, which the hotel claims as the world’s first of its kind, is built around locally foraged herbs and plants, with treatments and cosmetics prepared fresh on site by the hotel’s own natural healer, Renate De Mario Gamper. She also leads guided herb-foraging hikes into the surrounding mountains, which double as an education in South Tyrolean folk medicine.
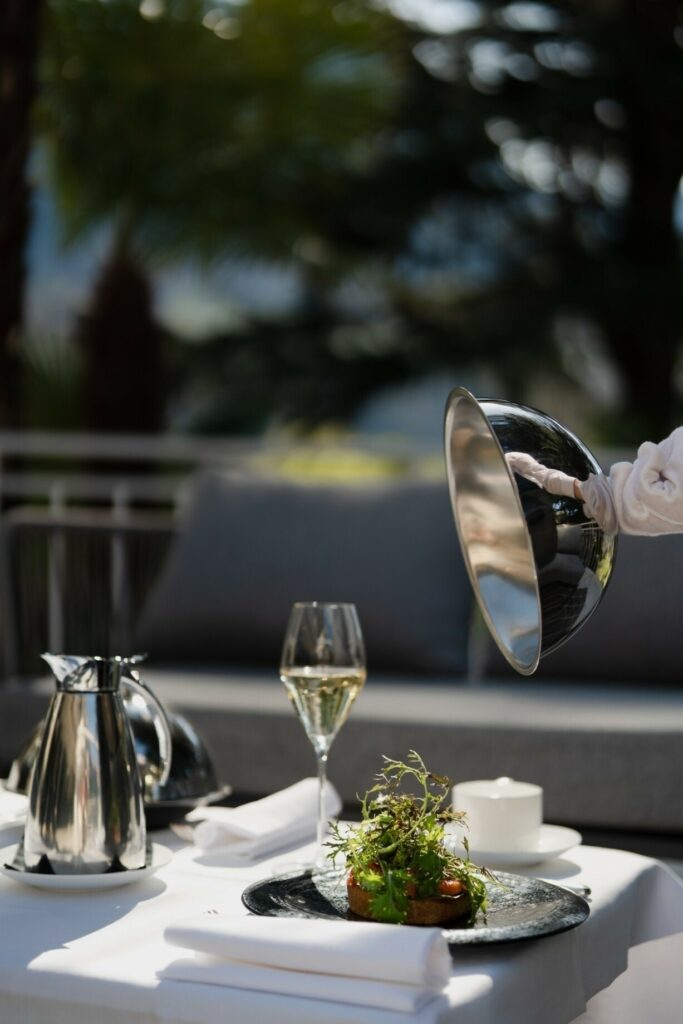
Wine is woven into the experience with equal care. The hotel offers private tastings in a 14th-century castle that sits on a nearby cliffside and now serves as the property’s events venue, and the Michelin-starred restaurant Prezioso pairs its South Tyrolean-Mediterranean cooking with wines from the surrounding region. The terrace, with its panoramic views down across the Adige valley, is the kind of spot where a glass of Gewürztraminer can hold your attention for an unreasonable amount of time.
Schloss Hotel Korb, Missiano
Ideal for tasting Tre Bicchieri wine in a WWII bunker beneath a medieval castle…
Not every hotel on this list is a five-star property, but Schloss Hotel Korb earns its place through sheer character. This medieval castle sits high above the village of Missiano in the Appiano wine-growing area, surrounded by its own working vineyard where owner Fritz Dellago cultivates 14 different grape varieties, from Pinot Blanc and Gewürztraminer to Pinot Noir and Zweigelt. The Dellago family’s Pinot Blanc, cellared by Bolzano Winery, has received the Tre Bicchieri award from Gambero Rosso, Italy’s highest wine honour.
The wine story here goes deeper than the vines. The hotel’s extensive cellar, with the finest bottles stored in a converted WWII air-raid bunker and barrique tunnels beneath the castle. Fritz Dellago leads weekly tours through these spaces, combining wine tasting with a history lesson that covers everything from medieval fortification to wartime repurposing. Concerts, readings and literary evenings are also held in the bunker, lending the whole operation a cultural weight that most hotel wine programmes lack entirely.
The spa is more modest in scale than some of its five-star neighbours, with indoor and outdoor pools, a hot tub and a solarium set against views of the Überetsch valley and the Dolomites beyond. The restaurant serves Tyrolean-Mediterranean cooking, and the castle’s own Vin Pur cosmetics line, made from grape extracts, features in every room.
As a four-star superior property, Schloss Korb sits at a lower price point than others on this list, but the experience, particularly for anyone with a genuine interest in wine, is comparable.
Villa Eden, Merano
Ideal for arriving with a suitcase and leaving with a personalised health plan…
Villa Eden takes a different approach to wellness than most South Tyrolean spa hotels. This adults-only retreat in Merano positions itself as a destination for longevity and medical wellbeing, with an optional week-long programme that begins with a full medical check-up on arrival and ends with a personalised health plan to take home. The treatments, overseen by medical professionals, span detoxification, fitness optimisation and mental balance, making this as much a clinic as a hotel.
The wine connection is direct and familial: the Schmid family, who own Villa Eden, also own Castello Rametz, one of Merano’s most established wine estates, located just a few steps from the hotel. Guests can visit for guided tours of the historic stone cellars, the wine museum and the vineyards, with tastings led by a member of the family.
The wines also feature at the hotel’s Tasting Room restaurant, where the focus is on healthy gourmet cuisine prepared with high-quality local ingredients. Villa Eden believes in the harmony of indulgence and health – it’s all about finding balance and delight in life’s simplest joy, they say. Savouring a carefully curated and healthy dish paired with a glass of fine wine so you can enjoy the best of both worlds – yep that’s joyful.
The property itself is set within a centuries-old park on the outskirts of Merano, with mature trees, manicured gardens and a Longevity Spa offering an extensive menu of face, body and mind treatments. The suites are spacious and design-led, with south-facing balconies overlooking the park and the Adige valley. It’s a place that takes itself seriously, and asks its guests to do the same.
For those looking to combine a South Tyrolean wine-country escape with a genuine investment in their health, Villa Eden is the most focused option in the region.
Ideal for a six-storey sauna tower, 16 ways to sweat and a view of the Vinschgau from the top…
A short drive west of Merano, in the town of Naturns at the entrance to the Vinschgau valley, Preidlhof is an adults-only resort that has built a reputation as one of Europe’s most decorated wellness destinations. It holds the distinction of being the world’s first spa property to receive ISO 17679 certification for wellness and spa services, and the Ladurner family, who founded the hotel in 1966, now have three generations involved in running it.
The spa facilities are extensive. Multiple pools, whirlpools, a Mediterranean wellness garden with palms and cypresses, and a six-storey sauna tower that rises above the surrounding orchards and vineyards, housing 16 distinct steam, sauna and relaxation experiences. That tower includes sauna rooms themed around wine cellar ambience and olive groves, and features 12,500 LED elements in its Deep Sea Room for a sensory relaxation experience.
Beyond the standard spa offering, Preidlhof runs year-round Transformational Wellness Retreats covering stress relief, digital detox, weight management and trauma healing, combining modern science with traditional modalities.
The wine-country setting is immediately apparent. Naturns sits on the Adige valley floor, flanked by orchards and vineyards, with the Texel Group Nature Park rising directly behind the hotel. The restaurant makes full use of this geography, and the wine list draws heavily on South Tyrolean producers. The Ladurners’ approach to hospitality is warm and personal in a way that feels characteristically South Tyrolean: professional without being corporate, attentive without being intrusive.
The Bottom Line
South Tyrol’s particular alchemy of Alpine landscape, Mediterranean climate and world-class viticulture makes it one of Europe’s most compelling destinations for a combined wine-and-wellness break.
Whether you’re drawn to a vineyard resort on the Wine Road, a medieval castle with its own cellar, or a medical retreat backed by one of the region’s oldest wine estates, the options here are varied enough to match most definitions of luxury. The common thread is a deep connection to the land: the same terroir that produces the wines also shapes the spa treatments, the cuisine and the views from your balcony. And you did say you were seeking something holistic, didn’t you?
While the leafy streets of Dulwich might be better known for their pristine parks and the Dulwich Picture Gallery (Britain’s oldest public art gallery, no less), the area’s food scene has been quietly evolving into something special.
With three stations (North, East and West Dulwich) serving the area, you’re never more than a short walk from your next memorable meal, whether that’s a Georgian feast with wine from clay vessels, satisfying, sprawling pizza, or modern Indian cooking that’s earning widespread acclaim. With that in mind, here’s our pick of the best places to eat in Dulwich.
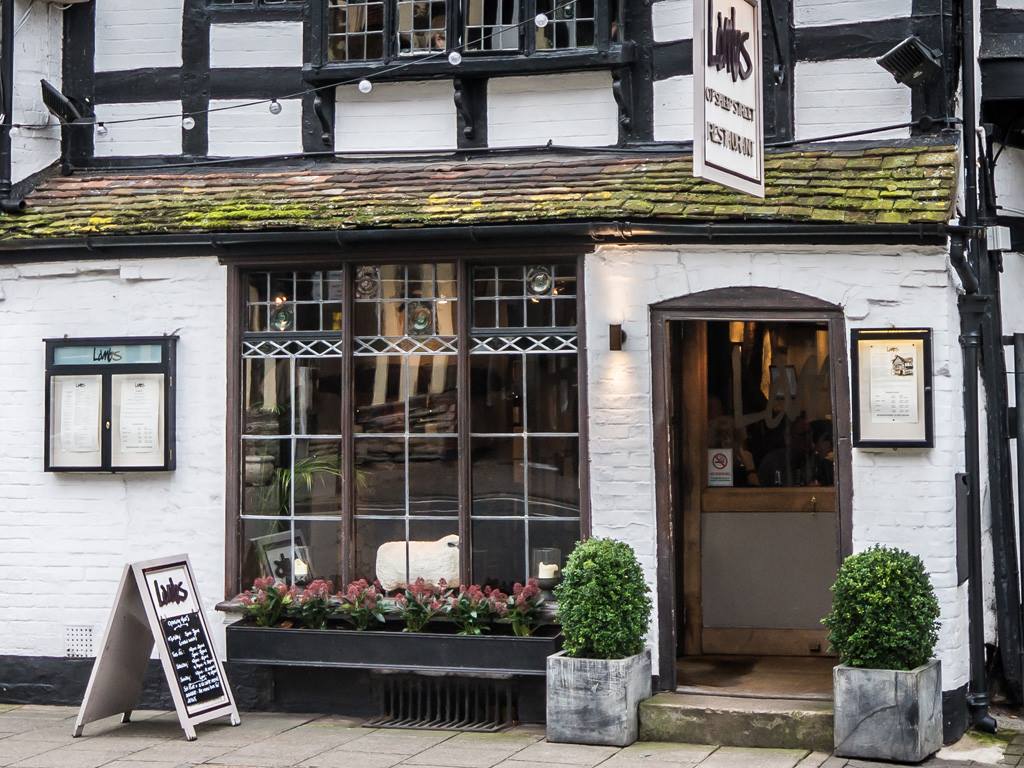
Kartuli, Lordship Lane
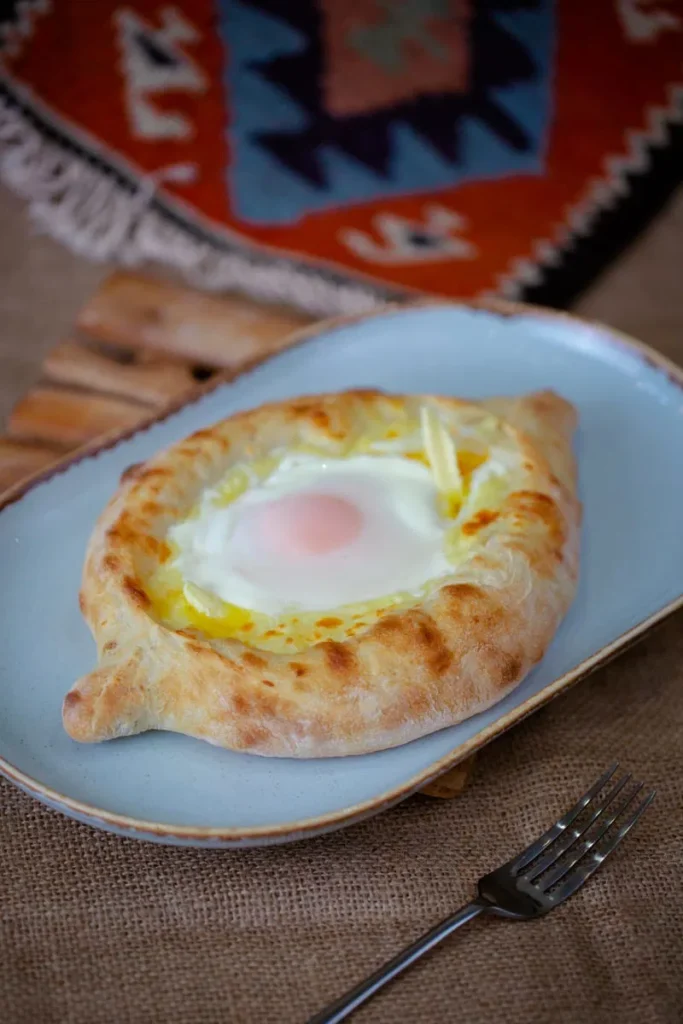
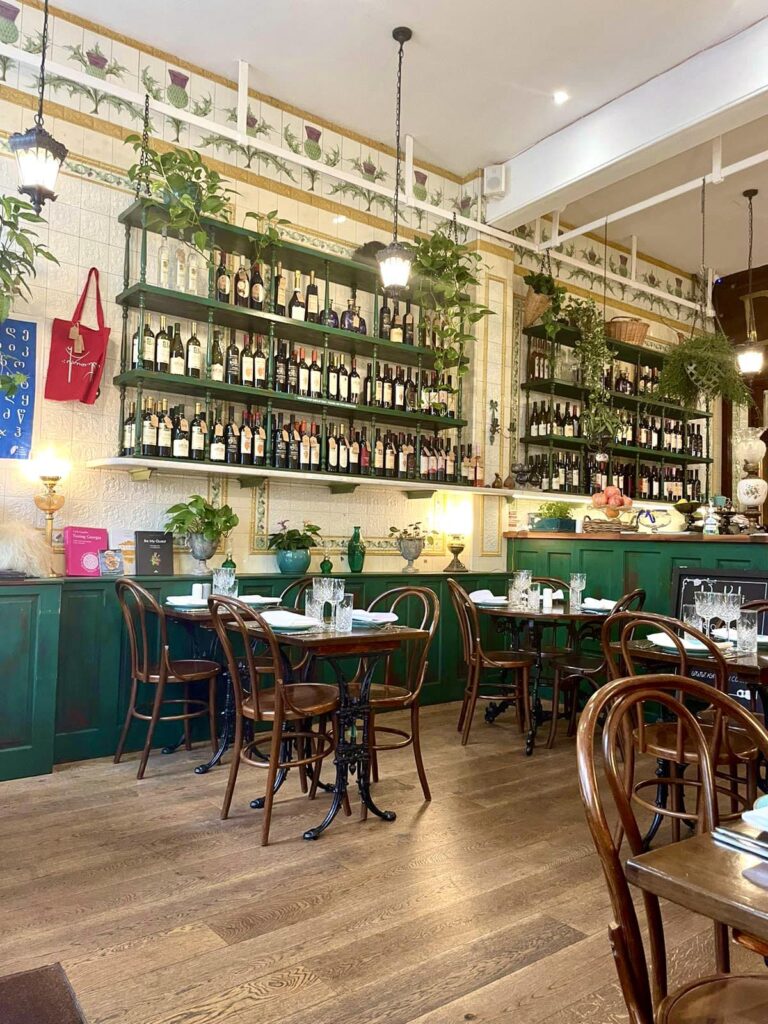
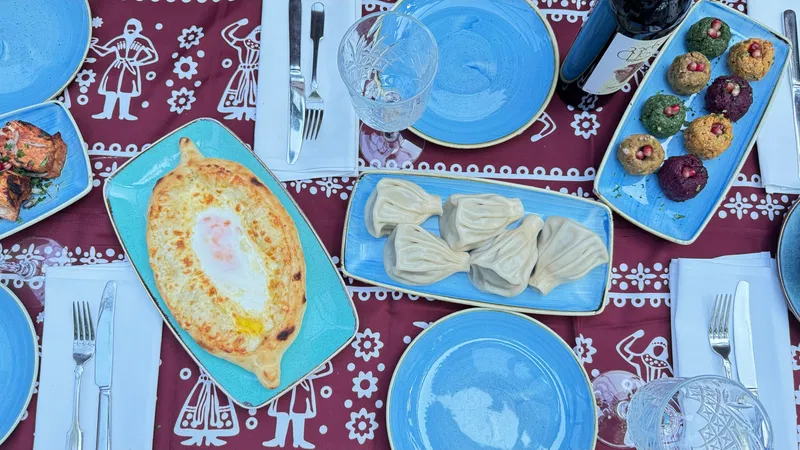
Ideal for discovering the comforting flavours of Georgian cuisine and wines from the cradle of winemaking…
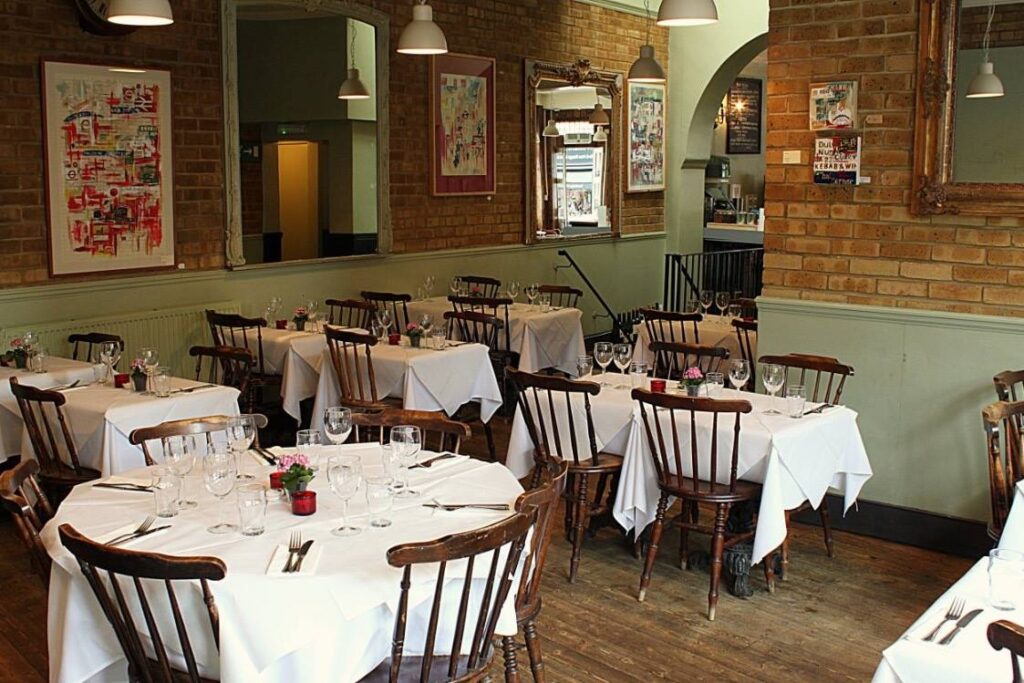
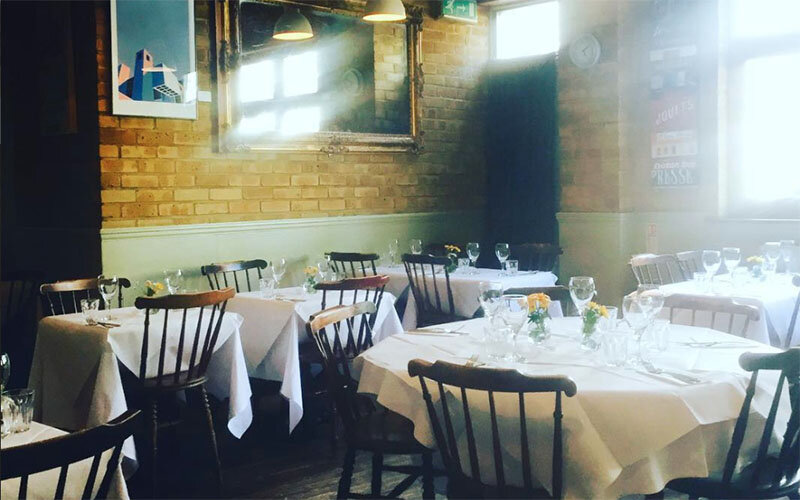
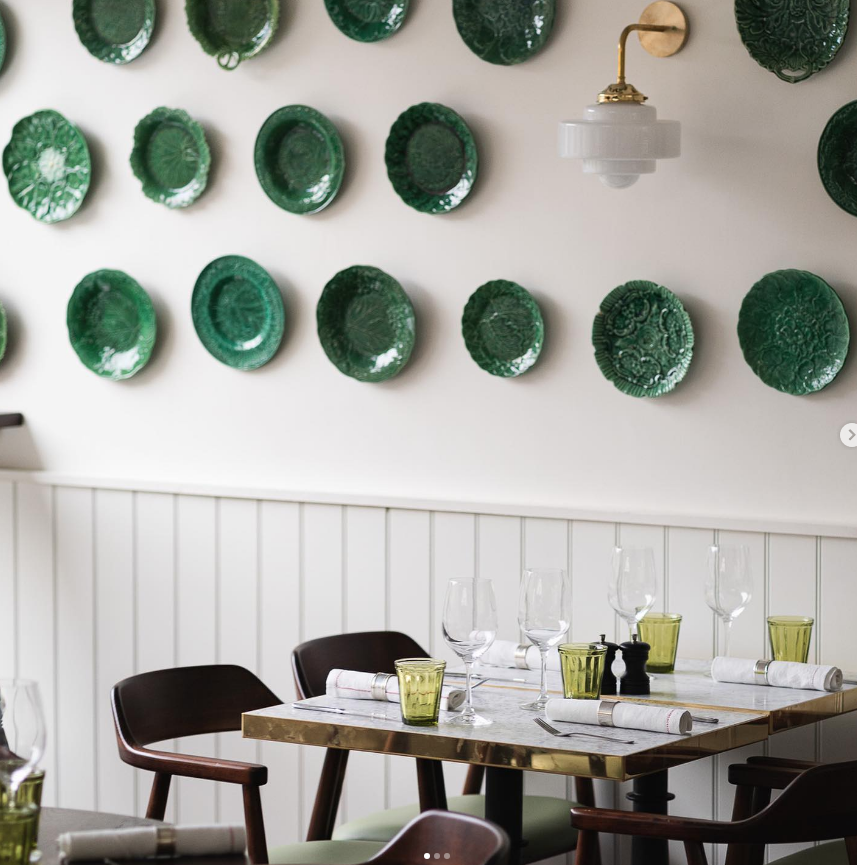
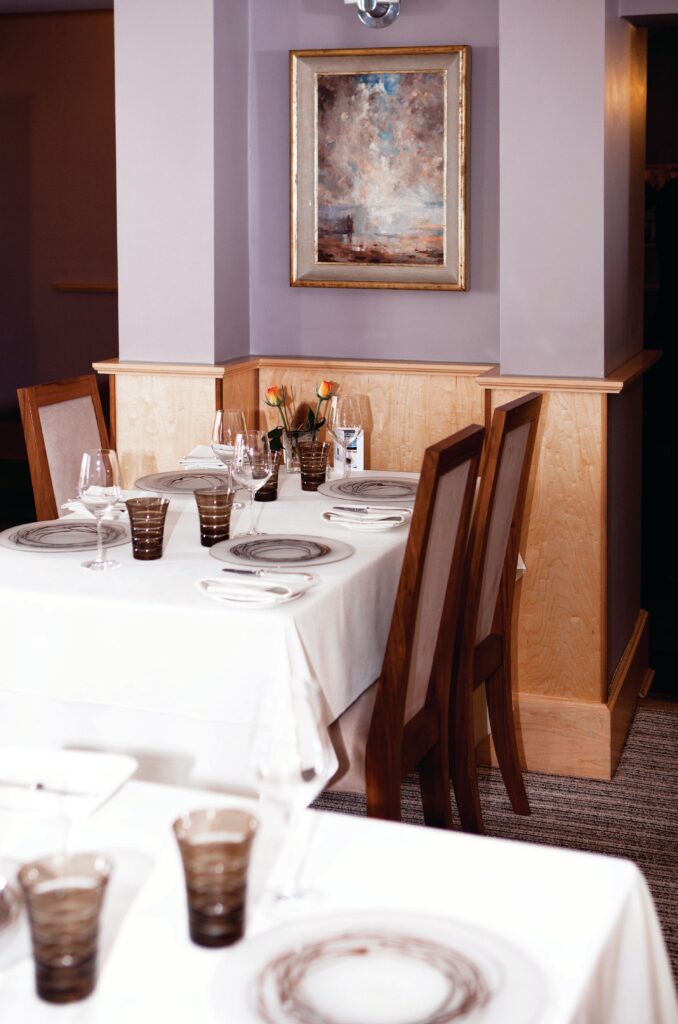
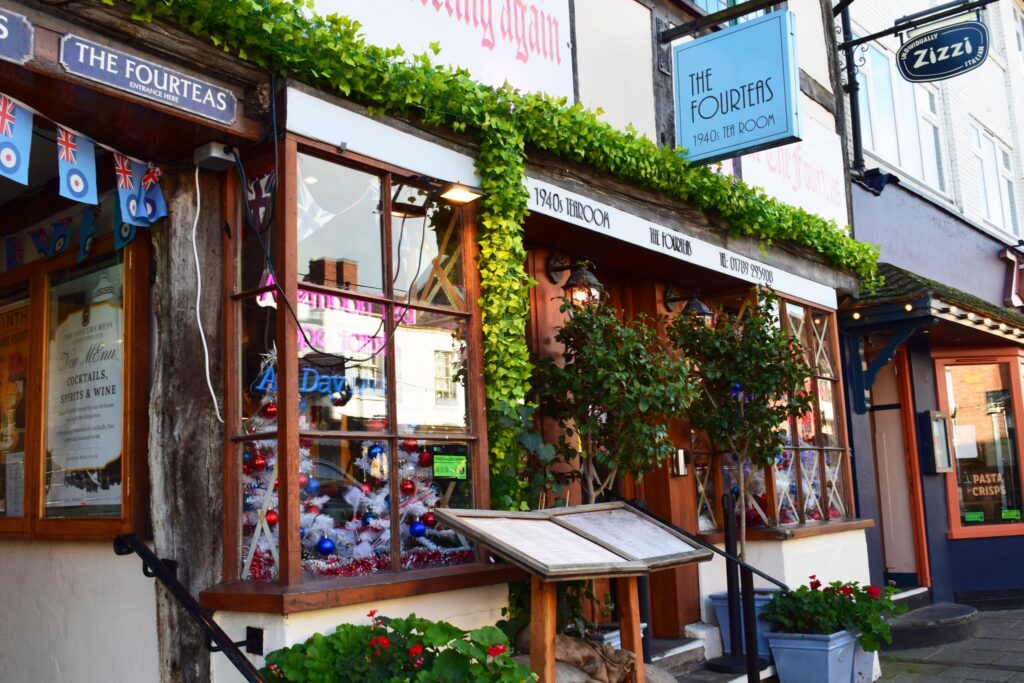
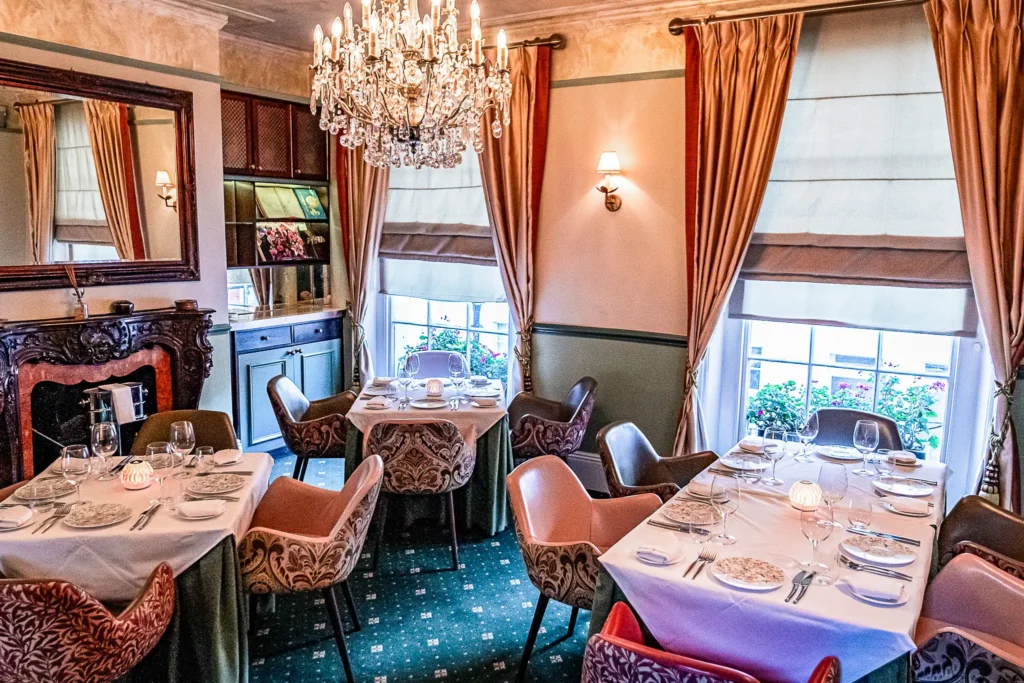
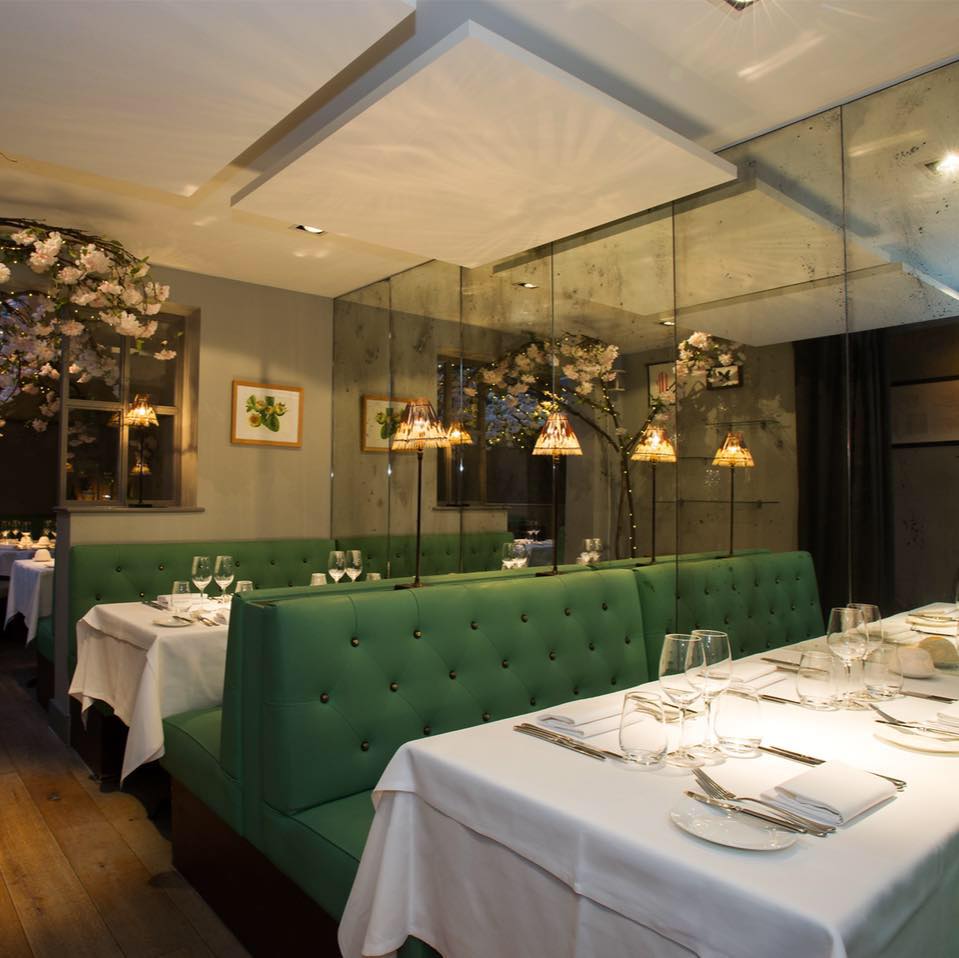
Behind a striking emerald-green shopfront adorned with hanging baskets and Georgian bunting, Kartuli brings a slice of Tbilisi to East Dulwich. Housed in the historic David Greig building, the dining room marries bentwood chairs and warm wooden surfaces with trailing plants and a spectacular wall of Georgian wines – it’s the kind of place that makes you want to settle in for the long haul.
The menu reads like a love letter to Georgian cuisine. Start with badrijani – tender fried aubergine rolls filled with a ground walnut, garlic and spice paste – or their exemplary pkhali selection, where spinach, beetroot, carrot and beans are transformed through grinding with walnuts and aromatic spices. The legendary khachapuri (cheese-filled breads) come in several regional varieties, but it’s the Acharuli version that draws gasps: a boat-shaped bread filled with molten cheese, topped with an egg and butter that you stir together to create what might be the world’s most indulgent dip.
Main courses showcase Georgia’s mastery of slow cooking – the chakapuli (lamb shank fragrant with tarragon, spring onions and Rkatsiteli white wine) is soul-warming, while their shkmeruli (roasted poussin in garlic cream) shows how elevated ‘simple’ dishes can be. Vegetarians are particularly well-served; the lobio (pinto beans rich with herbs, fresh chillies and spices) is served with fermented vegetables and puts most meat dishes to shame.
The wine list is, quite simply, one of the most exciting in London. Georgia, widely considered the birthplace of wine, is represented in all its amber-hued glory. Start with their ‘First Time Taster’ flight, which includes a qvevri-made amber wine that will change how you think about white wine. Their Saperavi reds are powerful yet elegant, while their standout Shumi Qvevri sparkling wine offers a fascinating Georgian take on traditional method bubbles, made with 70% Chinebuli and 30% Mtsvane grapes.
End with their honey cake (layers of honey-infused sponge filled with caramel cream) or, better yet, the intriguing Pelamushi – a traditional dessert of Kindzmarauli wine and grape juice, served with roasted walnuts. A shot of chacha (Georgian grape brandy) provides the traditional finale.
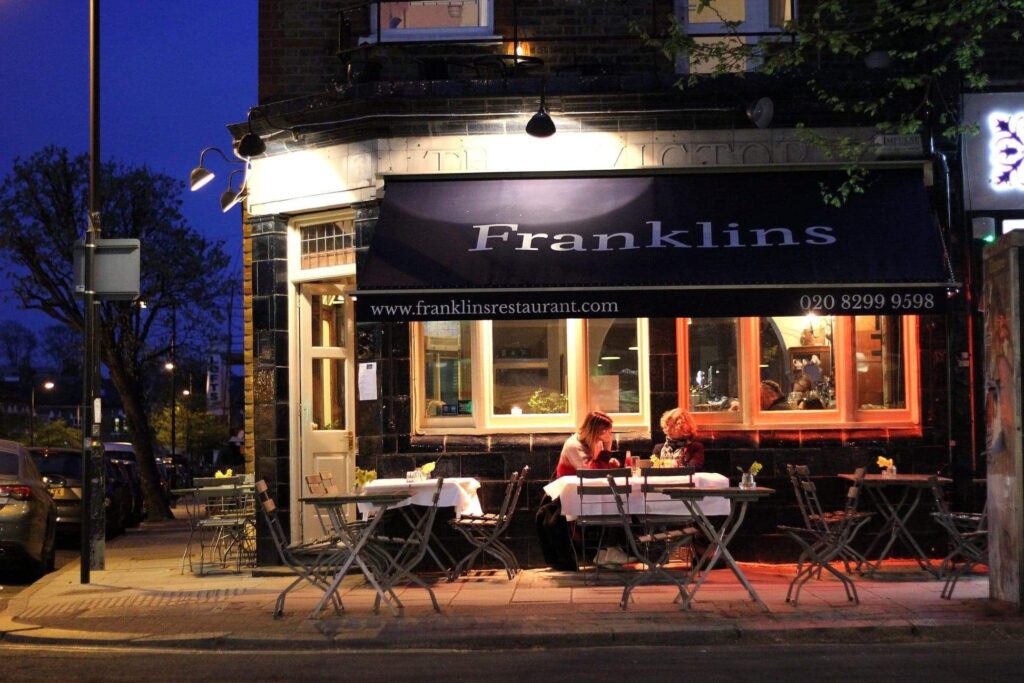
Ideal for seasonal British cooking that lets the ingredients sing…
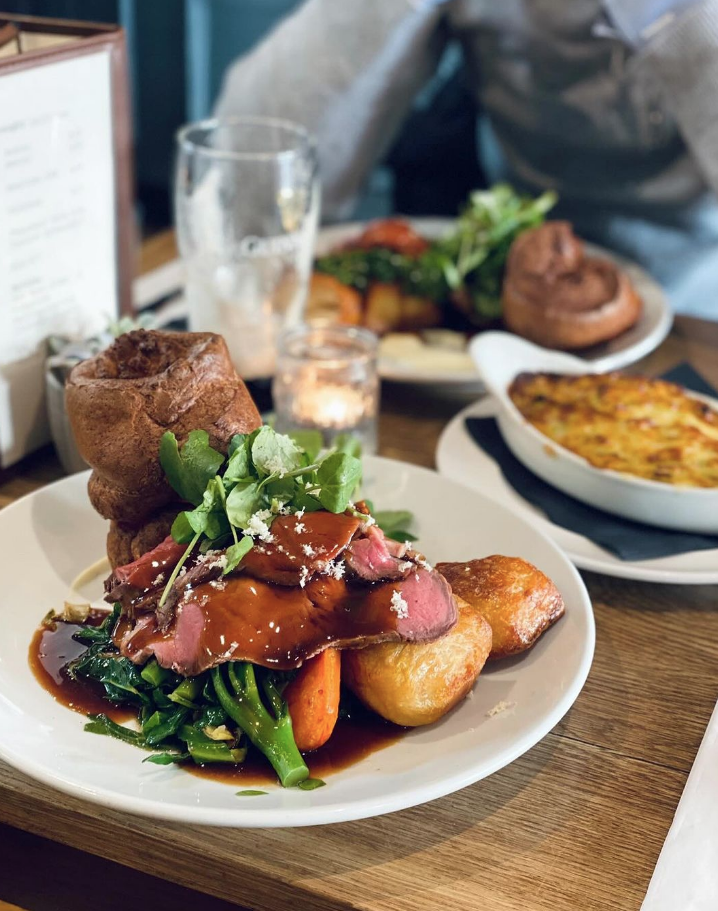
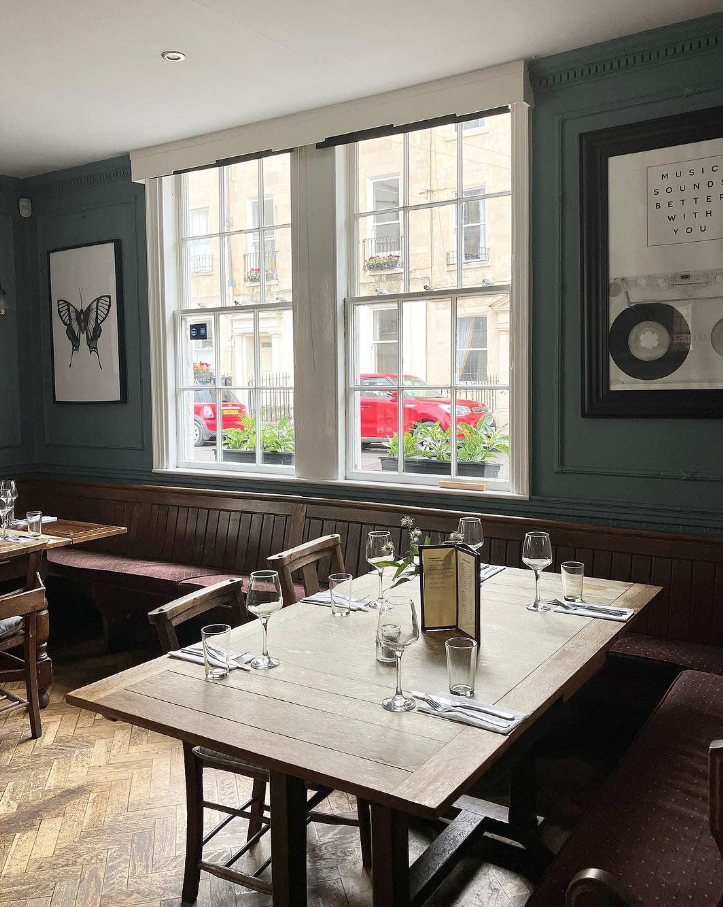
A quarter-century into its tenure on Lordship Lane, Franklins remains exactly what you want from a neighbourhood restaurant – unfussy yet special, with a daily-changing menu that reads like a greatest hits of British cooking. As Jay Rayner put it (some 21 years ago, admittedly), it’s “West End style without the hype.”
The farm shop next door may have closed, but its spirit lives on in the restaurant’s devotion to excellent produce. The menu shifts with the seasons and market availability – on any given day you might find clear venison soup with chive pancakes to start, followed by ox heart with chicory and chorizo, or cod with beetroot and tarragon yoghurt. The kitchen shows particular flair with game during season, and their generous Barnsley chops have achieved near-mythical status among locals.
There’s real value to be found in their set lunch menu (£21.95 for two courses, £24.95 for three), while the evening a la carte delivers proper cooking at prices that remain remarkably fair for the quality.
The wine list is equally thoughtful and fairly priced, with interesting guest wines by the glass, while the puddings – think quince crumble with custard or chocolate and hazelnut parfait with red wine pear – make lingering essential. Their selection of after-dinner armagnacs and cognacs, including some remarkable aged examples, provides a final flourish.
Price: Starters £9-13, mains £18.95-29.50, set lunch menu £21.95/£24.95
Opening hours: Mon-Sat 12pm-12am, Sun 12pm-10:30pm
Book ahead: Essential for Sunday lunch, advisable other times
Ideal for contemporary Greek cooking that values substance over stereotypes…
There’s not a smashed plate or bouzouki in sight at Evi’s, and that’s exactly the point. This compact North Cross Road spot – from Evi Peroulaki and Conor Mills, who earned their stripes running the much-loved Souvlaki Street stall – delivers Greek food that’s both authentic and excitingly contemporary.
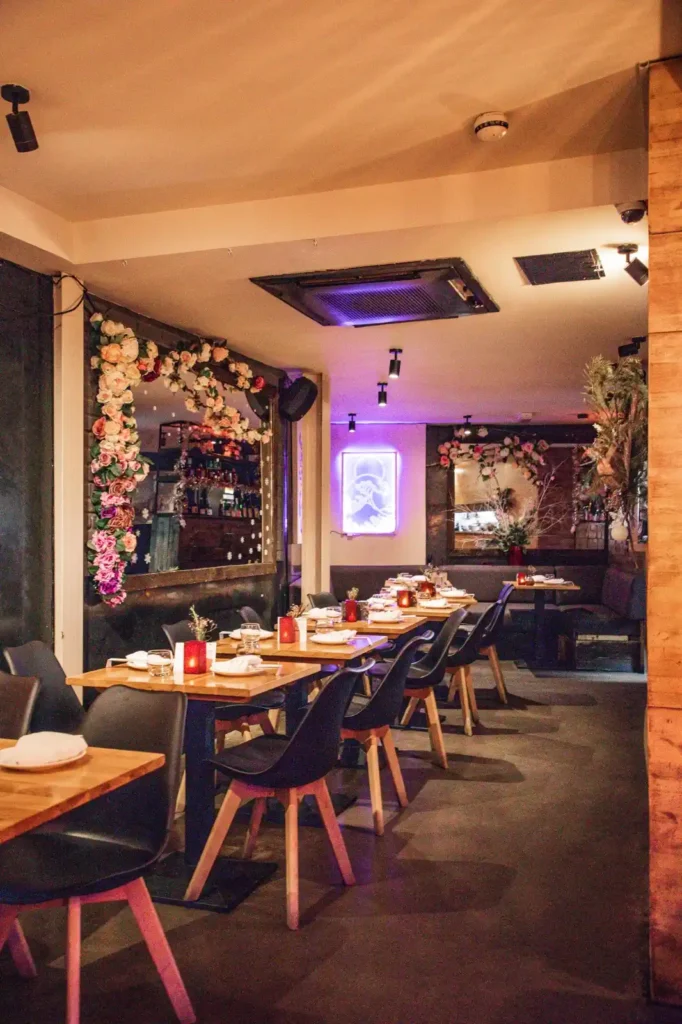
The narrow space, with its navy blue booths and whitewashed walls, offers just enough Hellenic hints without falling into taverna cliché, while the perspex-sheltered garden is a suntrap perfect for long weekend lunches. But it’s the cooking that makes this place special – elegantly rugged dishes that showcase just what happens when you spend years perfecting your craft in London’s street food scene.
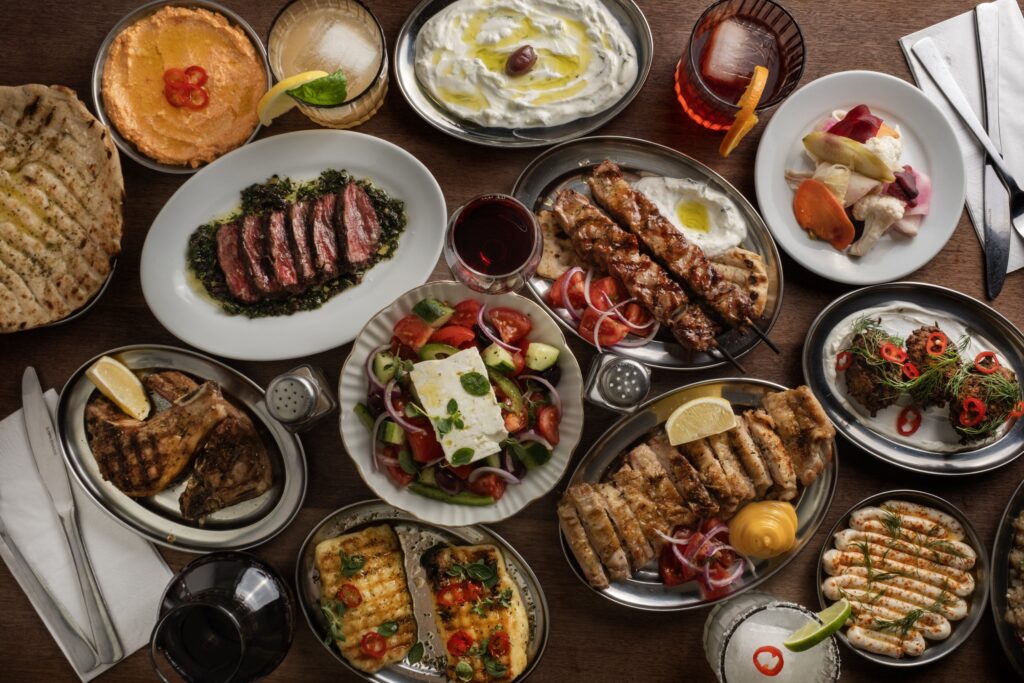
Their famous pork souvlaki, made with premium Tamworth collar, shows how elevating ‘simple’ street food can be, while the tzatziki and melitzanosalata (smoky aubergine dip scattered with walnuts and pomegranate) have the vivid freshness you’d expect from something made minutes ago. The courgette fritters are a must-order, arriving as golden-crisp boulders with dill-flecked centers and cooling sumac yoghurt.
The drinks list is ace, too – think all-Greek wines and house-made sodas spiked with cucumber and lime. Don’t expect coffee or dessert (a conscious choice given the space), but do expect some of the most exciting Greek cooking in London.
Ideal for contemporary Japanese cooking with serious sushi credentials…
From the team behind Clapham’s much-loved Tsunami comes this sophisticated spot that’s been serving some of South London’s best Japanese cuisine since opening over a decade ago. The dining room strikes a perfect balance between sleek and welcoming, with the sushi counter providing dinner theatre for those lucky enough to grab a seat there.
The menu covers impressive ground without losing focus. Start with yellowtail hamachi with jalapeño and ponzu or their exemplary salt and chilli squid, before moving onto their selection of precisely crafted nigiri and sashimi – the scallop is a particular highlight. Their ‘special’ rolls show real creativity; the soft shell crab version, wrapped in tempura and served with avocado and spring onion, is lightness in batter form, and after the initial satisfying crunch, disappears on the palate.
For those seeking something more substantial, the black cod marinated in sweet miso is worth its £29.50 price tag, while the Scottish Angus rib-eye comes three ways: straight-up teriyaki, ‘dynamite’ style with chilli sauce, or with exotic mushrooms and truffle. Their bao buns – try the pork belly with truffle mayo or Korean fried cauliflower – make perfect drinking food alongside their selection of Japanese beers and sake.
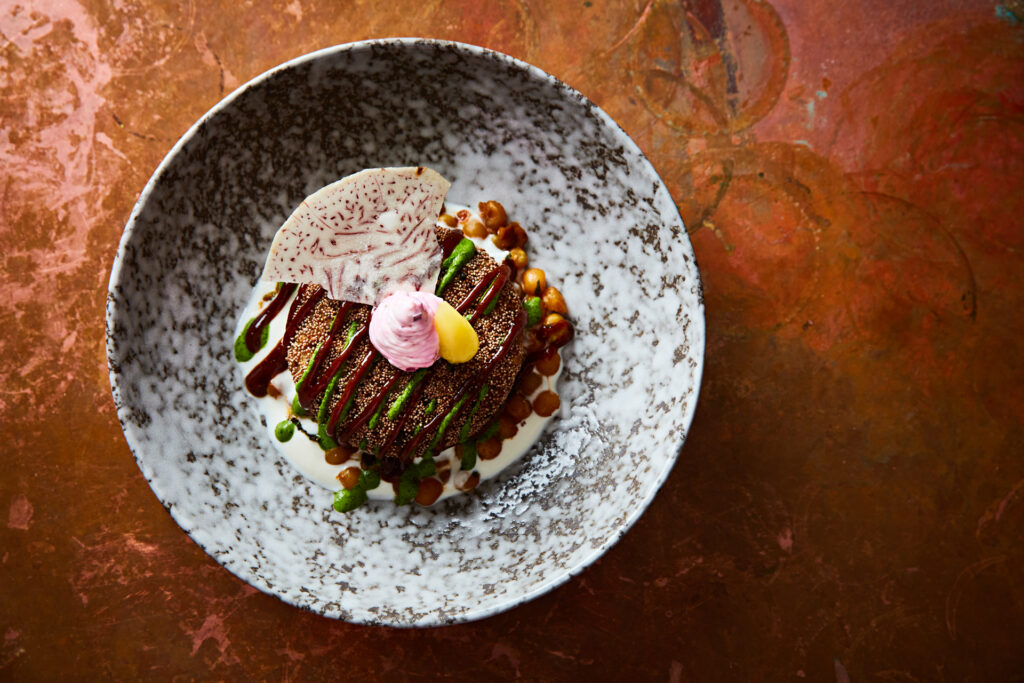
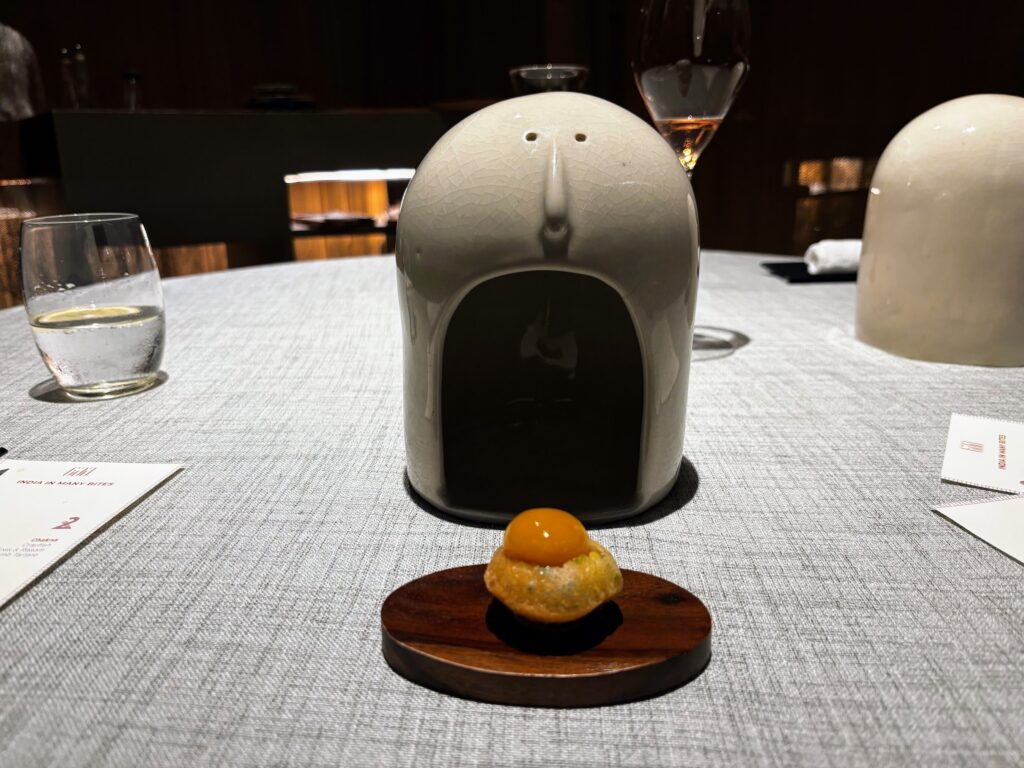
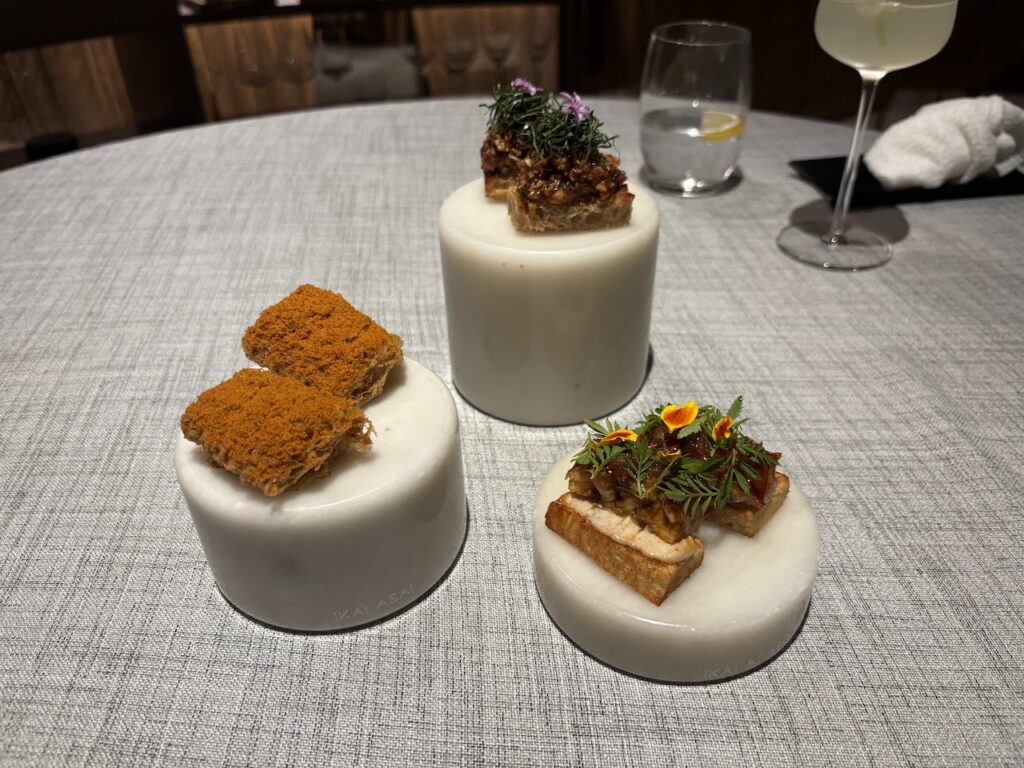
Ideal for sophisticated Indian cooking that honors tradition while embracing modernity…
In a smart suburban parade on Rosendale Road, Heritage – Dulwich’s only Michelin-recognised restaurant – is quietly reinventing Indian fine dining in South London. Chef Dayashankar Sharma, who has led many of London’s finest Indian kitchens over three decades, now cooks alongside his son Anmol, creating dishes that are both reverent to tradition and thrillingly contemporary.
The menu reads like a masterclass in balancing heritage and innovation. Start with old Delhi papdi chaat – wheat crisps topped with sweet potato and pomegranate – or venture into more ambitious territory with the venison badal jaam, where wild venison meets spiced aubergine and tomato. The tandoor section showcases technical precision: Heritage lamb chops are given the royal treatment with black cardamom and raw papaya, while king prawns come alive with Bengali shatkora citrus.
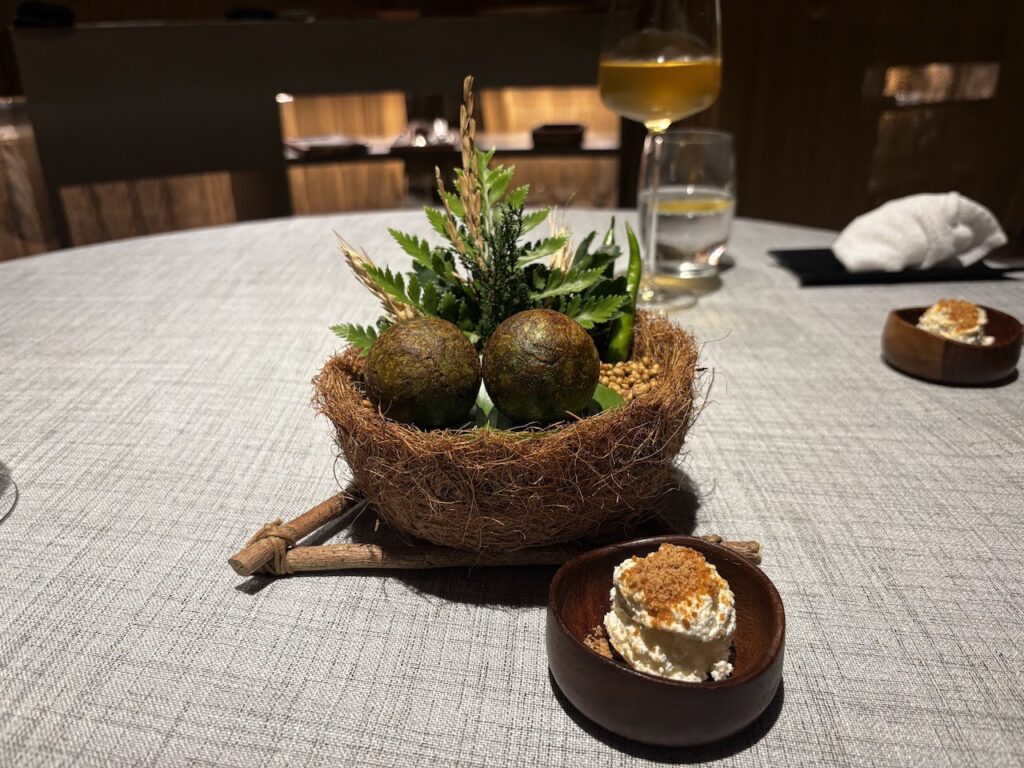
Mains strike a perfect balance between comfort and refinement – the rogani nalli gosht (lamb shank with black cardamom) is pure indulgence, while the Kashmiri lamb shows real respect for regional recipes. Their weekend thali lunch (£19.99) might be the best value fine dining in South London. For the full experience, opt for one of their tasting menus – the 7-course feast (£68) with matched wines (£40) shows particular ambition, moving from rabbit kebab with radish yogurt through to tandoor-grilled pineapple with salted caramel ice cream.
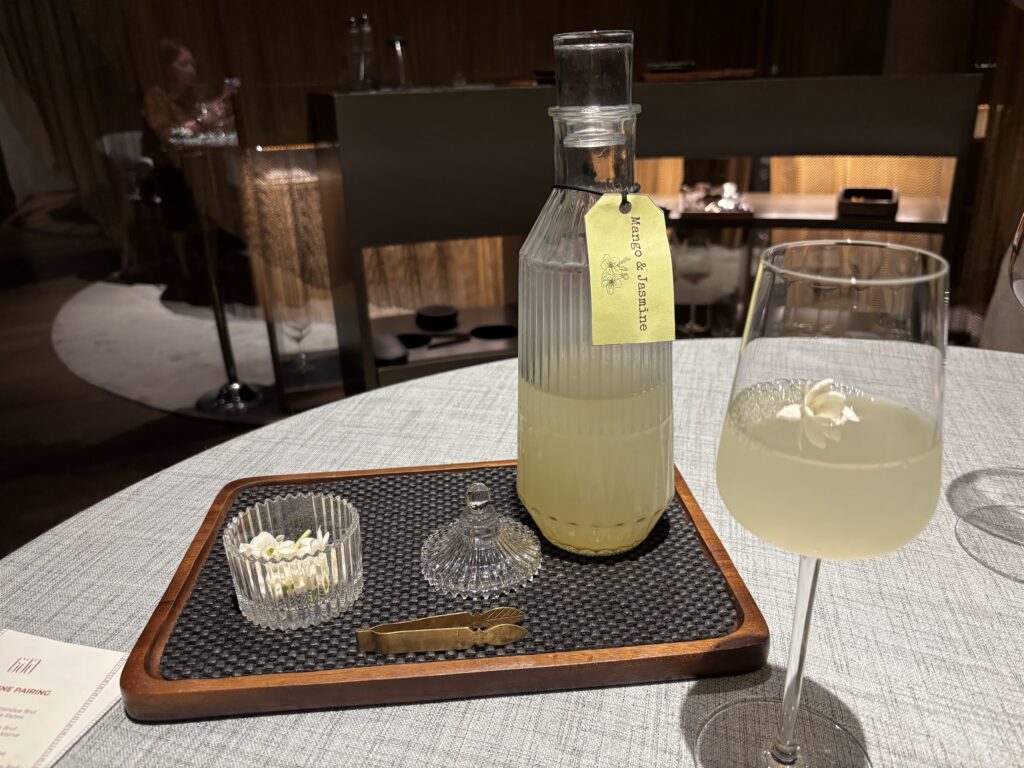
The wine list shows real thought, with interesting pairings like Grüner Veltliner with scallop moilee, while the cocktail menu plays with Indian flavors – try the Rajwara Old Fashioned, where cardamom-infused bourbon meets bay leaf and bitters.
Price: Small plates £8-12, mains £12-23, tasting menus £52/£68
Opening hours: Mon–Fri 5:30pm–10:30pm, Sat 12pm–2:30pm & 5:30pm–10:30pm, Sun 12pm–2:30pm & 5:30pm–9pm
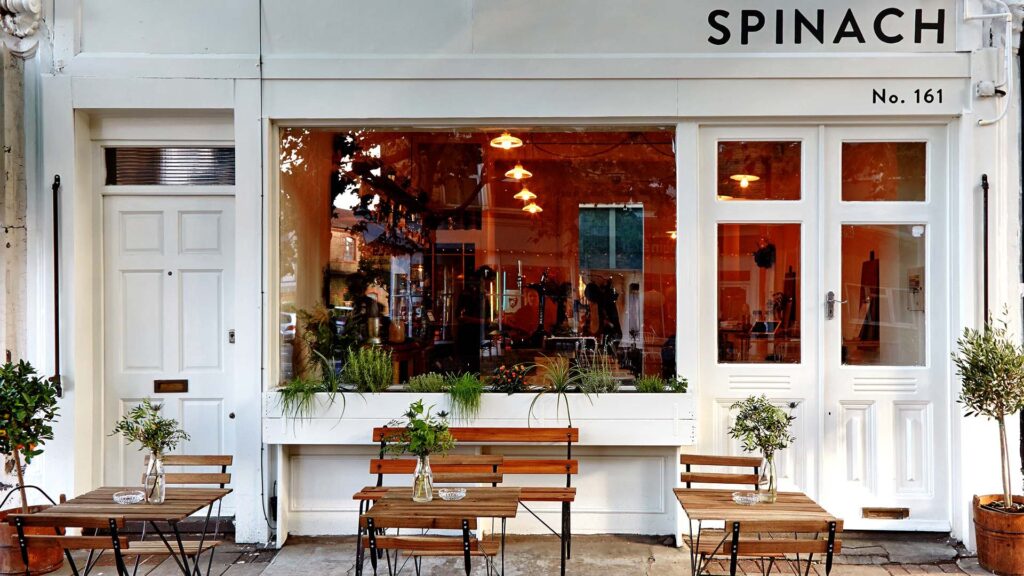
Ideal for creative all-day dining with a plant-forward focus…
Behind the charming white-painted frontage of this East Dulwich stalwart, complete with wooden benches and window boxes spilling with herbs, Spinach has been quietly revolutionizing neighborhood dining since 2013. Founded by Melissa Harwood, who you’ll still find between here and their sister site most days, it’s the kind of place that makes you wish all local restaurants could be this good.
The daytime menu sings with creative brunch dishes that work whether you’re virtuous or hungover. Their sweet potato shakshuka – two perfectly poached eggs swimming in a sauce livened up with cheddar, pickled onions and sriracha butter – has achieved cult status, while their brioche French toast with black forest compote offers indulgence done right. The ‘Oooh go on then’ section of add-ons (from £2-£6) lets you customise to your heart’s content.
Their cocktails are well-crafted and fairly priced – the English Garden (£10), with gin, elderflower, cucumber and mint, is summer in a glass. Sustainability is a key driver of the whole vibe here too, from careful menu planning to reduce waste to a commitment to local suppliers – the sourdough comes from nearby Blackbird Bakery, while William Rose provides the meat.
Price: Brunch and lunch £8-14
Opening hours: Mon-Thu, and Sun 8am-5pm, Fri-Sat 8am-7pm
Book ahead: Yes for weekend brunch and Thursday-Saturday dinner
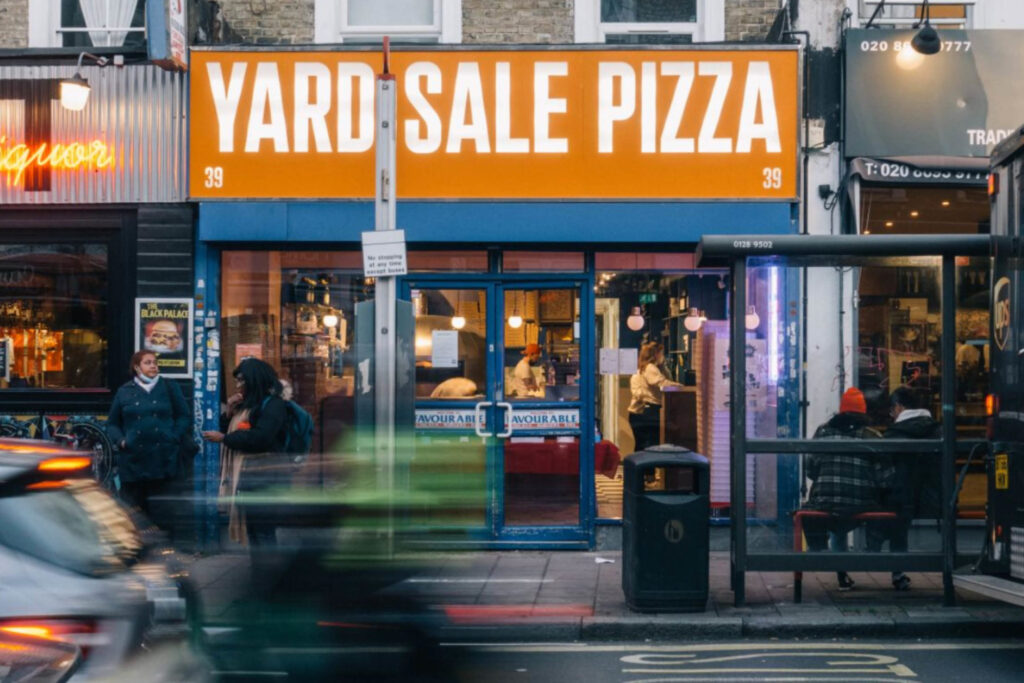
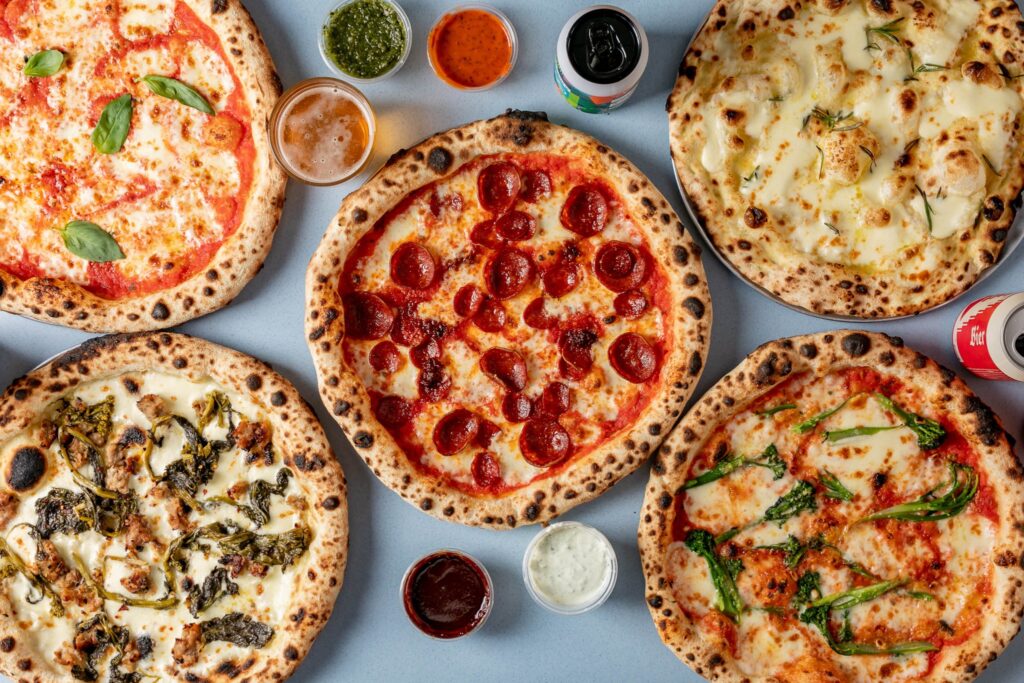
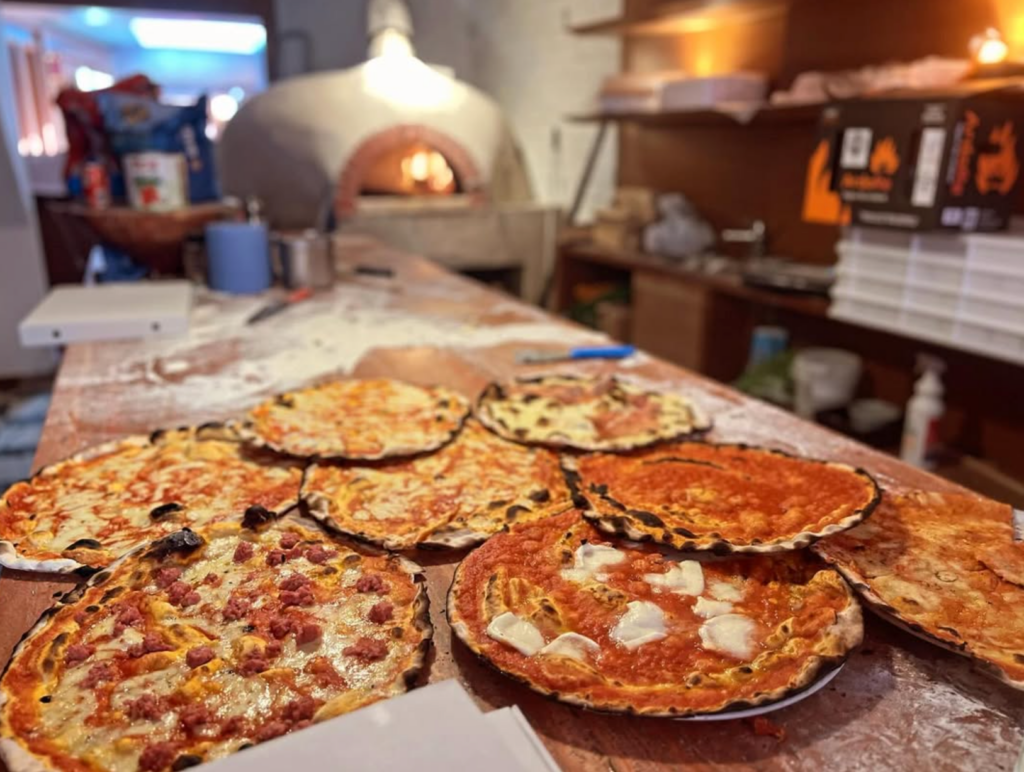
Ideal for properly good pizza that doesn’t take itself too seriously…
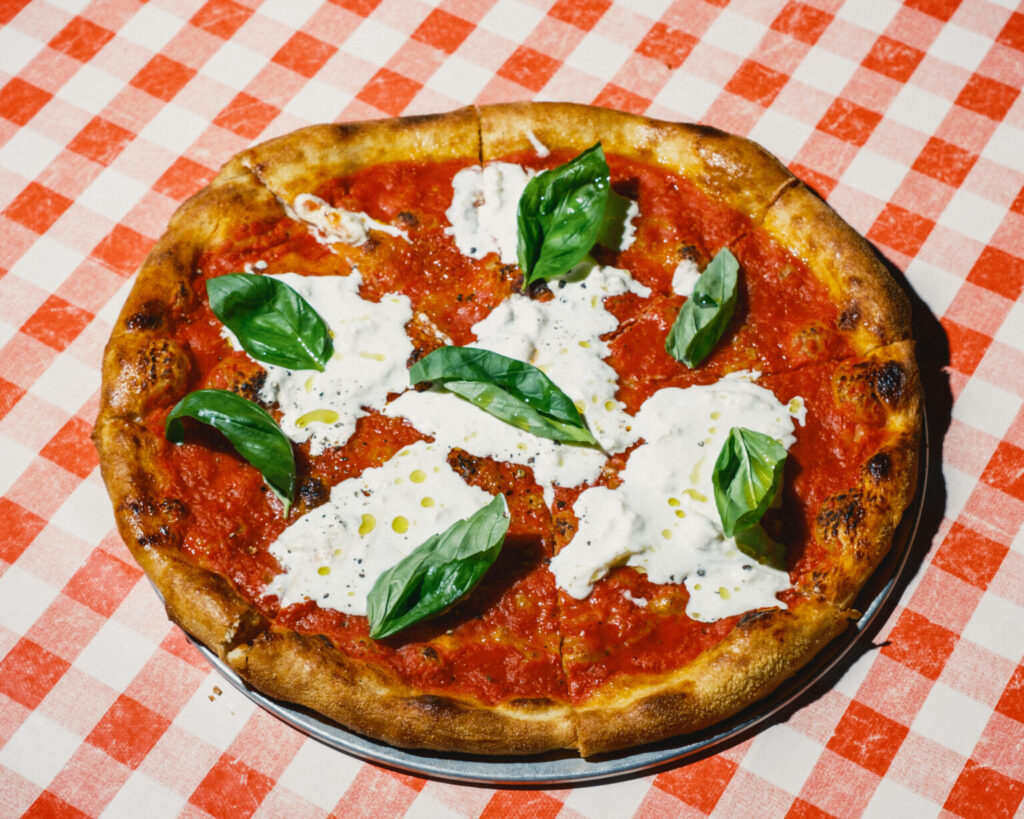
Behind the distinctive orange and blue shopfront, Yard Sale has been quietly revolutionising London’s pizza game for some time now. The Lordship Lane outpost (the operation’s sixth) might be compact, with just a handful of seats, but that’s hardly the point – this is a pizza joint that knows exactly what it’s doing.
Each pizza starts with their signature slow-cooked tomato sauce and carefully sourced fior di latte mozzarella. The ‘TSB’ (tender stem broccoli with parmesan, pine nuts and garlic) has achieved cult status, while the ‘Holy Pepperoni’ – loaded with regular pepperoni, smokey gyula pepperoni and nduja – shows they’re not afraid of excess. For the truly committed, there’s the ‘Unholy Pepperoni’, which doubles down on everything and adds hot honey.
The menu plays with tradition without losing the plot – their vegan options aren’t afterthoughts (try the Texas VBQ with THIS™ plant-based chicken), and there’s a knowing wink in dishes like ‘Guindillas in the Mist’. Pro tip: the 18-inch pizzas are better value than two 12-inch ones, perfect for sharing or ambitious solo dining.
They’ve thought of everything: truffle mayo for crust dipping, the Ribman’s famous Holy F*ck sauce for heat seekers, and even marmite and cheese garlic bread for the umami-heads.
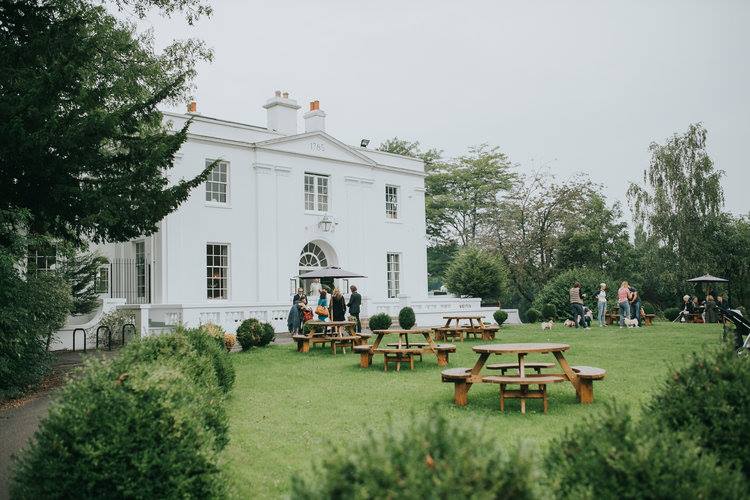
Ideal for special occasion dining in a Grade II-listed Georgian mansion…
Behind the grand columns of Dulwich’s most imposing mansion, No. 5 at Belair House delivers a dining experience that matches its setting. The restaurant balances special occasion glamour with neighborhood warmth, serving modern British cuisine across several menus that change with the seasons.
Their brunch game is particularly strong – the breakfast waffle topped with crispy bacon, poached eggs and hollandaise shows their knack for elevated comfort food, while their lamb kofta with yogurt and mint dip proves they can handle more substantial fare. The afternoon tea (£22, or £29 with prosecco) needs pre-ordering but delivers the full works: finger sandwiches, fresh scones and petit fours.
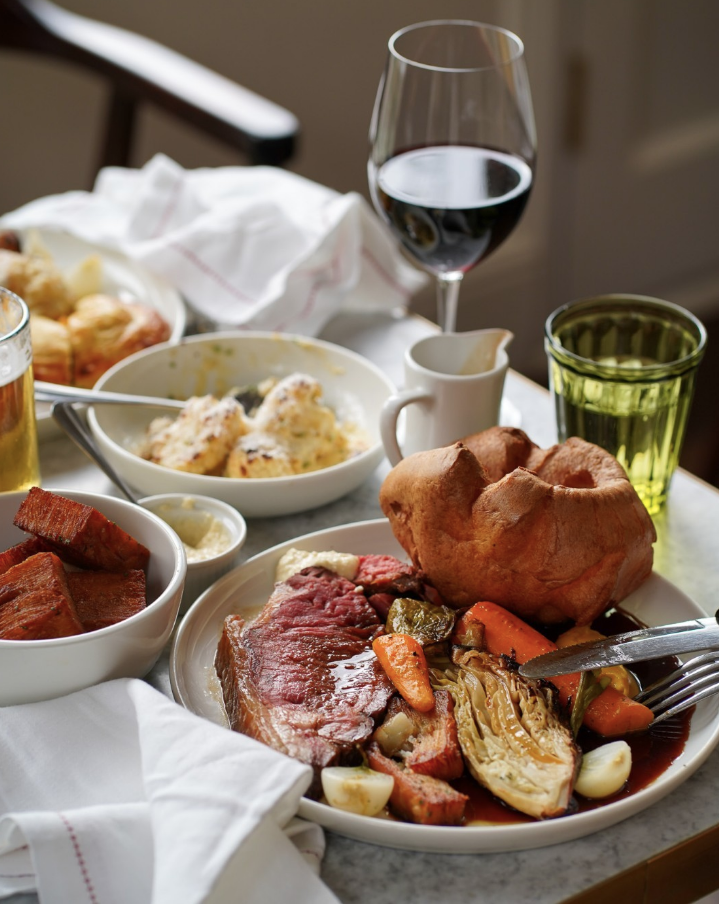
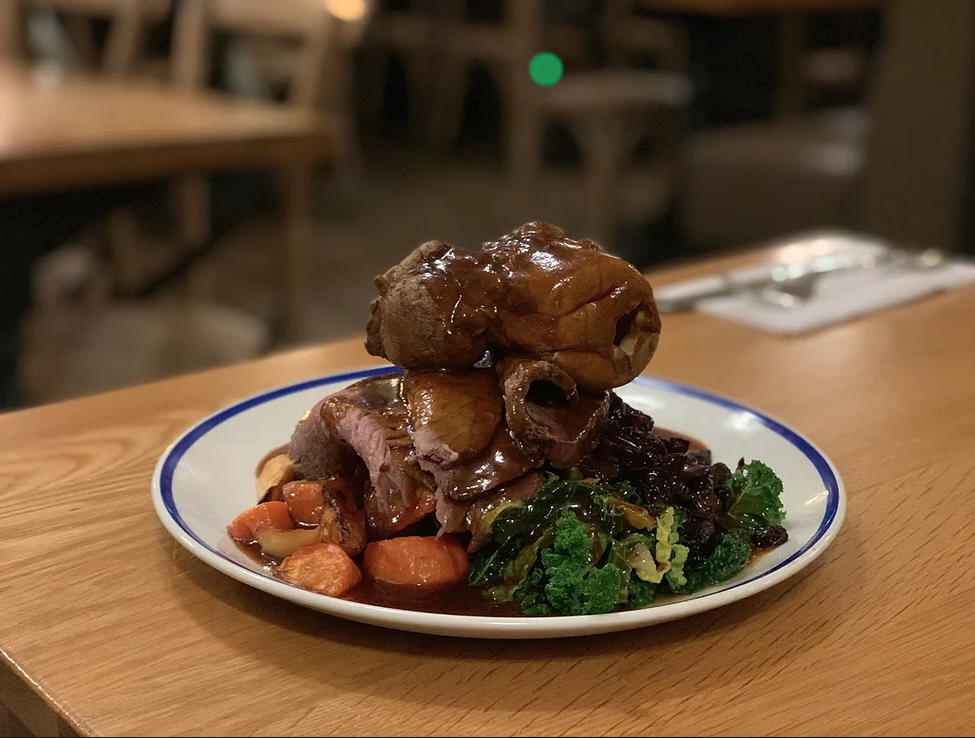
Evening brings more ambition to the plate – think scallop and prawn with butternut squash purée, or herb-crusted corn-fed chicken with garlic and rosemary potatoes. Their Sunday roasts have earned a loyal following, with options including slow-roasted beef ribeye and whole roasted poussin (£17-18), all served with a pleasing array of trimmings and Yorkshire puddings the size of your head.
The cocktail list shows similar attention to detail – try their English Garden (gin, elderflower, cucumber and mint) while taking in those park views. Just remember to book ahead and check they’re not closed for a wedding – it is, after all, primarily an events venue.
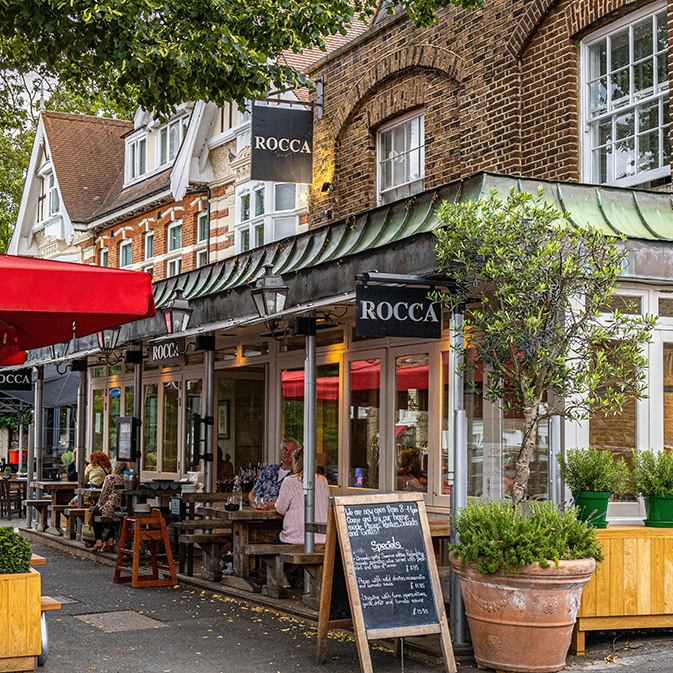
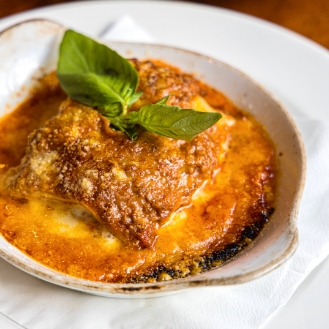
Ideal for relaxed Italian dining that doesn’t sacrifice authenticity…
Named after a village in the Alban Hills southeast of Rome, this independent trattoria brings a genuine slice of Italian hospitality to Dulwich Village. The bright, airy space offers alfresco seating both out front and in their rear garden – perfect for long summer lunches after a stroll around Dulwich Park or the Picture Gallery.
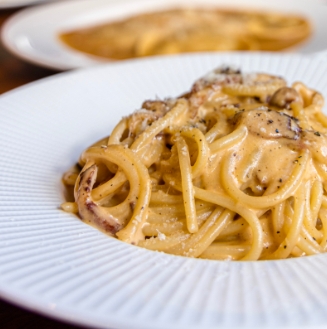
The menu reads like a greatest hits of Italian cuisine, but done with real care. Pizzas come on dough made with Wildfarmed flour – try the pizza Romana with spinach, pork salsiccia and chillies, or the bianca which swaps tomato sauce for a decadent mix of mozzarella, parmesan, and goat’s cheese with caramelized onions. The pasta, all made in-house under Executive Chef Francesco’s supervision, ranges from comforting classics (the carbonara with guanciale and Clarence Court eggs is textbook) to more ambitious plates like tortelloni filled with lobster and prawns in a sage and caper butter sauce.
For those seeking something more substantial, the branzino puttanesca (grilled seabass with a punchy sauce of capers, anchovies and olives) shows they can handle fish with finesse, while the lamb cutlets with mint sauce prove there’s more to Italian cooking than pasta and pizza. Their wine list focuses entirely on Italian bottles, with helpful pairing suggestions for each dish.
End with their torta della nonna or pecan caramel cheesecake, and don’t skip the digestivi – their grappa selection is impressive.
Welcome to Soho, arguably the finest place to find yourself hungry in all of the UK. Boasting a diversity of cuisine, concept and price point pretty much unparalleled on these shores, this once (and still occasionally) risqué area of Central London is now home to some of the capital’s most cherished dining experiences.
But with such choice comes a well-worn paradox which sometimes leaves you catatonic in a Côte, spluttering something about their steak frites being ‘actually quite nice’.
Which it is. But anyway, if you’re looking for the creams of the crop, the jewels in the crown, the forces of the tour, then you’ve come to the right place. Here are our favourite restaurants in Soho; the IDEAL 22 places to eat in Soho.
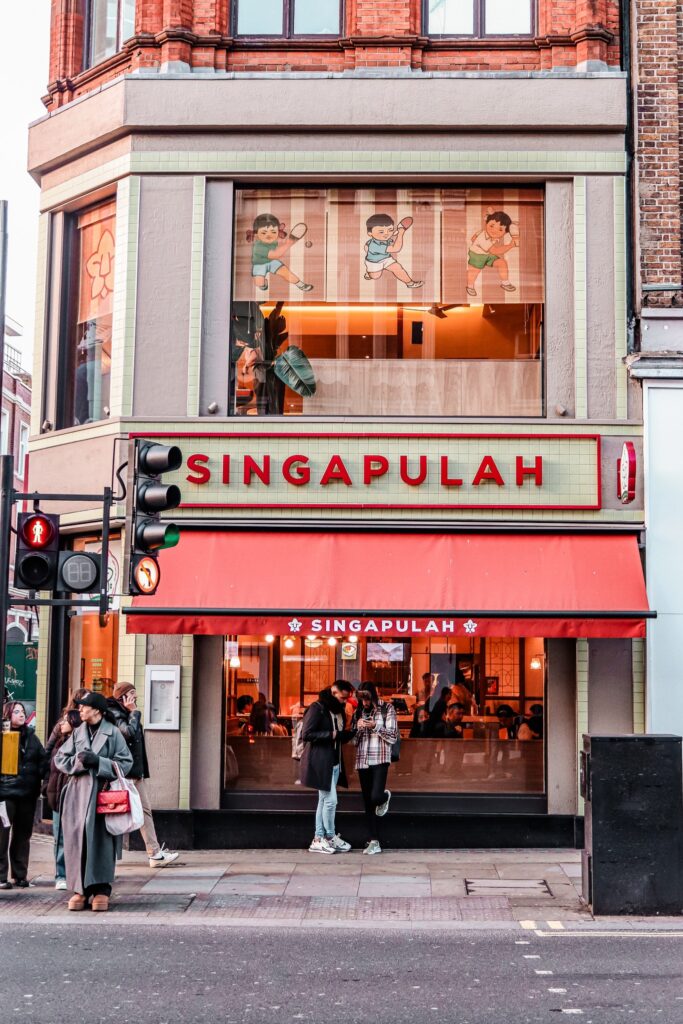
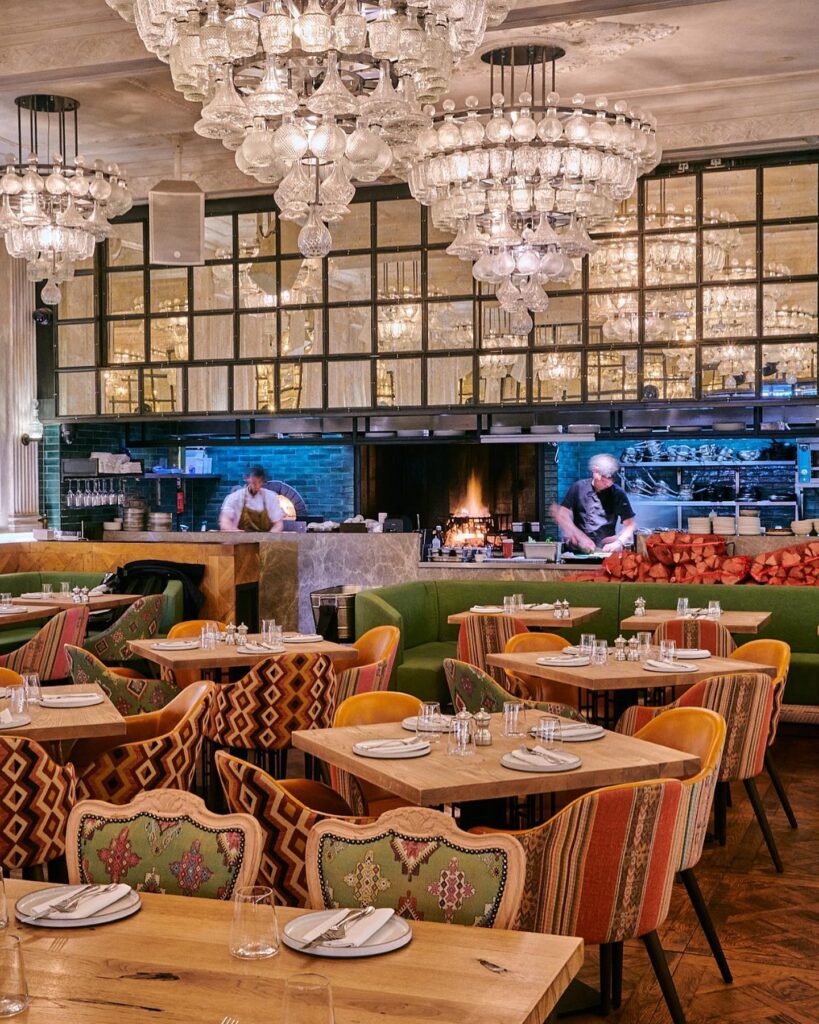
Singapulah, Shaftesbury Avenue
Ideal for faithfully rendered Singaporean hawker flavours on the edge of Soho…
We start on the peripheries of Soho, where Singapulah proudly wears its mission statement on its sleeve – ‘Discover Singapore on Your Plate’.
And if you thought that all sounded a bit ‘tourist board-y’, then you won’t be surprised to learn that the restaurant is a collaboration between Enterprise Singapore (the government agency championing enterprise development) and the Singapore Tourism Board. The restaurant aims to showcase the city-state’s famed culinary culture, perhaps the most curious example of gastro-diplomacy we’ve encountered in Soho, but one that pulls off the assignment in some style.
You might approach Singapulah with the same trepidation as we did – the design of the menu looks a little corporate, and there were reports of teething problems with service. Lesson learned; you should never judge a book by it’s cover, nor a restaurant by the layout of its menu. Others hadn’t been so shallow, and by 6pm, there was a long queue forming round the corner down Wardour Street.
We’re also pleased to report that those teething problems were greatly exaggerated (that, or they’ve simply ironed out the kinks) as a recent meal here was tidily handled, with knowledgeable staff guiding us through the menu’s disparate elements with enthusiasm.
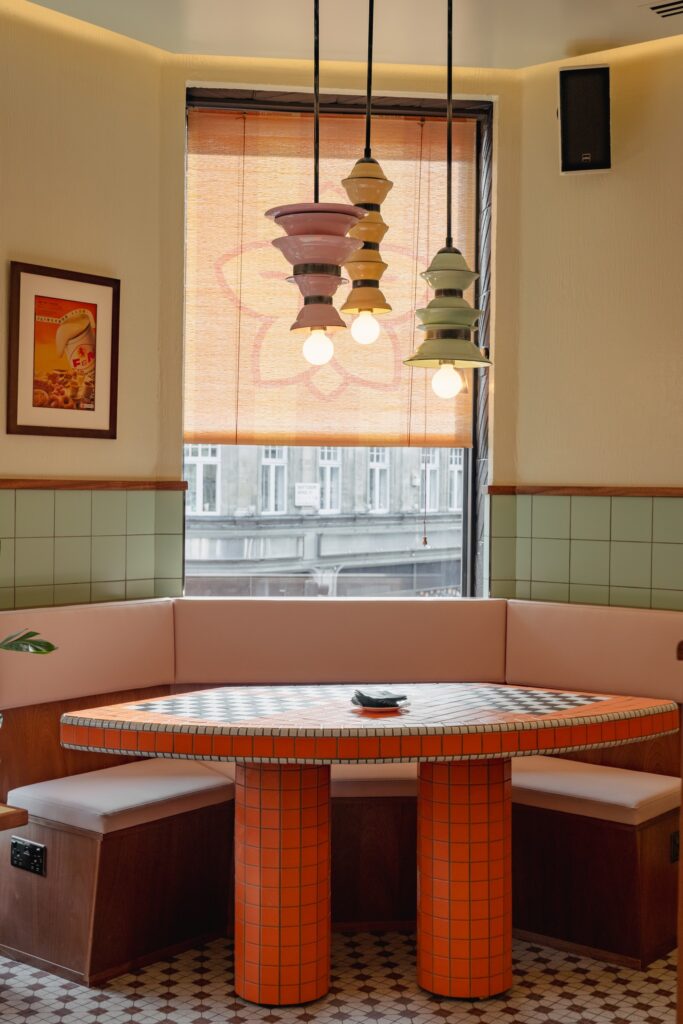
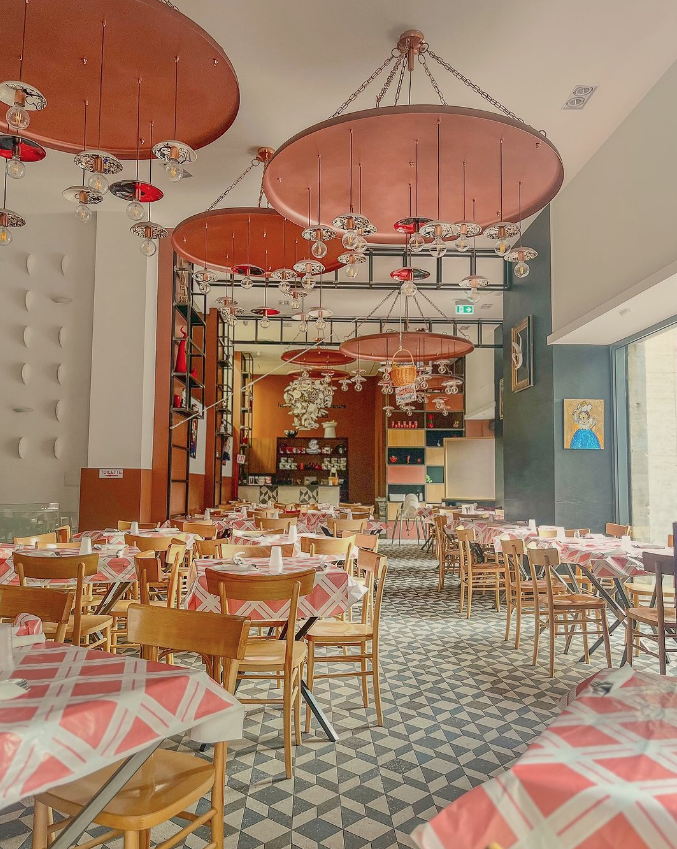
The space itself is airy and bright, with playful pastelled pendant lights hanging from the ceiling like layered kueh lapis. Terrazzo tabletops and patterned tile flooring add a distinctly retro-modern café feel of the kind cropping up all over South East Asia right now, while wooden dividers and booths create intimate dining zones; necessary in such a lively – and clearly popular – space. Shelves lined with bottled sauces and Singaporean products remind you that this is as much a showcase as it is a restaurant.
The clientele mirrors a true hawker centre in its range: Singaporean businessmen namedropping Goldman Sachs over laksa, curious day-trippers hesitantly approaching their first durian dessert, and groups of students drawn by the Instagram-friendly decor and relatively gentle prices of the small plates.
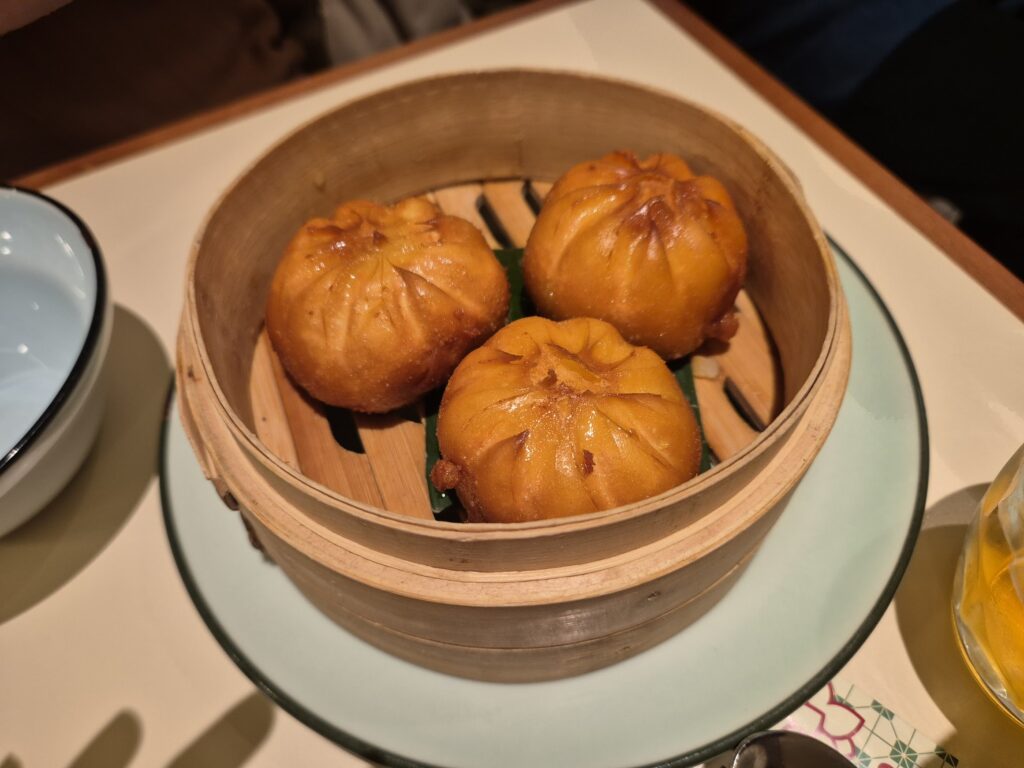
Just as Singapore thrives at the crossroads of Chinese, Malay, Indian, Indonesian and Peranakan traditions, the menu presents a complex — if initially overwhelming — culinary landscape. Our advice? Focus on the Malay and Indonesian-inspired offerings, where the kitchen demonstrates particular prowess. That said, you’d be missing out if you didn’t order some of their deep fried crab bao buns while you peruse the rest of the menu. So, do that.
For that order, the Singapore Loaded Rojak makes for an ideal starting point – a composed fruit salad featuring cucumber, green apple, green mango and pineapple chunks, tossed with tofu skin fritters and fermented shrimp and peanut paste. It’s sweet, salty, spicy and astringent all at once – a proper introduction to Singaporean flavour profiles and just the right idea to set the tone.
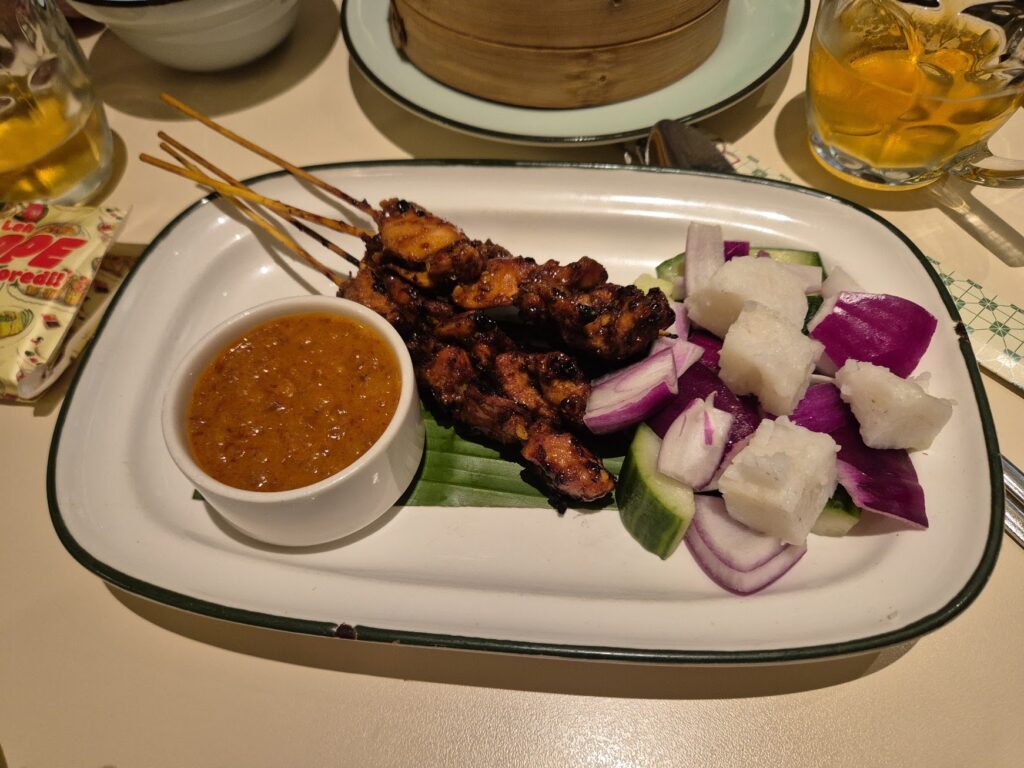
Alongside, you’ll want to open with the satay – here in Iberico pork (£14.50) or corn-fed chicken thigh (£12.95) – offering grilled skewers of gnarly, marinated meat served with ketupat rice cakes, fresh cucumber, pleasingly large and rough cut red onions and a rusty, dappled peanut sauce that whisks you straight to Lau Pa Sat.
We’re only just getting started: the Har Cheong Gai is a faithfully rendered version of a classic, with chicken mid-wings marinated in fermented shrimp paste and red beancurd, hard-fried until crisp and golden brown. Arriving looking fairly downbeat by modern standards (no luminous sauce cloyingly coating things, no ASMR-baiting crunch), these pungent, funky morsels deliver big on flavour.
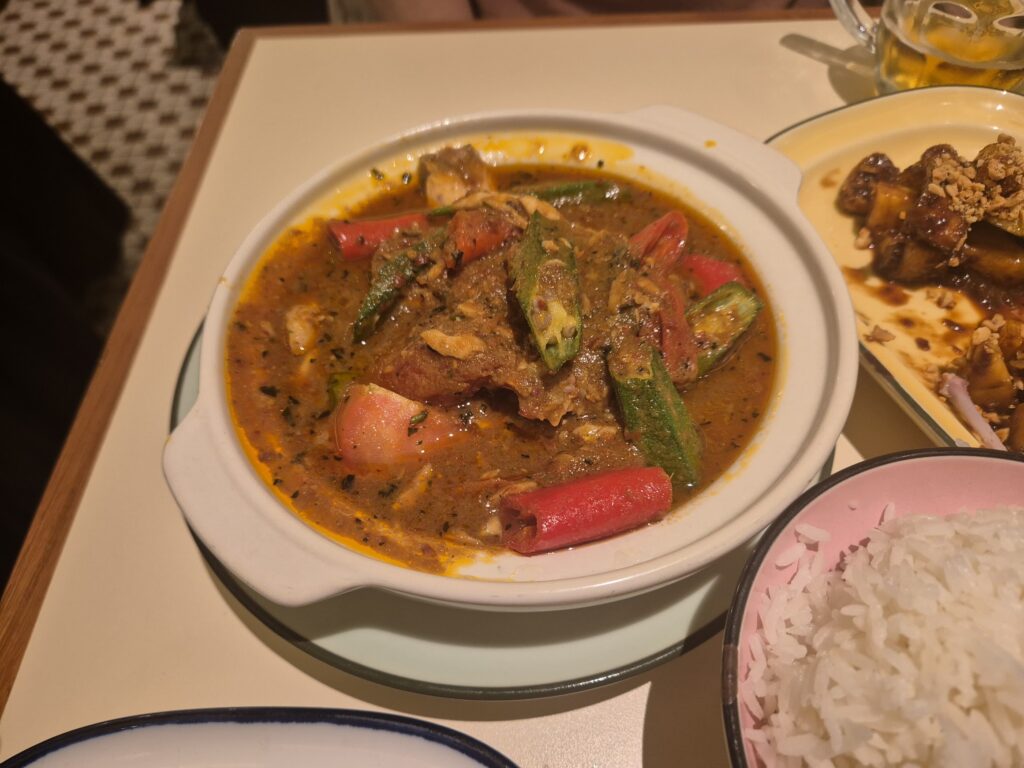
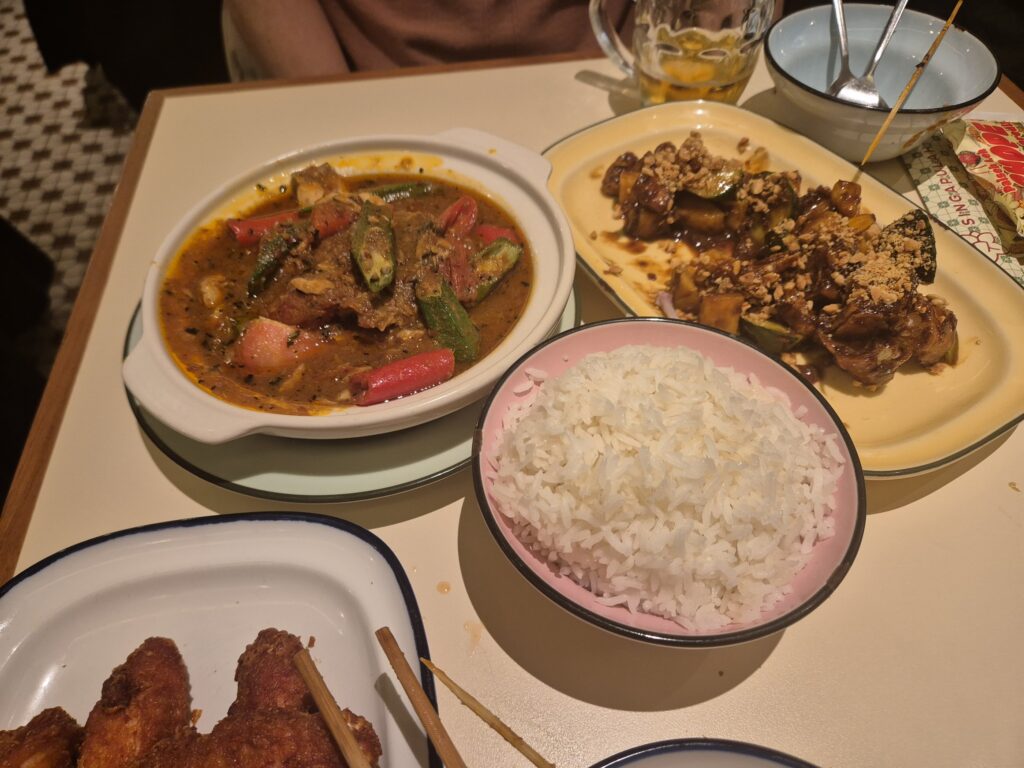
For sharing mains, the Peranakan Assam Fish impresses in its rustic delivery. Sea bass and okra sit a sour-spicy soup performed with tamarind, lemongrass and makrut lime leaf; a perfectly balanced dish showcasing the complex, layered flavours that Peranakan cuisine is so celebrated for.
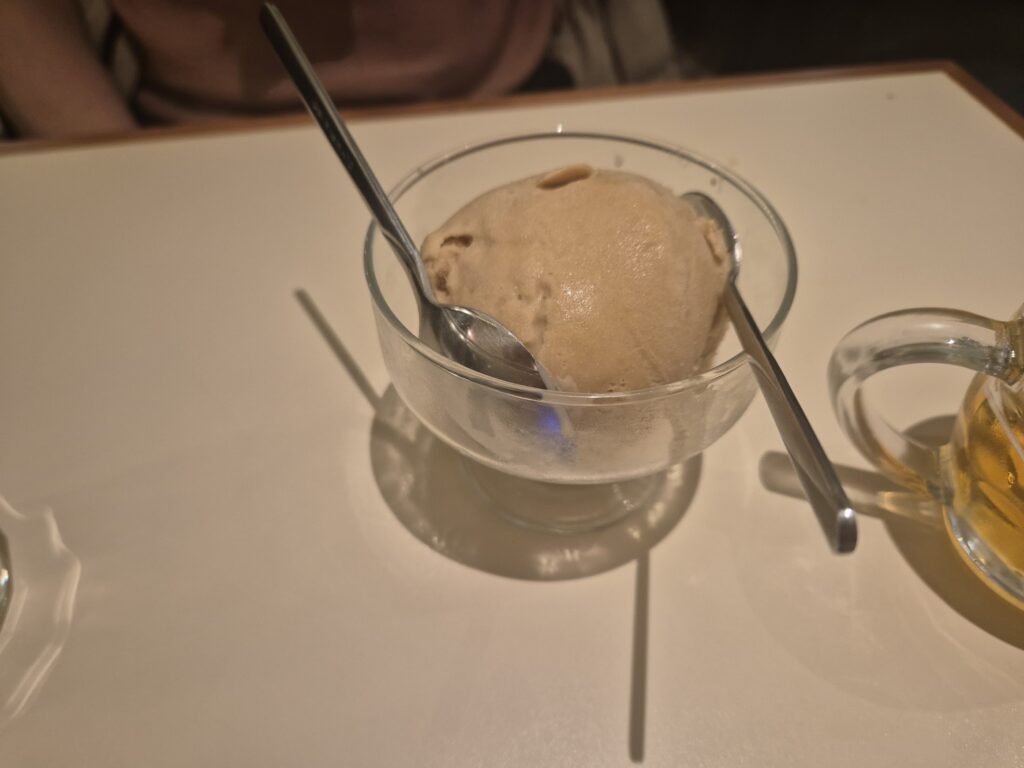
The Bone-In Beef Rib Rendang is worth asking about before you even sit down, as it’s a dish that the rest of your order should orbit around – fork-tender beef short ribs slow-cooked for six hours in a medley of aromatic herbs and spices that coax out serious depth of flavour. Both clock in at just above £20. End your meal with the durian ice cream (what else?) – a bold move for newcomers to Singaporean cuisine, but a necessary rite of passage.
Singapulah is a lively space, with a menu where dishes somewhat jostle for attention. But approach with focus and balance in mind and you’ll be rewarded with a dining experience that makes its mark, reminding us that while Singapore may be just a ‘little red dot’ on the world map, its cuisine demands attention. The country has a new London embassy, and it’s well worth the diplomatic visit.
Ideal for exciting regional Italian cuisine that changes with the seasons…
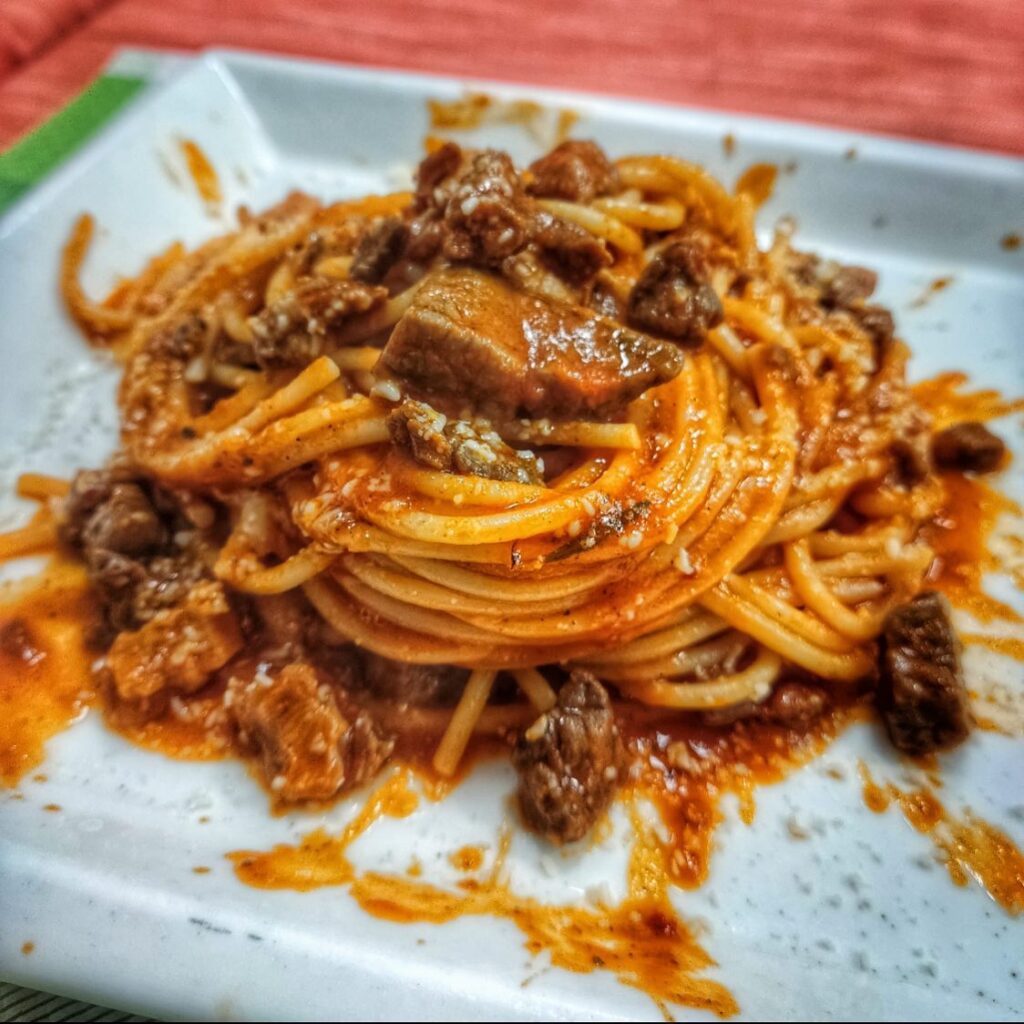
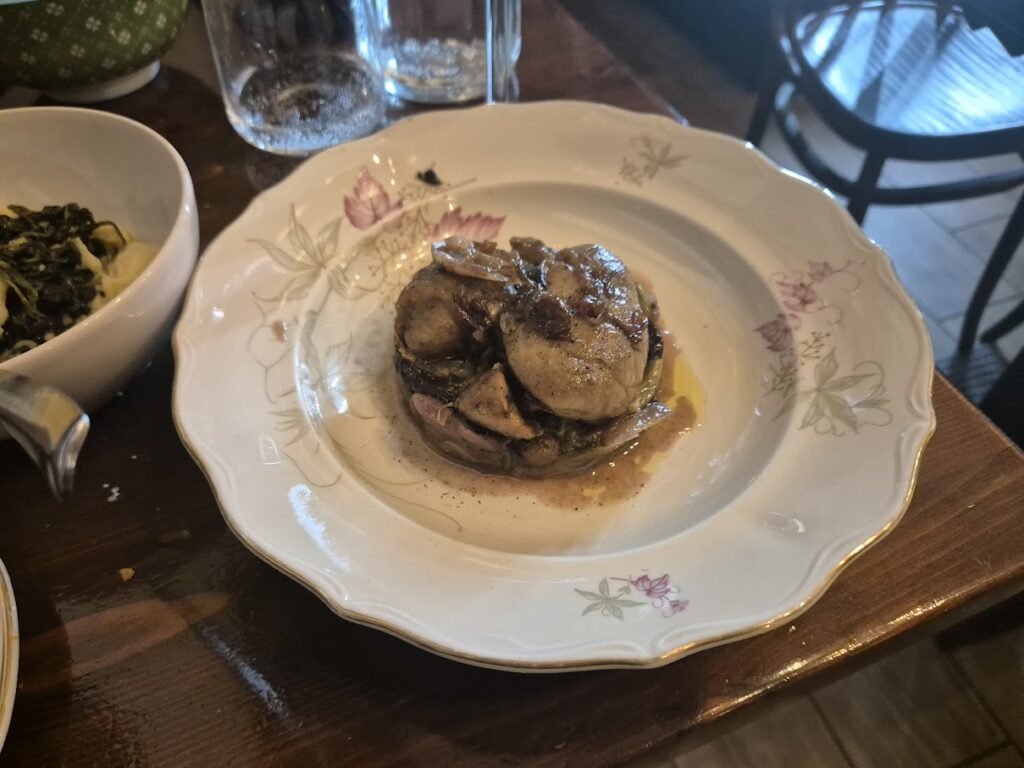
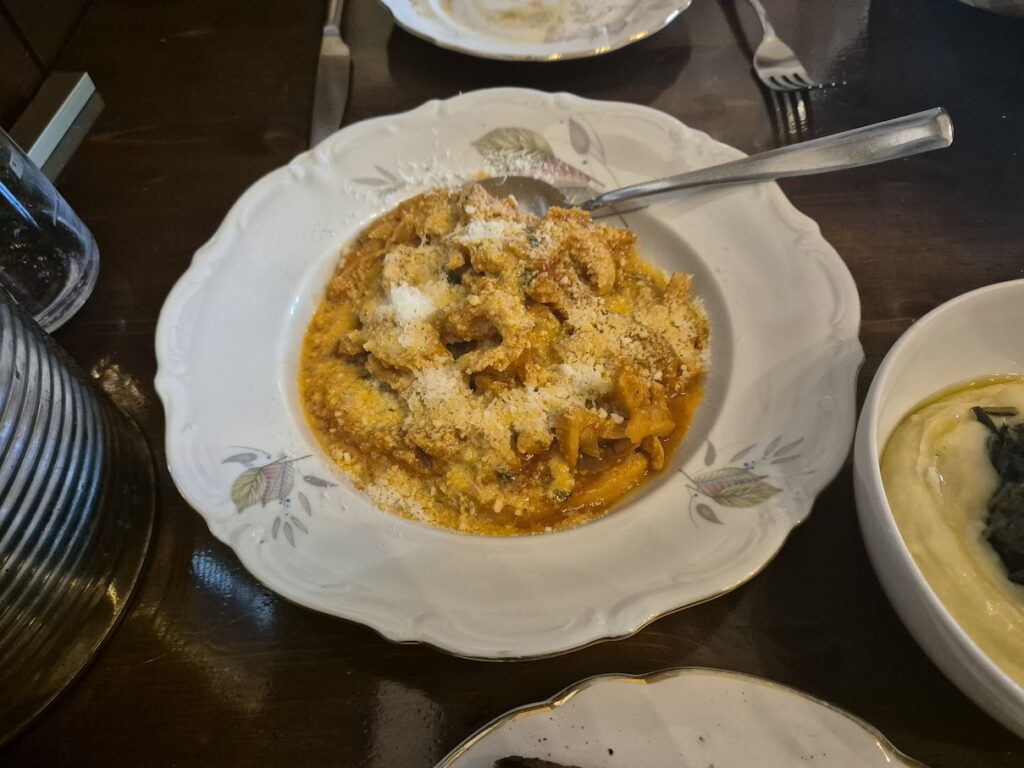
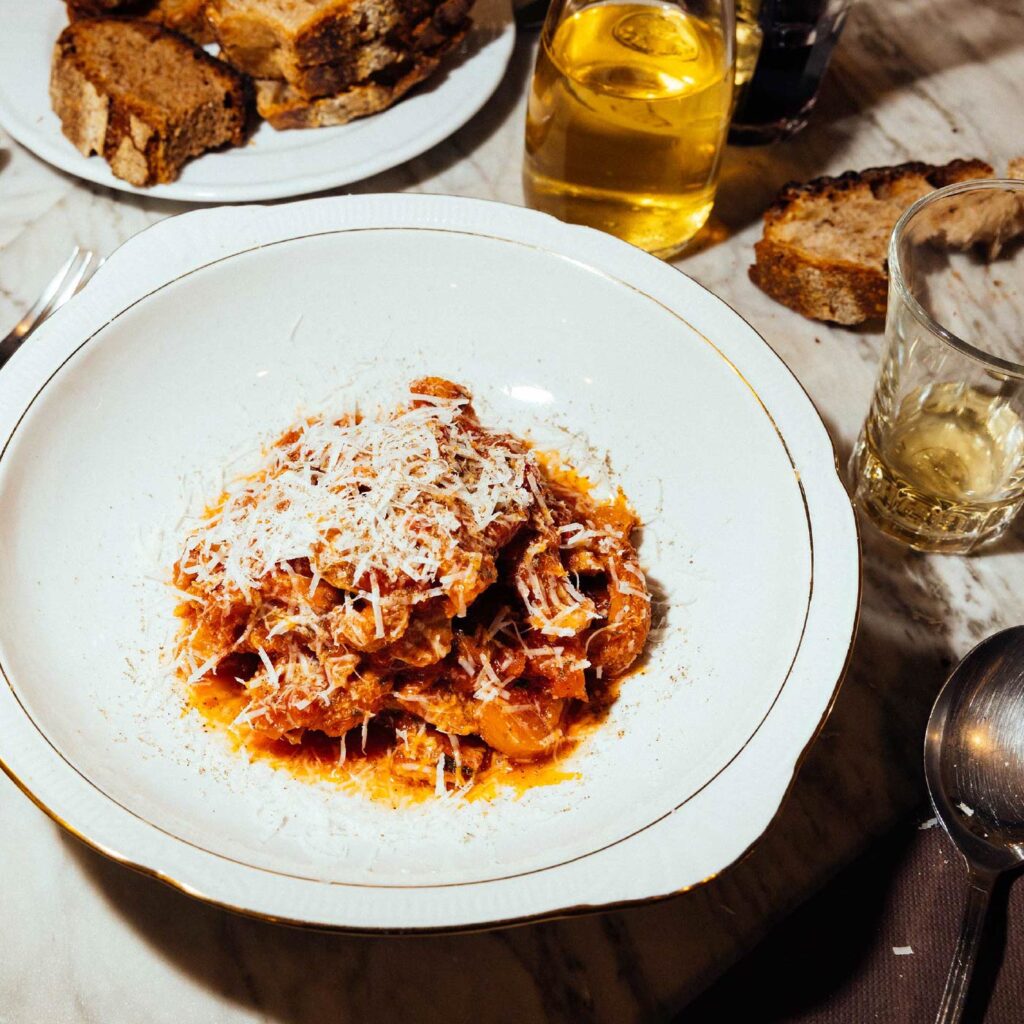
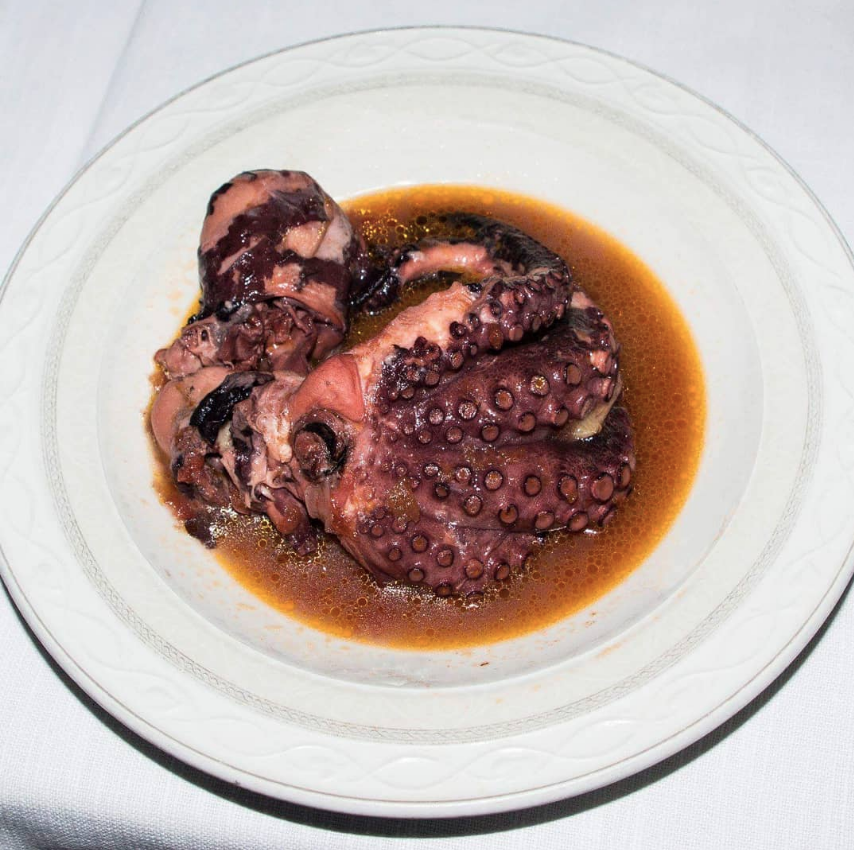
One of our favourite restaurants in Soho if not all of London, Bocca Di Lupo is without doubt one of the city’s most fortifying restaurants to step into. Its long Carrara marble bar overlooking an open-plan kitchen is reliably abuzz with gentle chatter and the soundtrack of dish after dish of dexterous plating pretty much anytime you drop in (it’s open from midday to 11pm daily, without pause).
The food here is an ode to regional Italian cooking with a focus on sometimes obscure highlights from all twenty regions of Italy. Game and offal is an abiding presence here. The menu changes daily, showcasing a variety of Italian dishes with each item’s region of origin clearly labelled.
Recent highlights have included succulent, subtly-humming pork and foie gras sausages, as well as a unique sanguinaccio dolce – a chocolate pudding flavoured with pig’s blood. The restaurant’s commitment to authenticity extends to its wine list, which features carefully sourced selections from across Italy. What’s not to love?
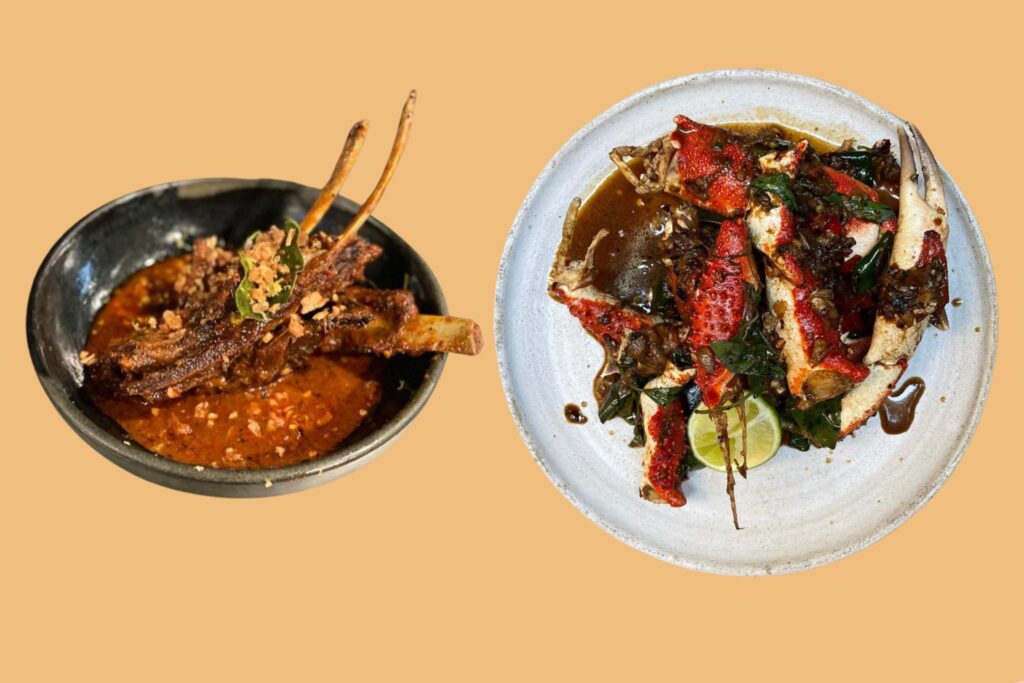
Ideal for invigorating Filipino food done with flair…
Kingly Court is a weird old place. Frantically busy at ground floor level and with a weird passive aggressive energy (the outpost of Nightjar here…just don’t), its USP feels aimed at offering some solace from the manic Soho streets outside, but does the exact opposite; it stresses you out.
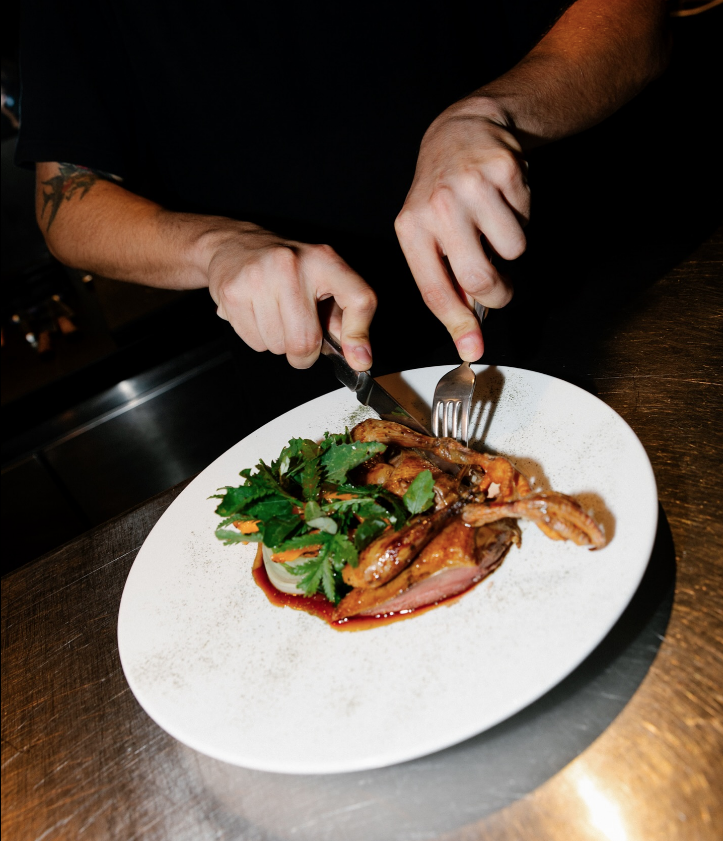
Give the plastic pints and lurid neon colour scheme a swerve and make for the top floor, and you’ll find some seriously good restaurants however, with Asma Khan’s Darjeeling Express and the brilliant Imad’s Syrian Kitchen both occupying the space. Best of all though, is the hit 2023 opening Donia, an exciting addition to a string of modern Filipino restaurants that have opened up across the capital in the last few years, and already the proud recipient of a Bib Gourmand award.
Suddenly, Londoners are conversant in tugak and sisig, tinola and tapa, and we’re very much here for it. At Donia, from the team behind both Panadera Bakery and Mamasons ice cream parlour in Kentish Town, homegrown ingredients – yep, Flourish and Philip Warrens have no doubt had their wicked way here – are celebrated in a series of playful yet sophisticated dishes.
It’s a tight, keenly priced menu, with a gorgeous opening snack of chicken heart skewers clocking in at just £3.50 for five or six blushing bits of offal, glazed until burnished and sitting in a glossy pool of glaze. That is the way to start a meal.
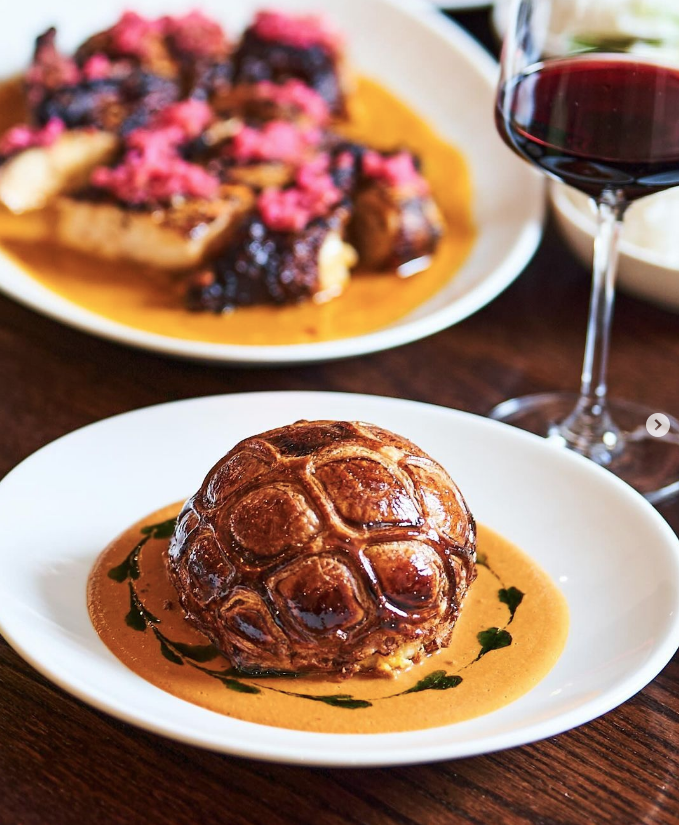
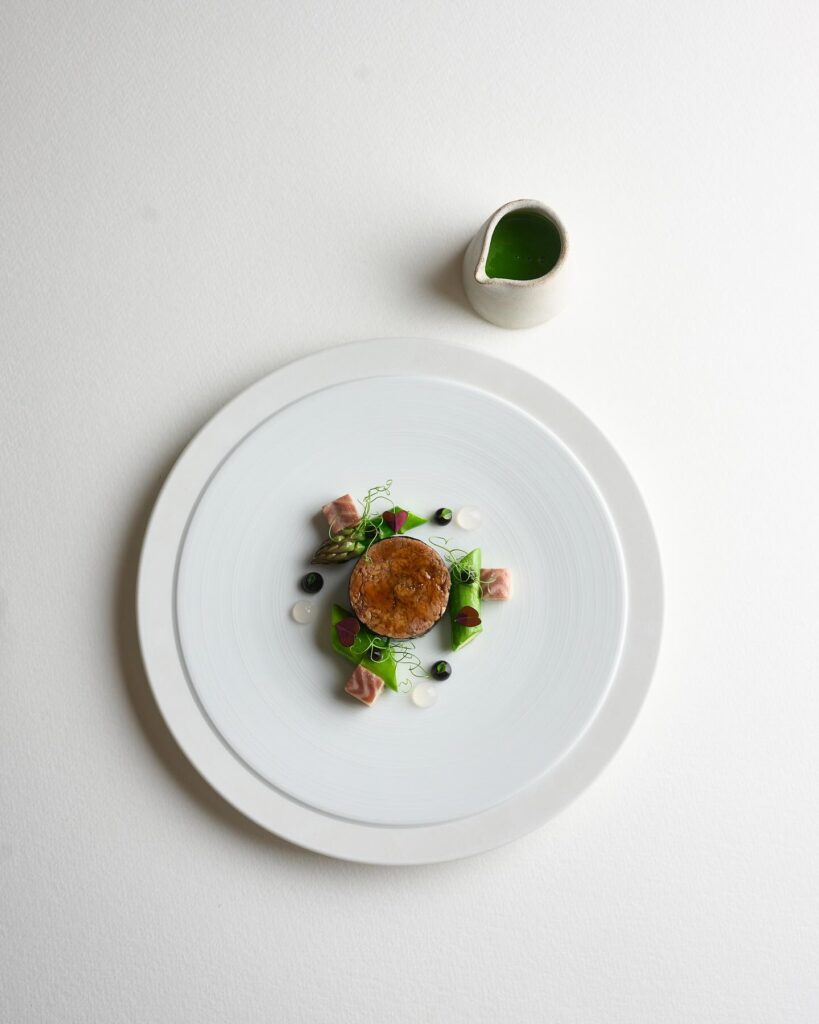
Even better is the pretty-as-a-picture lamb caldereta. Traditionally a goat stew enriched and thickened with Pinoy liver spread (similar in texture and lowkey thrum to a country style French pâté), here the stew has made its home under a lacquered, mahogany-hued pastry dome that crackles as you cut into it. The accompanying sauce is rich and funky, but also aerated to lighten things up. It’s all pretty masterful, comfortingly familiar but with depth and intrigue. You’ll want to order a side of pandesal – Filipino milk loaf – to mop up the sauce. Its adjacent rocher of verdant, bracing chive butter is more than a bonus; it’s one of the highlights of the meal.
Of course, owing to the team’s pedigree in the pastry department, it would be rude not to end on a sweet note. The corn tart is a thing of beauty – sunflower yellow and with pastry that’s crisp but reassuring irregular, its filling straddles the sweet and the savoury in the best possible way. We’d have loved to try the much-hyped ube choux, winner of the Hot Dinners best dessert of the year a couple of years back, too, but by that stage, we were stuffed. Next time, next time…
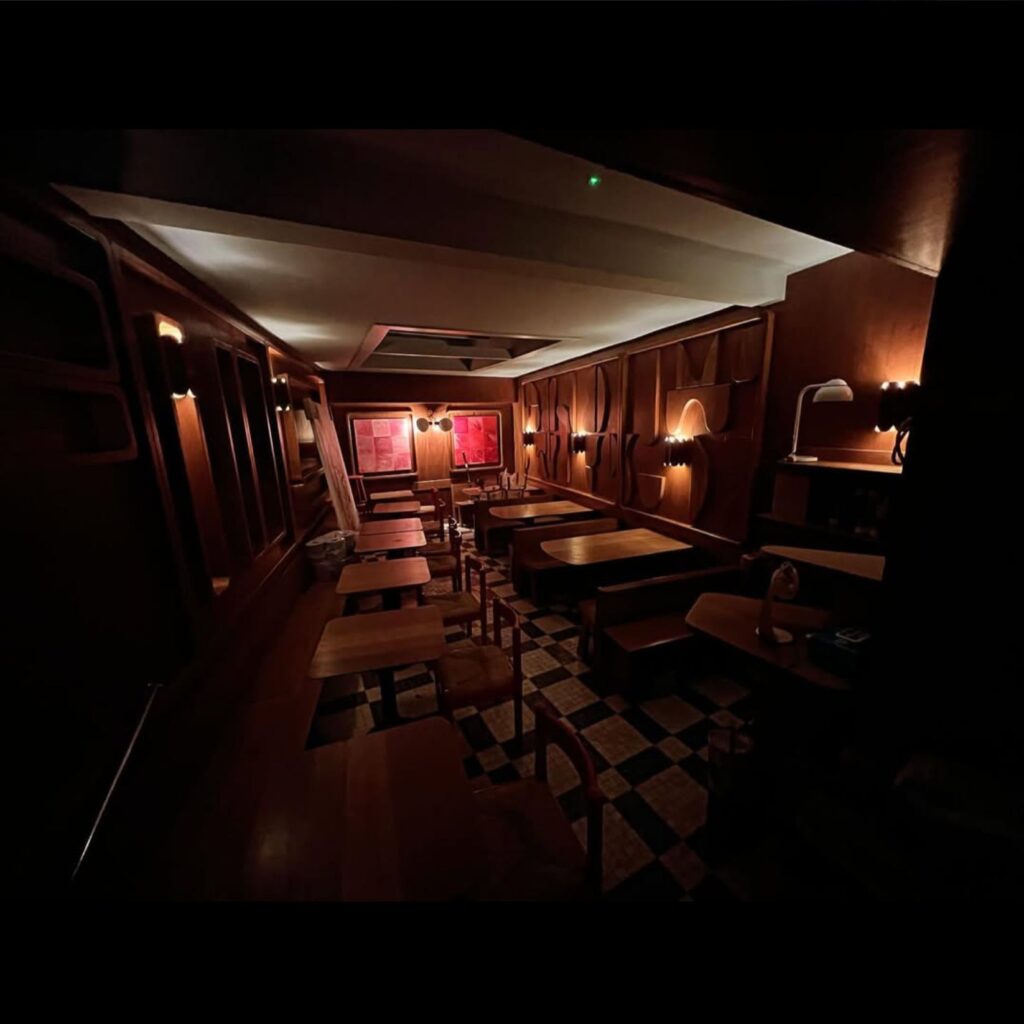
One of Soho’s best restaurants first and foremost, Noble Rot is restaurant steeped in political intrigue, having once been the site of the legendary Hungarian restaurant Gay Hussar. A notorious haunt for left-wing politicians such as Clement Atlee, Gordon Brown, and Tony Blair, the dimly lit room here retains a few nooks, crannies and corners of intimacy, where deals could still be done and illicit affairs conducted.
At the helm of Noble Rot Soho’s kitchen is Head Chef Áron Stigmon alongside Executive Chef Stephen Harris of the Sportsman. Together, they have crafted a menu that pays homage to the French country cooking that Jackson is known for, while also incorporating subtle nods to the Hungarian culinary traditions of the Gay Hussar. Expect dishes like smoked eel Salade Lyonnaise, and a regularly changing goulash, on not just for posterity’s sake, but also for reasons of pleasure.
As a wine-focused restaurant, Noble Rot Soho boasts an extensive wine list that playfully dabbles in contemporary trends while remaining grounded in traditional winemaking regions and practices. Yep, you won’t find too many cloudy drops here.
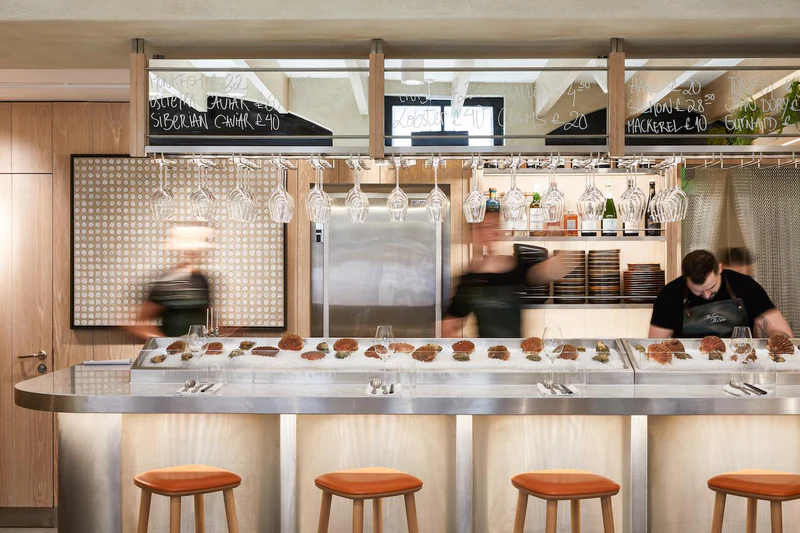
Ideal for Scottish seafood served with Spanish panache…
There’s a glowing blue neon sign on Maresco’s back wall that reads, translated from Spanish, “Spain, Scotland and the sea.” It’s a simple mission statement that belies the gentle sophistication of what’s happening in this corner of Soho, where owner Stephen Lironi – a former record executive and member of new wave punk outfit Altered Images – has created something genuinely original.
The concept was sparked by a Guardian article Lironi read while producing records in the Hollywood Hills, detailing how Scotland’s finest seafood was being exported directly to Spain. Two decades later, after successful ventures in Crouch End (Bar Esteban) and Stoke Newington (Escocesa), he’s brought his vision central, intercepting those Scottish treasures before they cross the Bay of Biscay.
The restaurant’s name reveals this cultural marriage – ‘mar’ meaning sea, and ‘esco’, borrowed from ‘Escocia’, the Spanish word for Scotland – whilst the dining room strikes a perfect balance between fishmonger’s functionality and restaurant theatricality. High stools line the counters, offering front-row views of the open kitchen where head chef Pablo Rodriguez (formerly of Barcelona’s Michelin-starred Jean Luc Figueras) works his magic. The display of ice-packed seafood isn’t just for show – watch as live langoustines wave their pincers moments before being transformed into elegant but full-bodied plates that would feel at home in San Sebastian.
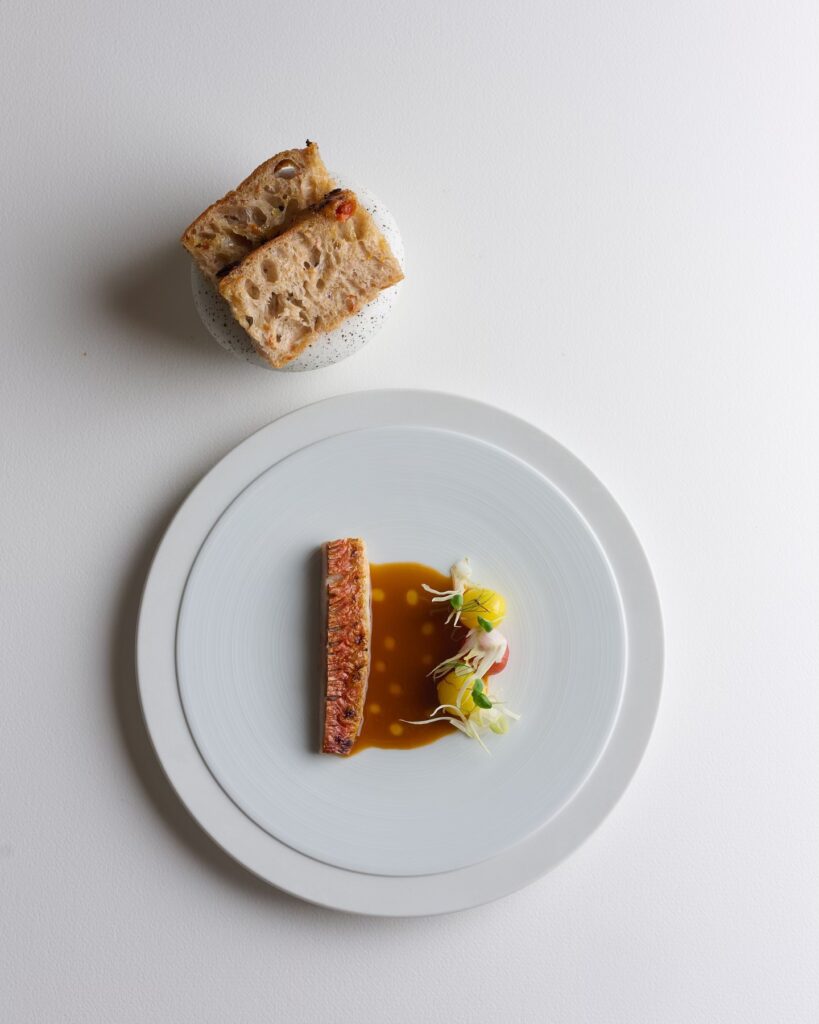
The menu changes daily based on what’s landed from the Scottish coast, but certain dishes have already achieved signature status (as in, there’s mild uproar when they’re not on the menu). Maresco’s take on txistorra reimagines the traditional Basque sausage with mackerel and monkfish, served on mini corn tortillas with spicy yoghurt. The bocadillo de calamar arrives as a noir masterpiece – squid ink-blackened bread stuffed with both grilled and fried squid, a clever textural play made bracing and sensual by generous (in every sense of the word) aioli. Their ‘Bomba Maresco’ offers another creative twist, replacing the traditional meat filling with Shetland mussels, served atop fennel sofrito, pureed and sweet. The bomba wears another round of that aioli like a jaunty little beret.
Now firmly bedded in on Berwick, and the international clientele and constant buzz suggest that Maresco has already found its audience, but it’s the fundamentals that will ensure longevity – pristine ingredients treated with respect, backed by an excellent wine list that leans heavily on sherries and Spanish low-intervention wines. For a restaurant that essentially reimagines what could have been a simple tapas bar (of which, let’s face it, Soho – and this list – aren’t exactly short of), Maresco delivers something arguably more compelling.
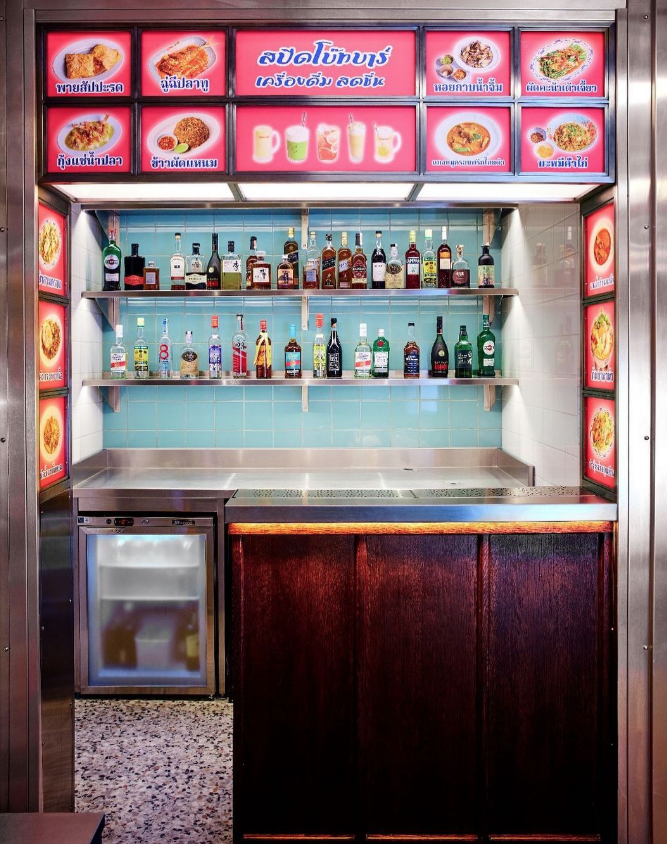
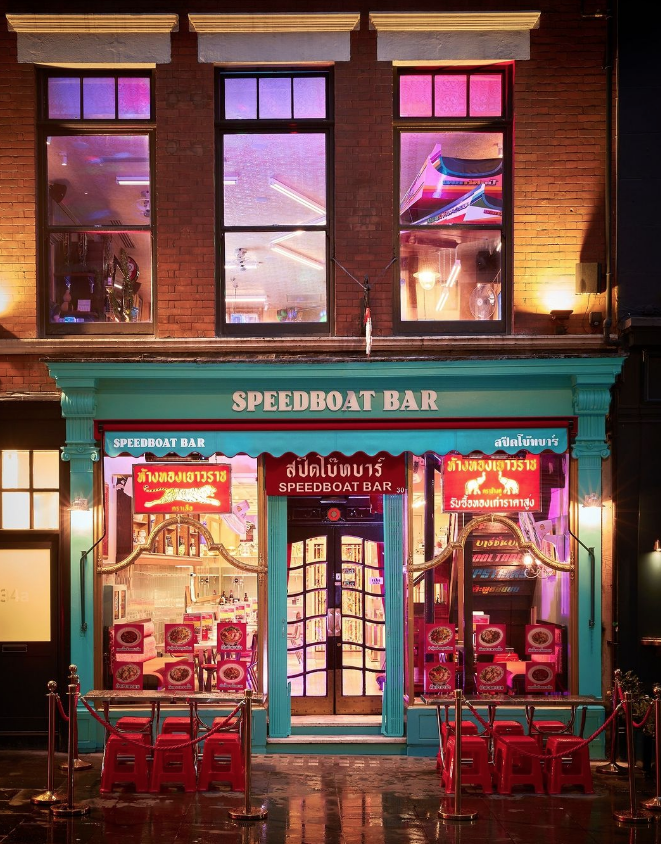
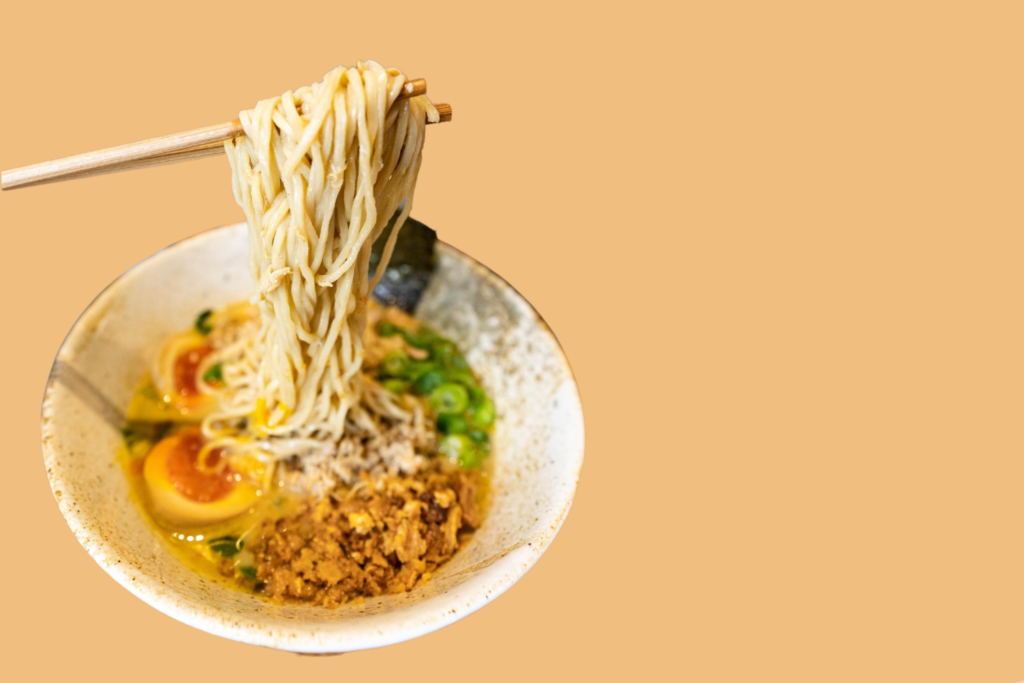
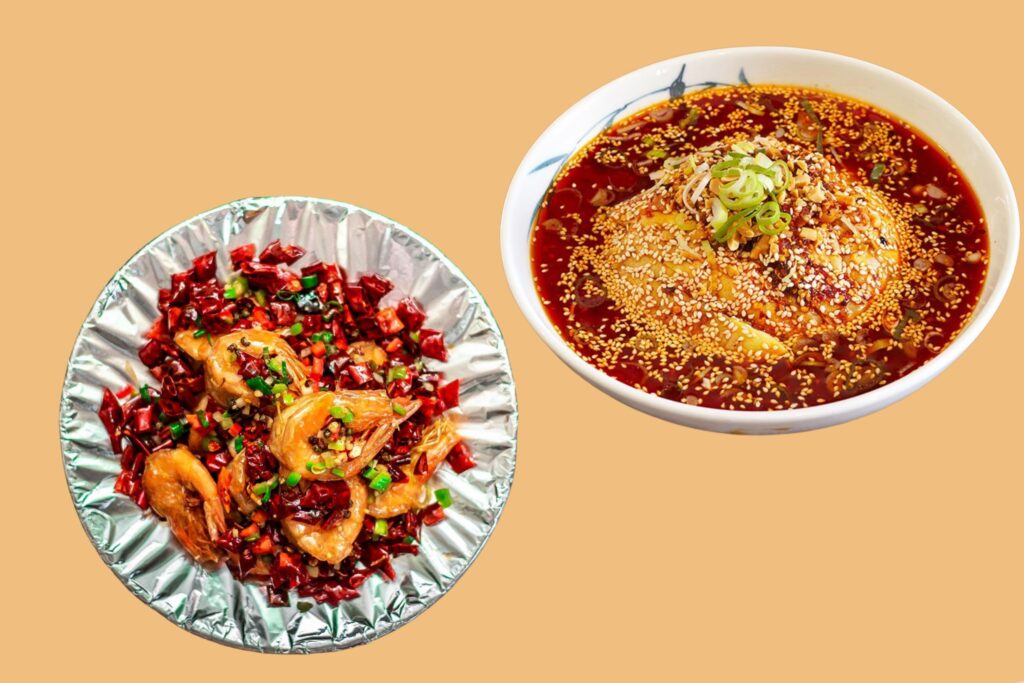
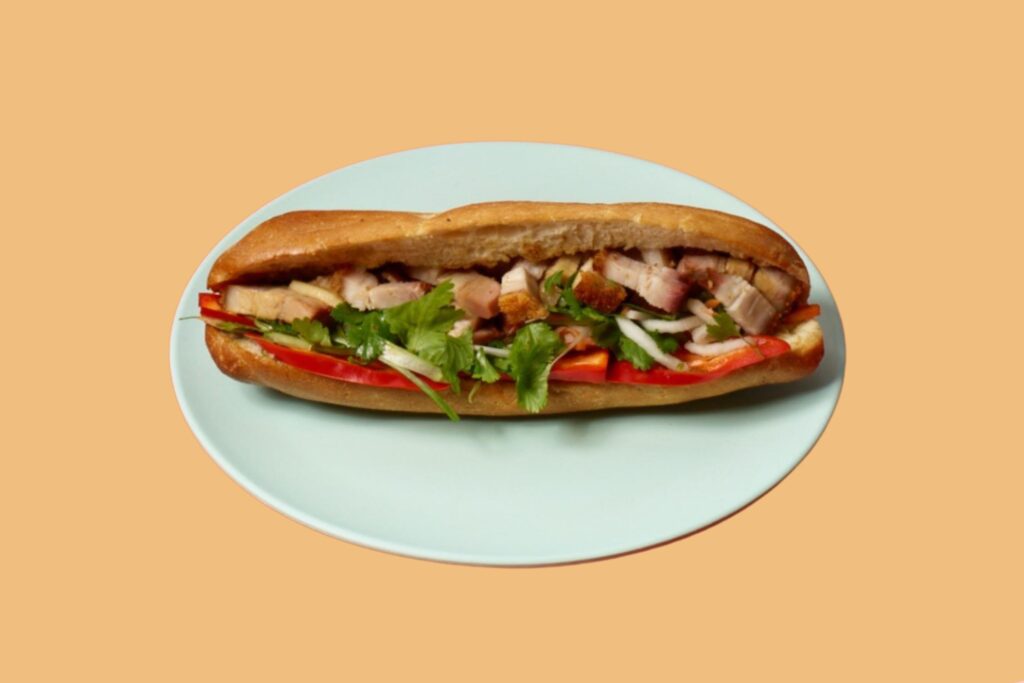
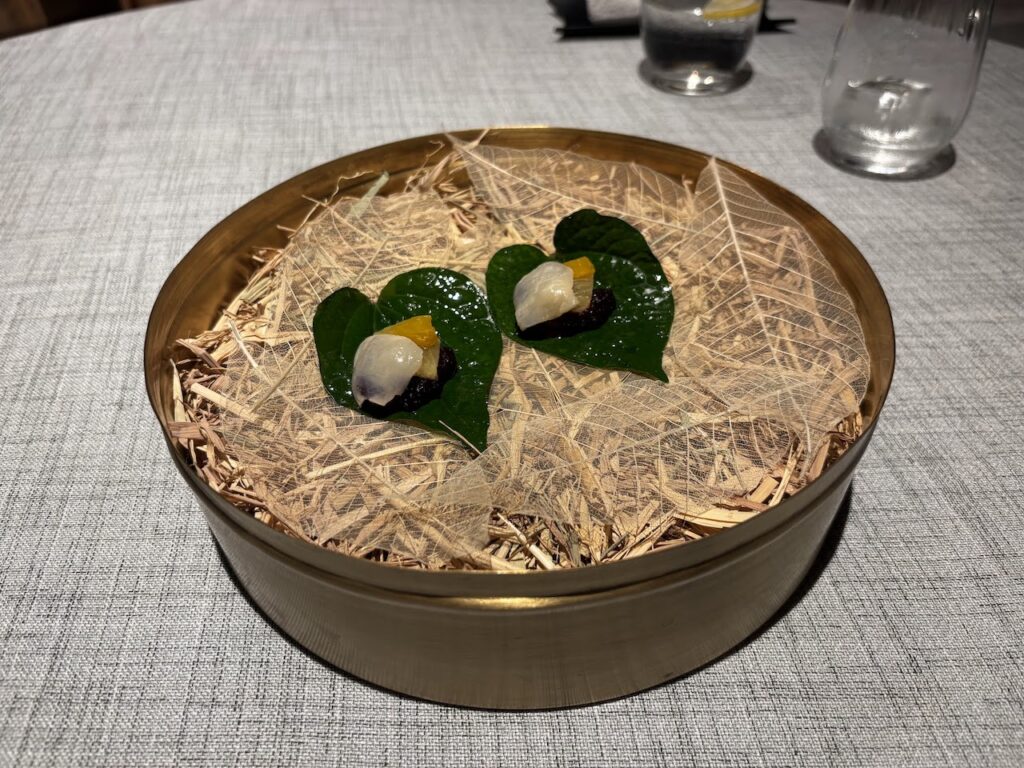
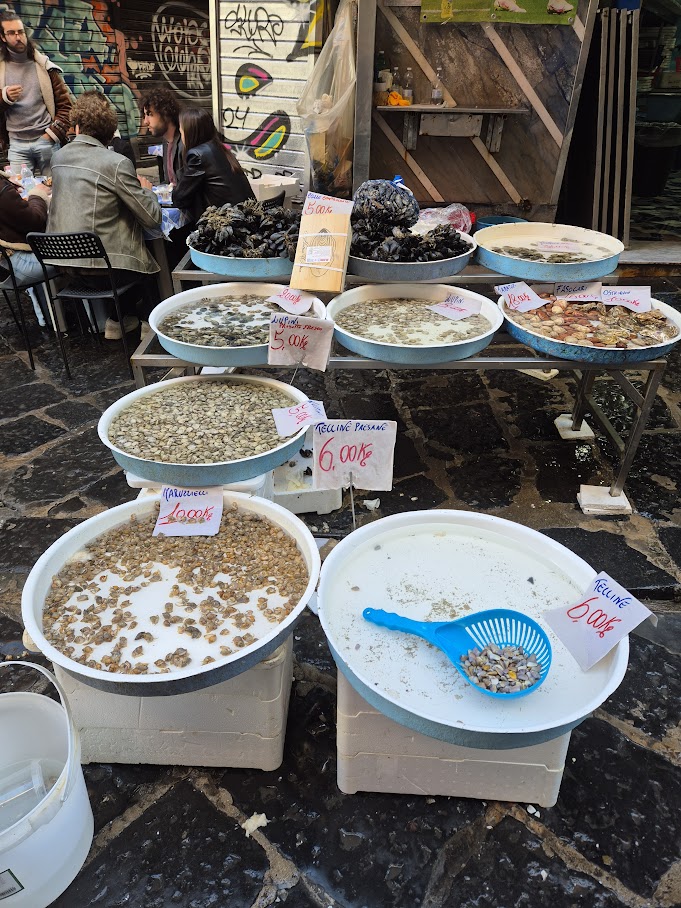
If you’ve never enjoyed a stroll through Bangkok’s ever bustling Chinatown (aka Yaowarat), now’s your chance to do so without the hassle of flying to Thailand.
Speedboat Bar, a neon-lit gem in London’s Chinatown, is the brainchild of talented, Thai-food obsessed British chef Luke Farrell, who has been exploring the cuisine of the Kingdom for years while bouncing between Dorset, London and Thailand.
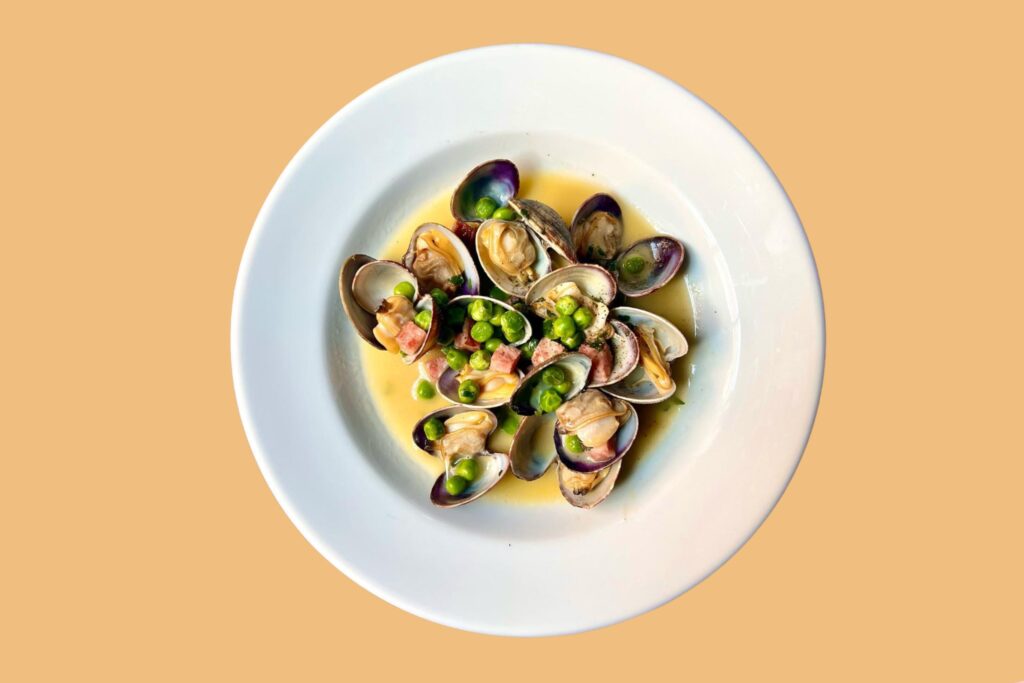
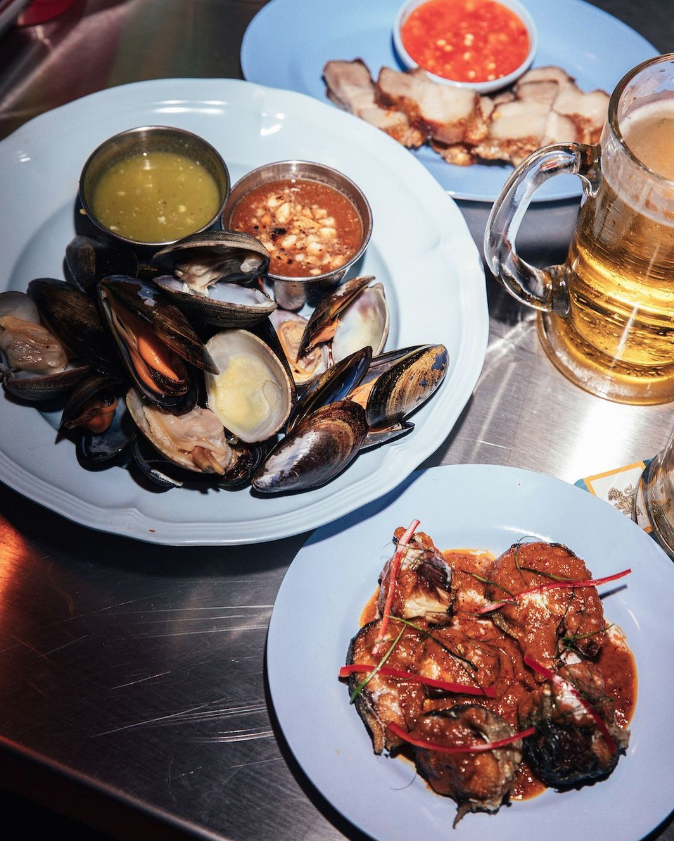
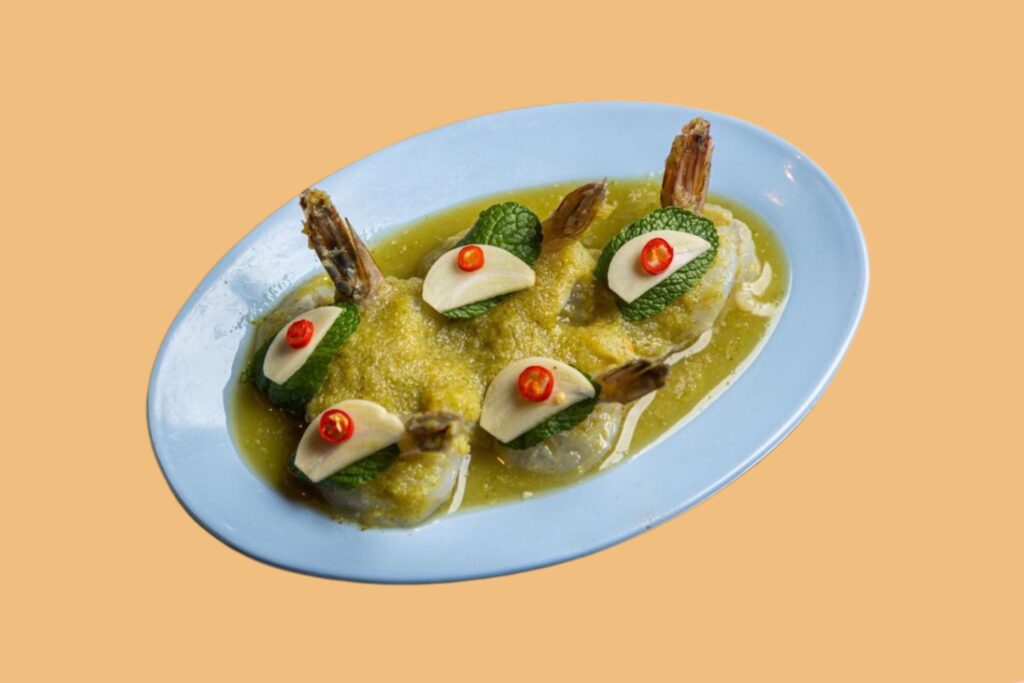
The restaurant takes its inspiration from the neon-fuelled party atmosphere of Bangkok’s Chinatown and the thrilling sport of speedboat racing along the canals (klongs) of the city. The menu leans on Thai drinking food, known as gap klaem, with the crispy chicken skins the first thing pretty much everyone orders here. Follow them with a collection of dishes reliably enjoyed on the streets of Yaowarat – clams stir fried in chill jam, and raw shrimp dressed in nahm jim seafood are particular highlights.
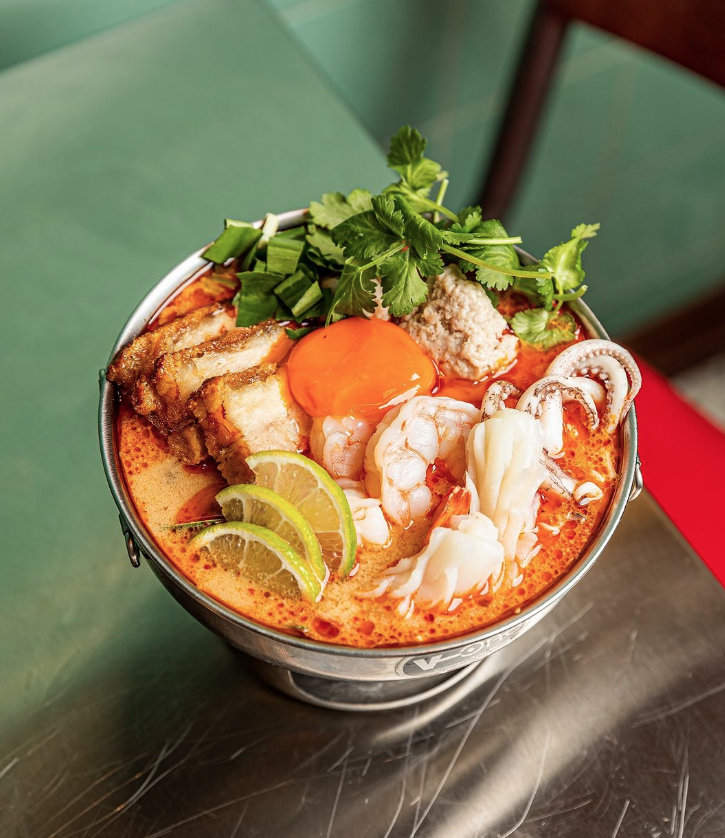
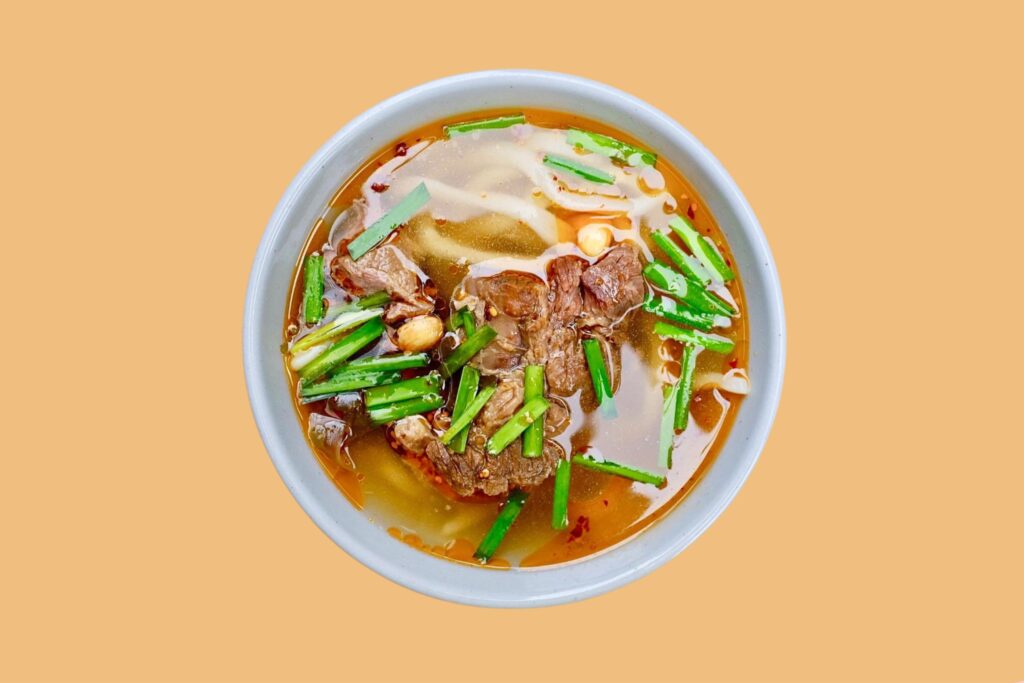
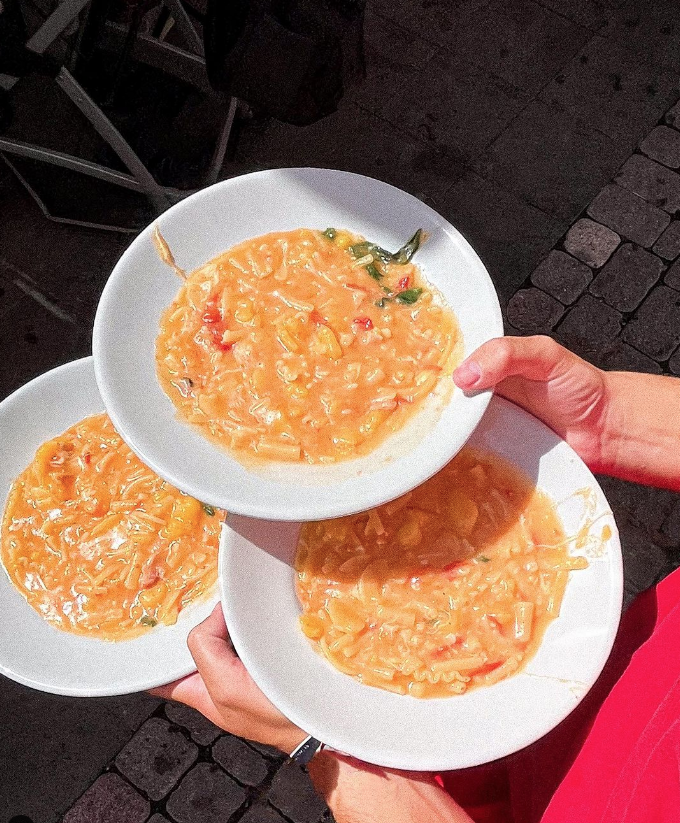
All of this is just foreplay before the main event. The Speedboat signature is a tribute to the iconic Jeh O Chula, a shophouse that sits on the outskirts of Bangkok’s Chinatown, and her legendary Tom Yam Mama Noodles – a once late-night special invented by her son which is ideal if you’ve had one too many Thai whisky sodas, and one of our IDEAL 22 street food places in Bangkok to boot.
Open until 1am on Friday and Saturdays and midnight most weeknights, you’ll certainly be having a few of them.
Ideal for gorging on croquettes, tortilla and other Michelin-starred Spanish small plates…
There are many reasons to head to Barrafina, not least because it’s arguably the best tapas restaurant in London, let alone Soho. But more than that, it’s for the vibe, which is exquisite whatever the weather, time of year, or other extraneous factors that would put lesser London restaurants off their stride…
Barrafina Soho, first opened on Frith Street before moving to Dean, has been around, and consistently packed, since 2007, and held a Michelin star for a decade before a recent unceremonious removal. Headed up by Andalucia-born Antonio Gonzales Milla, the focus here is classic tapas dishes with an emphasis on seafood.
The restaurant boasts a no-booking policy and an unfussy, ingredients-led approach to dining. The chef’s expertise in Spanish coastal cuisine is found in every dish served at Barrafina, whether that’s in the deceptively simple pan con tomate, topped somewhat unconventionally with finely sliced chives, or on the imposing bomba, a classic croquette from the backstreets of Barcelona. The real joy, though, is found in the fresh fish hooked off the ice display opposite to order, kissed by the plancha within seconds and on your plate a few moments later.
With only 23 seats available around that cherished counter, the space is both intimate and bustling. You’ll never want to leave.
Ideal for haute cuisine that marries California’s abundance with Japanese precision…
Born in New York to a French-Spanish mother and American father, Victor Garvey’s culinary journey (you may have seen him on the latest season of Masterchef: The Professionals) has taken him through Barcelona, Los Angeles, Tokyo and Copenhagen. It’s this cosmopolitan background that informs SOLA, where California’s seasonal bounty meets exacting technique in one of Soho’s most accomplished dining rooms.
Following a major refurbishment in late 2023, the restaurant has expanded to include an intimate basement space and a chef’s table, but it’s the ground floor dining room that remains the jewel in the crown.
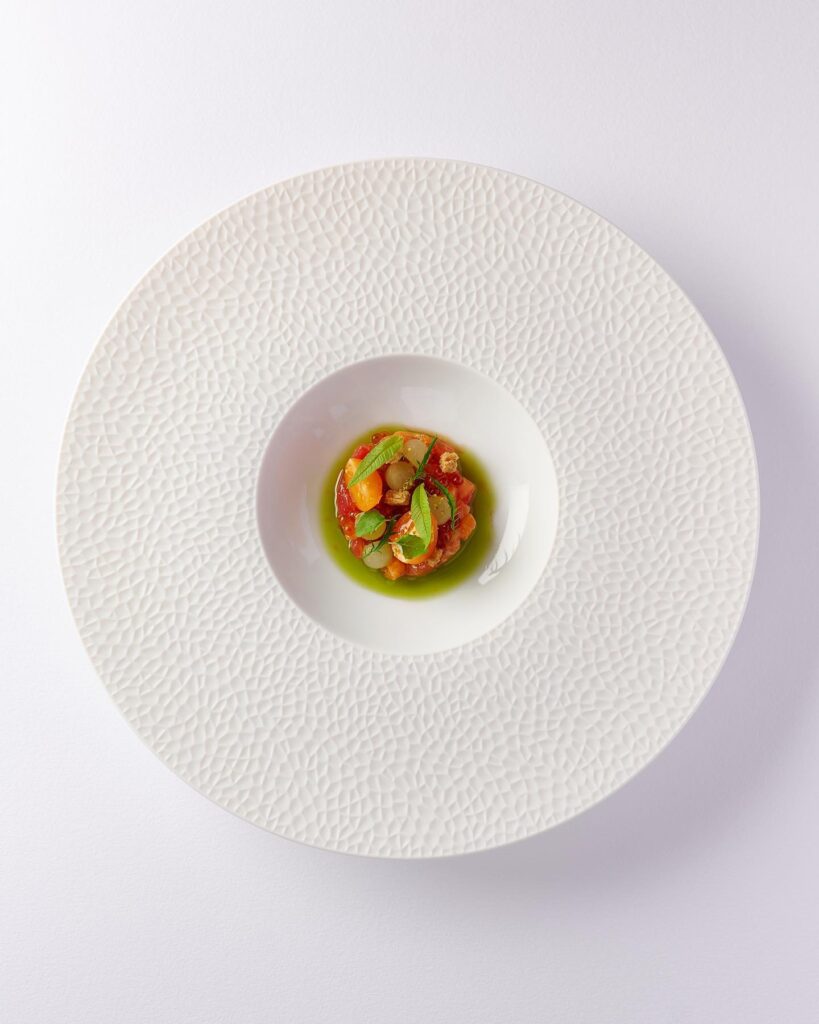
Here, amid perfectly spaced tables and thoughtful lighting, Garvey and his team deliver a tasting menu of remarkable precision. A sequence of elegant canapés sets the tone – a devilled egg arrives as a hollowed-out shell filled with smoked sturgeon mousse and sauce gribiche, further elevated with espelette pepper and toasted pumpkin seeds. Each course builds on the last, from vodka-cured wild salmon with fresh wasabi and red onion escabeche to the ‘Memories of Kyoto’ sashimi plate, where pristine fish meets roasted baby leeks, avocado sorbet and shimeji mushrooms dressed in kinako vinaigrette.
The highlight arrives midway – Scottish langoustines flambéed tableside, served alongside a bowl of profound dashi broth containing duck liver tortellini and an onsen quail egg. It’s this marriage of classical technique, premium produce and theatrical presentation that earned SOLA its Michelin star in 2021, as well as its current 74th place on the National Restaurant Awards list.
At £174 for the tasting menu it’s firmly in special occasion territory, but Garvey’s cooking offers something genuinely distinct in London’s fine dining landscape – a cuisine untethered from geographical constraints yet precise in its execution.
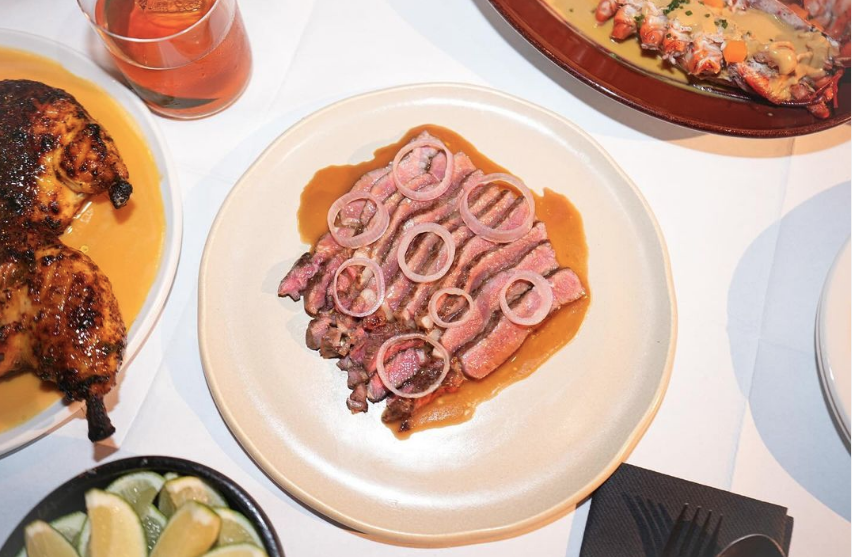
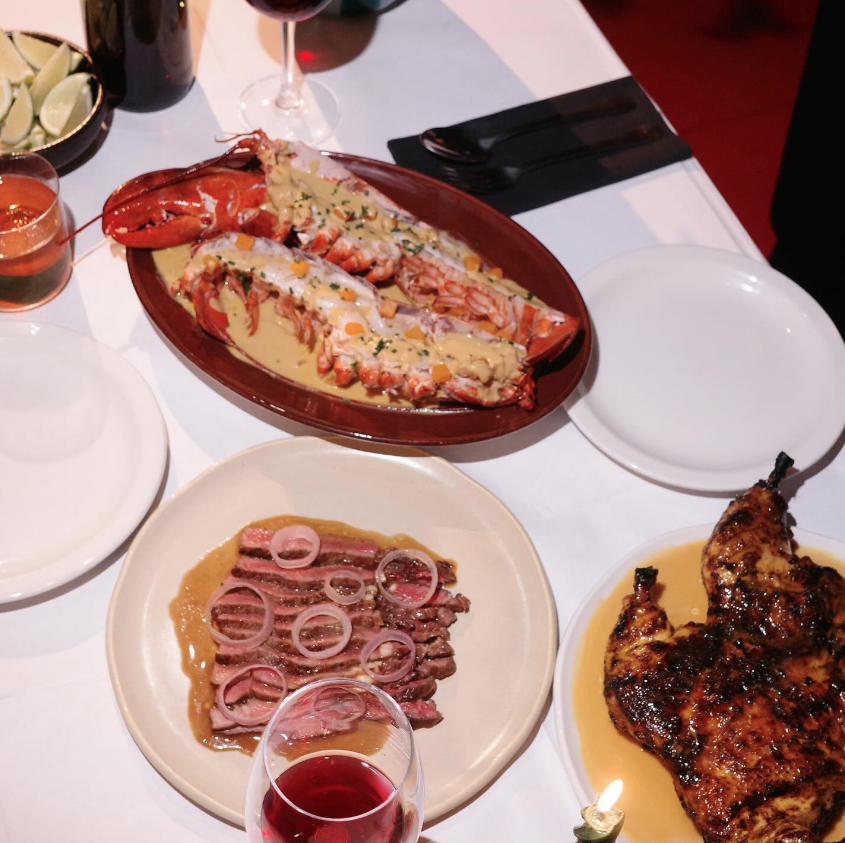
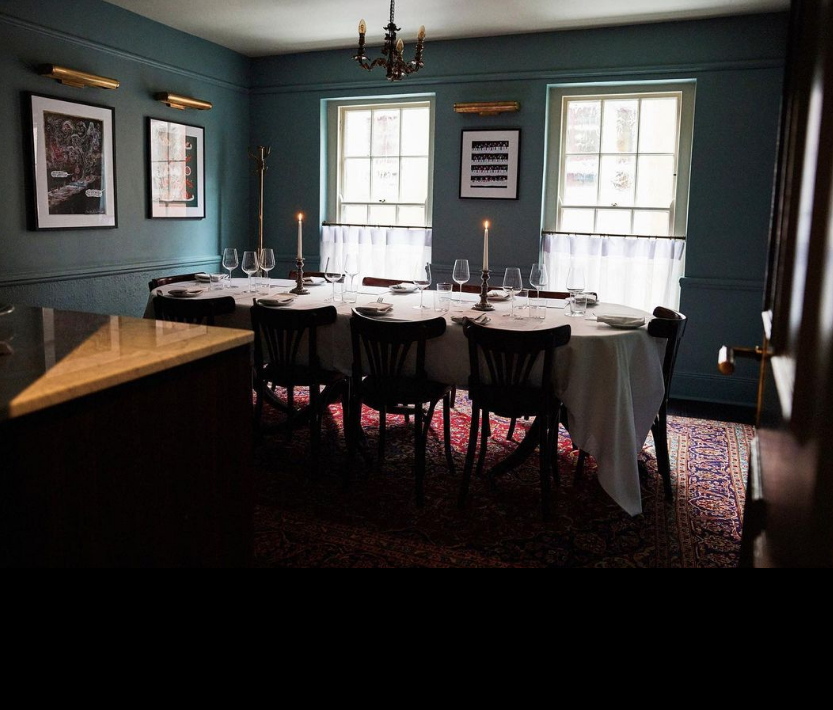
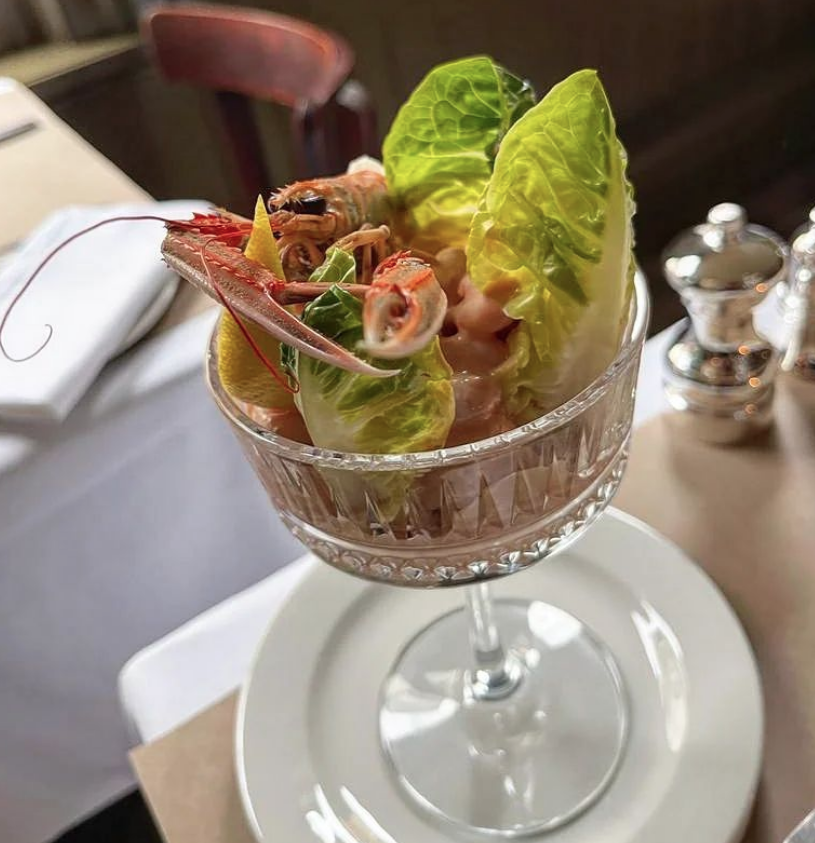
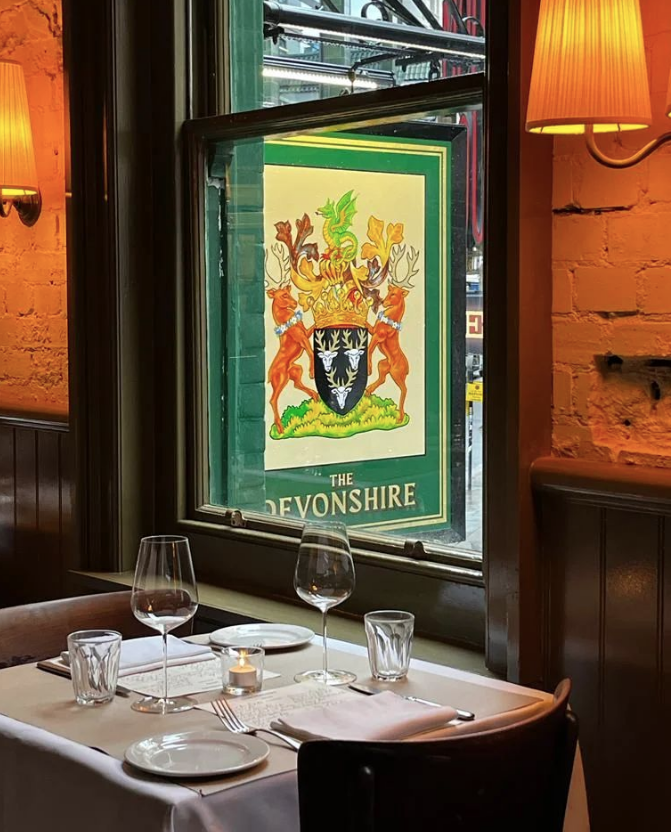
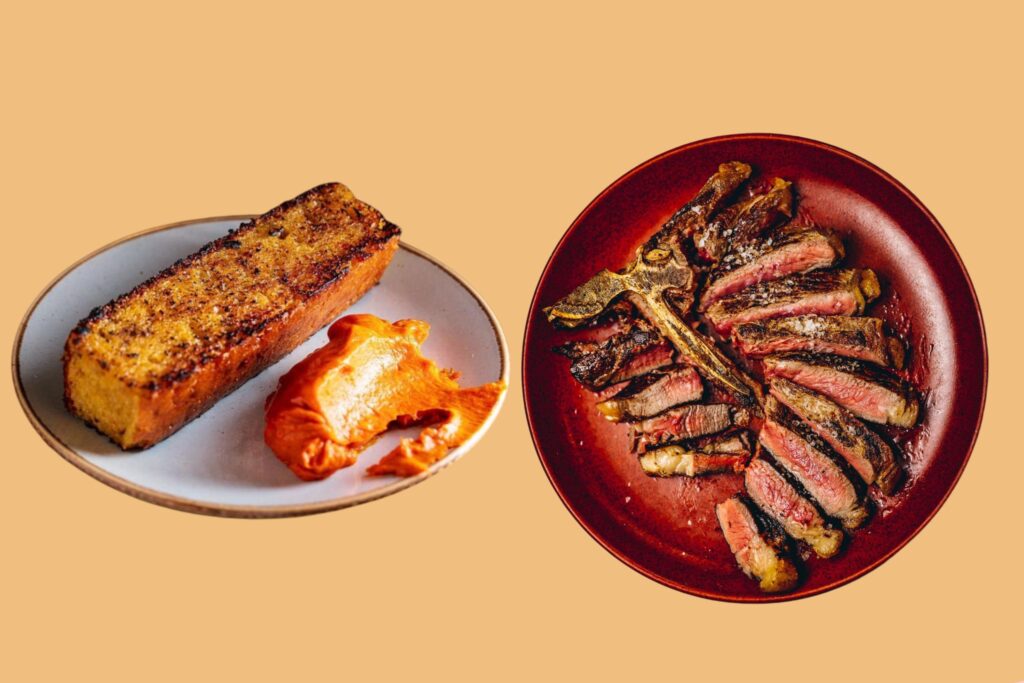
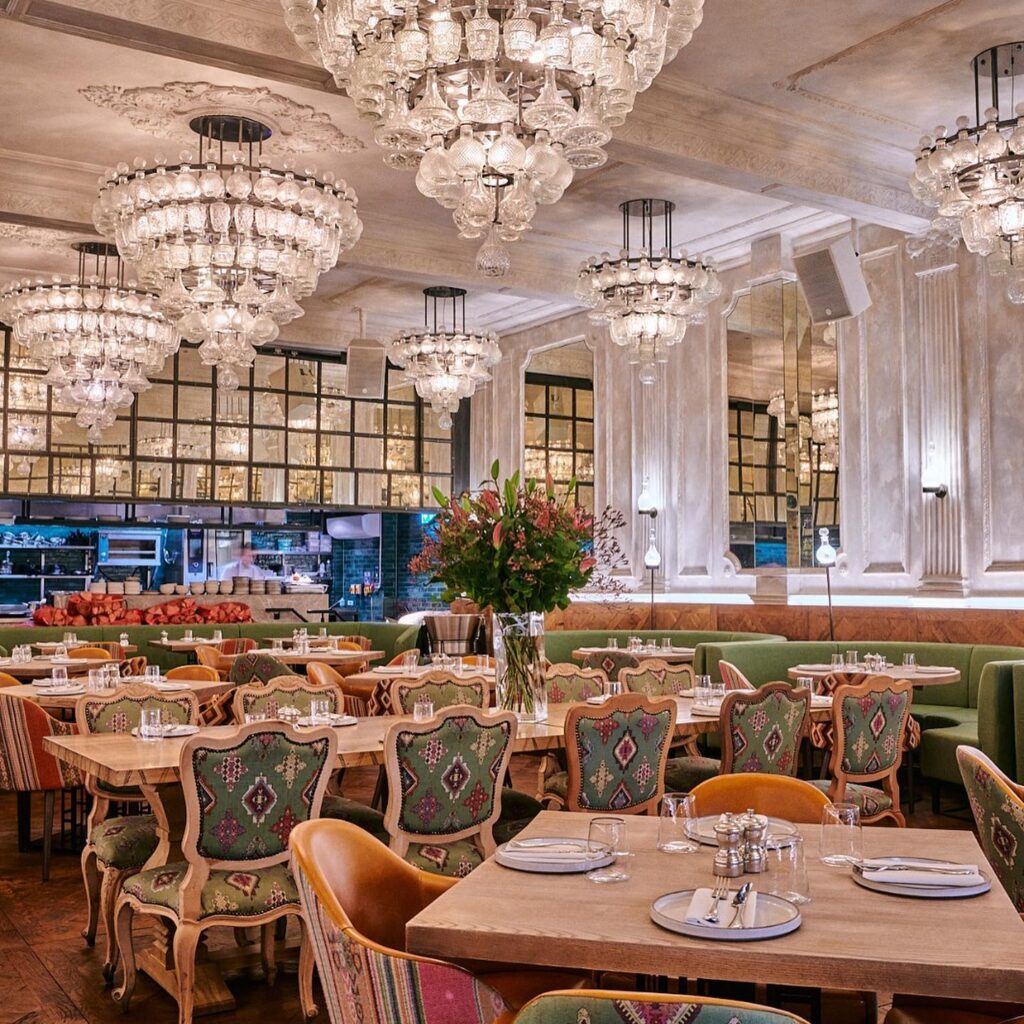
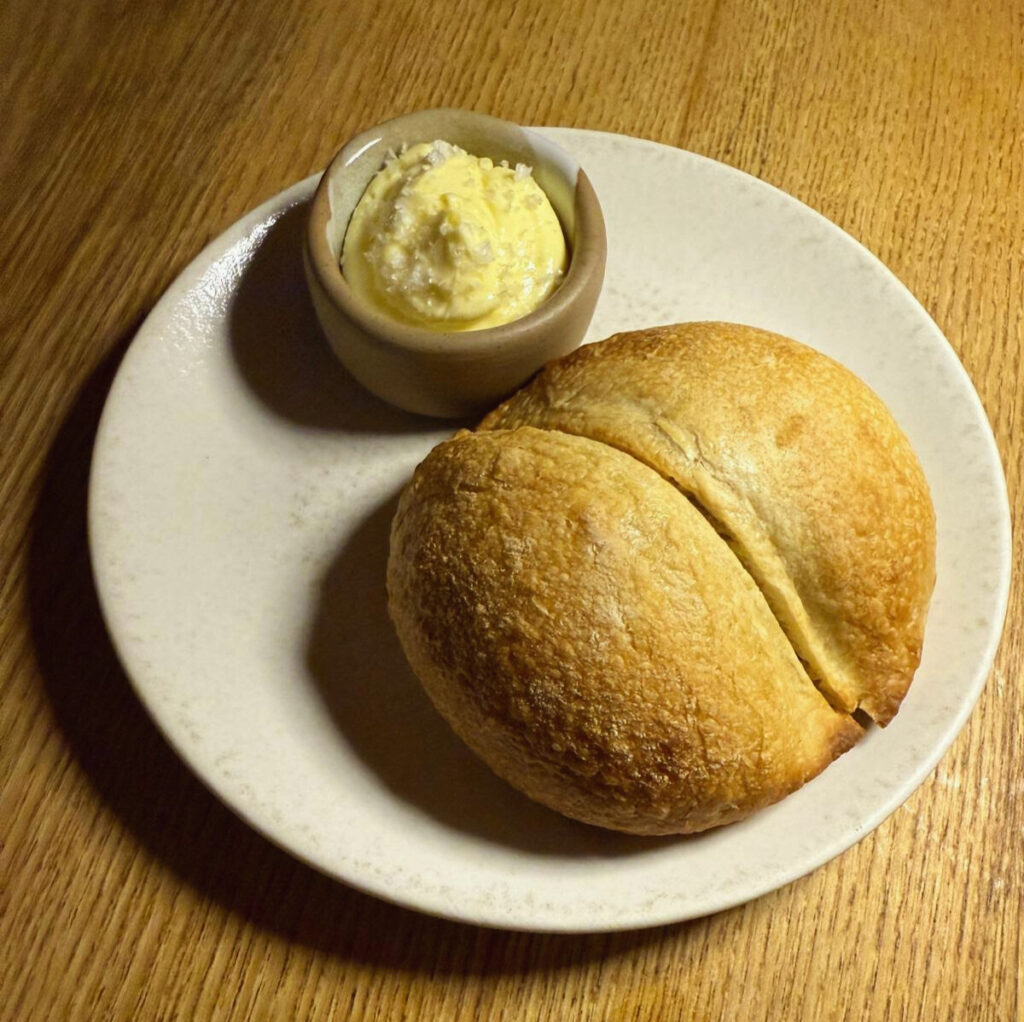
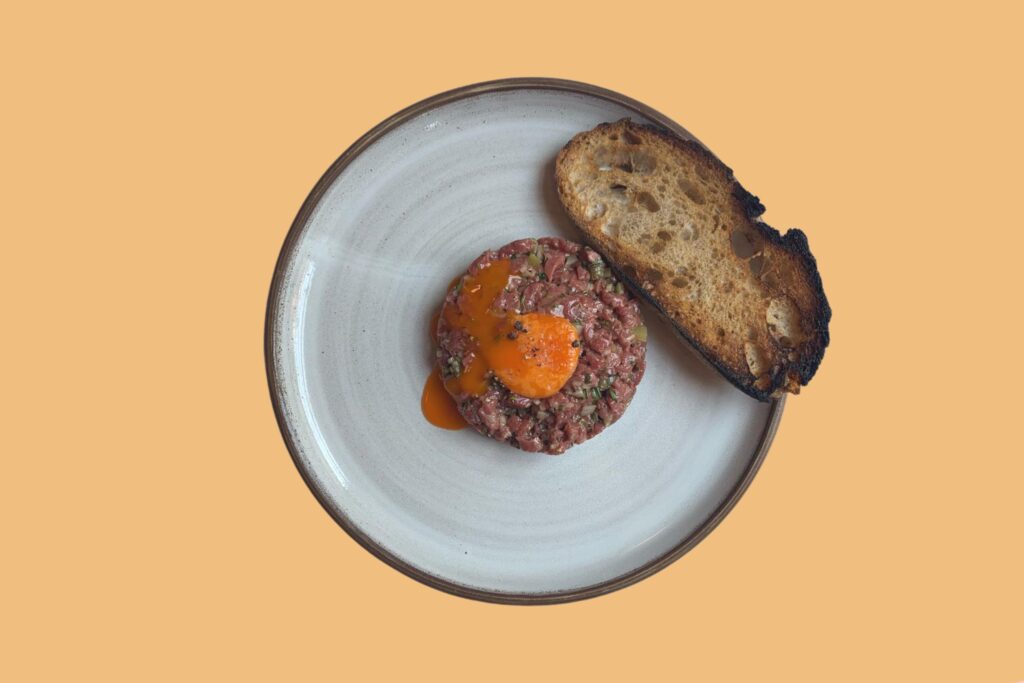
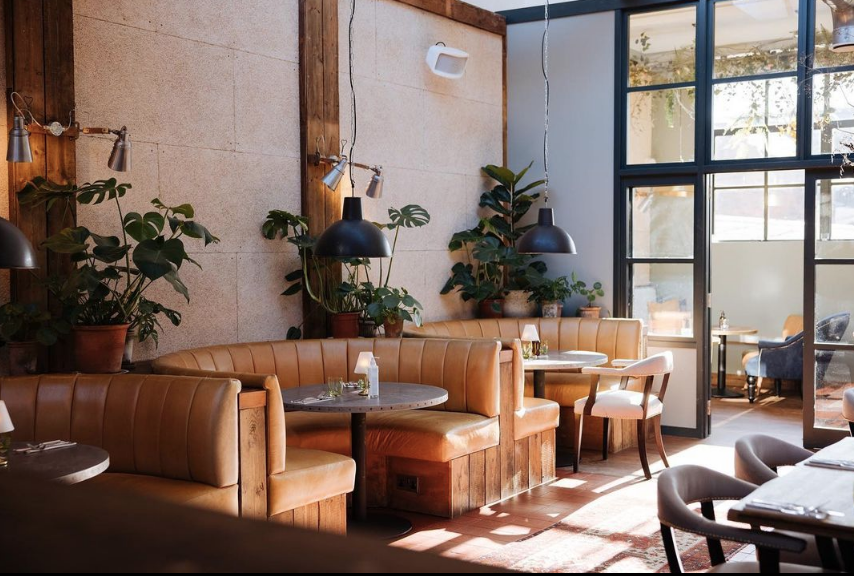
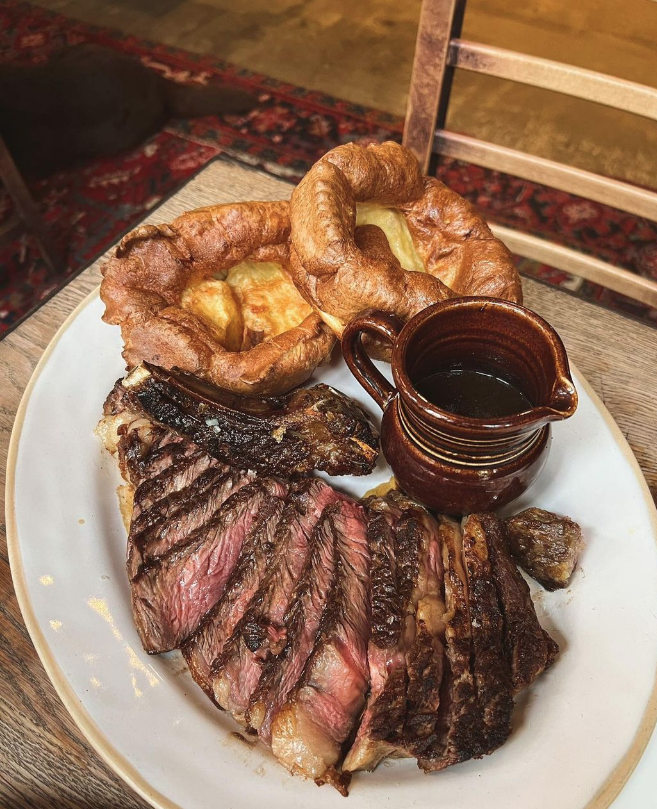
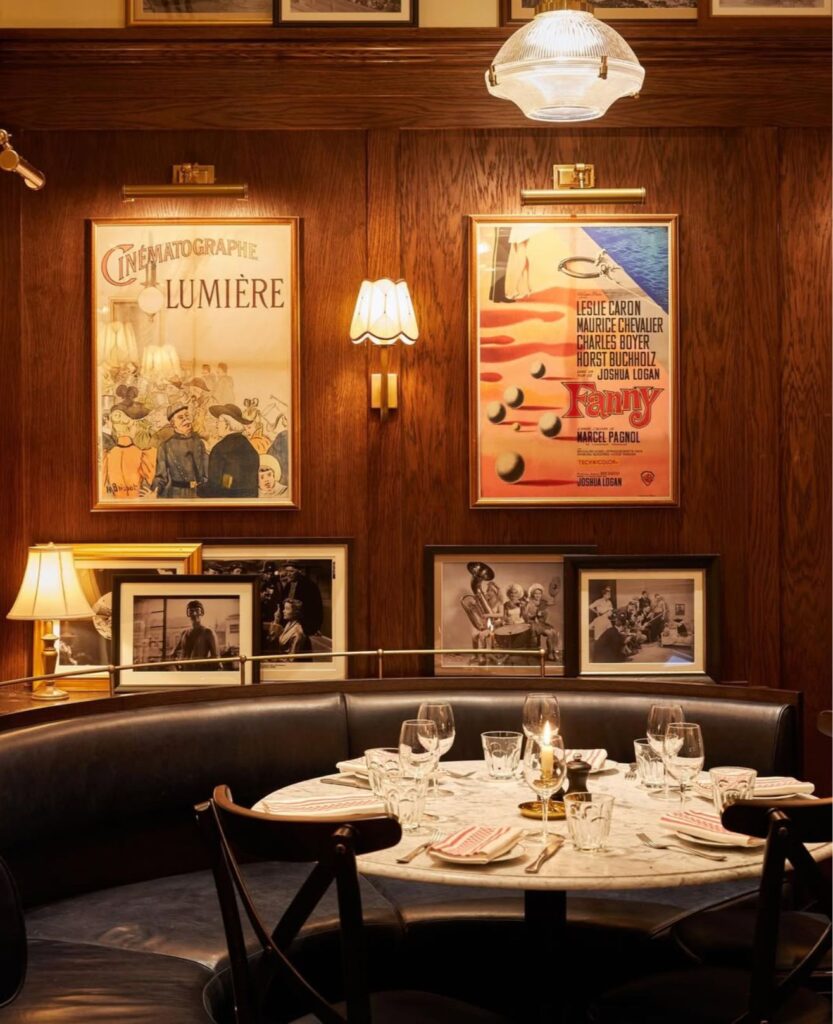
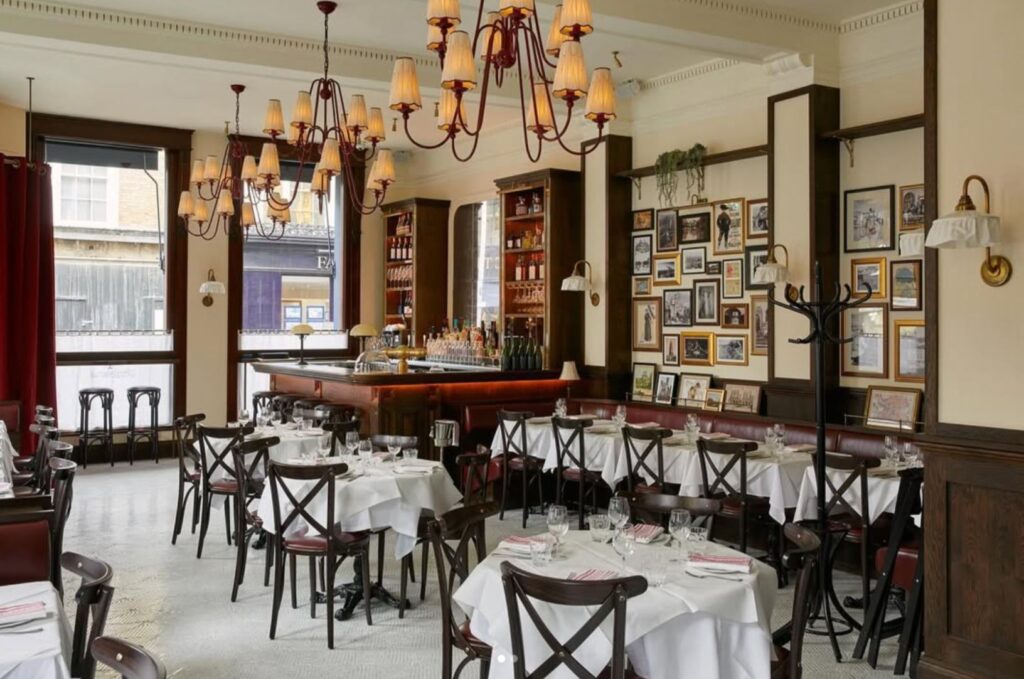
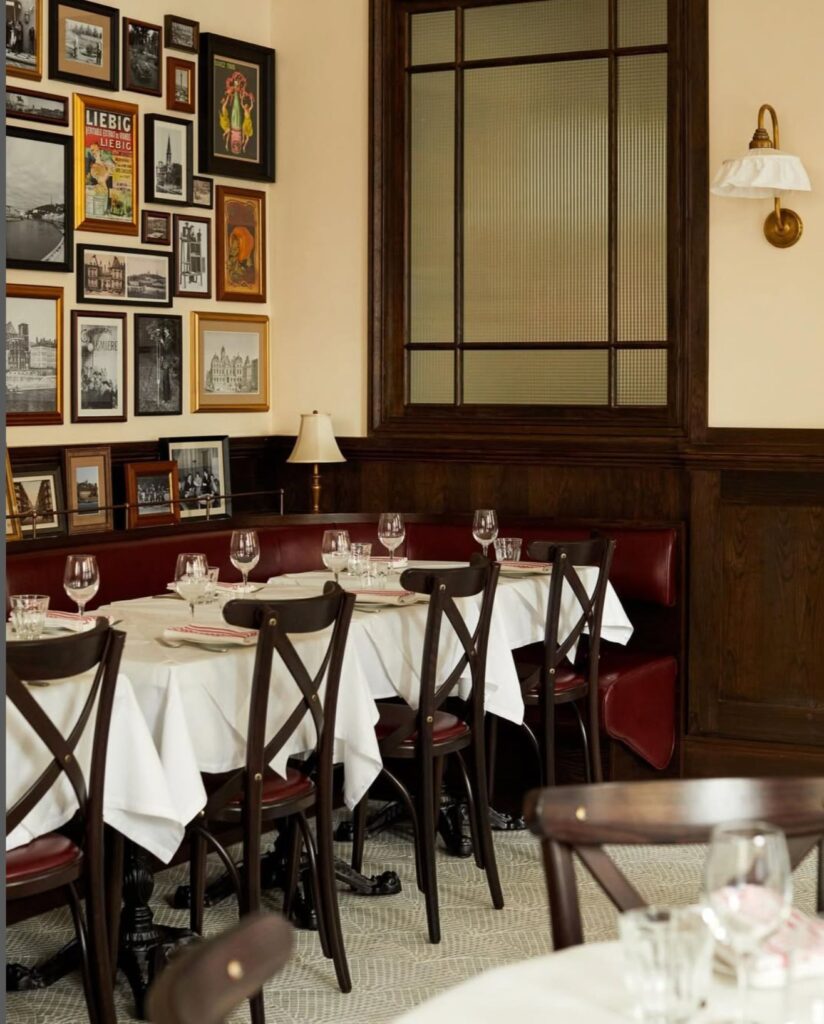
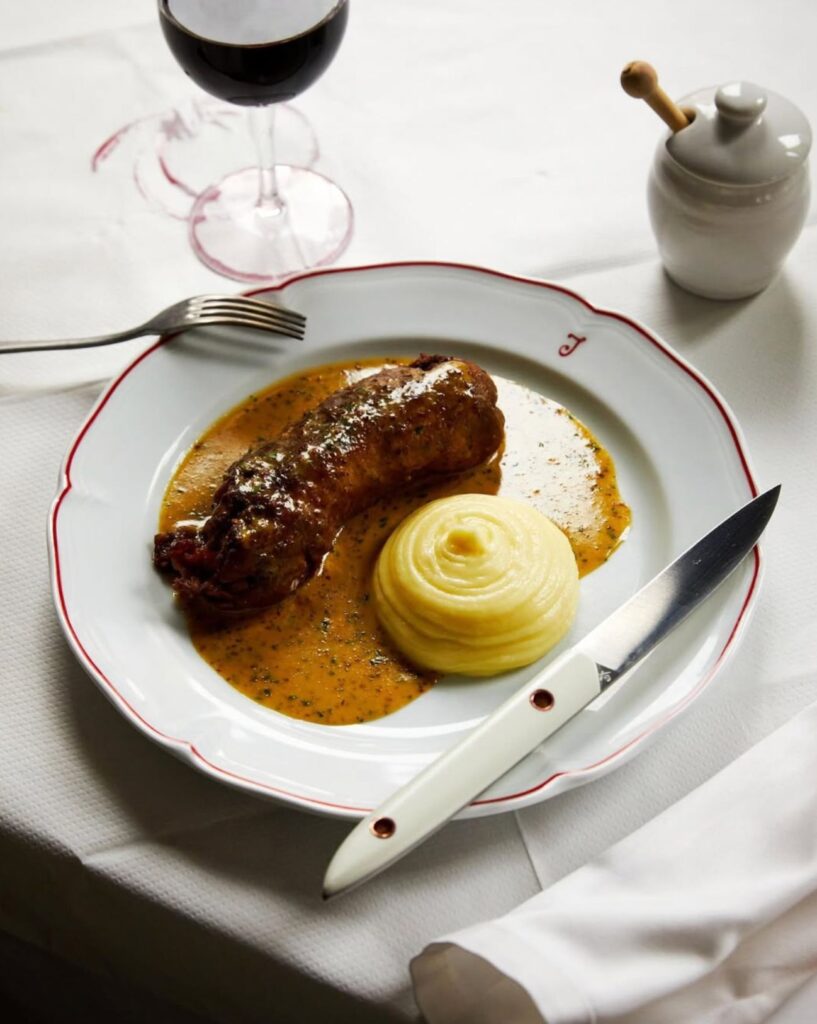
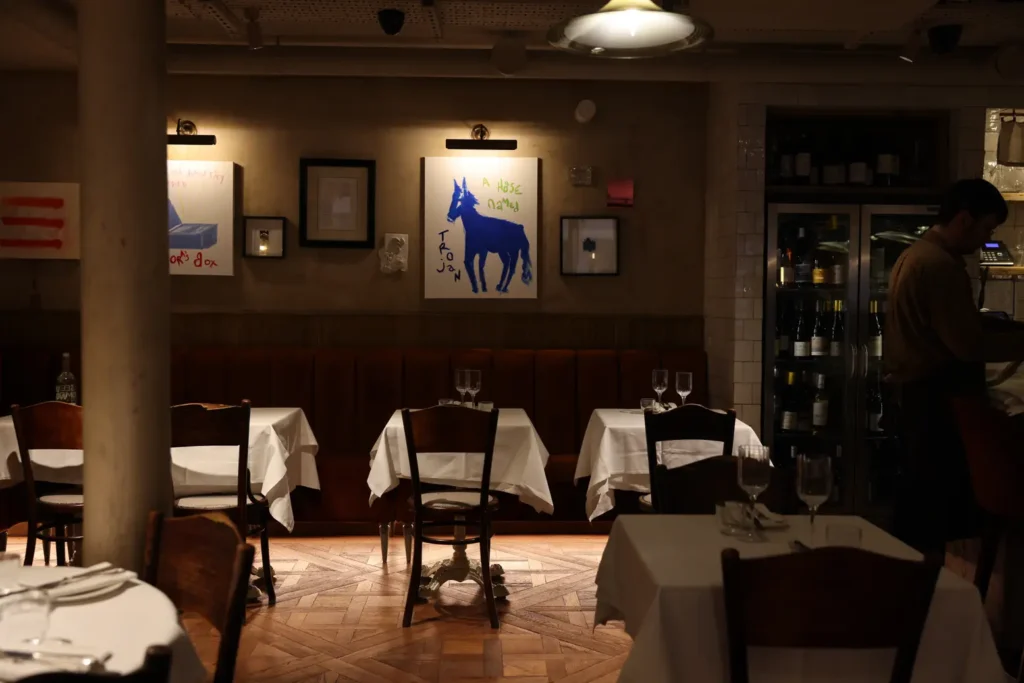
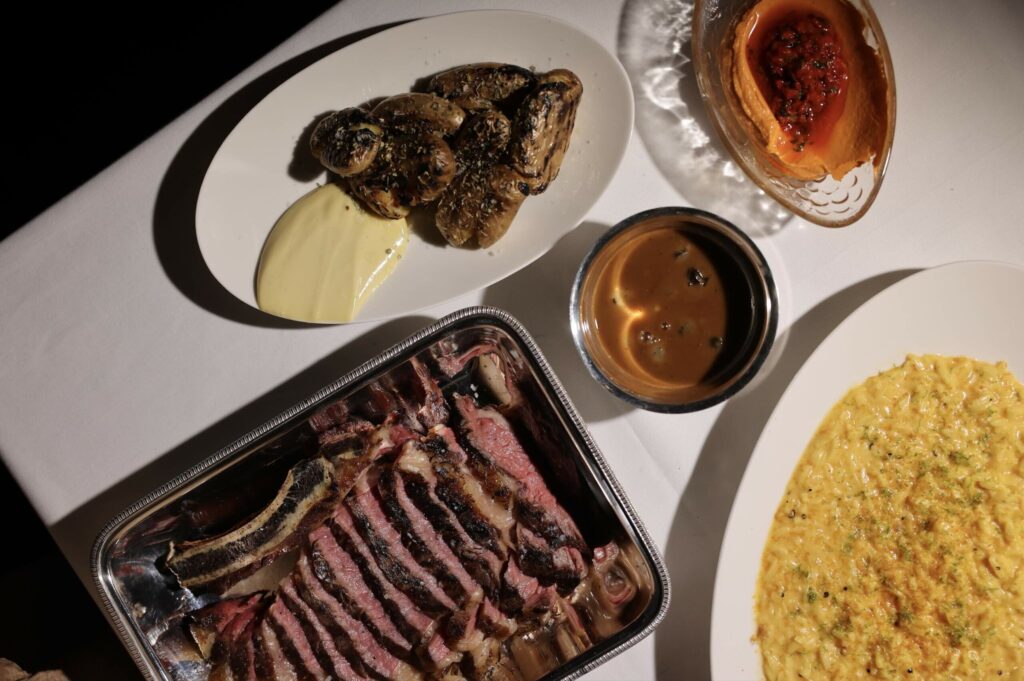
Our latest addition to the IDEAL 22, if you’re looking for where to eat and drink in Soho, then this is the place. Sure, you’ll need to have scored a reservation actual months in advance. And yes, you run the risk of running into TopJaw hanging around outside clutching a microphone and an untouched Guinness. But the absurdly hyped Devonshire is worth those considerable hurdles to your patronage, with a dream team of consummate host Oisin Rogers, Flat Iron founder Charlie Carroll and decorated chef Ashley Palmer Watts all bringing their unique expertise to this supremely confident pub/restaurant/bar-and-grill.
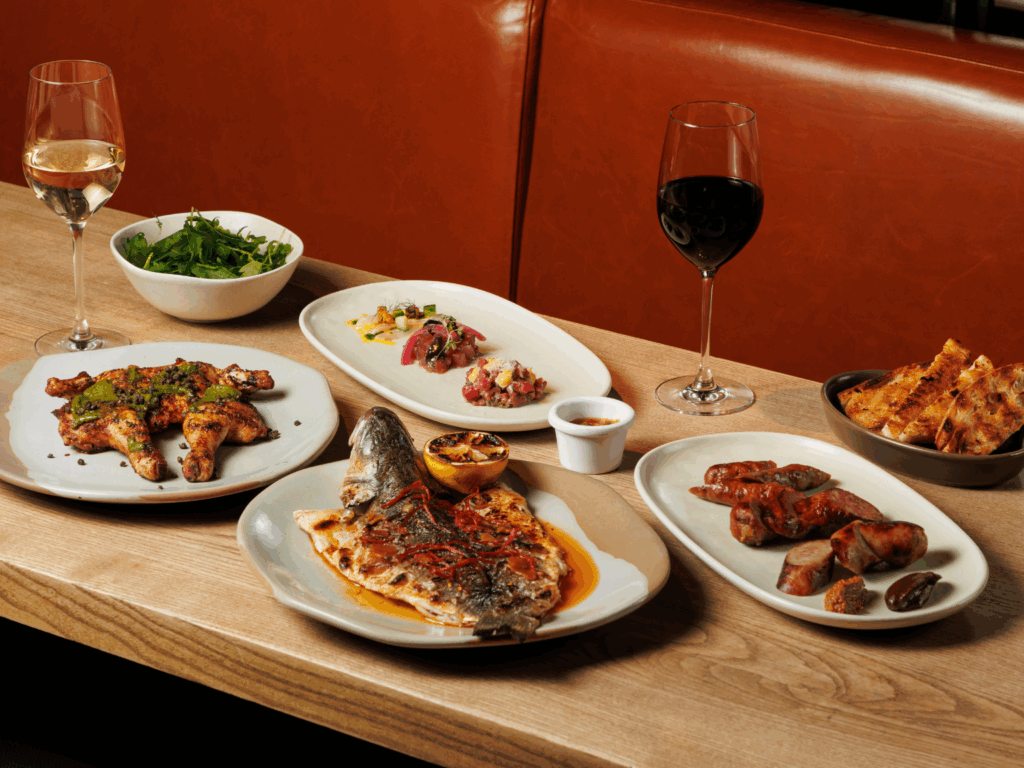
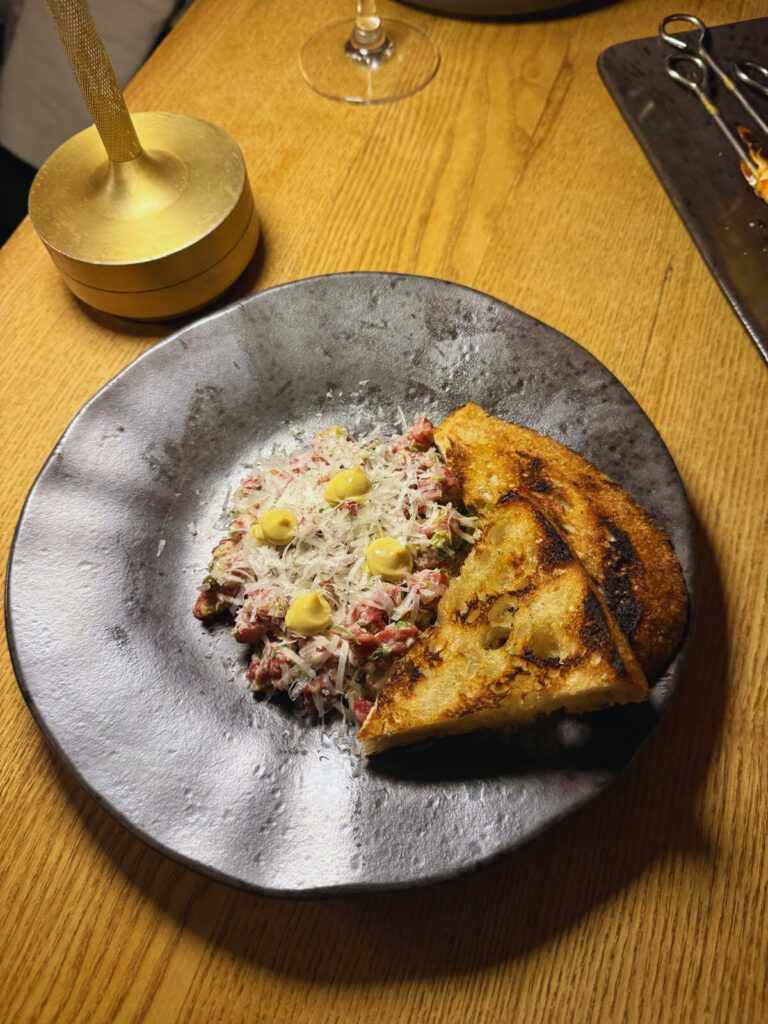
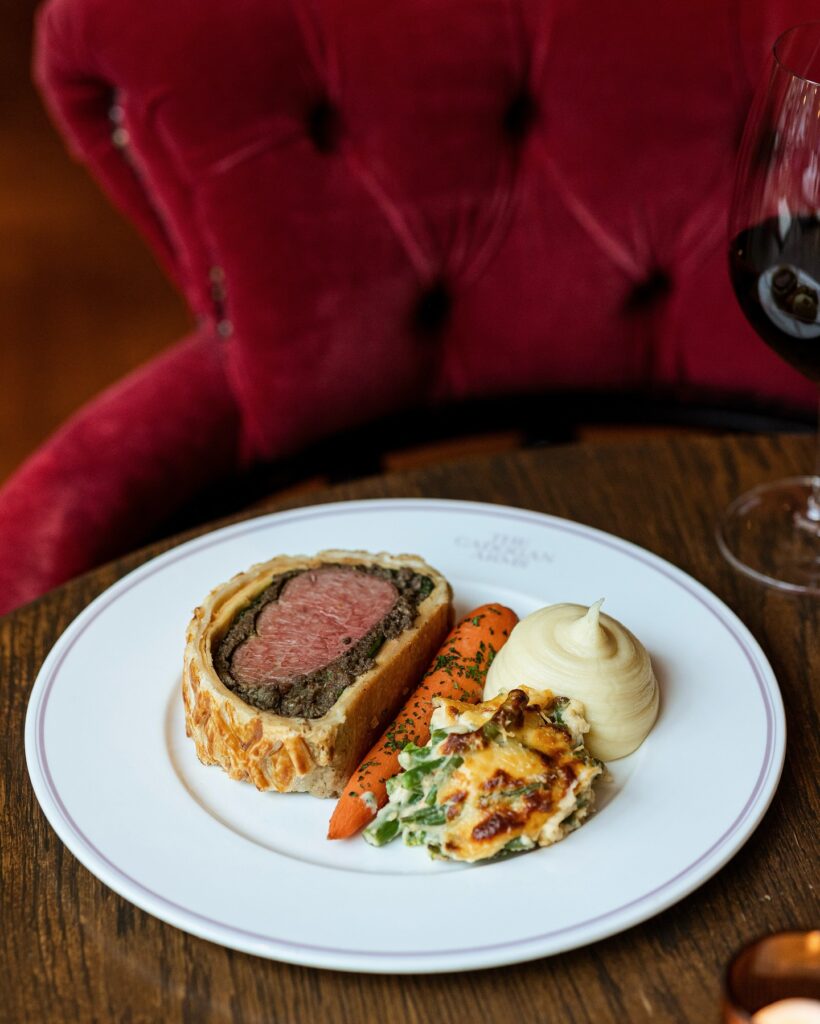
Standing proud on a street corner where Piccadilly becomes Soho, The Devonshire sprawls over four floors, with the pub on the ground floor walk-ins only and the dining rooms above very much needing to be booked. Once you’ve secured a table in the Grill Room section of the restaurant, you’ll want to order from the grill section of the menu, which makes up almost half of everything that leaves the kitchen here, sourced from a string of bespoke suppliers via the Devonshire’s dedicated butchery room, which boasts space for 4000 steaks.
Go for the ribeye (around 300 grams for £36), which gets chucked on the handsome wood fired grill until a gorgeous bark has formed but it’s still blushing in the centre, of course. It’s wonderful, and only elevated further by a gold standard Béarnaise sauce (yours for £2.50). Because this is a place of excess, pair your steak with the ‘pile of langoustines’, which are, well, just that; halved and grilled, a generous shower of rock salt and plenty of seasoning from a smoking stack of beechwood seemingly all they need.
If you’re going to make a cursory nod to health and vitality, then be warned; all sides come with a good dose of fat; buttered carrots, creamed leeks, duck fat potatoes…you get the picture. A rich, thick pint of the black stuff feels appropriate right now, and this is one that won’t be documented on any tedious ‘pints’ accounts on Instagram, that’s for sure.
Despite it’s seemingly unstoppable wave of popularity, things are kept humble with a reassuringly priced set menu that will set you back £29 for three generous courses. Currently, it’s prawn and langoustine cocktail, skirt steak, chips and Béarnaise, and an indulgent sticky toffee pudding to end on. And it’s ended us, too; we’re stuffed…
Ideal for a nourishing Japanese breakfast and the best udon noodles in Soho…
Shuko Oda’s Koya is one of London’s most straightforwardly enjoyable, soul-nourishing restaurants, Japanese or otherwise. The menu here focuses on two types of udon atsu-atsu (hot noodles in a hot broth) and hiya-atsu (a hot broth with cold noodles on the side), with plenty of extra treats and toppings to liven up proceedings.
The iconic traditional Japanese breakfast and steaming bowls of udon noodles with tempura prawn are the headliners, but there’s so much more to enjoy here, from the perfectly poised house pickles all the way to braised pork belly with cider, gelatinous and giving in all the right places. It’s an absolute joy.
Ideal for timeless British food in the most illustrious of settings…
Jeremy Lee has been at the helm of Quo Vadis since 2012. With the voice of a thespian and the culinary generosity of the old French masters, he represents everything that is good and great with cooking on this isle.
The food at Quo Vadis is a lesson in simple British fare with a flourish of French technique; be it in a whole mackerel served prosaically/poetically with just a wedge of lemon, or a wing of skate dressed with brown butter, capers and parsley. Or, simply, a plate of pate and pickles.
Mainstays of the menu include one of Lee’s signature dishes; the iconic smoked eel and pink pickled onion sandwich, which you’ll find in many a listicle of must try dishes in London. Then there’s always a pie – golden, pastry bottom intact, filled generously – on the menu. Just delicious and oh-so satisfying.
For us, desserts are one of the main draws here. Though not always on the menu, the profiteroles here are simply irresistible and are something we dream of, much like Lee himself.
Ideal for basement level barbecue with a difference…
Temper Soho is a one-of-a-kind barbecue restaurant nestled beneath Broadwick Street in a vast basement space, its grungy, below street-level surrounds feeling synergistic with the live fire cooking and nose-to-tail ethos of the place.
The restaurant’s centrepiece is a giant fire pit, where chefs expertly cook whole animals sourced from English farms. If you’re expecting an American style barbeque joint with brisket and burnt ends, you’ll be sadly disappointed – that, or pleasantly surprised.
Instead, the menu at Temper Soho comes with a pronounced Mexican inflection, with quirks from other countries, like their fantastic gochujang butter served with beef fat cornbread, keeping things interesting.
Made for sharing, their whole beast board blessed with a whole host lesser-used cuts of beef including house-made sausages, smoked ox cheek, liver and ox heart anticucho skewers, is one of the best things an omnivore with a particular penchant for grilled food can enjoy in London.
Ideal for a taste of Iran in the heart of the city…
Berenjak, Soho’s first Iranian restaurant, is another JKS Restaurants creation, with skilled chef Kian Samyani, formerly of Gymkhana and Brigadiers, at the helm.
Inspired by Tehran’s hole-in-the-wall kabab houses, the menu features succulent charcoal grilled kababs and khoresht (stews), as well as superb mazeh-style small plates and, perhaps most famously, an incredible baklava ice cream sandwich.
The name itself is inspired by the brightly coloured, toasted rice snacks enjoyed at Persian funfairs, setting the tone for a playful, nostalgic dining experience, as well as the dining room itself; all beautifully intricate Iranian tiles and rich leather banquette seating.
What truly sets Berenjak apart, however, is the sense of family, community and conviviality that permeates the entire dining experience. Samyani’s long-standing relationships with his team members, some of whom he has known for over a decade, ensure that the restaurant operates with a genuine warmth. And that’s not just coming from the charcoal grill!
Ideal for ravishing bowls of Filipino flavoured Japanese ramen…
A good few years ago there was a ramen revolution in London, thanks in part to Momofuku’s David Chang, whose Japanese-Korean fusion bowls are often credited with the rise of ramen across the pond.
Today, you can get a good bowl of ramen just about anywhere in the city, especially Soho. But through its unique fusion of Filipino and Japanese flavours and their unorthodox riffs on ramen, Ramo Ramen has given us a whole new reason to bite into a bowl of toothsome noodles and slurp away.
So, what to order here? With a 16-hour fish and tamarind broth, their heady and intoxicating Sinigang Ramen is a standout dish for us.
Whatever you take a punt on, Ramo Ramen has quickly become one of the most interesting Soho restaurants, and a fine purveyor of ramen to boot. Not only are they proving that ramen is so much more than a sum of its parts, but the chefs behind the restaurant are also helping change perceptions of Filipino food in the city. And we’re very much here for that.
Ideal for a 100% plant-based high-end fine dining experience in London…
This much loved and lauded vegan-only fine dining restaurant subverts the traditions of your classical French fine-dining experience, focusing instead on vegetables and plant-based cuisine
Unlike some British culinary institutions that tend to treat vegetables as an afterthought or distraction, at Gauthier they are everything – the main focus – paired with herbs and spices to create decadent combinations.
And in true indulgent, fine-dining style, the food here is delivered as a tasting menu. In fact, Gauthier Soho claims to be the first classical French fine-dining vegan restaurant in the world. It also claims to be the world’s first primary sustainable gastronomic restaurant – in other words, their carbon footprint is relatively low because of the ingredients they choose not to use. And that’s something we can all throw our support behind, don’t you think?
Some of the highest praise we can offer is that this isn’t simply one of the best places to eat vegan food in Soho, but simply one of the best places to eat in Soho, full stop.
Ideal for Argentine fire and flair in a former concert hall…
Fire-cooking aficionados, prepare to be smitten. Sucre brings Argentine-inspired flame-focused cooking to Soho in what might be the area’s most jaw-dropping dining room. Housed in a 310-year-old building that once served as the London College of Music’s concert hall,the restaurant marries spectacular design with impressive cooking.The acoustics aren’t half bad, either…
We’re not sure what hit us first; the smell of wood smoke coming off the parrilla, seasoning the dining room with something suave and intoxicating, or the chandeliers fashioned from over 1,000 cut glass decanters shimmering above the dining room.Let us have both.
These statement pieces and scents, coupled with soaring ceilings inherited from the venue’s concert hall days, create a grand entrance, make no mistake. Now all we need is our theme song playing as we saunter in, and the welcome would be complete. You know what? We wouldn’t be surprised if that service was actually offered to some patrons; Sucre is perennially popular with celeb diners, or so we’re told.
Chef Fernando Trocca, who established the original Sucre in Buenos Aires back in 2001 (the original has been featured on the Latin America’s 50 Best Restaurants list), has created a menu that subtly challenges preconceptions about Argentine cuisine.Yes, there’s brilliant, blushing, beautifully barked beef, but Trocca’s approach – what he calls ‘Fire Dining’ – is more nuanced, drawing on his Spanish-Italian heritageand the traditional Latin American technique of cooking with embers rather than direct flame.
The result? Dishes with depth, complexity and that addictive cloak of smokiness that only proper fire-cooking can deliver.Begin with a cheddar and onion empanada with pleasingly chalky pastry or the excellent (though slightly obscene looking) bread course, before moving on to a raw plate or two. The sea bream ceviche is pretty as a picture (if you can take your eyes off the handsome dining room for more than a moment), with dots of charred blood orange and jalapeño delivering that perfect citrusy punch, but the beef tartare, showered in parmesan and dotted with parmesan cream, is perhaps even punchier.
It would be rude not to order some bits off the grill (it would be insanity not to, in a place like this), and the king prawn skewers and grilled whole tale of monkfish compete for attention on a table getting increasingly crowded with delicious bits. A steak feels almost perfunctory at this stage, but delivers on that all-important contrast between caramelised crust and blushing pink centre.
Desserts maintain the South American connection, but play a little faster and looser with the brief, and the dulce de leche fondant steals the show, packing in more oozing centre than it appears physically possible to possess. Pair it all with Sucre’s excellent, aesthetically on-point cocktails – they do particularly brilliant things with tequila and mezcal – and totter out of that handsome dining room a little unsteadier, but so much more satisfied than when you arrived.
Ideal for modern Jerusalem cuisine and a raucous, arak-soaked session…
The Palomar is a cornerstone of Soho’s vibrant dining scene, a place where shots of arak are taken down with almost as much vigour as you’ll find in the ever-present, za’atar spiked labneh, perfect for pulling through with the just grilled house pita.
Founded by siblings Zoë and Layo Paskin, it’s a thrilling whirl through modern Jerusalem cuisine, which draws inspiration from the rich cultures of Southern Spain, North Africa, and the Levant. While the bread and dip section of the mnu is a wonderful way to start (and punctuate a meal), it’s the stuff cooked over coals at The Palomar that really gets us going. Think impossibly succulent lamb rump given vivacity via a pert salsa verde, and oh-so crispy metugan bream served alongside Israeli kimchi and green harrisa – the latter tasting as striking as it looks.
Yep, this is a place where you’ll leave feeling full but flighty, satisfied but sprightly, and that’s a tough balancing act to pull off.
Ideal for superbly seasoned steak tartare and other French bistro favourites…
The French House holds a special place in our hearts for more than one reason. Firstly, it satisfies the need to have a quick pint before a dinner date, while also providing a moment to truly acknowledge and appreciate Soho’s history and just how great its pubs are. But more importantly, it’s also one of our favourite places to eat in the capital.
While it’s known as an iconic London pub by many, the French House also has a small, exquisite dining room upstairs serving immensely satisfying French fare. It’s our go to place whenever we have a hankering for nimbly seasoned steak tartare, or when a craving for steak frites suddenly strikes. Which, we’re shy to admit, is rather often…
The dining room at The French House has a storied past, having been opened by Fergus and Margot Henderson in 1992. Today it is headed up by the talented chef Neil Borthwick who has worked at prestigious establishments such as The Connaught (where he met his wife, chef and national treasure Angela Hartnett) and Merchants Tavern, which he co-founded with Hartnett. Borthwick’s culinary prowess is evident in the hearty, fuss-free French cuisine served at The French House, and long may it continue.
London is blessed with some superb Sichuan restaurants, but if you’re seeking faithful, fearsome, f’ing delicious renditions of the region’s staples, then Barshu (an apt name considering the ol’ Scoville Heat Units) in Soho will see you right. Unlike many similar spots in the city, the food here is not watered down for the Great British palate, and is all the better for it..
Whilst capsaicin-philes will find plenty on the menu at Bar Shu to tantalise and titillate, perhaps the straight up spiciest dish on the menu is the boiled sea bass with sizzling chilli oil (Shuizhu Yu). We recommend ordering some cooling dishes to help temper its rougher edges.
Elsewhere on the menu, we adore the dumplings doused in a smoky chilli oil and a vinegar sauce that’s so delicious you can slurp the liquid just by itself. We have. Or, head here for perhaps the finest bowl of dan dan noodles in the city. Yep, there’s a lot to love about the food here.
Ideal for Thai barbecue with a sense of both fun and theatre…
Kiln is quite the sensory spectacle, with bar seating overlooking flames, smouldering coals, clattering clay pots and burning woks. The vibe transports you right out of central London and to somewhere altogether hotter and more rustic.
And that’s before you’ve even had a bite here. When you do, you’ll find Thai plates that are downright delicious and frequently fiery.
With a focus on high quality ingredients, the menu changes seasonally. Our favourite time to visit is during game season, where the menu comes alive with jungle curries of wood pigeon or wild mallard and minced laab salads of raw venison.
A mainstay and must order on the menu is Kiln’s grilled cull yaw skewers sprinkled in cumin; so damn delicious and an unforgettable snack. Follow with the clay pot baked glass noodles (a standout dish that’s never been taken off the menu) and you’ve got yourself a gorgeous little meal.
Ideal for some of the most exciting bánh mì outside of Vietnam…
The bánh mì, a sandwich sold throughout the streets of Vietnam which beautifully melds French and Vietnamese ingredients, is one of the world’s greatest sandwiches. And some of the best Vietnamese sandwiches in London can be found at Keu where they are fresh, crisp and astonishingly delicious.
With thirteen fillings to choose from, Keu’s stellar bánh mì making operation sees hundreds of baguettes made each day. From classic fillings of pate and pickles to less traditional takes like slow braised mackerel in caramelised fish sauce, all the way to their kimchi-filled bánh mì that comes with honey glazed pork, there’s something for everyone here.
We end, exhausted and inebriated, at Ganton Street’s Dehesa. In fact, we might be full to finish this one. Why not check out our write-up of the restaurant here, rather than eating a single bite more today? The IDEAL 22 restaurants can have that effect on your waistline, we think.
And when our appetites both resume, we’ll see you over in Marylebone; whoever arrives first gets the Welsh rarebit croquettes in? Deal.
Forget everything you think you know about university town dining. While Oxford might claim the literary lunch, Cambridge has quietly transformed itself into East Anglia’s most compelling food city.
Here, Michelin-starred kitchens share streets with dumpling houses that would make a Shanghai chef homesick, and third-generation fishmongers turn their catch into the kind of seafood that makes London critics book train tickets. Hmmm, almost sounds like we’re rapping here…
Between the centuries-old college walls and along the backstreets where Newton once pondered gravity, you’ll find everything from wine bars pouring up something natty to pastry chefs who learned their craft in Paris before bringing it to Parker’s Piece. The result is a dining scene that’s both relaxed and forward-thinking – where you might start your evening with hand-pleated xiao long bao on Mill Road and end it with a twelve-course tasting menu overlooking Midsummer Common. Better have a friend willing to pitch up with a Haemmerlin to wheel you home…
…Anyway, you’re here to read, not get a case of Couvade syndrome as we reel from a food baby. Let’s not mess about any longer; here’s our guide to the places making Cambridge as much a destination for food lovers as it is for scholars. These are the best restaurants in Cambridge.
Noodles Plus, Mill Road
Ideal for xiao long bao that rival Shanghai’s finest…
In a bright green, no-frills space on Mill Road, Dong Huang and Hui Yan Li have created a place that draws homesick Chinese students and dumpling aficionados alike in their droves. Since opening in 2015, this modest spot has earned its reputation through consistent excellence rather than fancy furnishings. In all honesty, it’s our favourite place to eat in all of Cambridge.
The star attraction costs just £9 for six pieces: xiao long bao (soup dumplings) that require a certain technique to eat properly. Place one on your spoon, make a tiny hole to release the steaming broth, sip the rich soup, then dip the dumpling in sauce and devour. If you don’t heed this advice, your oral mucosa is getting burned clean off. And we promise that’s the last time we write ‘oral mucosa’ today…
Anyway, these little parcels of lava-filled joy are made fresh throughout service, each one perfectly pleated and filled with a deeply savoury pork and broth mixture that speaks of some serious skill and commendable attention to seasoning. It’s all in the judicious use of naturally occuring gelatine, you see…
Beyond the signature soup dumplings, the menu spans everything from pork and green bean dumplings to heartier options like their noodles with king prawn in spicy sauce. The spare rib noodle soup draws repeat-eaters (rep-eaters?) week after week for an all-encompassing and wholly satisfying lunch, while the mixed seafood noodle soup shows they know their way around the flavours of the sea, too. Each table comes with its own DIY sauce station – black vinegar, soy sauce, and minced garlic let you create the perfect accompaniment. No dish we mentioned breaks the tenner ceiling.
The setup at Noodles Plus is as casual as you want it to be – think canteen-style seating and counter service that’s all part of the charm. There’s usually a queue (especially at lunch), but it moves quickly, and you can watch the dumpling masters at work while you wait. Stacks of bamboo steamers line the counter, releasing puffs of steam that promise good things to come. Is there a better sight when you’re hungry and tucked in towards the front of the queue?
It’s cash only here, but with most dishes under £10, you won’t need much of it. The vaguely billed ‘Chinese herbal drink’ (a can of wong ko lat, it turns out) at £2.50 makes the perfect companion to a table full of dumplings and a welcome sense of humble luxury.
Ideal for special occasions that demand something extraordinary…
There’s something rather magical about Midsummer House’s current incarnation, now in its 40th year. In a Victorian villa overlooking the handsome grazing cows of Midsummer Common, chef and owner Daniel Clifford has created the sort of restaurant that makes you understand why Michelin stars still matter – his two have been twinkling here since 2005, making it the only double-starred establishment in East Anglia, and a destination for culinary pilgrims from all over the country.
The elegant conservatory dining room benefits from floods of natural light, lightening the mood in the process, with a window into the kitchen that lets you watch the culinary theatrics unfold. Here, classical techniques meet modern British innovation in dishes that celebrate both simplicity and surprise – expect to start with delicate morsels like aged parmesan sablé with autumn truffle and a complimentary glass of Billecart-Salmon Brut Sous Bois before moving onto more substantial delights.
The full tasting menu experience comes in at £280 (there’s a shorter one for £170), a serious investment that delivers equally serious rewards. Current highlights include a playful take on a Bloody Mary featuring celery sorbet and lime, and Loch Duart salmon elevated – genuinely – with white chocolate and caviar. The coconut parfait dessert, served with Nyangbo chocolate and a hint of green chilli, shows exactly why this kitchen team has maintained their stars for so long – it’s an intriguing, intoxicating balance of flavours that read like jargon on the page but make total sense on the palate. Petit fours are a particular highlight – dainty af and closing the meal in some style.
For the more budget-conscious, weekday lunch offers the same precision cooking at £95, while still including treats like their signature warm French bottereaux with Midsummer apples. The wine pairings are so well judged here that a flight feels almost essential, ranging from the Classic at £135 to the truly special Luxurious selection at £540. Their ‘juicelier’ has created an equally impressive alcohol-free pairing for £70 that proves non-alcoholic drinks can be just as exciting.
If weather permits, you can finish your evening with a Cuban cigar on their terrace overlooking the river. Just don’t expect to be thinking about dinner anywhere else for quite some time.
Located at number 22 Chesterton Road (hence the name), in a Victorian townhouse with stained glass windows dating back to 1892, Sam Carter and Alex Olivier earnt its Michelin star just a year ago, but that didn’t stop the hard work with a satisfied dusting off of the hands. Instead, they’ve continued to push creative boundaries while keeping the atmosphere agreeably breezy – a fine balancing act for a restaurant with clear, myopic ambition.
The intimate dining room backs onto Jesus Green, making it perfect for a pre- or post-dinner stroll (or punt, if you’re feeling brave). The vibe within – all flickering candlelight, stretched shadows and intimate corners – creates the kind of ambience that makes every meal feel like a special occasion, without ever tipping into formality.
The full tasting menu at £150 shows remarkable creativity and deep respect for seasonal produce. Current highlights include smoked Chalk Stream trout with lovage and ikura (red caviar), and Isle of Skye venison paired with Alsace bacon and black trompettes. The blood pudding with mustard and toasted barley has become a signature dish, showing how comfortable they are elevating humble ingredients to new heights.
For lunch, you’ve got options – 22’s short tasting menu offers the same precision in a more time (and wallet) friendly format at £115, while Thursday lunchtimes see a set menu for £65 that remains one of Cambridge’s best value meals. The Cornish cod with brassicas and preserved lemon appears across all menus, suggesting they know when they’re onto a good thing.
The wine program deserves special mention – their sommeliers have carefully curated a list that ranges from accessible to exceptional – the AA recently recognised it as a Notable Wine List, which is actually a more esteemed accolade than the prosaic billing suggests.
The drinks pairings take you on different journeys: the Discovery flight at £90 features lesser-known regions and exciting styles, while the Signature flight for £165 showcases fine wines from around the world. Their non-alcoholic pairing at £65 receives the same careful attention as its wine counterparts.
Anyway, back to the beginning; start your evening with one of their house cocktails – the Twenty-Two Espresso Martini with muscovado and chocolate bitters puts a clever spin on the classic, while their Cambridgeshire Negroni uses locally-distilled spirits including their own Restaurant 22 gin, created in collaboration with Cambridge Distillery. You could, of course, finish with one, too. Suddenly, that punting feels like a fine idea. Anyone got a life jacket?
Ideal for seeing vegetables in an entirely new light…
In an understated space on laid back Mill Road, with an open kitchen framed by white metro tiles and brass pendant lights, chef Alex Rushmer and his team have created something truly singular. Since opening in 2019, Vanderlyle has evolved from an exciting newcomer into one of Cambridge’s most innovative restaurants – and they’ve done it without ever serving a piece of meat or fish.
The minimalist dining room, with its teal-blue bar and mid-century modern furniture, sets the scene for what’s to come: thoughtful, stripped-back cooking that lets ingredients speak for themselves. Music plays an important role here too (the restaurant takes its name from a song by The National), with carefully curated playlists adding to the relaxed yet focused atmosphere.
At £85, their tasting menu changes with what their local farmers and producers deliver each morning. Expect clever combinations that might make you forget you’re eating purely plant-based food – recent highlights include a smoked carrot tartare with horseradish and fermented white asparagus, and an oyster mushroom milk bun that could convert the most committed carnivore. Their mushroom and ricotta tortellino with bordelaise sauce demonstrates that depth and richness don’t require animal products. It really is a lip-smacking sauce, and we’d encourage Rushmer to start selling the stuff in pint form.
Their signature dishes have become the stuff of local legend – the ‘Vanderlasagne’ layers house-made pasta with 12-hour vegetable ragù and truffled bechamel foam, while their carrot rigatoni cleverly mimics smoked salmon using just carrots, seaweed caviar and dill. Perhaps most impressive is their smoked carrot tartare, a plant-based homage to Thomas Keller’s famous salmon cornet that proves vegetables can be just as luxurious as any protein.
Sustainability isn’t just a buzzword at Vanderlye – it’s built into everything from their four-service week (allowing staff proper rest) to their pre-payment system that helps minimise food waste. They work directly with regenerative farmers and local producers, creating dishes that celebrate what’s growing right now in Cambridgeshire’s soil.
The drinks program matches this thoughtful approach – their wine list starts from £30 a bottle, with drinks pairings that might include anything from South African Chardonnay to house-made cola herb soda. The non-alcoholic pairing at £35 stands equal to its alcoholic counterpart at £50, with some intriguing, invigorating kombuchas making up the bulk of the offering. Even their petits fours feel considered, providing a perfect full stop to an evening of discovery. Eat your cake, indeed.
It feels rather perverse to leave Vanderlyle and immediately duck into a restaurant for some fish, but the proximity here is rather poetic, so we’re running with it…
Ask any Cambridge chef where they eat on their day off, and this unassuming Mill Road spot inevitably makes the list: Jay Scrimshaw and Richard Stokes’s Fin Boys – a restaurant that’s part fishmonger, part dining room, and entirely dedicated to celebrating the best of British seafood. There’s some serious pedigree in the kitchen here: Scrimshaw has previous at Parker’s Tavern and London’s Bibendum and Chez Bruce, whilst Stokes has done time at Alice Waters’ legendary Chez Panisse. It all comes together with a menu of precise simplicity. When fish is being served, there really is no better duo of adjectives.
Working directly with day boats and independent fishermen, the kitchen champions lesser-known sustainable catches alongside the classics – expect to see coley, ling and pollock rubbing shoulders with cod and crab… You know the drill. The menu changes daily depending on what’s been landed, but the cooking is consistently clever without being showy – this is a place that knows when to let exceptional ingredients speak for themselves.
Their a la carte menu, served Tuesday-Thursday evenings and Wednesday-Saturday lunches, might feature anything from cured sea trout in green garlic broth with kombu oil for £12 to Cornish monkfish with boiled courgette, basil and mint at £32. Yep, they love a little verdancy in this part of town…
All that said, it’s perhaps the most humble dishes where the kitchen (and their sourcing) truly shines. The house-made crumpet with Portland crab in a luxurious cacio e pepe emulsion has become their signature dish, and their treatment of Maldon oysters (six for £18 or twelve for £36) proves they know when to let pristine ingredients shine. When we say ‘treatment’, we mean simply shucking them properly and serving them over ice – which is all these guys need when they’re this damn fresh.
That said, weekend evenings at Fin Boys see a more elaborate six-course set menu at £85 that really lets the kitchen flex its creative muscles. Recent highlights include Portland crab with velvet crab and plum vinegar sauce, paired with a 2013 Pinot Gris from Moorooduc Estate in Victoria, both all richness and refinement.
Grab a seat at the pass if you can – the chefs are happy to chat about where your dinner was swimming that morning, and you might pick up some tips for cooking the fish you can buy from their attached fishmonger.
Of note, their commitment to exceptional, accessible seafood extends beyond Mill Road – catch them at The Gog Farm Shop at the weekend (11am-3pm) for alfresco hits like tuna laap and lobster rolls. The farm shop outpost also gives you a chance to grab fresh fish for home cooking, along with their signature oysters in bucolic surroundings.
Ideal for French bistro classics with modern flair…
Holly and Dan Fancett’s slice of Parisian charm is just such a charmer; a cosy space with sage green banquettes and bentwood chairs beneath decorative wisteria, it happens to serve some of the best French bistro cooking in the country.
Since opening in 2021, this intimate bistro has earned its place in both the Good Food and Michelin Guides (recommended again for 2026) with cooking that respects French classics while embracing modern British sensibilities. Though it’s a well-trodden path in recent years in that there London, Fancett’s could quite rightfully stand up to Zedel, Racine, Francois et al in a duel, and come out with their head held high.
The prix fixe menus change regularly, showcasing seasonal ingredients with finesse. Lunch brings excellent value with two courses for £30.50 or three for £36. You might find a velvety cream of chestnut mushroom soup with truffle chantilly, followed by confit Guinea fowl leg with braised puy lentils and smoked bacon. Their bouillabaisse of John Dory with mussels, squid, and nduja shows they’re not afraid to put their own spin on the classics, the spicy Calabrian sausage bringing not only spice but a welcome blast of piquancy, too.
Dinner sees three courses of similar confidence, but priced at £58. A recent dish of Cornish crab and scallop mousse lasagne with beurre blanc was a real technical piece of work, and a showstopper quite frankly. Eyes widened on first bite, let’s just say that…
Vegetarians aren’t an afterthought – the double-baked cave-aged cheddar soufflé with soft leeks and English autumn truffle proves that with a dish of utter decadence. If I could eat this every night, I’d happily go veggie, too. I’d also die young, but it’d be worth it…
The wine list deserves exploration, with thoughtfully chosen bottles from across France and beyond. Begin with a Bellini or their house Negroni, before blowing the budget on the suave Thomas Labille chablis at £78; it makes an excellent companion to seafood courses. For something even more special, their fine wine list, curated with Cambridge’s Thorne Wines, offers exceptional bottles at surprisingly reasonable prices.
The intimate atmosphere and professional, warm service make this feel like your neighborhood bistro, even if you’re only visiting for the day – that’s if your neighborhood bistro happened to be in the Marais, of course.
Ideal for transforming “I’ll just have one scoop” into an afternoon’s adventure…
In a sleek storefront on Bene’t Street, Jack van Praag’s gelato shop is something of an ice cream obsessive’s paradise. His culinary background (he’s ex-Midsummer House, don’t you know?) shows in the inventive flavours and meticulous attention to ingredients – think Estate Dairy milk, Pump Street chocolate, and honey from local Cambridge hives.
The menu changes daily, but expect anything from classic iterations done perfectly (their white chocolate and vanilla brown sugar are masterclasses in simplicity) to more adventurous combinations that somehow just work – fig, Manuka honey and gorgonzola might sound odd until you try it. One bite (lick?) and you’ll be a convert. The vegan dark chocolate and sea salt number proves that dairy-free doesn’t mean compromising on richness and mouthfeel.
A single scoop will set you back £2.90, with doubles at £4.90 and triples at £6.90. The attention to detail extends beyond the gelato – their thickshakes at £6 (available with Estate Dairy or house oat milk) are properly thick. For the curious, ‘tiny’ scoops at £1.80 let you sample more flavours without quite so much commitment.
A sign of how good Jack’s gelato is, even in winter there’s often a line down Bene’t Street. Fear not, it moves fast, and gives you time to ponder important questions like whether salted Oreo gelato counts as dinner (it does).
Indeed, we’re not putting our neck on the line (except in the minds of the pedants) when we say that Jack’s Gelato is one of Cambridge’s best restaurants.
Open: Daily 9:30am-11pm (Friday-Saturday until midnight)
Ideal for North African flavours that transport you straight to the Sahara…
Step through the doors of this Mill Road favourite and you’ll find yourself transported to North Africa, with a real Bedouin tent, authentic wall rugs from the Sahara, and an atmosphere that makes you forget you’re in Cambridge altogether. Indeed, Bedouin’s 2022 win for Best Restaurant in Cambridge at the British Restaurant Awards merely confirmed what locals already knew.
image via @bedouincambridge
The menu roams across the Maghreb, with tagines taking centre stage. The tagine beldi features slow-cooked lamb shank in a rich sauce with tomato, paprika, and chickpeas that falls off the bone, while the tagine berkook brings slow-cooked beef in a warming sauce with ginger, cinnamon, prunes and apricots to the table. Both generous affairs give you change from a twenty. The best of the lot, though, is perhaps the tagine boustaan (£15.90), which proves they take vegetable dishes just as seriously, combining seven vegetables in a tomato and apricot sauce fragrant with ras el hanout.
It’s not only about the tagine here. Begin with the kemiette for £9.90 – a chef’s selection of dips and salads served with hot pitta bread. The borek jubna features brik pastry rolls stuffed with spinach, potato, and feta, while the chekchouka – a dish of peppers, onions and tomatoes with egg and harissa – makes a perfect lunch.
They may not serve alcohol, but Bedouin’s bespoke range of non-ABV cocktails, developed with London Cocktail Club, offers creative alternatives. The Ottoman at £6.50 presents a clever play on tzatziki with apple and cinnamon, while L’Etranger at £7 takes a spiced approach to a Virgin Mary with harissa and cumin. Of course, you could just go with the traditional North African mint tea, which starts at just £1.50.
For groups of six or more, a special menu offers two courses for £20.50 or three for £25. Early birds can enjoy similar pricing Monday to Friday between 12-3pm and 5-6:30pm. The 60-seat dining room fills up quickly, but the warm hospitality and aromatic dishes make any wait worthwhile.
Ideal for Spanish small plates that transport you to San Sebastián…
Mercado Central brings the spirit of Spain’s historic markets to Cambridge. In a handsome townhouse just steps from Trinity College, the ground floor’s open kitchen, backed by striking turquoise tiles and fronted by a marble counter with leather bar stools, adds drama and authenticity to proceedings – grab a seat here to watch the chefs at work with the day’s market produce.
The focus firmly falls on exceptional Spanish produce, whether that’s wild Cornish seafood or aged Rubia Gallega beef from the lush pastures of Galicia. Start with admittedly ubiquitous aperitivos that still mange to set the tone – Marcona almonds and spicy gordal olives at £5 each, alongside sourdough with arbequina olive oil for £5.50. Mercado Central’s selection of Ibérico charcuterie shines, with a plate of acorn-fed chorizo, salchichón and lomo at £13.50 showing why Spanish curing is both an art form and the only way to truly start a meal.
Image via @mercadocentral.co.uk
The menu changes with the market and seasons, but current highlights include wild Cornish squid with confit onion, and a black rice with monkfish, cuttlefish, mussels and prawns that’s a moody, brooding affair. Their grass-fed beef options vary daily (check the blackboard), but all are dry-aged in a Himalayan salt chamber for at least 28 days before meeting the charcoal grill.
Finish with their Basque cheesecake, which lands on just the right side of bitter, perhaps paired with one of Mercado Central’s dessert wines – the Dulce Enro ice wine at £12 per 75ml from Spain’s highest altitude winery is particularly special.
The wine list travels through Spain’s regions, with some exceptional finds from Galicia’s Rías Baixas. Try the Attis Lias Finas Albariño at £58, aged on the lees for extra complexity, or for something truly special, their Attis Mar at £140 – aged underwater in the Atlantic Rias for six months, complete with barnacles on the bottle. As with any self-respecting tapas joint, the sherries deserve attention too, from Fino Inocente at £10 per 100ml to rare Palo Cortado at £13 per 75ml.
At lunch, their menu del día offers exceptional value at £30 for two courses or £33 for three, with dishes like wild mushroom rice with goat’s curd or sustainable St Austell Bay mussels a la marinera.
Ideal for another taste of Cambridge’s ace dumpling scene…
In a modest blue-fronted shop on Norfolk Street, this no-frills dumpling house has been quietly serving some of Cambridge’s most faithfully rendered Chinese snacks for over a decade now. With picture menus in the windows and a functional interior, it’s the kind of place that lets the food do all the talking.
The extensive menu covers everything from dim sum classics to hearty noodle soups, but the hand-made dumplings take centre stage. Available with a vast array of fillings, each dumpling (twelve pieces for £8.90) is expertly pleated to order.
Beyond dumplings, their side dishes demand attention – the cold dressed seaweed and five-spice pig ears make perfect starters, while their noodle soups starting at £8.50 offer warming comfort on chilly Cambridge days. The barbecued pork steamed buns showcase their skill with different dough textures (these are satisfyingly smooth, bouncy numbers), and the green tea cakes provide a perfect sweet finish.
The menu helpfully notes which dishes are spicy (and they mean it), but they’re happy to adjust the heat levels to your preference. Make any a dumpling soup for just £1 more. In this economy and for this quality, it’s no wonder this place is so enduringly popular.
Ideal for when you want your craft beer with seriously good food to match…
We end in a handsome Grade II-listed Georgian townhouse where E.M. Forster once lived. Here, the Pint Shop has managed that rare feat of being both a serious beer destination and a proper restaurant. The 2013 opening marked Cambridge’s first new pub in over a decade, setting a standard that others have followed. The building, spread across three floors with multiple rooms, balances historic charm with contemporary edge – think parquet floors and industrial-chic décor, with a rear terraced garden for summer escapes.
The beer selection impresses with its breadth and rotation – four cask ales are joined by 17 keg lines offering both UK and European craft options. For gin enthusiasts, their collection (over 100 at last count) ranks among Cambridge’s finest, and the bar staff know their spirits as well as they know their beers.
But it’s the food that elevates this from an excellent pub to a dining destination. The kitchen takes pub classics and gives them a creative twist – their Scotch egg comes with apple and mustard ketchup and pickled mustard seeds, while the chorizo croquettes for are given lift off with chilli and honey-cured egg yolk. Single portion pies are something of a signature, and for good reason; they’re carefully crimped and beautifully burnished numbers, their quenelles of mash and dedicated gravy boats making such a satisfying plateful.
Unsurprisingly, the roast dinners are top drawer here, but even better are the midweek ‘local’ lunches. A recently dish of charred gammon steak (topped with a fried egg, naturally) and pineapple relish was gloriously retro, and for £16 including a pint of house ale, gloriously retro in its pricing, too.
Perhaps the biggest draw here, though, is the burger. A towering number featuring a double patty, house sauce that’s a fine imitation of Big Mac sauce, and Ogleshield cheese, it has a devoted following across the city (you can tell by all the slack-jawed folk walking about). All three of those highlights cost around £20 – not bad value in one of the UK’s most well-to-do cities.
The plan was never to stay in Bangkok. Garima Arora had just spent three formative years at Noma in Copenhagen and was heading home to India when, by chance, she made a pit stop in the city. One trip north to Udon Thani with a chef friend, one market visit, and the deep connection between Indian and Thai food cultures opened her eyes to something she couldn’t ignore. “I really thought we could do something interesting here,” she has said. In April 2017, she opened Gaa. “Now, Bangkok is my second home in so many ways.”
Bangkok already had famous Indian restaurants, places known for their showboating: emoji menus, umami bombs, dishes you licked off the plate. Gaa was something more considered, regal where its predecessors were raucous, its cooking rooted in Indian culinary grammar applied to Thai lexicon, and a curiosity about what those traditions share.
Her first Michelin star arrived just a year after opening, making her the first Indian woman to receive one; the second came in 2023, and she remains the only female Indian chef with two.
Gaa now occupies a baan ruen thai, a traditional Thai wooden house, this one originally built in Ayutthaya, transported piece by piece to Bangkok and reassembled using joinery that requires no nails. The setting lends the evening a stillness that could verge on the stifling if it weren’t for a neat design trick in the dining room.
The ground floor Garden Room has recently been reimagined by Bangkok firm Architectkidd, with sweeping gold chain-mail curtains that hang from ceiling tracks in curved formations creating semi-private dining pods. From your vast round table you can hear the murmur of the other cocoons, catch the shadows of silhouettes, sense proximity and motion. It’s almost voyeuristic, how a medieval sex party might have looked; all that shared intimacy without direct eye contact, silhouettes moving behind veils, the awareness of other people’s pleasure happening just out of reach. Each pod, seen from a distance with a circular spotlight beaming down from above, also manages to look like how UFOs landing on earth look in the the movies. Both comparisons will sound absurd until you see the room.
Now then, where’s my goblet of mead? Instead, an opening salvo of chaat to centre you back in your cocoon. The first arrived in a ceramic pot by Aman Khanna of Claymen, a striking piece with a big round dome and a pursed little mouth, like a sleeping Yoshitomo Nara figure. It’s a playful touch presented with no explanation, but a little background reading reveals each pot has a different face, inspired, according to Arora, by the faces you see on the streets of India, because this course is all about Indian street food.
You lift the lid to find a riff on Delhi’s beloved aloo chaat, a crispy nest of potato and a potato foam that together resembled a baby jellyfish, but was warming and familiar. A strong start. The anar bhel that followed, a frozen pomegranate disc over yoghurt and greens, passed without incident beyond the jolt of ice. Alongside, a rosé champagne and Chiang Mai strawberry kombucha, arriving in the same blush pink, both pert and full of promise.
AlooAnar
Things picked up with the tuna bhel. Folded khakra, the Gujarati thin cracker, arrived with a bowl of raw tuna in a chilli-spiked soy dressing. You spoon the tuna into the khakra yourself, a satisfying, hands-on gesture that also keeps that cracker crisp. The khakra looks like a hard-shell taco, which is worth noting only because it categorically is not one; it is a Gujarati staple, and the visual similarity is a neat little trap for assumptions. Fresh and lively, it’s the best of the opening run.
Then puchka, the Bengali version of pani puri. The Claymen pot returned, but this time the mouth was open and the bite was lodged inside it like an offering on the tongue, daring you to reach in and risk having your hand bitten off in the process. Admire it momentarily; the mango chutney on top was glossy and vivid. It woke up the whole room, its inners salty and spicy and vivacious enough to recalibrate your attention for everything that followed.
Tuna BhelPuchka
A chakna course next, India’s answer to bar snacks. Here, three toasts on upturned ceramic columns, to be eaten shortest to tallest. Crayfish first, super savoury with an undulating sesame flavour, delicate and precise. Then fish floss and rasam, the rasam turned into a spicy dust that tasted like the seasoning on Monster Munch, or the flavour packet from instant ramen. This is not a criticism.
The lamb tartare was the standout, raw but smoked, with julienned seaweed that shared the lamb’s minerality. The smoke lingered long into the next course, the kind of sequencing that showed a kitchen thinking several moves ahead. The mango and jasmine pairing with the chakna was heady, a real winner.
Crayfish, Fish Floss & Rasam, Lamb Tartare
The saag and homemade butter course was superlative. It arrived in a coconut fibre nest: two dark green spheres of spinach paratha – fondant like in texture – and a small wooden bowl of butter. The butter was house-whipped to the point of tasting really, almost aggressively, cheesy, then topped with jaggery, commonly consumed in India as an Ayurvedic remedy for the negative stomach effects of pollution (Bangkok’s AQI was in triple figures that day – what foresight!). A cloudy, undiluted nama genshu from Saga brought its own brain fog, in the best possible way.
The combination of heavily cultured butter and the brooding, round sweetness of jaggery is a classic North Indian pairing, but tasting it here, this perfectly formed, it felt like something entirely new. It’s also a dish with roots. Arora’s paternal grandmother used to keep a cupboard with a lattice door where she would watch cream fermenting into butter; Arora has said she didn’t understand what her grandmother was doing until she became a cook herself.
Saag & Homemade ButterSaagSummer Curry
The summer curry is another signature, one that has evolved over the years but always centres on misdirection. You expect hot; you get cold. Today, it arrives in a spider crab shell that had long been in a state of torpor in the freezer. Inside was green apple granita, sticky black rice, coconut cream and the clean, sweet, thrumming flavour of crab. Delicious, strangely cathartic, and a dish that makes you reassess a few things. Curry does not have to mean balmy or bold, and Indian food does not have to meet you where you expect it to.
Then gucchi, wild Himalayan morel mushrooms in a golden curry with six types of millet, served in a terracotta pot that made an already earthy dish feel even more so. Gucchi are India’s (according to some, the world’s) most expensive mushroom, foraged by hand from the forests of Kashmir and Himachal Pradesh above 2,000 metres. They cannot be cultivated and their flavour is irreplicable. The curry was topped with candied onions, more chewy than crispy, and the whole thing was toasty and savoury but surprisingly light. A luxury ingredient layered over something ancient and everyday, our sommelier said it reminded her of childhood in Russia, that every country has a grain.
Gucchi
A mulberry and spice soft arrived alongside a Spanish Mencía, both the same deep, inky red. Every non-alcoholic pairing had been colour-matched to its corresponding wine, and placed side by side they were near impossible to tell apart. A nice touch that carried some gravitas, removing any sense of hierarchy between drinkers and non-drinkers at the table.
The beef ‘kebab’, two blushing slabs of jasmine wagyu from Khon Kaen in actuality, came with a glossy sauce that Arora calls Thai garam masala; her own invention, the Indian spice blend remade with Thai spices. It recalled a French peppercorn sauce but the provenance was entirely different. Surin jasmine rice cooked in ghee on a lotus leaf sat beside it, jewelled with pomelo and diced mustard green. A final flourish of luk pra grated over the top, a fermented Southern Thai seed with an umami richness closer to parmesan than the Mughlai nut I’d mistaken it for. Substantial and grounding after the precision of the earlier courses, it felt like a payoff.
Surin Jasmine Rice
By dessert, the meal’s recurring theme had crystallised; shared food memories across cultures. It had been there all along, in the khakra and the millets and the Thai garam masala, but the final three courses made it impossible to miss. Malai toast wrapped in spun sugar threads that recalled roti sai mai, the Ayuthayya street dessert. India and Thailand, threaded together in spun sugar.
Then chai and Parle-G. A cup of chai-perfumed custard with raspberry coulis at the bottom and a miniature Parle-G biscuit on top, finished with gold leaf because why not? The saucer came with an actual Parle-G advert, the world’s best-selling biscuit, and what you’re looking at is essentially a cup of tea and a biscuit, the slowing down ritual of kitchens the world over.
Chai & Parle-GMalai toast
To close, miang kham x paan: a mash-up of betel leaf snacks, here topped with chocolate ganache and a fruity compote. Miang kham is Thai, paan is Indian, but they share almost everything, the betel leaf, the single-bite format, the fact that both exist as street food and ceremony simultaneously, the drawn out, developing flavour that rewards a bit of purposeful chewing.
The final pairing was clarified coconut milk and tonka bean, and it may have been the best drink of the evening, clean and precise and extraordinarily pronounced, a cocktail in all but name. Arora’s commitment to the non-alcoholic programme reportedly grew during her first pregnancy, and it shows.
The tasting menu is priced at just north of THB 6000 per person (around £140), which, in the context of Bangkok’s increasingly opulent dining scene, represents fair value for what is a long, carefully paced, genuinely surprising meal. The cooking throughout was precise, delicate, finely spiced, and a different showing to whatever assumptions you might bring to the table about the weight of Indian food, if such a catch-all term does the cuisine any kind of justice. Service was polished and present, the kitchen team bringing several dishes out themselves with visible pride.
What stays with me is not any single dish but the thread running through all of them. The insistence that food memories are shared across borders. Arora has said that Gaa is an extremely personal space for her, an extension of who she is, that it is not the same without her there. On the evidence of this meal, that feels about right.
There’s something real synonymous feeling about the traditional Sunday Roast and the Georgian city of Bath. In this storied, honey-hued city, there’s a sense of homeliness and heritage that chimes so well with the time-honoured tradition of eating fuck loads of meat with loved ones and drinking ‘till ruddy faced.
Whether you’re a student reluctantly receiving your parents for the day, a hungover rugby fan looking to refuel and forget last night’s misdemeanors, or a tourist looking to settle into one of Bath’s beautiful pubs for the afternoon, you’ve come to the right place for proper guidance. Here are the very best Sunday Roasts in Bath.
*Owing to the popularity of enjoying your Sunday Roast out in this corner of the UK, and because of the popularity of Bath with tourists, you’ll likely need to book in advance for all of the pubs and restaurants on our list.*
Chequers, Rivers Street
Chequers has long been a bastion of British hospitality in Bath, boasting a history that stretches back to 1776. Sitting pretty on resdiential Rivers Street and just a short stroll from the Royal Crescent and the Circus, this gastropub serves up a Sunday Roast that is deeply rooted in tradition yet feels refreshingly modern. With its cosy ambiance focused around a welcoming central bar that’s the beating heart of the dining room, and replete with wooden beams and open fires, it provides the quintessential setting within the quintessential city to enjoy a roast dinner.
Images via Chequers instagram
With a Michelin Bib Gourmand 2026 plaque proudly nailed to the entrance and regularly named as the best Sunday lunch/roast dinner in Bath, the chefs at Chequers take immense pride in their craftsmanship. Their roast beef is sourced from prime Hereford herds and aged to perfection, the chicken has roamed freely in nearby Castlemead, and the pork belly comes from the esteemed Middle White. Each hits the table with carefully curated accompaniments to bring out their best side – black garlic emulsion, horseradish and watercress; celeriac remoulade; and baked apple compote, respectively, if you’re asking.
The catch-all trimmings are a league apart – think fluffy, crisp duck fat roast potatoes, and lovingly prepared, seasonal veg that retains just the right amount of crunch.
The pièce de résistance is unquestionably their signature Yorkshire pudding, a glorious golden dome that is the epitome of comfort food. Homemade gravy with a depth of flavour extracted from, you know, actual bones rather than gravy granules, seals the deal. You’ll want to request refills of this one…
The Sunday Roast at Chequers runs from midday until 7:30pm, with the roast beef and trimmings priced at £26.
Just outside Bath city centre lies the Hare & Hounds, a gem of a pub with a prime position on high (well, at the top of Lansdown Road) with breathtaking views of Bath’s surrounding countryside and down to the city itself. The two mile trek to the pub – all uphill – takes around an hour and represents the perfect excuse to build up an appetite for the H&H’s Sunday Roast (not before one of their famous lamb scotch eggs, mind).
Images via Hare & Hound Instagram
A lavish affair of the usual suspects, plus an apricot and chestnut roast for the vegans in the group, the roasted pork loin is particularly good here, replete with a sheet of puffed, bubbling crackling that’s just about as good as it gets. The appearance of cauliflower cheese, blistered and burnished on top and silky beneath, helps further the case for this being one of Bath’s very best Sunday Roasts.
But really, it’s the views that seal the deal here. The dining room has massive windows that bathe the space in natural light during that Sunday lunch slot, sure, but when the weather is kind, there’s no better place to dine al fresco than the Hare & Hound’s terrace, admiring the Somerset landscape and rewarding yourself with another cloudy cider for the road. You did earn this one, after all.
This one runs from midday until 9:30pm. The roasts hover just above £20.
Back in town and over by the picturesque Royal Victoria Park, The Marlborough Tavern has long been one of Bath’s most cherished pubs, with a history dating back over 200 years and a frontage of fading Bath stone to prove it. The fact that it does excellent pub food is just a bonus!
With its two AA rosettes and inclusion in the Michelin Guide, you can expect a mighty fine roast dinner here, all in warming, welcoming pub surroundings – thick blond wood table, brown leather banquettes, the lowkey hum of locals popping in for a frothy pint…the works.
It’s a laid back atmosphere that somewhat belies the quality of the cooking coming out of the Marlborough Tavern kitchen, the roast beef rump arriving blushing pink – to make the boys wink – and beautifully marbled. It’s served with seasonal vegetables, naturally, and a red wine gravy that’s luscious and glossy, the product of a well managed reduction rather than a gacky roux. It coats that beef rump and its accompanying roasties just right. Regardless, you’ll want an additional side of the truffle and parmesan fries, muttering “double carbs” by way of an excuse/acknowledgement, if you wish.
For the vegetarians, the sweet potato, spinach and mushroom is much more than a mere afterthought; it’s a perfectly formed puck of crisp pastry and well-balanced, just giving vegetables. A vegetarian version of the gravy is just what you need to slather all over it.
In summer, there’s plenty of pleasant outdoor seating to settle into, if you can get over the idea of eating a Sunday Roast in the sun, you sick sort.
The roast dinner at the Marlborough Tavern is served from midday until 8pm, with the beef priced at £26.
Set against the backdrop of Bath’s historical charm, and slap bang in the centre of this handsome city, The Elder offers a Sunday Roast experience that tastefully intertwines traditional British cuisine with modern gastronomic finesse. Located within the charismatic walls of the Indigo Hotel, the establishment prides itself on championing local produce and nose-to-tail eating – expect dishes featuring high-quality, locally-sourced meats, where every cut is given the respect it deserves.
All of this should come as no surprise with a chef/owner of Mike Robinson’s pedigree behind operations. Co-owner of the acclaimed Harwood Arms in Fulham, London’s first and only Michelin-starred pub, which has set a benchmark for excellence in serving British game and wild food, as well as being the man behind the excellent Woodsman in Stratford-Upon-Avon, Robinson knows a thing or two about meat cookery.
No wonder the roast dinner at the Elder is held in such high acclaim, then. Served in the restaurant’s adjacent Brasserie Beau, it’s a refined affair, priced at £25 for slow roast sirloin with all the trimmings, but this premium reflects the calibre of the produce, make no mistake. Robinson’s signature touch is perhaps most evident in the starters, with a wild boar scotch egg a dish very much on brand. Don’t worry if you think things are getting too ‘cheffy’ – roast spuds and seasonal vegetables are part of the main spread here.
While indulging in this feast in a dining room of soothing racing greens, classic Chesterfield leathers and paintings of hunting scenes (what else?), you can’t help but admire how The Elder seamlessly merges Bath’s genteel heritage with modern-day culinary excellence. It’s a dining room you won’t want to leave.
Oh, but before you do leave we should mention that The Elder simply isn’t a place where you skip dessert. The pastry team have a superb touch, with the sweet stuff delivered with true finesse. Though the restaurant’s incredible souffles aren’t part of the menu (a travesty) since the roasts were moved over to the brasserie, there’s still plenty to enjoy; a recent tarte tatin was an exemplary version of a classic. The whole restaurant inspires this kind of confidence, quite honestly.
The Elder’s Sunday Roast runs from 12.30pm until 9pm. The beef is priced at £25, with all the trimmings included.
Though we think it’s something of a push to call Walcot Street ‘Bath’s Artisan Quarter’, there are a couple of murals up along the drag, as well as some more interesting charity shops and a flea market, so we’ll give them that. It’s all relative, after all…
Anyway, on Walcot Street you’ll find a damn good Sunday Roast over at Walcot House, a sprawling, multipurpose venue where chic decor meets industrial elegance, forming the backdrop for a leisurely meal that could easily stretch out for hours.
So, stretch it out; a starter of rock oysters with a wellmade Bloody Mary kicks things off perfectly, and dusts off that hangover that the majority of diners are seemingly suffering from.
Yep, this is one you feel comfortable lingering over as you order that second bottle, the vibe unhurried and the clientele getting progressively looser. On the plate, prime cuts of locally-sourced meats with their rightful relishes (horseradish, mint salsa verde, apple sauce…you know the drill), a parade of organic vegetables, and lashings of homemade gravy (which comes in its own jug – rejoice!), are all executed with aplomb. There are also a couple of larger sharing beefs to luxuriate over if you’re coming with a stacked, spendthrifty squad. The dry-aged chateaubriand with bearnaise is a real treat and, frankly, what Sundays are made for. And yes, that was us gnawing on the bone like a caveman last weekend.
For something lighter, pescatarians (or, you know, just people who fancy a change) are well catered for at Walcot House, with the ray wing and Cafe de Paris butter – a menu item that seems to be everywhere right now – on the list for next time.
Now, how about that third bottle? Actually, the oddly fussy House Rules strictly prohibit ‘continuing drinking’. Perhaps it’s on to the next one…
The Sunday Roast here at Walcot House is served from midday until 4pm, with roast prices ranging from £21 to £27.
A recent(ish) addition to Bath’s culinary scene that’s had several national restaurant critics cooing, Beckford Canteen’s light and bright dining room provides the ideal setting for a laid back but refined Sunday Roast.
Don’t be put off by the proasic-sounding menu here (Who needs flowery descriptions of roast dinners, anyway? Except perhaps you, if you’ve gotten this far through our article), as what matters is what’s on the plate, and at the Beckford Canteen, it’s carefully sourced (and sauced), carefully roasted chicken breast, pork belly and beef sirloin.
The real point of difference of the Sunday Roast here are the – purists, look away – confit potatoes, these lovely, layered things that have been cooked low and slow in duck fat before getting a final crisping up in the pan. A real labour of love, they’re as good as the iconic Quality Chop House version, if not better. There are few better bites in the city than these when positively bathed in the excellent Beckford Canteen gravy.
For a further point of difference in a roundup that’s getting dangerously repetitive, why not end with the cheeseboard, composed of local cheeses? The piquant, crystal-heavy Montgomery Cheddar is particularly good.
Owing to the restaurant’s relationship with the excellent Bottle Shop up the road, the winelist here is a real treat.
Beckford Canteen’s Sunday Roast is served from midday to 6pm, with the roast beef clocking in at £32.
Just a 10-minute drive from the city centre lies Newton Farm Foods, a family-run gem that perfectly embodies the farm-to-fork ethos that makes a British Sunday roast so special. To be enjoying that ethos actually sitting on a, you know, farm, certainly adds to the experience…
Set on the picturesque Duchy of Cornwall Estate (hey, perhaps the King could provide some sausages for brekky from his own digits), this fourth-generation working farm offers a dining experience that connects you directly with the source of your Sunday lunch – quite literally, as you can spot their South Devon, Aberdeen Angus and Hereford cattle grazing in the surrounding fields.
The Sunday roast here is served in The Parlour, their licensed café space that manages to sit somewhere in that sweet spot between rustic charm and contemporary comfort. Floor-to-ceiling windows flood the space with natural light and offer sweeping views across the Duchy Estate’s rolling countryside – proper Somerset pastoral scenes that make you feel like you’re starring in your own BBC period drama.
The meat is, unsurprisingly, the star of the show here. The rare roast rump of Newton beef comes from cattle that have spent their entire lives grazing these very pastures, raised with regenerative farming practices that not only talk the talk, but trot the trot and taste the taste, too. For the indecisive (or the simply greedy), the Combi Roast offers both the beef and their slow-roasted pork belly – the latter being a particular triumph with its perfectly crisp crackling.
All roasts come with the full array of trimmings: properly crispy roast potatoes, Yorkshire puddings that look like they’ve been inflated with a bicycle pump (in the best possible way), seasonal vegetables including a rather lovely carrot and parsnip mash, and braised red cabbage that adds just the right amount of sweet-sharp contrast. The cauliflower cheese, available as a side, is worth the supplementary spend – it arrives blistered and bubbling, exactly as it should be.
For those seeking alternatives to the traditional meat options, their handmade nut roast shows the same care and attention as its meaty counterparts, while the roast fillet of cod with mussel and samphire cream offers a delicate alternative. There is also steak, which got us thinking; there should always be steak as a Sunday lunch option.
Booking is essential here – the combination of field-to-fork credentials, generous portions, and that wholesome, family-farm atmosphere makes this a popular spot with both Bath locals looking for the briefest escape from a city that very rarely feels like it needs escaping. Pro tip: leave room for dessert – everything’s made in-house and the pastry chef clearly knows their way around a pudding.
The roast dinner at Newton Farm Foods runs from midday until 3:30pm, with the roast beef priced at £20.95. The Combi is £24.95.
Located just a Bath stone’s throw from the historic Abbey and the Roman Baths, The Salamander could easily be dubbed the quintessential Bath pub, with a style that’s quirky and idiosyncratic but traditional all at the same time, a line-up of local ciders that you’d need a packet of Omeprazole to take down, and, of course, a fine Sunday Roast.
Here, you’ll find slow-roasted topside of Hereford beef, braised pork belly, a vegan nut roast, sure, but you’ll also find a rare outing for roast lamb, seemingly less popular on the menus of Bath’s best Sunday Roasts than the Big Three. At The Salamander, it’s a shoulder, studded with rosemary and garlic and roasted for 12 hours until silky and giving. In terms of trimmings, cumin roasted beetroot is something of an outlier, but a welcome one at that.
A simple dessert of affogato (two scoops here!) picks you up, dusts you off, and helps you out the door.
This one runs from midday to 6:30pm, and clocks in at £21.95 for a slow roast lamb shoulder.
We end on a roast that’s a little out of town but worth the walk to enjoy. Climb the hill behind Bath Spa station and seek out The Bear Inn, a stylish community pub with a 250-plus history that knows its way around a roast dinner.
Their private dining space is perfect for gatherings, and for sports fans, there’s Sky Sports to catch the games. The roasts here – chicken (complete with pigs in blankets!), beef, porchetta, or vegan wellington – are served with all the trimmings, including Yorkshire pudding (except for the vegan option), making it a feast fit for those who have made the 20 minute walk into more rural Bath.
And hey, if you want to imagine that Carmy has cooked your Sunday lunch for you, then please do; we’re already doing the same thing!
The Sunday Roast at The Bear Inn runs until 7:45pm, and starts at £19.
Cursory mentions of nut roasts and sweet potato wellingtons be damned! Plant-based eaters, we haven’t forgotten about you. Instead, here’s a handy guide to the best vegetarian food in Bath. For all those in a meat coma, you might find relief there, too.
Whilst it may not often be termed as ‘groundbreaking’, the food scene in Cheltenham has long been one of the UK’s strongest. In a place that’s as moneyed as the stones are honeyed, this isn’t much of a surprise.
The town may be famous, first and foremost, for its racing festival and Regency architecture, but its restaurants have been consistently delivering excellent food for decades – from Michelin-starred institutions to characterful independents and a fair amount in between.
In fact, leave the paddock behind (you didn’t sleep in there last night, did you? You look fucked) and you’ll discover a thriving restaurant landscape that perfectly balances refined dining rooms with relaxed independents. So, whether you’re in town for the races or simply exploring this handsome corner of Gloucestershire, here are the best restaurants in Cheltenham.
Lumière
Ideal for innovative fine dining in intimate surroundings…
It took the Michelin inspectors long enough, but they finally got there. Jon and Helen Howe’s intimate restaurant in Cheltenham town centre recently received its first star (some 15 years after first opening), a recognition of cooking – and an atmosphere, too – that manages to be both precise and soulful. Much of what lands on your plate comes from the couple’s own 15-acre smallholding, transformed by Jon’s classical technique and contemporary vision into something magical.
Both garden and carefully sourced local produce is precisely cooked and beautifully presented, with a finesse that never sacrifices on big, bold flavours. On a recent visit, Gloucestershire’s Stinking Bishop cheese was celebrated in a delicate tart where a crémeux made from the cheese was burnished with a pear gel, all decorated with Alyssum flowers & spiral chives. This was a clever dessert (yep, it was a sweet course) that made total sense, since the cheese is washed in a Perry made from the namesake Stinking Bishop pear during the maturing process.
The dining room feels special without trying too hard – Helen’s warm presence and sommelier Matthew’s thoughtful wine pairings create the sense that you’re in the hands of people who genuinely care about your evening. Choose between four, six or eight courses (£85-£175), book well ahead, and settle in for something memorable.
They’re only open Wednesday to Saturday (Wednesday and Thursday are dinner only), and tables are becoming increasingly precious since that star arrived, so plan a few months ahead if you’re keen to cap off your evening with the signature Tequila Slammer sorbet.
Ideal for masterful French-influenced cuisine from a Cheltenham institution…
There’s something wonderfully reassuring about David and Helen Everitt-Matthias’s Suffolk Road restaurant. For nearly four decades, they’ve been doing their thing – David has famously never missed a service – and their thing happens to be some of the finest classical cooking in the country.
The menu reads like modern French cuisine and tastes like pure joy: pigeon might come with black pudding and chocolate ganache, monkfish with barley broth and cockles, but whatever lands there, everything on the plate is precise and (cue Masterchef judge pontificating) there for a reason.
Dessert offerings are equally well-judged, the bramble and wood sorrel ‘cannelloni’ balancing the earthy tartness of sorrel with delicate bramble flavours, all given luxury via a refreshing buttermilk sorbet. Visually, it’s all very Prince, in the best possible way, of course.
For a place of this prestige, the wine list feels refreshingly honest – yes, there are trophy bottles for those who want them, but you can drink well for around £30 here. Go for lunch (two courses £43) if you’re watching the budget, or splash out on the full four-course evening menu at £105. Whatever you do, save room for ‘the selection of cheeses’ – a description which doesn’t do the whole thing justice. It’s the finest cheeseboard you’ll see this side of the channel. Or, at least, this side of Chez Bruce…
Open for lunch and dinner Wednesday through Saturday, though you’ll want to book ahead – after three decades, they’re still one of the toughest tables to land in town, even if Michelin, in 2019, demoted the restaurant from two stars to one. It remains one of the weirdest decisions the Big Red Book has made.
Ideal for a refined take on Indian dining that transcends curry house clichés…
Sometimes a restaurant comes along that makes you rethink everything you thought you knew about a cuisine. That’s Prithvi (‘Mother Earth’ in Sanskrit)…
Set up by cousins and restaurateurs Jay Rahman and Taj Uddin, since 2012 the restaurant has been quietly showing that Indian fine dining needn’t feature dots of mango chutney presented artfully in ellipsis, or an arrangement of lamb cutlets that looks more like a cairn than dinner. Instead, at Privtvi you’ll find familiar but punchy Indian flavours plated in surprising, minimalist ways. But most of all, you’ll find objective, undeniable deliciousness.
The elegant first-floor lounge sets the tone – this is a place that takes itself seriously but not stuffily. Chef Thomas Law’s seven-course tasting menu (£95) might feature tortellini filled with spiced ox cheek floating in burnt shallot consommé, or chalk stream trout bobbing about in a curry beurre blanc and a dainty little quenelle of avruga caviar.
It works because Law has a handle on both classical European technique and Indian spicing. This isn’t fusion for fusion’s sake, make no mistake; it’s a thought-provoking interpretation of a cuisine that doesn’t lose sight of flavour.
Dinner bookings are essential – this is one of Cheltenham’s – if not the South West’s – hottest tables.
Ideal for modern British dining with skyline views…
Cheltenham finally has a rooftop restaurant worth climbing stairs for. The Nook on Five combines panoramic views over Imperial Gardens with cooking that’s confident enough to compete with the vista. Sure, you can come for brunch – their smashed avocado on sourdough is exemplary (and also pretty steep at £13, it has to be said) – but evening is when this place really shines.
The dry-aged T-bone to share (£130) has its own loyal fan club, and the Loch Duart salmon with seafood risotto shows they can do delicate just as well as dramatic. The Nooks Bubble Martini has ruined many a productive Monday morning and induced a fair amount of vertigo all the way up here.
They’re open from lunch until late (and from 9am weekends) – though you’ll want to book ahead for those coveted terrace tables.
Ideal for Sri Lankan street food turned Gloucestershire success story…
What started in 2016 as five Sri Lankan friends converting an old pub in St Paul’s now stands as the original outpost of a nine-strong (and ever-expanding) restaurant group. While they’ve expanded across the South West and into Birmingham, this Cheltenham site remains the mothership – a place where the exposed brick walls still tell the story of late nights spent renovating after day jobs, and where the signature ‘penny bar’ made from old crates and coins first took shape.
The space feels pleasingly incongruous in this residential corner of Cheltenham – step through the door of this grey-painted former pub and you’re transported from terraced houses to an urban hangout where bass-heavy tunes and warm Sri Lankan hospitality fill the room. Tables suspended by chains and low lighting create the kind of atmosphere that makes you want to settle in for the evening, which probably explains why weekend bookings here are like gold dust, even after almost a decade on St Pauls Road.
The menu is essentially a country-spanning roll call of Sri Lankan street food greatest hits. The egg hopper exemplifies their approach – that bowl-shaped fermented rice flour pancake arrives with a perfectly cooked egg at its base, ready to be loaded with the house coconut sambol. The Cheesy Colombo – think sweet-and-sour paneer with properly crispy edges and a sauce that demands to be mopped up with roti – remains the dish that regulars order first and talk about longest.
More substantial dishes shine equally bright. The chicken curry on the bone delivers the kind of lingering heat that has you reaching for water and more curry in either hand, while the black pork, slow-cooked in a sauce dark as night with multiple spices, is a brooding number that hits the spot despite being quite bloody salty, it does have to be said. Vegetarians are particularly well-served – the Fat Sister pumpkin curry shows how something so simple can be transformed into something sublime.
The ‘Cocotails’ list is a key feature, with a menu of illustrations, overzealous descriptions and the kind of encouragement that will have you slurring through a third if you’re not just a little restrained. The Drunken Sri Lankan, which blends coconut-flower-sap whisky with turmeric and lime, and is topped with ginger beer, is dangerously moreish.
Open seven days a week for lunch and dinner, with an Express Lunch menu that has you sorted in 30 minutes if you need it to. While they do take walk-ins, this original branch fills up fast – booking ahead isn’t just recommended, it’s practically mandatory for weekend evenings. There’s something special about eating here, knowing this is where it all began, where five friends took a chance on sharing their food with Cheltenham and ended up creating something that resonated far beyond this quiet corner of Gloucestershire.
Ideal for contemporary Japanese dining under cherry blossoms…
What started in a tiny basement has blossomed into something spectacular. KIBOU now holds court in Cheltenham’s Regent Arcade, where artificial cherry trees create a canopy over diners and anime projections dance across the walls.
The food needs to stand up to this faux-dramatic setting, and there are some fine touches on display on the KIBOU menu. The Volcano Roll isn’t just clever marketing – it arrives at your table looking ready to erupt, while the A5 wagyu nigiri (clocking in at just shy of £30) offers a moment of pure indulgence – all buttery, beefy notes that will have you resenting your chewy old supermarket topside forever more.
Save room for their miso ice cream. Made in-house, the salty/sweet interplay is harmonious and delicious, which isn’t an easy feat when deploying miso in desserts. Served in a golden choux pastry and finished with a drizzle of warm miso butter sauce, it’s pure indulgence.
The sake flight options here make for an educational evening, though the rare Japanese whiskies might mean you forget the lesson. Try to snag a spot in the traditional horigotatsu sunken dining area – there’s something especially satisfying about removing your shoes and settling in for the night. Liberating, even…
Open daily from noon until late, making it perfect for everything from quick lunch stops to leisurely evening feasts.
Ideal for sustainable seafood in intimate surroundings…
Gareth Fulford’s cooking at Purslane makes you wonder why more inland restaurants don’t focus on seafood. His connections with small Cornish day boats mean the fish on your plate was likely swimming yesterday, and his Cotswold Life Food & Drink Awards ‘Chef of the Year’ title from 2018 suggests he knows exactly what to do with it.
The bi-monthly changing menu (three courses for £69) from this independent might feature cured Cornish pollock that tastes of pure ocean, or halibut so perfectly cooked it makes you think you’re eating by the coast.
The menu, which champions Cotswolds produce with equal devotion, is naturally seasonal. This autumn featured dishes of Loch Duart salmon with handmade beetroot cavatelli, Severn & Wye smoked eel, horseradish, and bilberry. Or, red gurnard paired with Delicia pumpkin, suckling pig belly, russet apples and rainbow kale. Gorgeous stuff, indeed, the former so well balanced that even the presence of sputum on the plate was forgiveable.
The wine list is as carefully considered as the fish is fresh – these people understand that great seafood needs great wine, and don’t get pretentious about it, with plenty of drops available by the large glass under the £10 threshold.
They’re only open Thursday to Saturday for lunch and dinner, and booking ahead is essential – this intimate spot has earned its reputation as one of the UK’s top seafood restaurants.
Ideal for sophisticated South Indian flavours in sumptuous surroundings…
There’s something instantly transporting about stepping into Bhoomi Kitchen’s elegantly appointed dining room. The dark walls adorned with carefully curated artwork, velvet chairs trimmed in gold, and soft lighting create an atmosphere that feels both sophisticated and welcoming – much like the food that emerges from the kitchen.
Run by the third generation of a family who settled in Cheltenham from India half a century ago, Bhoomi manages that rare feat of honouring tradition while executing it with finesse. The menu leans heavily into South Indian territory – think delicate dosas filled with spiced potato and fresh coconut chutney, or Kerala lamb leg enriched with cardamom and curry leaves. But there’s also space for northern classics from the tandoor, with their barbecued prawns winning particular praise from regulars.
The masala dosa here deserves special mention – crater-pocked and golden, it arrives spanning the width of your table like an edible piece of architecture. Their baby aubergines in ground coconut curry might make you forget every other curry you’ve eaten this year. And speaking of forgetting – don’t you dare leave without trying their chocolate samosa, an inspired riff on the beloved street food snack that somehow makes perfect sense.
Open daily (lunches Wednesday to Sunday, dinner every evening), though you’ll want to book ahead for weekend services when the dining room fills with a mix of loyal regulars and appreciative locals. This is refined Indian dining that respects its roots while delivering them with contemporary polish.
Ideal for casual fine dining that doesn’t forget to be fun…
Tucked away in Montpellier Courtyard, this recent winner of the ‘Best Restaurant 2024’ at the Gloucestershire Foodie Awards (and recipient of a cracking Jay Rayner review) strikes that perfect balance between serious cooking and laid-back charm. Their black pudding scotch eggs with Burford Browns have developed something of a (rightful) cult following, while the Shetland mussels in cider broth show a lighter touch. The wine list ranges from Tuesday night bottles to serious weekend splurges, and their cocktails deserve far more attention than they get.
Like all the best restaurants, it feels special enough for celebrations but casual enough for a Wednesday – though you’ll need to plan those celebrations around their schedule, as they’re closed Mondays and Tuesdays. Open Wednesday to Saturday for lunch and dinner, plus Sunday lunch, with weekend bookings strongly advised.
Moving house sits somewhere between root canal treatment and doing your tax returns on the list of life’s most enjoyable activities. One day you’re living in a perfectly normal home, the next you’re surrounded by towers of boxes and wondering how you accumulated enough stuff to fill a small department store.
There’s always that moment of standing in the middle of your house, looking at everything you own, and thinking “Maybe I could just leave it all behind and start fresh?” But unless you’re planning a dramatic lifestyle change involving nothing but a backpack and a one-way ticket to Bali, you’ll need to pack it all up somehow.
The good news? With a bit of planning and the right approach, packing doesn’t have to reduce you to sitting on the kitchen floor at midnight, surrounded by half-packed boxes and questioning every life decision that led to this moment. The trick is to tackle it room by room, maintaining some semblance of order in the chaos. Here’s how to pack up your entire house without losing your mind, your favourite mug, or your will to live.
Start In The Kitchen
The kitchen is always the trickiest room to pack, so it’s best to get it out of the way first. Start by sorting through your cupboards – those fancy kitchen gadgets seemed like a good idea at the time, but if that spiralizer has been gathering dust since 2019, it might be time to find it a new home.
When it comes to packing dishes, here’s a game-changing tip: pack plates vertically, like records in a box, rather than stacked flat. They’re much less likely to break this way because they can’t bear the weight of everything above them. If you’re worried about your best china or family heirlooms, it’s worth getting proper packing materials from a packing company. For everyday dishes, wrap each piece in newspaper and cushion with tea towels – they need packing anyway, so they might as well be useful.
The kitchen requires serious organisation. Start with things you rarely use, like the fancy serving platters and special occasion glasses. Be sure wrap anything fragile in bubble wrap. Pack heavy items like pots and pans in small boxes – a box full of cookware quickly becomes impossible to lift. Keep your everyday cooking items until last, and when you do pack them, put them in a clearly marked box.
Your first-night box should include: a kettle, mugs, teabags, coffee, sugar, a few plates, bowls, cutlery sets, a sharp knife, chopping board, washing up liquid, tea towel, kitchen roll, bin bags, and a corkscrew (trust us on this one). Add any essential cooking items if you’re planning to make meals right away – a frying pan and wooden spoon can be invaluable.
Tackling The Living Room
The living room is deceptive – it might look straightforward, but it’s amazing how much stuff accumulates in there. Start with books, but remember they get heavy quickly. Use small boxes and mix in lighter items like cushions or throws to balance the weight. Sort books as you go – there’s no point moving the ones you’ll never read again.
Electronics require methodical packing. Before unplugging anything, take detailed photos of how everything’s connected – both close-ups of the connections and wider shots of the overall setup. Label every cable (masking tape works well), and keep all components from one device together. Put screws and brackets in labelled sandwich bags and tape them to their corresponding items.
Pack your DVDs, games, and consoles next, but keep back some entertainment for the final days. Photos and artwork are last – they keep the place feeling homely while you’re packing. When you do pack frames, wrap them individually and pack them vertically, just like plates. Mark these boxes as fragile and store them upright.
Sorting The Bedroom
Bedrooms are all about smart wardrobe decisions. Start by sorting everything into categories: definitely keep, maybe, and donate. Try everything in the ‘maybe’ pile – if it doesn’t fit or you haven’t worn it in a year, it’s probably time to let it go.
For the clothes you’re keeping, pack according to season and necessity. Box up off-season items first, then occasional wear. Keep a week’s worth of everyday clothes accessible. Rolling clothes really does work better than folding for most items – they take up less space and crease less. The exception is structured items like suits and formal dresses, which need proper hanging.
Speaking of hanging clothes, here’s a brilliant hack: group them on hangers, slip a bin bag or old pillowcase over the top, and tie at the bottom. They’ll stay clean and crease-free, and you can transfer them straight to your new wardrobe. For delicate items like jewellery, thread necklaces through straws to prevent tangling, and use egg cartons for earrings and small items.
The Bathroom Clear-Out
Bathrooms might be smaller, but they deserve careful attention. Start by checking expiration dates on everything – makeup, skincare, medications, and toiletries all have shelf lives, and moving house is the perfect time to clear out expired items.
For items you’re keeping, group similar things together and pack them strategically. Double-bag anything liquid or cream-based – a shampoo explosion mid-move is no fun. Keep prescription medications with you rather than packing them. Pack a separate box with immediate essentials: toothbrushes, toothpaste, deodorant, shower gel, shampoo, conditioner, toilet roll, hand soap, and any daily skincare items or medications. Include a shower curtain and towels if you’ll want them right away.
The Dreaded Loft
The loft requires a ruthless approach. Start by bringing everything down and sorting into clear categories. Old paperwork can usually be scanned or shredded. Christmas decorations might need culling – check lights work before packing them for another year.
Create a clear inventory of what you’re keeping. Label boxes with detailed contents rather than vague descriptions like ‘miscellaneous’. Consider whether temperature-sensitive items like photos or electronics should be stored differently in your new home, and finally, organise seasonal items together so they’re easier to access when the right month rolls round.
The Home Office
Home offices often hide masses of paperwork. Sort documents into essential categories: must-keep legal documents, necessary paperwork, and disposable items. Scan important documents – having digital backups is invaluable. Shred anything with personal information rather than just binning it.
Pack your office supplies methodically. Keep one set of basics accessible for the move itself – you’ll need pens, scissors, and tape until the last minute. Back up your computer and pack peripherals carefully, taking photos of connections just like with entertainment systems.
Getting Through Moving Day With Your Emotions In Tact
Your essential documents box should include: passports, driving licences, house paperwork, insurance documents, and any medical information. Keep valuable items and sentimental pieces with you rather than on the moving van.
Your personal essentials box needs: phone chargers, extension leads, basic tools (screwdriver, pliers), first aid supplies, painkillers, snacks, water bottles, toilet paper, hand soap, towel, and change of clothes. Don’t forget the kettle, mugs, and tea bags – a cup of tea makes everything more manageable.
If you’re dealing with a larger property or inherited belongings alongside your own, estate cleanout services can take on the heavy lifting of sorting, removing, and disposing of items you don’t need, freeing you up to focus on packing what matters.
The Bottom Line
Moving house isn’t anyone’s favourite activity, but breaking it down room by room makes it manageable. Take it steady, be organised, and remember – every box you pack is one step closer to being settled in your new home. The key is to start early, stay systematic, and keep essential items accessible until the last possible moment. It’s also ok to have a miscellaneous box just labelled as stuff.
When the bard William Shakespeare wrote, “If music be the food of love, play on,” he may not have been referring to Stratford-Upon-Avon’s dining scene, yet his words resonate perfectly with the town’s current culinary landscape.
This picturesque medieval market town, set in the heart of England’s Shires, has long welcomed tourists keen to immerse themselves in the history of the world’s most famous playwright, and with such footfall, fine food naturally follows.
From quaint country pubs and cosy tea rooms all the way to Michelin-starred restaurants, each establishment narrates a poetic tale of taste and texture.
Shakespeare himself said that “Good company, good wine, good welcome, can make good people”, and in Stratford-Upon-Avon, you can expect to find all this and much more.
With that in mind, here’s where to eat in Stratford-upon-Avon.
Woodsman
Ideal for sophisticated game dining in a historic Tudor setting…
You could argue that the Woodsman is the restaurant that most embodies the spirit of Stratford-upon-Avon’s historical roots, all while offering a contemporary dining experience. It’s quite the proposition.
Sitting pretty on Windsor Street, the restaurant is reminiscent of the character Nick Chopper from the play The Woodsman. This character, a mortal woodsman cursed by the Wicked Witch of the East, is a symbol of resilience and determination, much like the building which houses the restaurant, which is Grade III listed and has been standing in this spot since 1500.
The mind behind the menu here is chef and restaurateur Mike Robinson, whose work with wild British game and fish has earned him a string of accolades at the Harwood Arms in London and the Elder in Bath. That’s some serious pedigree, and the premise is similarly straightforward here; sustainably sourced produce cooked with an almost prosaic precision.
Right now, with game season in full swing, the Woodsman is on song. Fallow deer sourced from the prestigious Bathurst Estate, is cooked until blushing, and served with a sticky, sumptuous faggot of the brilliant beast’s liver and heart. An attitude of no-waste, nose-to-tail permeates the menu, with a tartare of that same deer an option on the starters. Paired with a spiced peach ketchup, it’s a one-two punch of deer-based deliciousness that feels like a must-order.
Perhaps unsurprisingly for a restaurant in thrall to protein, the Sunday roasts here are excellent and quite possibly the best in Stratford-upon-Avon. They’re excellent value, too, with starters (that tartare is currently an option), the main event – a choice of rare Hereford beef rump, roast Bantham chicken or slow roast Berkshire pork belly, plus all the trimmings – and dessert clocking in at just £55 per head. If the apple and blackberry crumble is on, do not miss it!
Ideal for refined countryside dining worth the short drive from town…
Just a short drive from Stratford-upon-Avon, nestled in the chocolate-box hamlet of Armscote, The Fuzzy Duck offers a rather different proposition to the town’s urban eateries. Owned by Adrian and Tania Slater – the latter being the creative force behind luxury soap company Baylis & Harding – this beautifully renovated country pub strikes that rare balance between sophisticated dining destination and cosy village local.
Since its transformation in 2013 from what they playfully refer to as an ‘Ugly Duckling’, the restaurant has established itself as one of Warwickshire’s most charming dining spots. Recognised with 2 AA Rosettes and a mention in the Michelin Guide, the menu here celebrates the flavours of the Cotswolds with both finesse and accessibility – exactly what you want from a modern country pub.
Currently, the kitchen team is turning out some properly accomplished cooking. A starter of pan-seared scallops with roasted celeriac purée and orange butter shows real refinement, while the Fuzzy Duck’s chorizo scotch egg with café de Paris mayonnaise offers a sophisticated take on a pub classic. Warming to a theme here, the braised pig cheek with parsnip purée and black pudding croquette is a masterclass in nose-to-tail cooking that would make Fergus Henderson proud.
Main courses maintain this high standard, with locally-sourced meat taking centre stage. The rack of lamb, served with hasselback potatoes and a roasted cauliflower purée, is a particular triumph. Meanwhile, the kitchen’s treatment of Todenham Manor Farm’s 8oz sirloin – accompanied by all the classic steakhouse trimmings – demonstrates their respect for prime local ingredients. The Sunday roast here has a fine reputation, too.
Leave room for pudding if you can – the Baked Alaska with raspberry ripple ice cream and Italian meringue is worth the indulgence, while the blackberry panna cotta with poached blackberries and stem ginger cookie offers a lighter, equally accomplished finale. For coffee and booze lovers (almost everyone, then), the affogato – featuring vanilla ice cream, an espresso shot and your choice of premium liqueur from the likes of Kahlua, Amaretto, or Cotswolds distillery cream – provides a particularly sophisticated way to round off your meal.
What sets The Fuzzy Duck apart is its ability to be both a destination restaurant and a welcoming local pub, with attention to detail apparent in seemingly innocuous details like the satisfying weighty steak knives and fine selection of locally brewed beers. It’s these thoughtful touches that make The Fuzzy Duck worth spreading your wings for.
Ideal for elegant pre-theatre dining with river views…
Sitting directly opposite the Royal Shakespeare Company theatres, No 44 Brasserie at The Arden Hotel presents refined dining with a theatrical flair. Having earned 2 AA Rosettes, this elegant waterside restaurant manages to strike that delicate balance between special occasion destination and relaxed local favourite.
The setting is undeniably impressive; housed within the sophisticated Arden Hotel, the restaurant benefits from a prime position on the banks of the River Avon. A recent refurbishment in 2019 has given the space a fresh, contemporary feel, while the addition of an all-weather terrace means you can dine al fresco whatever the British weather throws at you.
Head Chef Chris Butler’s menu pays homage to modern British cuisine with a French accent. His cooking demonstrates both technical skill and restraint, perhaps best exemplified in dishes like the signature Arden ‘mille feuille’ fish pie – a refined take on the humble comfort classic. The kitchen’s commitment to seasonal, local produce shines through in plates like the Cotswold lamb, while vegetarians are well-catered for with considered options like a fine, funky wild mushroom gnocchi.
Pre-theatre dining is, naturally, a speciality here. The kitchen’s three-course offering at £30 represents excellent value, especially considering the calibre of cooking. Better still, theatre-goers can pop back post-performance to indulge in their dessert – a civilised touch that feels very Stratford.
For something a bit different, the restaurant’s ‘shareables’ concept encourages a more sociable style of dining. The idea is simple: order 5-6 small plates between friends and share the lot. It’s a clever way to explore the menu without committing to a single main course, and perfect for those who suffer from chronic menu envy.
The Champagne Bar adds a dash of sparkle to proceedings, making No 44 an equally appealing spot for a celebration or pre-show tipple. Throw in the restaurant’s views over the RSC theatres and river, and you’ve got yourself one of Stratford’s most complete dining packages.
Ideal for a charmingly authentic 1940s afternoon tea experience…
Back in Stratford-Upon-Avon proper, and just 50 metres from the renowned Royal Shakespeare Theatre, The Fourteas offers something utterly unique in Stratford’s dining landscape – a chance to step back in time to 1940s Britain. Housed in a remarkable 500-year-old townhouse, this isn’t merely another themed café; it’s an immersive experience that manages to hit all the right notes without falling into pastiche.
The authenticity here is striking. The restaurant’s carefully curated 1940s memorabilia creates an atmosphere that’s both nostalgic and genuinely atmospheric, while staff in period dress add to the theatrical experience – fitting, given the proximity to the RSC. The gentle sounds of The Andrew Sisters and Judy Garland provide a perfect backdrop to what is undoubtedly one of Warwickshire’s most characterful dining spaces.
The menu, cleverly presented as a ration book, belies the austerity of its inspiration. The kitchen’s flagship offering is the Ivor Novello Afternoon Tea (£31), a generous spread that includes an expertly curated selection of sandwiches – from classic smoked salmon and cream cheese to coronation chicken and the delightfully English cucumber and dill. A homemade fruit scone with strawberry preserve and proper Cornish clotted cream follows (they serve it the Cornish way here, cream on top – though they diplomatically note the Devonian preference for cream under the jam!).
Alongside, their exclusive house blend tea is a proper cuppa, while the selection of loose-leaf options shows real dedication to their craft. For special occasions, you can upgrade your afternoon tea with a glass of Prosecco (£38) or Champagne (£44) – because who says rationing can’t be glamorous?
For something more substantial, the all-day dining menu offers some genuine delights. The Croque Monsieur is a proper affair – fresh local ham and Emmental cheese on toasted white bloomer, topped with a mustard cheese sauce and served with mixed leaf salad and fries. The Lancaster Bomber Burger is another triumph, featuring a 5oz beef brisket smash burger loaded with cheese, chargrilled tomato chutney and streaky bacon.
Breakfast here is equally accomplished. The Full Monty’s Breakfast (£15) is everything you want from a morning feast – two Barry’s sausages, two slices of bacon, baked beans, flat mushroom, two hash browns, grilled tomato, toast, and your choice of eggs. There’s a well-considered vegetarian version too.
The restaurant’s Spitfire Room upstairs offers a VIP lounge experience for groups of 10-22, popular for everything from birthday celebrations to post-wedding gatherings (the registry office is conveniently just 500 metres away). The attention to dietary requirements is noteworthy too, with gluten-free scones, cakes and sandwiches available throughout service.
What makes The Fourteas truly special is its ability to maintain its theme without compromising on quality. This isn’t just a gimmick – it’s a properly good tea room that happens to transport you to a different era. Whether you’re catching their ‘Vera Lynn Cream Teas’ (including both sweet and savoury variations at £9.50) or settling in for a full afternoon tea service, The Fourteas offers a dining experience that’s both unique and genuinely accomplished. In a town that trades heavily on its history, here’s a relatively modern addition that feels like it’s been here forever.
Ideal for casual European dining with broad appeal…
A local favourite that always pulls in the day trippers too, Loxley’s offers a mix of British and European gastropub-adjacent cuisine that’s got enough variety to satisfy all members of the squad.
Named in Open Table’s Top 100 UK Restaurants in recent years, the restaurant’s interiors are as eclectic as the menu, with plenty of foliage and flora (both painted and real!) defining the dining room.
On the plate, the eclecticism is there again, though committed with good taste and refinement; Welsh rarebit rubs shoulders with tempura prawn tacos on a menu of appealingly light, vibrant dishes. For something even more laid back, the lunch menu takes the form of a relaxed bistro, with moules frite, steak burgers and caesar salad all served Mondays to Saturdays, 12 to 4pm.
If you are settling in for the evening, however, Loxley’s wine bar adds a sophisticated touch, making it an ideal spot for a romantic dinner or sophisticated debrief with friends over the restaurant’s popular Mediterranean sharing board.
Ideal for family-friendly Mediterranean fare in Tudor surroundings…
Sitting pretty in the heart of Stratford-Upon-Avon on historic Sheep Street, and housed in one of the town’s oldest buildings dating back to the early sixteenth century, possibly during the reign of Henry VIII, Lambs Restaurant is something of a Stratford institution.
Boasting original features and open beams, it’s a lovely dining room to settle into, and that’s before the fresh, broadly southern Mediterranean fare hits your table. Go for the salt cod fritters with saffron aioli to start, providing a saline, rusty kick that pairs beautifully with a glass of white Alvarinho. Follow with a herb crusted rack of lamb, served blushing, and adorned with a glossy rosemary jus, and you’ve got yourself a gorgeous meal.
Lambs is a great place to take the kids, with a children’s menu of affordable, satisfying options (the sausage and mash is a crowd pleaser), and attentive staff who can deal with a boisterous dining room with grace. One of Stratford-upon-Avon’s most treasured restaurants, make no mistake.
Ideal for authentic Neapolitan pizza from genuine Italian pizzaiolos…
The best pizza in Stratford-upon-Avon is without doubt found over at Corte Campana. Only open for a couple of years, the restaurant has already established itself as a firm local favourite due to their authentic Neapolitan pizzas, the work of restaurateur Christian Porzio, from Naples, and his two esteemed pizzaiolo, Vincenzo Crudele and Sergio Boschetto, hailing from Bari and Naples respectively.
Available by-the-slice (only when ordering Margherita, Marinara, Diavola or Bianca), as a proper pizza, or as a ½ or full metre affair, toppings are restrained and elegant, with the Bufalina perhaps our favourite order. With a puffed, airy crust and gently sloppy base, it’s a delight.
Ideal for family-run Italian dining with regional specialties…
We’re sticking around in Stratford’s very own Little Italy for a fully blown Italian meal next, just a minute’s walk from Corte Campana, at Sorrento. This family-run restaurant is well known locally for its regional Italian dishes, friendly service, and cosy atmosphere. The pasta, in particular, is ace.
Established in 1984 on Ely Street, Sorrento is just a short four-minute stroll from the Royal Shakespeare Theatre, making it the ideal spot for a pre-theatre bite. At the helm of Sorrento’s kitchen is father and son duo, Antonino and Adriano De Angelis. The pair take immense pride in crafting fresh, ingredient-led dishes, exemplified by the excellent salads and antipasti served here.
Particularly good is the house bresaola, aged for 3 months especially for the restaurant in the Italian village of Valtellina, and topped simply with rocket, sun dried tomatoes and generous shavings of top-quality parmesan. It would be rude not to follow with some pasta, and the line-up here is reassuringly compact and confident. During summer, there are fewer better dishes in town than Sorrento’s spaghetti alle vongole; a briny, slippery delight of a bowl. All you need alongside is a glass of the house Pinot gris and a seat on the patio, and there are fewer more pleasant places to be on the planet.
Ideal for comforting bistro classics at neighbourhood-friendly prices…
When a neighbourhood bistro has garnered a ubiquitous pet name, you know it’s a place that will welcome you in with open arms and feed you capably. And so it is at The Opposition, known locally – affectionately – as the Oppo.
From the same team that gave us Lambs from just a few paragraphs earlier, and found on the same Ship Street, there’s no sense of rivalry between the restaurants. In fact, the Oppo’s menu is a little more homely and comforting, with the cakey, sliceable lasagna a hit with just about everyone who tries it. The double-carb completer of a side of garlic focaccia certainly does no harm before a cheeky finisher of sticky toffee pudding truly finishes you off.
With mains rarely topping £20 and a set-lunch and pre-theatre menu of three courses clocking in at just £26.50, the Oppo is an inclusive place to dine, which is exactly what you want from your cherished neighbourhood restaurant. Just don’t make us choose between here and Lambs!
Ideal for generous Greek feasting with market square views…
Whilst Stratford-upon-Avon is undeniably picturesque, it’s always nice to be transported to the Mediterranean once in a while, and that’s the proposition over at El Greco on Rother Street.
This Greek restaurant, nestled in one of the town’s most beautiful historic buildings, offers delightful views over the Market Square and Minories. A family-affair, chef Patron Dimitrios is at the stoves here, with his wife running the dining room and son also currently learning the trade, peeling spuds and washing glasses.
image via @el.greco.stratforduponavon
The move here is so obvious that dining in El Greco is an effortless, decision free experience; for just short of £30, the restaurant’s 22 course signature menu, of mezze, moussaka, souvlaki and so much more, is a table-filling dream. You’ll need a dining companion, as this one’s available for two people at a minimum, but let’s be honest; who’s tucking into a feast this expansive solo, anyway?
Ideal for plant-based refreshments near Shakespeare’s birthplace…
After all that feasting, we end somewhere a little more wholesome – dietarily speaking, at least. Centrally located right next to Shakespeare’s Birthplace, the Plantarium Cafe is a great place to refuel after exploring the town (or eating your way through Stratford-upon-Avon’s best restaurants, as we just have!).
It’s all plant-based here, food and milk-wise, with a selection of filling sandwiches defining the menu. The caramelised onion and stringy vegan cheese toastie is a favourite. The made-fresh-daily cake selection is great, too.
And it’s on that rather nourishing note that we will bid you farewell; we’re in need of a lie down!
Whether you’re a Shakespeare enthusiast or a foodie, Stratford-upon-Avon has something for everyone. That said, if you came here looking for where to eat in London’s Stratford, then we’ve got you covered for that, too.
For a generation prone to procrastination, who put off packing for their holiday until they’re in the car on the way to the airport, the actual, physical prospect of moving house can be overwhelming. So much so, in fact, that a whopping 42% of those aged between 15 and 34 still live at home with their folks.
Of course, that’s a tenuous causal link and should be scrapped from the record.
In fact, recently the Independent reported that a “survey of around 3,000 people for Nationwide… indicated 38% across the UK were either in the process of moving or considering a move.”
That’s a lot of people upping sticks which we all know, can be a stressful, strained experience. Well, we’re here to help. Here are 7 ways to take the headache out of moving house.
Plan Your Utilities & Services in Advance
One of the most overlooked aspects of moving house is the transfer or setup of utilities and services. It’s easy to get caught up in the physical act of moving and forget about the essentials like electricity, gas, water, and internet. To avoid any disruptions, make a list of all the utilities and services you currently use and contact each provider well in advance of your move. Inform them of your moving date and new address to ensure a seamless transition.
Additionally, consider setting up your internet and TV services ahead of time. Many providers allow you to schedule an installation date, so you can have everything up and running as soon as you move in. This way, you won’t be left without essential services during the first few days in your new home.
Leave The Heavy Lifting To The Professionals
Leave The Heavy Lifting To The Professionals
‘I can manage this’, before the beloved family heirloom smashes into a thousand pieces on the floor.
Indeed, someone, somewhere right now is arguing with a loved one about moving house. With every packed, repacked and packed again box, with every dropped sentimental ornament and broken down rental van, with every temper flared over the right position for the ill fitting new sofa comes an even iller thought out divorce. And that’s a fact.
The moving and manoeuvring needed for upping sticks isn’t something you want to boldly carry on your shoulders alone. All that shifting and lifting will only leave you with a slipped disk or sore back for your troubles. Rather than enlisting the help of friends and family (which only passes the burden of risk, rather than negates it), it’s prudent to bring in man and van for hire services that specialise in house removals to help with the bigger and heavier items.
For smaller, simpler moves – students, solo movers, single furniture items – a man with a van service is a cost-effective option, typically running at around £30-50 per hour. For bigger moves, a full removal service with more resources and equipment is worth the investment.
Ideal Tip: Communicate your moving needs as clearly and as early on as you can to a prospective removal service. This way, your needs can be anticipated, or they can let you know if a given task isn’t feasible. Call ahead to discuss how fragile or difficult items like pianos or mirrors will be transported safely.
Address The Inventory Ahead Of Time
If you’re bidding farewell to a rented property, then it’s almost certain that your landlord will have an inventory that they’ll want to check; a dreaded part of the process, indeed.
It’s crucial that you get this sorted and out of the way well ahead of the time you actually move out. Finding that a cupboard door is damaged and needs replacing, or there’s a giant stain on the carpet which needs professional attention, will make for a huge amount of stress in the middle of a move.
Embrace The Opportunity To Streamline
Getting rid of the clutter and junk which has held pride of place for far too long can be a really valuable byproduct of moving house. As the old saying goes, ”with a tidy house comes a tidy mind’’, so embrace this chance to start afresh without that massive teddy bear you won for your ex-girlfriend at the fair or the box of vinyl you never, ever listen to.
Although the other side of the move might seem like a long way away, a little foresight goes a long way when you’re packing up. To get to the unpacking part and be met with random boxes in random rooms of varied shapes and sizes and no logical organisation, is to crush a spirit which has already been stretched and strained by the moving process.
This soul destroying part can be avoided by a fastidious, obsessive commitment to codifying and labelling when you’re packing up your life. At the very least, you’ll want to have boxes arranged by room, but if you’re going to get obsessive about it, by item. For instance, a box dedicated purely to the living room bookshelf is going to be much easier to unpack and reorganise than one containing a golf club, toothbrush, some crayons and a sieve.
Create A Moving Day Survival Kit
Moving day can be chaotic, and the last thing you want is to be rummaging through boxes to find essential items as the removals team wait at the door, on the clock and ready to go.
To make the day go smoother, prepare a moving day survival kit. This should include all the necessities you’ll need for the first 24 hours in your new home. Pack a bag with toiletries, a change of clothes, important documents, medications, and basic kitchen supplies like a kettle, mugs, tea, and snacks. Don’t forget to include tools like a box cutter, scissors, and a screwdriver for any immediate assembly or disassembly tasks. Having these items easily accessible will save you a lot of hassle and help you settle in more comfortably.
By planning your utilities and creating a moving day survival kit, you can significantly reduce the stress and chaos that often accompanies moving house. These small steps can make a big difference in ensuring a smooth transition to your new home.
Make A Pact With Your Pals
Everyone hates moving. Some simply accept it’s going to be arduous and approach it with a stiff upper lip. Others choose to ease the load and make things a bit more fun by entering into a moving house pact with their nearest and dearest. Sharing the load is the name of the game here, a ‘you scratch my back and I’ll scratch yours’ mentality, if you will.
Perhaps have the promise of something fun waiting for you all at the end of a gruelling day of lugging and loading. What could be better than opening a bottle of bubbly and exploring the takeaway options delivering to your new abode?
From safety-pinned punks to polished socialites, the King’s Road has witnessed quite the transformation. This historic Chelsea thoroughfare, originally carved out as Charles II’s private route to Kew, has seen London’s cultural tides ebb and flow – from the swinging sixties and Vivienne Westwood’s anarchic spirit to today’s more polished incarnation, where aestheticians have replaced the aesthetes and, erm… Can’t think of any more snappy lines. That’s a shame.
Anyway, today’s King’s Road is a different beast from that of yesteryear, but it’s still an undeniably great place to hang out, and to eat. Between the gleaming shopfronts and beneath the striped awnings, you’ll find restaurants that may not break culinary boundaries, admittedly, but deliver exactly what their well-heeled clientele desires. And quite often, what us folk less of heel are craving, too…
Whether you’re in a contemporary Mexican mezcal joint or traditional Lyonnaise bouchons, the people-watching remains Olympic-grade, though these days you’re more likely to spot a clean-eating influencer than a punk icon. There were no good old days, and all that.
Anyway, we’re here to keep our eyes firmly on the plate, and all while strictly swerving any mention of that TV show; here’s our pick of the best restaurants on and around the King’s Road.
The Cadogan Arms
Ideal for when you want pub classics given a little extra sheen…
The Cadogan Arms embodies the ideal of a modern Chelsea pub – all gleaming wood panels, lovingly restored stained glass windows and plush velvet seating that make you fear for the bill when you’re only one pint in. But don’t let the polished appearance fool you; at its heart, this is still very much a genuine boozer, just one that happens to serve exceptional food.
When acclaimed, ubiquitous restaurant group JKS took over, they brought much-needed clarity and class to both the food program and the room here. The pub’s extensive 2021 renovation revealed original architectural treasures like the elaborate corniced ceiling and backlit stained-glass bar, while chef James Knappett (of two-Michelin-starred Kitchen Table) was enlisted to oversee the menu, the kitchen here delivering consistently outstanding pub classics without any efforts to ‘elevate’ or ‘refine’ them.
The Sunday roast is a big draw here – the sharing board for three (which could easily feed six) comes with a rich bone marrow sauce that could transform even a leathery old slab of roast beef into something truly memorable. And leathery old slab this roast beef ain’t. Equally impressive is their gold-standard beef Wellington, accompanied by a clotted cream mash so indulgent it’s worth having a heart attack for. Fortunately, Chelsea and Westminster Hospital is just round the corner.
Ideal for pretending you’ve escaped Chelsea to a backstreet in Lyon…
One of increasingly prolific chef Claude Bosi’s more casual ventures, Joséphine feels like it’s been lifted straight from a charming backstreet in Lyon, self-identifying as a ‘bouchon’ – the name given to traditional Lyonnaise restaurants serving hearty, ingredient-focused cuisine. Burgundy leather banquettes, flickering taper candles and crisp white tablecloths create an atmosphere that’s a little pastiche, perhaps, but also transportive and refreshingly unpretentious.
There are no hushed, reverent tones here, that’s for sure – more guttural sighs of satisfaction at dishes rendered in all manner brown shades – but that’s not to say that the menu doesn’t deliver Lyon’s culinary heritage with remarkable finesse. A deeply savoury onion soup, silken calf’s sweetbreads with seasonal morels, and an intensely boozy rum baba that comes soaked enough to genuinely get you pissed, all hit the high notes. A big log of andouillette, served with mustard sauce, keeps things funky.
The house wine here follows the traditional ‘by the metre’ approach – you only pay for what you drink from the bottle, which feels refreshingly honest in this postcode. Or, predictably dangerous, depending on what kind of drinker you are.
The weekday lunch and early evening set menu (two/three courses for £24.50/£29.50) is notably good value.
The success of the Chelsea original – which picked up a Michelin Bib Gourmand in the 2025 Guide and retained it for 2026 – has since spawned a sibling. Joséphine Marylebone opened in April last year on Blandford Street, this time drawing more from the grand Parisian brasserie tradition than the Lyonnaise bouchon. It’s a bigger, all-day affair with breakfast service, an oyster kiosk and a 16-seat terrace, but the DNA is the same: proper French cooking at prices that don’t require a second mortgage.
Ideal for exclusive Catalan cooking close to Sloan Square…
Chelsea Barracks is a strange place for a restaurant. A 10-minute stroll from Kings Road’s eastern end at Sloane Square, it’s not the first place you’d expect to find soulful Catalan cooking.
The restaurant’s presence here is explained by a vast £959 million project (nothing should cost that much) that has repurposed the 150-year-old former military base. Representing one of the priciest real estate transactions in UK history, the 12.8-acre grounds have been turned into a fortress of unparalleled private luxury, comprising flats with multi-million-pound price tags. Within this gilded sanctuary, The Campaner now serves as the central dining destination.
Open all day, from 11am ‘till late at the weekends (and from midday through 10pm during the week), there’s a concern that The Campaner is essentially a canteen for the incredibly wealthy, but they’ve certainly chosen an attractive place to hang, you’ve got to concede.
The architectural stunner – designed by Ben Pentreath, who drew inspiration from Sir Christopher Wren’s stable buildings at the neighbouring Chelsea Hospital—features soaring vaulted brick ceilings and double-height windows that flood the space with natural light. The restaurant’s name (meaning ‘bell ringer’ in Catalan) is a fitting nod to both its proximity to the Grade II-listed Garrison Chapel and its ambition to become the beating heart of this reimagined neighbourhood.
The restaurant marks the first international venture for Barcelona restaurant royalty Los Reyes del Mango (‘The Mango Kings’), a group that has achieved near-cult status in the city. The menu aims to reflects Agreda’s philosophy of ‘honest and simple cuisine with a Catalan soul’, beautifully executed with seasonal British produce. Start with their pan con tomate – that deceivingly simple Spanish staple where quality ingredients have nowhere to hide. Here, it’s rendered with a correctly restrained application sweet, ripe tomatoes, a whisper of garlic, and exceptional olive oil.
Iberian ham croquettes deliver that perfect contrast between crisp and oozing, deeply savoury interior, while the charred endives with Olavidia cheese and beetroot cream offer a sublime study in bitter-sweet-creamy balance. Perhaps most interesting is the chargrilled aubergine paired with manchego cheese, sobrasada de Mallorca and black treacle – a dish of remarkable depth that demonstrates this kitchen’s deft hand with the seasoning. It’s salty, sure, but spicy and sweet too, with the aubergine’s smoky fudginess pulling it all together. It’s very good indeed.
Main courses are designed for sharing, with the grilled octopus deserving special attention – cooked in the restaurant’s Josper grill with the kind of precision that only comes from true understanding of heat and timing. We’ve had too many bullet-tough octopus tentacles in our time, but this one arrives tender and bouncy, its ‘come hither’ gesture well and truly merited.
The headliner is without doubt the Catalan socarrat with red prawns, the eponymous crust of caramelised rice supporting plump, sweet prawns that taste emphatically of the sea. It’s a flavour that feels just right as the sun pours in through those massive windows, and everyone around you sports absolutely perfect tans.
Intent on chasing the sun, we retire to the restaurant’s gorgeous wraparound terrace for dessert, a particularly cheesy Basque cheesecake and a rough and ready berry mille-feuille that eats much better than it looks. Out here, life feels worlds away from the city’s frenetic pace, despite being just minutes from Sloane Square. It’s pretty blissful.
Back inside, and for those seeking a more clandestine experience (deals that no one quite understands are definitely struck down here), head beneath the restaurant to The Clandesti, their speakeasy-style cocktail bar bathed in warm terracotta tones. Here, mixologists craft artistic concoctions inspired by Catalan masters like Dalí and Miró – the Dream Shell cocktail topped with a toasted marshmallow proves particularly Instagram-worthy (rather defeating the point of the clandestine part, admittedly). Like its parent restaurant above, the bar manages to transport a slice of Barcelona to SW1 without descending into caricature. You know what? We think we might just stay here a while…
Ideal for Aegean-inspired dishes in Chelsea’s most obtusely photogenic dining room…
From the Pachamama group (who previously ran Peruvian seafood spot Chicama from this same King’s Road address), Bottarga channels the spirit of summers spent island-hopping across the Aegean. Every element feels considered here – from the Greek mythology-themed artwork dotting the uneven plaster walls to the eclectic crockery sourced from antique markets. The space became Instagram catnip earlier this year, quite the achievement given how dimly lit it is, with candlelight casting shadows that make photos look pretty poxy, quite honestly.
Executive chef Tzoulio Loulai brings his Greek upbringing to bear on a menu designed for sharing, though certain dishes demand protection from greedy dining companions. The bottarga orzo arrives rich with XO oil and generous shavings of the restaurant’s namesake ingredient – cured fish roe that brings umami depth and a proper hit of the sea. Lamb belly shows serious technique, the meat rendered sticky-sweet with Greek Easter spices whilst maintaining structural crispness and something approaching tender, which is a mean feat. The sides work too; confit ratte potatoes come slicked in burnt butter with roasted garlic aioli, quietly dominating the table despite everyone’s best intentions.
The heated, covered terrace offers year-round alfresco dining and proves easier to book than the dimly lit interior, where the atmosphere skews date-night territory. Desserts arrive in portions that test your commitment – the chocolate burnt cheesecake is particularly formidable, though the Ozempic-faithful simply push it around the plate. That’s fair enough, actually; share it between two and you’ll still struggle through the final bites.
Wine leans Mediterranean, cocktails take playful turns, and the staff strike that balance between attentive and relaxed.
Ideal for tasting the Sussex countryside without leaving SW3…
The Gladwin brothers bring their farm-to-fork philosophy to life at this rustic-chic spot, sourcing produce directly from their family’s Nutbourne vineyard and farm in Sussex, where youngest brother Gregory still works as a farmer.
The eclectic menu at Rabbit changes constantly to reflect what’s hyper (rather than quarterly) seasonal, with the small plates and keen pricing encouraging exploration – try the mushroom marmite eclairs and the beef heart skewers with port glaze. Both are excellent.
Rabbit’s ‘Farm To Fork’ set lunch (two courses for £22, three for £25) offers laughably good value in this part of town. It runs from Tuesday through Friday.
In a discreet corner just off the King’s Road, chef Anna Haugh’s elegant cooking has found a home here, bringing a taste of contemporary Ireland to Chelsea. The intimate dining room — with its gorgeous quilted armchairs, green-and-cream walls and statement mirrors — provides a splendid backdrop for sophisticated dishes that showcase the best of Irish produce while incorporating classical European techniques.
Menu highlights include Clonakilty black pudding wrapped in crispy potato, butter-poached turbot with Irish dulse seaweed, and sirloin of Irish beef with a beef stuffed boxty, something of a Haugh signature. Yep, that feels like a lot of beef, but when the product is this good, it’s worth celebrating, don’t you think?
Speaking of celebrating, Head Sommelier at Myrtle Katarzyna Kostrzewska has curated an impressive global winelist that perfectly complements Anna Haugh’s Irish-influenced cuisine. Beyond the expected French heavyweights, you’ll find gems from Greece, Hungary, and even Peru. Particularly noteworthy is Anna’s own signature wine range, created in partnership with Vino Hero from the South of France – each bottle featuring a QR code linking to recipes she’s designed specifically to pair with that wine.
Ideal for Indian seafood in tranquil townhouse surroundings…
Chef Rohit Ghai’s first solo venture occupies a beautiful townhouse just off the King’s Road, where mint-green walls and floral accents create an atmosphere that feels quite grand, even round these parts.
The kitchen displays remarkable prowess with its contemporary Indian seafood cooking, especially — a pleasingly light sea bass curry comes generously adorned with plump mussels, its sauce luxurious and sweet via freshly-pressed coconut cream. Or, stone bass is crowned with crispy squid, sitting atop well-seasoned squid ink rice. Yep, they love using seafood as a garnish here. We’re certainly not complaining…
That’s not to say that the vision is myopic here. Comprehensive dietary options include separate vegan, halal, gluten-free, nut-free and dairy-free menus. The wine list features several interesting by-the-glass options that are designed to pair beautifully with spiced dishes.
For first-timers, the ‘Expedition’ tasting menus offer the most complete experience, though the set lunch menu provides a more accessible introduction to Ghai’s cooking.
Ideal for buoyant Mexican flavours and a boisterous dining room energy…
This recent arrival brings fresh energy to the King’s Road, named for the Mayan moon goddess and making an immediate impression with striking interiors, including a dramatic mural by Mexican artist Rafael Uriegas.
Here, chef Ximena Gayosso Gonzalez crafts dishes of genuine finesse here, from yellowfin tuna tostadas brought to life with whisper-thin Granny Smith apple (there are some sharp knives in this kitchen) to robata-grilled plates that showcase an admirable command of elemental cooking methods.
The bar, overseen by ex-Cavita bartender Manuel Lema, houses one of Europe’s most extensive collections of agave spirits, featuring rare mezcals and tequilas seldom seen in London. Monday night live music sessions have swiftly become a neighbourhood favourite, drawing a fashionable crowd that keeps the place buzzing well into the evening.
Ideal for garden dining whatever the British weather throws at you…
You could easily miss this place, tucked away as it is just behind Chelsea Green (no, the celebrated wrestler isn’t a permanent fixture here – we mean the park). But to pass over Stanley’s would be to miss its unique brand of countryside enchantment, with its covered, heated courtyard that somehow manages to feel magical regardless of London’s meteorological mood swings. Proper ‘secret garden’ territory, this one…
On the plate, head chef Tomas Kolkus eschews culinary gymnastics in favour of a concise, seasonally shifting menu that lets quality British produce speak for itself. We’re all about the beef tartare crumpet with oyster emulsion and horseradish, which sounds like it could go awry in the wrong hands, but here, it’s wonderfully indulgent and perfectly balanced. Doubts assuaged, order the onglet steak with Jerusalem artichoke next, another dish that needs careful cooking to realise its potential. Rest assured; chef Kolkus knows what he’s doing.
Wine lovers will appreciate the unexpectedly reasonable glass pours (several at £6.50 – practically happy hour prices for this postcode), while their spicy margaritas pack a proper punch. The locals have caught on – the restaurant has developed a fiercely loyal Chelsea following who return as much for the boozing as for the food.
Ideal for experiencing a Michelin star without the stuffiness…
Often referred to as ‘the chef’s chef’, Phil Howard has achieved something surprisingly rare (and that’s not just the quail, served pink) at Elystan Street – creating a restaurant that feels both special occasion-worthy and comfortably unpretentious. The dining room, with its considered lighting and deep Chesterfield booths, is a peaceful place to settle into, while the front-of-house team navigates that elusive sweet spot between warmth and professionalism impeccably.
Howard’s cooking demonstrates an almost musical understanding of flavour and a poet’s knack for menu writing – calf’s sweetbreads arrive beneath a shower of toasted almonds and poppy seeds, pig’s head terrine is bolstered by a pitch-perfect sauce gribiche, while his seasonal game dishes reveal why he’s considered one of Britain’s most accomplished chefs. The kitchen doesn’t chase trends or Instagram moments; it simply delivers technically flawless food. And sometimes (all the time), that’s exactly what you want from your dinner.
Or your lunch, as there’s a set lunch (and early evening) menu here that’s pitched generously at three courses for £45; this is fine value for food of this calibre and relaxed precision. That the restaurant earned its Michelin star within a year of opening surprises precisely no one who’s eaten here, and the fact that the brigade is referred to as the ‘E Street Band’ on the socials keeps us coming back, we can’t lie.
Ideal for seafood obsessives who appreciate proper technique…
Half retail fishmonger, half dining destination, this Pavilion Road gem brings something genuinely distinctive to Chelsea’s restaurant landscape. Tucked down a charming mews off Sloane Square, the space undergoes a nightly metamorphosis – premium fish counter by day transforms into an intimate 12-seat chef’s table experience as dusk falls.
Executive chef Leandro Carreira approaches seafood with the reverence of a true believer. Some fish arrive at table fresh from the morning’s catch, while others undergo a dutiful dry-aging process that concentrates flavor – particularly fascinating with fatty specimens like sea bass or tuna. The daily-changing menu responds to whatever the tides have delivered, though the focus primarily falls on raw preparations – salmon is served as sashimi, dry-aged sea bream simply sliced and garnished with blood orange, a tiger prawn gently unfolds over vinegared rice, nigiri-style.
Images via @The-Sea-The-Sea
Timing matters here – early evening visits coincide with the venue’s transition, allowing you to witness its evolution while taking advantage of rather excellent oyster happy hour prices. The cocktail list leans appropriately toward the maritime, with several options featuring seaweed-infused spirits.
Change is afoot, too. In early 2026, founder Alex Hunter announced plans to relocate to a larger site further along Pavilion Road, relaunching as a 40-cover bistro-style seafood restaurant with an expanded retail fishmonger, a 10-seat seafood bar and a 28-cover outdoor terrace. Nick Marsden, who joined the kitchen in 2024, takes over as head chef. The Hackney outpost has already closed, but Chelsea remains very much the mothership — just a bigger, more ambitious version of it.
Ideal for suave food at the ‘unfashionable’ end of King’s Road…
There’s something deeply satisfying about Medlar’s location at the far reaches of the King’s Road – as if to say that true quality need not cluster in the fashionable heart of things. This independent restaurant delivers sophisticated cooking without unnecessary theatrics in a dining room where white tablecloths and large windows (thrown open during summer) create an atmosphere of calm refinement.
The partnership between chef Joe Mercer Nairne and front-of-house David O’Connor produces that rare restaurant alchemy – flawless food matched with intuitive service. Their signature crab raviolo with brown shrimps and leek fondue has resisted removal from the menu for good reason, inspiring near-revolt when they once attempted to retire it. The kitchen has a wicked way with offal, too; on a recent visit, a dish of chargrilled calf’s liver with sherry vinegar caramel was exceptional. Ditto a beautiful roast grouse served in that heady, hazy late summer period, accompanied by a parfait of its liver and game chips. Phwoar.
The cheeseboard is one of London’s most notable. From the winelist, look beyond the obvious bottles to discover genuine bargains lurking among lesser-known regions.
Last year, the team opened Cornus in Belgravia to rave reviews. It’s already won a Michelin star.
Ideal for a culinary journey through Portuguese-influenced cuisines…
This intimate venue offers something genuinely distinctive in terms of London’s restaurant scene – an exploration of the diverse flavours found across Portuguese-speaking regions worldwide. Husband-wife team Simon Mullins (Salt Yard founder) and Isabel Almeida Da Silva draw inspiration from multiple continents, so Goan curry might appear alongside Mozambican piri piri chicken or Brazilian moqueca with Macanese specialities.
Image via voltadomar.co.uk/David Robson
Since relocating from Covent Garden to Draycott Avenue, they’ve added a private dining room and heated terrace. Their exclusively Portuguese wine list emphasises small producers and low-intervention approaches – a refreshing departure from typical London offerings.
First-time visitors should consider the weekday set menus, while regulars return for signature dishes like grilled prawns ‘Laurentina’ and Iberico pork bafassa with turmeric potatoes – perfect expressions of the diverse culinary connections across Portuguese-speaking regions.
Ideal for authentic New York slices with The Sopranos on the wall…
Following the runaway success of their Marylebone original, this King’s Road outpost continues Alley Cats’ unapologetic embrace of NYC pizza culture. Checkered tablecloths and Sopranos episodes projected onto exposed brick create the perfect backdrop for what might be London’s most convincing New York-style pizza.
Head chef Francesco Macri approaches dough with the correct devotion, and his 14-inch pies emerge with textbook char, crispness and distinctive chew. The deceptively simple marinara proves that restraint often trumps complexity, while the halal pepperoni has rapidly developed its own Chelsea following.
Securing one of the wooden booths requires strategic timing – weekday evenings offer better odds. The bar programme focuses on quality essentials – craft beer, natural wines, and precise spicy margaritas. Don’t overlook their house chilli sauce, which elevates even basic slices to memorable heights.
Ideal for thin-crust Roman pizza worth staying up late for…
While London’s pizza scene worships at either the Neapolitan or New York altar, Marta celebrates Rome’s distinct pizza tradition. From L’Artigiano’s former Fulham Road premises, the kitchen follows strict Roman methodology – each pizza hand-rolled with a traditional Mattarello pin, creating characteristically thin, crispy bases that emerge perfectly blistered from their Valoriani oven.
The standout Focaccio di Marta sandwiches Stracchino cheese and truffle honey between whisper-thin crispy layers, while the Crostino Cotto achieves perfect harmony between tomato, mozzarella, prosciutto cotto and basil. Don’t be shy to ask for any extras on your pizza to make it ‘just right’ for you; the chefs here will happily oblige.
images via @marta.chelsea
Night owls take note: their late weekend hours (open until midnight Friday and Saturday) make Marta a rare post-theatre option in a neighbourhood not known for burning the midnight, chilli-infused oil.
We’re pleased to report that, two years on, nothing much has changed. Fresh off the back of a trip to Città del Sole, and with a wallet untroubled but a waistline widened, it’s truly striking just how fresh, flavoursome and affordable the food is there.
It shouldn’t need saying but we’ll do so anyway for those at the back; Naples’s culinary scene isn’t only about pizza. Sure, it’s the home of the stuff and the city plays host to many, many of the best pizzerias on the planet, both traditional and groundbreaking, but there’s so much more to enjoy about Neapolitan cuisine, from deep-fried street food snacks all the way to intricate fine dining.
Yep, Naples has got it all, but in a city where every corner houses a woodfired oven or a display of cream-filled sweet treats, it can be hard to separate the good from the great. We’re here for only the greatest; here are the very best restaurants in Naples.
L’antica Pizzeria da Michele
Ideal for, quite simply, the best pizza in Naples…
Of course, of course, we’re still going to talk about pizza in our rundown of the best restaurants in Naples. Because this delicious, democratic dish – arguably the world’s favourite – is just so well represented in the city of its birth.
The best in Naples? For us, it’s also the most simple; the one served at L’antica Pizzeria da Michele. A pizzeria steeped in history, da Michele has been doing its thing in the heart of Forcella since 1870. For decades, Da Michele was famous for serving just two items: a Marinara and a Margherita. The menu has since expanded to four, adding a Cosacca (tomato, pecorino, basil) and a Marita (half Margherita, half Marinara), but the ethos remains the same – a handful of pizzas, executed with obsessive precision, and nothing else.
The two main old stalwarts are absurdly good – light, fresh and digestible, and irregular enough to be spilling off the sides of the plate when they hit the table. Both were just €6 when we visited last month.
This unassuming spot has garnered global fame, even featuring in the film Eat Pray Love. Despite its global recognition, L’antica Pizzeria da Michele remains a favourite with locals just as much as it’s become something of a box ticking exercise for tourists.
Though queues stretch down the street from its 10:30am opening until it closes 12 hours later, there’s a ticketing system that offers some hope against the crowds. Simply collect yours and pitch up at the much-maligned but massively convenient bar opposite, Caffetteria Brasilena Aperol Spritz, which has a decent view of the digital queue number sign. It ticks along reassuringly fast. You can even eat your pizza at the bar to circumnavigate the queue, if you wish.
50 Kalò, founded by the acclaimed pizzaiolo Ciro Salvo, has rapidly established itself as a cornerstone of Naples’ contemporary pizza scene, with Salvo one of the world’s most recognisable and acclaimed pizzaiolo.
Located in the bustling Mergellina district and overlooking an attractive roundabout, this pizzeria is celebrated for its scientific approach to dough-making, which has earned it a perennial place in the prestigious 50 Top Pizza list, consistently ranking among the best in Italy and the world.
The name 50 Kalò translates roughly to ‘good dough’ in Neapolitan slang, and Salvo, a third-generation pizza maker, is renowned for his meticulous attention to hydration levels in that dough, often reaching up to 70-80%. The result is an exceptionally light and airy crust. You’re going to hear the word ‘digestible’ a lot in this article, and the pizzas at 50 Kalò are most certainly that.
The menu at 50 Kalò features a blend of traditional and more innovative toppings, with a strong emphasis on high-quality, locally sourced ingredients. Signature pizzas include the Cosacca, which features a San Marzano tomato base and a liberal grating of Parmigiano Reggiano, a homage to an old Neapolitan recipe that’s been having something of a resurgence in recent years, and the Salsicce e Patate, a white pizza topped with piquant fennel sausage and small cubes of potato. Only a couple of pizzas here top €10.
If a flight to Naples feels a little excessive just to get your hands on a €7 pizza, then you’ll be pleased to hear that since 2018 there has been a London branch of 50 Kalò. We’ve even included it on our list of the best pizzas in London for 2026. Do check it out sometime.
Founded by Gino Sorbillo (a pizzaiolo with serious pedigree – more on that later) in honour of his Aunt Esterina, Antica Pizza Fritta da Zia Esterina Sorbillo specialises in the art of pizza fritta, producing deep fried pizzas in the heart of Naples’s historic centre that aren’t in the least bit oily.
The Ripieno is the headliner, make no mistake, an indulgent affair filled with ricotta, smoked provola cheese, cicoli (pork crackling), and tomato sauce, encapsulating the essence of traditional Neapolitan flavours. Be warned; you’ll want to let this one sit for a few minutes prior to tucking in, as the middle is like lava when straight from the fryer.
With huge queues and just a couple of high top tables outfront on the street, this one should be tackled in a grab and go fashion. No matter; there are plenty of walls to sit on nearby.
*Please note that Da Fernanda, probably Naples’s most cherished pizza fritta purveyor and a regular of celebrity jaunts food around the city, sadly closed in 2023 due to the death of Nonna Fernanda. Our thoughts remain with her family*.
1947 Pizza Fritta Napoli
Ideal for taking your time over your pizza fritta…
With our buccal mucosa scalded and stripped of its lining, it might feel like folly to go seeking out a second fried pizza. But we simply can’t resist (which is kind of what got us in this mess in the first place), so we’re heading to 1947 Pizza Fritta Napoli next.
Just around the corner from L’antica Pizzeria da Michele in Forcella, this restaurant, named after the year it was founded, has perfected the art of the ol’ pizza fritta, with a dough that’s expertly fried to achieve a crispy exterior while maintaining a soft, airy interior. It ends up tasting a little sweet – doughnut-like, even – but once this gives way to the gorgeous fillings, it all makes sense, that sweetness a wonderful contrast to the smoked provola cheese, speck and Pienello tomato that makes up our favourite order, the Sophia.
The good thing about 1947 Pizza Fritta when compared to our old friend Sorbillo from a few paragraphs previous is that there’s plenty of seating available here, both indoors and out. When you consider just how well pizza fritta goes with a cold glass of Peroni, it only feels right to order a few of both and take your time.
Ideal for exemplary versions of Neapolitan classics in a convivial dining room…
We’ve typed ‘pizza’ so many times already that our ‘z’ key is starting to stick, so we’re heading into the tangle alleyways that make up Spaccanapoli next for something a little different.
Just off the main thoroughfare, you’ll find La Locanda Gesù Vecchio, an absolute gem of a trattoria that serves up hearty, generous Neapolitan dishes without frippery or fanfare.
The dining experience is both simple and informal, with closely set tables that invite a convivial atmosphere. The ziti with Genovese ragu is an obvious highlight, and seemed to be ordered by just about every table when we visited, as is the aubergine parmigiana, which was just so much lighter than just about any version we’ve had in the UK.
Hopefully, that might help you save room for dessert – these guys do the sweet stuff very well. The pastiera, a traditional Neapolitan dessert made with a sweet shortcrust pastry filled with ricotta and accented with orange blossom water, is very good indeed.
The fact that the restaurant has just two sittings an evening, with all guests sitting down at the same time at either 7pm or 9:30pm, creates a lively, sociable atmosphere. The eminently drinkable house wine for €20 and skilfully made Negroni for €7 certainly helps things along. Watch for the theatrical way they collect bottles of wine for the tables.
The restaurant’s success has even led to the opening of another venue on the same street. That hasn’t made it any easier to snag a reservation, though recently La Locanda Gesù Vecchio has started taking reservations over email. There’s a dedicated gluten free menu, too – a source of pride for the restaurant.
Ideal for Naples’s best ‘old school’ seafood experience…
Naples isn’t all about red sauces and starchy anchors. Being a coastal town and a major port, there’s also some fine seafood to be found in the city. Da Dora, to our mind, is the premier seafood restaurant in Naples, a wonderfully old school place – all nautical decor and photos of famous guests on the wall – that’s simply impossible to resist.
The standout dish here is without doubt the linguine alla Dora. Generously stacked with lobster, mussels, and fat prawns with their head juices still intact, all bound together with just a whisper of fresh tomato sauce, it’s a showstopper, and just so so good.
There’s the local classic spaghetti alle vongole too, the briny clams pert and sweet, as well as crisp, salty fritto misto featuring, pleasingly, whole anchovies, and a selection of crudo, the kitchen showing their confidence in the freshly landed produce.
A bottle of tight, fruity Biancolella white wine from across the way in Ischia is all you need to see this spanking seafood selection on its way. Oh, and a bib. You’ll definitely need a bib here…
Forgive us for returning to pizza so soon, but this is Naples after all, and the pizza is so digestible that it’s quite possible to have several in a single day. We certainly have…
La Notizia, helmed by the renowned pizzaiolo Enzo Coccia, is one of the most influential pizzerias in the world, and more than worthy of a spot on our list of the best 22 restaurants in Naples.
Coccia, a third-generation pizza maker and one the pioneers of the concept of ‘slow pizza’ which emphasises the importance of long fermentation times for the dough, has transformed his pizzeria into a culinary pilgrimage of sorts for aspiring pizzaiolo, earning it the distinction of being the first pizzeria in the world to be in the Michelin Guide all the way back in 2010.
He has even written a seminal book, The Neapolitan Pizza, a Scientific Guide on Artisanal Pizza-Making, and teaches at the Pizza University on his days off. What a guy.
Located on Via Michelangelo da Caravaggio, La Notizia is split into two venues on the same stretch: La Notizia 53 and La Notizia 94, each offering a slightly different menu but maintaining the same sky-high standards, of pliable, light-as-you-like dough and organic, locally-sourced toppings.
The pizzeria is also known for its rigorous selection of ingredients, all sourced from local producers and Slow Food Presidia, ensuring the highest quality and sustainability. Pizzas here straddle the innovative with the ancient, with the Mastunicola, an ancient recipe with lard, pecorino cheese and basil, a highlight. The Cetara, topped with anchovies from the Amalfi Coast, yellow tomatoes, and oregano, is another perfectly poised pizza from a true master of his craft. No wonder he’s affectionately nicknamed ‘The Maestro’.
Ideal for quite comfortably the best pizza on Via Della Pizza…
From the same team behind the acclaimed and always popular pizza fritta joint from a few paragraphs previous, Sorbillo is another of Naples’s most revered pizzerias. Located on Via dei Tribunali, it’s a cornerstone of Naples’ pizza scene, with a history dating back to 1935.
Founded by Luigi Sorbillo, the pizzeria is now helmed by his grandson, Gino Sorbillo, who has become a culinary icon (and something of a divisive figure) in his own right. Gino’s approach respects tradition while pushing boundaries, such as his use of organic flour, a meticulous 30-hour dough fermentation process, and, more recently, his introduction of a pineapple pizza to his menu.
The eponymous Sorbillo sits on the city’s so-called Via Della Pizza, a strip with several superb pizzerias. But Sorbillo is on another level altogether. This one gets busy, so be prepared to share a table or counter with other guests.
Actually one of three outposts in the city (with one in Pozzuoli and one in Bagnoli), the Santa Lucia branch is our favourite, with a modern, airy feel to the dining room and plenty of terrace seating for those warmer Naples days.
Chef Vitagliano is a rising star in the pizza world, with his pizzas distinguished by their light, airy crusts, achieved through a meticulous 36-hour fermentation process and the use of a blend of high-quality flours. Toppings can be as prosaic and traditional as you like, or can veer off into the contemporary and even experimental, if you so wish. For a taste of the latter, try the Marinara Sbagliata (the incorrect marinara), which features a San Marzano DOP marmalade and wild garlic pesto. It’s a joy. There’s even a pizza tasting menu, if you’re feeling particularly hungry.
That said, and perhaps surprisingly for a place that’s been recognised for serving the world’s best pizza, the take on traditional Neapolitan snacks are perhaps the best thing here, with the deep fried pasta balls oozing with whipped ricotta and mortadella. So, so good.
Pair with a glass of sparkling red wine (as suggested by the team here), and relax into a pizzeria experience that straddles the traditional and the contemporary with real skill.
In the historic Materdei district, Starita a Materdei is a legendary pizzeria with roots dating back to 1901. Founded by Alfonso Starita, this family-run establishment has been passed down through generations, with Peppe Starita currently at the helm.
The Montanara Starita, a lightly fried pizza that’s topped (rather than filled) with tomato sauce, provola cheese and basil, is the signature here, and a feat of some engineering – light but crisp, and not oily at all. It’s superb.
The absolute classics are excellent, too. We can’t resist their Diavola, which is – a rare thing with this type of pizza – nicely spicy but not absurdly salty. Pizza Express, take note!
Images via @pizzeriastarita
The warm, rustic interior, dressed up with vintage photographs and memorabilia, hammers home the pizzeria’s rich history. End with fried dough sticks (angioletti) dressed in a gorgeous pistachio cream or nutella for the full Startia experience.
Ideal for a classy, precise pasta tasting menu experience…
Piazza Municipio is a large public square sitting in the heart of Naples, known for its proximity to the historic Castel Nuovo and the city’s main port. Right opposite the castle, you’ll find one of Naples’s more contemporary pasta places; Di Martino Seafront Pasta Bar.
Opened by the Di Martino family, renowned pasta producers from nearby Gragnano, the restaurant seamlessly blends a pasta shop, take-away service, and a full dining establishment, all with a contemporary flair not exactly ubiquitous in a city still largely in thrall to old-school dining and tradition.
Pull up a pew at the horseshoe counter and watch the show commence, as skilled chefs perform endless mantecatura with the deftest wrist flicks. It’s all going into some seriously silky pasta.
The pick of the bunch on a recent visit was those appropriately shaped seashells tofette, which caught the sauce of broad beans and tuna bacon just beautifully. Equally good, and arriving in a neat little Jenga-style stack to remind you that this is a fancier operation than Nonna’s down the road in Quartieri Spagnoli, is the ziti with Genovese ragu. Glossy with added bone marrow, it’s an absolute treat.
Enjoy both on the a la carte menu for a premium price of €28 and €24 respectively, or as part of the restaurant’s pasta-based tasting menu (has there ever been a more enticing phrase?), which is a lavish nine-course affair priced at €100. Add a wine pairing option (much recommended – it was excellent) for an additional €40.
With operating hours from Tuesday to Sunday and views of the shimmering water and castle from the bright and airy dining room, it’s the ideal spot for a laid back but sophisticated lunch or dinner. Do note that it’s closed on Mondays.
Ideal for contemporary Neapolitan dining in artistic surrounds…
Sitting pretty (honestly, really bloody pretty) on one of Naples’s defining thoroughfares Via Toledo is the city’s history Banco di Napoli building, which now houses the Gallerie d’Italia museum. And inside that gallery is the fittingly easy-on-the-eye Luminist Café Bistrot.
Allow yourself to be enticed inside by the glass pasticceria display, which houses rows of intricately adorned pastries and cakes. Or, settle in for lunch proper (the restaurant closes at 7pm, but this is very much a lunch place in vibe and feel) and enjoy regional Campanian specialties and a few international twists for good measure.
The spaghetti with bottarga and lemon-spiked pangrattato is superb here, but you can go off-piste, too, with a hamburger, paella or even ceviche. Or, you could stick to the classics, as we did, and have yet another ziti alla Genovese. It’s just too good to ignore.
Luminist maintains a 30% minimum of natural wine on its wine list, amplifying its dedication to seasonal and organic fare. An air-conditioned, wheelchair-accessible environment ensures comfort for all guests. On a properly humid day in Naples, it’s such a welcome respite in here.
Ideal for celebrity spotting and old school fine dining…
A favourite of Diego Maradona during his time in Naples in the 1980s, Mimi alla Ferrovia has been frequented by celebrities and Neapolitan high society from the moment it first opened its doors back in 1944.
Though the tablecloths are starched white, the ceiling frescoed and the clientele celebrity, the vibe inside is refreshingly laid back. As is the food, with traditional Neapolitan and Campanian dishes served as they should be; generously proportioned and singing of their star ingredients. The ravioli of seabass – expertly made, naturally – arrives under several plump, still-pink prawns, whilst baby octopus is served with fresh tomatoes, olives and capers.
It’s refined but generous, and the service matches that sentiment, perfectly balancing attentiveness with privacy when required. In a city where the hospitality can occasionally be a touch brusque, Mimi alla Ferrovia stands out as something of a special occasion kind of place for its elegant pace. The fact Robert de Niro or even Alain Ducasse might be on the adjacent table certainly does no harm.
Ideal for Naples’s best Michelin-starred experience…
Speaking of special occasion sort of places, Palazzo Petrucci is the only once Michelin-starred restaurant we’ve featured on our list of the best places to eat in Naples, owing to its breathtaking views of the Bay of Naples and its sophisticated seafood menu that offers a different take on the food of this most cherished part of Italy.
Designed by revered local architect Alfredo Galdi, the restaurant offers a modern, minimalist setting that perfectly complements chef Lino Scarallo’s intricate tasting menus. Notable dishes include a rare blue lobster stuffed with caponata and buffalo mozzarella paired with Sicilian red prawns. That said, the candele with Genovese reduction, snapper tartare, provola fondue and lemon zest is a dish that will be remembered for some time still.
Prices for the tasting menu here start at €100, though we’d highly recommend forking out on the six course seafood menu featuring raw fish for €150, which offers the most comprehensive introduction to Scarallo’s cuisine. It’s a superb, sophisticated dining evening, and our favourite fine dining experience in Naples.
The pizzeria that operates under the Palazzo Petrucci umbrella, back in the city centre, is also excellent.
Crudore, on the edge of the attractive Villa Comunale, places an emphasis on raw fish which sets it apart in Naples’s culinary landscape.
Even if the name passes you by (a pun which means ‘king of the raw’), you’ll feel the freshness of the offering as you walk through the dining room to your table, with a huge display of sea bream, langoustines and more over ice assuring you that the catch is glistening. Of course, there are walls made up of fish tanks, reiterating that point.
That fish is served with real panache, delicately assembled and sliced just right, with Japanese influences peppered throughout. If they’ve got sea urchin on display, order it; we’ve had two superb preparations of the stuff on previous visits to CrudoRe’. That said, for those squeamish about raw fish, there’s still plenty to enjoy, including excellent clam ravioli and seafood risotto, the latter brought to life with fresh stracciatella.
The cellar is stacked, too, with 450 labels of champagne and 550 of wine. Sure, it’s all a bit (well, a lot) bling and brash, but when the food is this good, we’re not complaining.
Ideal for a gold standard version of Naples’s favourite sweet treat…
Neapolitans are just as crazy about their sweet stuff as they are seafood and pizza, and arguably the headlining sweet treat in the city (rum baba might have something to say about that) is the iconic pastry sfogliatelle, a a crispy, layered pastry filled with sweet ricotta cheese and candied citrus peel. God, it’s good.
La Sfogliatella Mary, in the bustling Galleria Umberto I, is known citywide for its mastery of the iconic Neapolitan pastry. Established in 1979, this small yet renowned pastry shop has become a pilgrimage site for pastry enthusiasts. The sfogliatelle, available in both ‘riccia’ (curly) and ‘frolla’ (smooth) varieties, is crafted with meticulous attention to detail.
The riccia version features a crisp, multi-layered shell filled with a fragrant mixture of ricotta, semolina, candied citrus, and a hint of cinnamon, while the frolla offers a tender, shortcrust pastry alternative. We’re very much here for the former variety, which, to our mind, is the best in the city.
La Sfogliatella Mary also excels in other traditional pastries of the region, such as baba and pastiera, but it is the sfogliatella that truly steals the show. Hence the name.
Ideal for artisanal gelato in both traditional and inventive flavours…
We’re on a roll (and a sugar high) in terms of sweet treats now, so we’re heading to Casa Infante, a cherished name in Naples synonymous with artisanal gelato and traditional Neapolitan pastries.
Founded in 1940, this family-run gelateria and pastry shop has built a reputation for its commitment to quality and innovation. Casa Infante’s gelato, made from the finest Campanian ingredients, offers a wide array of flavours, from classic pistachio and stracciatella to inventive combinations like ricotta and pear.
With multiple locations across Naples, Casa Infante always seems to pop up when you most need it. As in, when you’re hot, sticky and in need of a refreshing, cooling pick-me-up.
Speaking of pick-me-ups, the espresso here is excellent, too. And since you’re here, why not pick up a jar of baba soaked in rum to take home? It makes the ideal souvenir!
Another pit stop for a Neapolitan sugar hit, we’re heading to Pasticceria Poppella next. Nestled in the Rione Sanità district, it’s renowned as a historic pastry shop renowned for its innovative and traditional confections. Established in 1920, Poppella has become a household name, particularly famous for its signature creation, the ‘Fiocco di Neve’ (Snowflake).
This delicate pastry, a soft brioche filled with a light, creamy ricotta and milk mixture, has garnered a cult following for its combination of indulgence and cloud-like texture that disappears in a couple of bites. We are very much one of that following, as, it seems, is most of Naples. You can expect to queue here, so order several to take away.
Ideal for cones of freshly fried fried small fish…
Sweet stuff for starters and fish for dessert? Feels a funny way round, granted, but you don’t have to follow this rundown of the IDEAL 22 places to eat in Naples in order, of course. Neither do you have to eat at all of these places in a single day. That would be mental…
Anyway, just beyond the tightly knotted, always shaded streets of Centro Storico, in a part of town that feels like you’re coming up for air and bursting into the light, is Montesanto and its Pignasecca Market. Lively as hell and full of debate, bartering and the odd quarrel, there’s an irresistible energy to proceedings here, and nowhere is this better exemplified than Pescheria Azzurra, a seafood lover’s paradise that has been serving the community since 1950.
This family-run fish market and eatery is renowned for its fresh seafood, sourced daily from the nearby Tyrrhenian Sea and displayed on ice in the open air, with Neapolitans dropping by in a constant stream to inspect the catch.
What sets Pescheria Azzurra apart is its ‘from catch-to-table’ experience, where diners can select their seafood directly from the market and have it cooked on-site. The signature here is the frittura di paranza, a mixed fry of small fish, but you’ll get the classic Campanian pasta dishes too. There are tables, sure, and a predictably chaotic queue for them, but it’s just as nice to order a cone of fried fish, a beer or two, and just pitch up against the wall opposite to take in the show.
No trip to Naples (or roundup of the best restaurants in Naples) would be complete without a meal at Trattoria Da Nennella. Or, more precisely, no trip to Naples would be complete without being gently ribbed by the staff at this infamous trattoria.
Because that’s all part of the fun at Trattoria Da Nennella, a place where the hearty, roughly hewn renditions of Neapolitan homestyle dishes play second fiddle to the spectacle of service (where a waiter might suddenly be playing an actual fiddle, let’s be honest).
In the business since 1949, there’s plate throwing, insult chucking and chanting galore here, a theatrical experience that pairs surprisingly well with the pasta e patate and salsiccia e friarielli. The trattoria’s rustic yet somehow flashy decor, with its chequered tablecloths and vintage photos (what else?), adds to the fabric of the place, and the slightly fabricated vibe, it has to be said.
Idealfor legendary Neapolitan homecooking in the corner of a covered market…
Shimmy through the throbbing activity of Mergellina’s covered market, perhaps vaulting over a couple of crates of fresh fruit and veg in the process. Make for the far corner of the arcade and the crowds of hungry diners, all seeking a plate or two of home-cooked food from one of Naples’s most iconic kitchens.
There is no printed menu here, no waiters. Instead, what’s cooked is what’s fresh and seasonal from the market. Simply make your order at the counter (you’ll pay here once you’re finished, too) and keep one roving eye on any of the three or four tables. Be ready to pounce when a free one emerges.
Though it might not be on when you visit, we’ve enjoyed the finest spaghetti alla puttanesca of our life here; a properly briny, spicy version which had been cooked low and slow in good quality olive oil until almost confited. We’ve heard great things about the kitchen’s pasta e fagioli, too.
Cibi Cotti Nonna Anna first opened its doors in 1963 as a humble take-away kitchen. It wasn’t until the 1980s that the restaurant expanded to include tables. Now, it does both takeaway and sit-down. Though Nonna Anna Pappalardo sadly passed away in 2017, her children keep the name alive and the place is as bustling as ever. So bustling, in fact, that we wouldn’t recommend coming here between 1pm and 2pm, when office workers come in their droves – the ultimate compliment on the quality of the food, we think!
Cibi Cotti Nonna Anna is only open between midday and 3:30pm, and is closed on Sundays.
We end in the Vomero district, at Braceria Pastore. We’ve gorged on all our sweet treats during the day, as is the Neapolitan tradition, so we’re ending our tour of the best food in Naples instead with a steak. This is a city that doesn’t play by the rules, after all.
This family-owned braceria (simply meaning ‘steakhouse’) has built a reputation for serving some of the finest cuts of meat in the city, sourced from local farms and expertly prepared over an open flame. The menu features a variety of meats, including the headlining steaks, lamb chops, and the signature salsiccia napoletana (Neapolitan sausage), all blistered and burnished on the grill until smoky. Honestly, after an orgy of pastry, pasta and pizza, a big ol’ hunk of meat is just the ticket.
Don’t expect the usual steakhouse staging of wooden beams and exposed brick walls; the vibe here is more simple, with a few cream leather banquettes and stark overhead lighting. Not to worry; it only serves to illuminate the perfect bark and blushing centre on that steak. You know what? We might just stay here a while and admire this thing…
There’s a saying in Italy: “Non si mangia per vivere ma si vive per mangiare” – we don’t eat to live, we live to eat. And in the Eternal City, this philosophy rings truer than anywhere else, for it’s often said (in my stupid head anyway), that the Romano de Roma has an emulsion of Pecorino and pasta water running through their veins.
From centuries-old trattorias serving up perfect plates of carbonara to innovative fine dining joints pushing culinary envelopes all over the negozio, Rome’s food scene is a surprisingly satisfying balance of tradition and gentle innovation.
Indeed, Rome’s culinary landscape isn’t just about trippa alla romana and cacio e pepe (though both are certainly worth crossing continents for). The city plays host to everything from traditional Roman-Jewish cuisine to contemporary seafood restaurants, with its own take on pizza and deep fried street food rubbing shoulders and sharing lanes with some of the most affordable Michelin-starred experiences in Europe.
Yes, Rome has it all, but in a city where every cobblestone seems to hide either a cosy trattoria or a smart contemporary bistrot, it can be hard to separate the tourist traps from the treasures. We’re here to help you find only the greatest; here are the very best restaurants in Rome.
Armando al Pantheon, Pigna (Historic Centre)
Ideal for pinpoint renditions of Rome’s most cherished classics…
It could be argued that Rome’s Pigna district – the part of the historic centre that contains the Pantheon – is one of the city’s worst places to dine. Full of subpar gelato and couldn’t-care-less trattorias, finding a faithfully rendered rendition of Rome’s famous four pasta dishes in this part of town is surprisingly difficult.
All that changes if you’ve landed yourself a table at Armando al Pantheon. Just steps from the ancient dome, Armando al Pantheon is one of Rome’s proudest flagbearers of the city’s true culinary heritage. The Gargioli family’s dedication to Roman cuisine spans over sixty years, evident in the textbook versions of Roman classics that bless every plate that leaves their kitchen.
It’s Armando’s commitment to seasonal Roman ingredients and techniques that have largely vanished elsewhere that raises the restaurant above the rest. Their panino coratella, a sandwich filled with tender lamb offal, represents the kind of authentic Roman dish that’s increasingly hard to find. It certainly doesn’t harm that it’s bloody delicious.
Look, too, for puntarelle (Catalonian chicory) with anchovy sauce and carciofi alla romana (simmered artichokes) in the cooler months. When it warms up, delicate stuffed zucchini flowers take centre stage. It almost goes without saying that the carbonara, amatriciana et al are pinpoint versions.
Save room for the tiramisu, which is, quite simply, not even the same dish from your fridge cold Saino’s version. Their wine list improves yearly, featuring small producers from across Italy, with house wines offering exceptional value at modest prices. The house red (a smooth, fruity Rossé Ribelà) is keenly priced at just 28 euros. What’s not to love?
Armando al Pantheon is closed on Sundays, and is open for both lunch and dinner Monday to Friday, and just for lunch on Saturdays.
Another fine restaurant a gladiator’s gallop away from a famous Roman monument (this time, the Colosseum and Forum double-header), is Alle Carette.
In a city where pizza can be hit-or-miss, especially in tourist-heavy areas, Alle Carrette stands out as a neighborhood gem that’s maintained its integrity and quality for decades. Housed in a space that feels authentically Roman with its copper-colored walls and bare-brick arches, this bustling pizzeria serves up some of the finest thin-crust pies in the Eternal City.
The pizzas here epitomise the traditional Roman style – a satisfyingly thin and crispy affair with perfectly charred edges and plenty of structural integrity. While the classic fennel sausage number never disappoints (especially with the buffalo mozzarella upgrade), you should really try their namesake La Carrette, featuring a salty but harmonious combination of guanciale, taleggio, and tomato. When in Rome, and all that…
Whatever you do, don’t skip the fritti – their zucchini flowers stuffed with mozzarella and anchovies are legendary, and the fried baby artichokes (carciofini), served simply with a quarter of lemon, are among the best in Rome. Quite the claim in a city full of the stuff, we know, but one we’re happy to vouch for…
Despite its location in the trendy Monti neighborhood, prices at Alle Carrette remain remarkably reasonable, making it a favourite among both locals and savvy tourists who are either in-the-know or have just happened to chance upon the place.
The atmosphere strikes that perfect Roman balance – lively enough for a group dinner but still intimate enough for a casual date. In the warmer months, the small outdoor seating area offers prime people-watching opportunities. Book ahead for dinner, though the efficient service means walk-in waits are rarely too long.
Keep in mind this is a proper sit-down pizzeria – no by the slice vibes here. Even more excuse to get stuck in, we think!
Alle Carrette is open for both lunch and dinner, 7 days a week.
In a city where street food has ancient roots, Supplizio elevates the humble suppli – Rome’s beloved fried rice ball – into an art form. Acclaimed chef Arcangelo Dandini’s charming spot near Campo de’ Fiori feels more like a cozy living room than a takeaway joint, with its terracotta floors, exposed brick walls, and comfortable leather sofas inviting you to linger over your crispy treats (though not too long – a queue’s forming!).
The menu revolves around creative interpretations of the classic suppli, each handcrafted with premium ingredients including long-aged Carnaroli rice and organic vegetables, and all priced at €3. While the traditional ragu and mozzarella version is executed perfectly, those keen to ground themselves even further in the Eternal City’s food traditions should of course try the cacio e pepe or carbonara versions. Don’t miss their other fritti – the smoked potato croquettes and anchovy meatballs with Dandini’s house-made garum (a nod to ancient Roman cuisine) are standouts.
Honestly, it’s all excellent. Everything is cooked to order, ensuring each golden-breaded morsel arrives at the perfect temperature for that iconic string of melted mozzarella (what Romans call the ‘telephone line’) when pulled apart. Order yourself a Peroni or two before moving on – it’s an almost obligatory accompaniment.
Since 1860, Piperno has been serving refined Roman-Jewish cuisine from its palazzo dining room. The service, complete with bow-tied waiters, makes you feel like minor nobility. Start with the impossibly light fried starters – the filetti di baccalà (fried salt cod) and potato croquettes are mandatory. The seafood risotto and fontina-enriched gnocchi show there’s more to Roman-Jewish cuisine than just frying. Save room for their legendary zabaione.
Ideal for Rome’s most authentic food market experience…
In a city of great markets, Testaccio’s stands out for its pitch-perfect blend of tradition and modernity. Housed in a modern structure since 2012, this bustling market manages to honour its 19th-century roots while embracing contemporary Roman food culture. With over 100 stalls spread across 5’000 square metres, it’s both a neighborhood essential and a food lover’s paradise.
While the market excels at fresh produce, meats, and seafood, it’s the prepared food stalls that make it a dining destination. Don’t miss Mordi e Vai (Box 15), where former butcher Sergio Esposito crafts transcendent tripe sandwiches from traditional Roman recipes – their tripe panino, which houses intestines simmered in a savoury, tomato-based broth, is legendary. Grab a ticket; you won’t have to wait long for your number to be called.
Opposite Mordi e Vai, Casa Manco (Box 22) serves exceptional pizza al taglio using whole wheat flour. The stracciatella, courgette flower and anchovy number is intense and immense. No wonder Food and Wine recently declared Casa Manco “the world’s best pizza”. Arguably, Manco’s porchetta sandwiccia is even better.
Across the way, Le Mani in Pasta (Box 58) offers fresh handmade pasta you can watch being made. For wine lovers, Da Corrado (Box 18) pairs natural wines with some of Rome’s finest meatballs. It’s all here, and it’s all absurdly satisfying.
Visit in the morning (it’s open Monday through Saturday, from 7am to 2:30pm) when the market is at its liveliest – though expect a rush of local students around lunchtime. The modern facility even incorporates visible Roman ruins beneath glass floors, though this archaeological area is only accessible on Tuesdays with reservations. While tourists are welcome, this remains very much a working neighborhood market where quality and value still reign supreme.
Ideal for power lunches of Rome’s finest cacio e pepe…
The recent refurbishment of this Testaccio institution proves that updating tradition doesn’t mean selling your soul. Rather than infuriating locals and killing the inherent vibe of the place, the renaissance of this historic spot (first opened in 1936) has once again made Da Felice one of Rome’s buzziest trattorias, a decade after rumours of its decline began circulating. It’s got a slicker, more modern feel now, sure, yet the food remains steadfastly Roman.
Their tonnarelli cacio e pepe is still widely considered Rome’s best – they finish it tableside with a dramatic flourish, tossing the pasta enthusiastically with salad servers until properly luscious and creamy. We’d travel to this corner of Testaccio just for a bowl of the stuff – in fact, it’s a great choice for a power lunch, with speedy, efficient service meaning you’re in and out in less than an hour if you want to be. Not before you’ve ordered the signature tiramisu, though, which is served in tall glasses with a cheeky surprise of chocolate ganache lurking at the bottom.
Book well in advance and expect to see everyone from local politicians to food TikTokers in the exposed-brick dining room.
Ideal for Rome’s, and therefore the world’s, finest amatriciana…
On Via del Viminale, a stone’s throw from Termini, La Matriciana (the historic spelling reflects the restaurant’s 1870 origins) strikes that perfect balance between informal, paper-tablecloth charm and gently refined Roman cooking. It’s a match made in heaven; this historic establishment has been perfecting its craft for over 150 years, and it shows in every dish that leaves the kitchen. It’s a Roman institution, make no mistake.
The restaurant’s namesake pasta all’amatriciana is, naturally, the star of the show – a tangle of perfectly al dente bucatini in a rich sauce of crisp hand-cut guanciale and slow simmered San Marzano tomatoes. A comically large, serve-yourself silver gravy boat of pecorino is placed on your table with some ceremony, sealing the deal. It’s absurdly good – the best bowl of pasta we’ve had anywhere in the city. Or, perhaps, the world…
Don’t take those words too close to heart and enter with a myopic vision for the ama’, mind. It would be wrong to overlook the other Roman classics here, like their excellent saltimbocca alla romana or the seasonal artichokes, prepared either ‘alla romana’ (braised with herbs) or ‘alla giudia’ (crispy fried in the Jewish style). You could order both, you know, The wine list, featuring around 600 labels, is a cut above the usual trattoria standard.
Reservations are recommended for dinner (you can usually snag a table on the same day, if you’re willing to eat post 10pm), though less essential for lunch. Tables spill onto the pavement in summer, offering prime people-watching opportunities in this elegant corner of Rome.
Prices are a little above what you’d normally pay (the headlining dish is €18) but entirely reasonable given both the location and the quality – this is how Roman cuisine should be. Word of warning: there’s another restaurant of a similar name – La Matriciana ai Consoli – down in Don Bosco. It could well be delicious, but it’s not what you’re looking for.
Please be aware that La Matriciana is closed on Saturdays.
L’Osteria della Trippa, Trastevere *temporarily closed*
Ideal for the city’s signature offal, done perfectly…
The food of Rome is rooted in the so-called quinto quarto (the fifth quarter), which celebrates the ‘less noble’ parts remaining from the animal slaughter. One of the best places to sample this side of the cuisine is at L’Osteria della Trippa, across the river in hip Trastevere.
Despite its name suggesting a singular focus on tripe, this modern osteria offers much more than only Rome’s famous offal dishes (though those are indeed exceptional). Open since 2019, here chef Alessandra Ruggeri has created a menu that pays homage to Roman traditions while adding contemporary flourishes that feel natural rather than forced.
The house specialty trippa alla romana is indeed unmissable – strips of tripe braised until tender in a rich tomato sauce with pecorino and mint – as is the fried tripe (there’s a recipe on their website, by the way!) but don’t overlook other seasonal standouts like the fava bean puree with a knot of braised wild chicory, which is just gorgeous, or the veal sweetbreads served over aubergines, which were a special delivered only verbally.
The wine list is particularly strong on natural and biodynamic options from small Italian producers, with plenty of exciting options by the glass for around the €5 euro mark. It came as no surprise to anyone familiar with Ruggeri’s generous cooking and hospitality that Michelin awarded L’Osteria della Trippa a Bib Gourmand within a year of its opening.
Please note that L’Osteria della Trippa is temporarily closed for renovation.
Such is the ever burgeoning reputation of chef Sarah Cicolini, that she really could be cooking anywhere. The fact she chose this modest space in Rome’s southeastern residential Appio-Latino quarter to serve her elevated trattoria fare speaks volumes about her desire first and foremost for flavour over frippery.
Her carbonara at Santo Palato has a cult following, sure, but the real draws are dishes like the delicate trippa alla romana and wagyu heart tartare that show off her refined fine-dining tekkers while respecting Roman traditions. No wonder Stanley Tucci was in awe of the place when he visited for his Searching For Italy series recently. To finish, the maritozzo with grano arso flour is unmissable.
Ideal for a superb value set menu of Roman classics near the Pantheon…
If you’re only in Rome for a whistle-stop tour and you’re keen to try as much of the cucina romana as you can possibly fit in, then Hosteria Grappolo d’Oro is a no brainer.
Moments from Campo de’ Fiori, this is that rare find – a centrally-located restaurant that maintains high standards despite the tourist crowds. The exposed wooden beams and warm service create the perfect setting for textbook versions of Roman classics. Their five-course Roman tasting menu is a steal at €34, and the wine list features excellent bottles from Lazio and beyond at fair markups.
That menu starts with a refined trio of traditional antipasti, presented tastefully but tasting robust and fully flavoured (the puck of panzanella is particularly good). Then, it’s onto pasta, and here you’ve a choice of the holy Roman trinity (sorry alla gricia, you don’t make the cut). Go for tonnarelli cacio e pepe, which is a particularly decadent rendition, heavy on the pecorino emulsion and even heavier on the black pepper. Just as it should be.
The procession continues with oven roasted lamb or cod in tomato sauce and ends, of course, with a a perfectly proportioned tiramisu – it’s the real deal. What a fantastic, ridiculously cheap meal, right in the heart of Rome. With tables able to be reserved as late as 11pm, it’s perfect for a late night bite, too.
Open every day for lunch dinner, except Wednesdays, when it’s only open for dinner service.
Ideal for outdoor dining and people watching in Trastevere…
This tiny Trastevere spot draws crowds for good reason – the Roman classics are done faithfully, and the vibe is always just the ride side of raucous.
Enzo’s outdoor tables on the adjacent cobblestone street are prime real estate, especially during summer evenings. While you wait for one (and you will wait), they’ll serve you beer from plastic glasses and, if you’re lucky, a few snacks.
Once seated, it’s the usual (we say that with enthusiasm, rather than a sense of weariness) fritti, puntarelle, artichokes, pastas and sweet treats. From the latter section of the menu, their Nutella-dotted tiramisu has a cult following. Such a following, in fact, that on any given night of the week it’s sensible to pitch up at least an hour before opening time (6:30pm), to get a place in the queue to nab yourself a table for that first round of service. If not, you’ll be watching a whole round of diners eat before you (in every sense of the word), which can be a little demoralising.
Ideal for modern Italian fine dining and the puffiest of pizza…
In a city devoted to tradition, Allegrío dares to be different. Chef Daniele Creti’s contemporary takes on Italian classics have earned both critical acclaim and a devoted following among Rome’s culinary cognoscenti (as well as a little criticism from the purists, it should be said). The restaurant’s opulent and enjoyably camp design – all massive sun sculptures, every shade of gold and plenty of crushed velvet – provides a fitting backdrop for plates that are as visually striking as they are delicious.
In a city so devoted to tradition, Allegrío brings a welcome splash of contemporary flair to Via Veneto. Opened in 2023 and ranked in Italy’s Top 50 pizzerias a year later, this 150-seat restaurant delivers drama in spades.
The space is divided into four distinct dining rooms, each with its own personality: Joyful (tropical warmth), Lucky (gold and red velvet), In Love (adorned with 500 Capodimonte porcelain roses), and Intrepid (wild, exotic colors). It’s opulent and enjoyably theatrical in a very Roman sort of way, setting the stage for a dining experience far removed from the trattorias and osterias further south into town.
While the restaurant offers refined Italian cuisine in the form of a handful of tasting menus (the full Dolce Vita experience is priced at €95 for eight courses with four wines), it’s Allegrio’s pizza program that’s earned the most accolades. Helmed by Peppe Aiello and Ivano Veccia, the Neapolitan-style pizzas deliver perfectly balanced, extravagantly puffed crusts giving way to a pillowy interior. The Diavola, featuring a blend of seven different peppers, house nduja and shocking pink ricotta, shows their mastery of simple flavours with just a touch of the playful.
On the restaurant side, Executive Chef Daniele Creti offers seasonal menus that respect tradition while embracing innovation. Their signature ‘La Carbonara My Way’ (€45 for two), prepared tableside and finished with 24k gold, epitomises the restaurant’s balance of classic technique and contemporary showmanship. The wine list, curated by sommelier Davide Gelormini, is appropriately extensive for a restaurant of this confidence and calibre.
Open daily for lunch and dinner, until 12:30am, and an hour later on Friday and Saturday nights.
Ideal for impressing your date with the finest ingredients in town…
More than a restaurant, SalumeriaRoscioli is a temple to exceptional ingredients. The counter heaves with pristine cheeses and salumi, while the cellar holds nearly 3,000 wines.
Yes, everyone orders the carbonara and cacio e pepe (can’t keep saying ‘when in Rome’, can we?), and they’re undeniably excellent. But the real move here is to start with their burrata, all splayed out and topped with clusters of semi-dried, intensely flavoured tomatoes, then shift on to a little premium charcuterie and something from their daily seafood selection. The pesce bianco del giorno (fish of the day served with pine nut cream and seasonal greens) is always a winner.
Avoid the basement tables if possible – things get a little dingy down there. Instead, book well ahead and be specific about wanting a ground floor or counter seat. It’s where the action is.
And just recently, Salumeria Roscioli topped the 50 Top Italy 2026 rankings as the Best Trattoria in Italy, leaping from fourth to first – four generations of Roscioli family graft paying off in style.
Ideal for offal lovers and natural wine enthusiasts…
We came here on a recommendation from Osip’s Merlin Labron-Johnson, and we’re so glad we did. Trattoria Trecca has quietly become one of Rome’s best spots for offal since opening just four years ago in this out of the way spot down in Ostiense, a few minutes from the San Paolo metro stop.
It’s a handsome room to sink into. Natural light pours in through the huge windows that make up Trecca’s facade, reflecting off the brown and white chessboard tiles and marble topped dining tables that set the scene. Both are easily wipeable, and this is a place you want to roll your sleeves up and get messy in. Their regaje di pollo e patate (chicken giblets with potatoes) makes the ol’ quinto quarto accessible even to skeptics – it’s tender, aromatic with herbs, and served sizzling in a skillet alongside impossibly crisp potatoes.
While their Roman pasta classics are solid, you’re here for the offal and their always-excellent daily specials. If it’s on the menu, order the pajata (suckling veal intestines) skewers, which arrive blistered and burnished from the grill in a pool of good quality olive oil. They’re superb.
The wine list focuses on natural producers but isn’t dogmatic about it – just funky, drinkable drops that just seem to pair so perfectly with this kind of food.
Interestingly, the Trecastelli brothers have since expanded, opening Fratelli Trecca – a pizza al taglio spot near Circo Massimo
Ideal for serious wine at fair prices and fritti that will wow you…
Take tram 8 from Centro Storico’s Via Argentina to its final stop right in the heart of suburban Gianicolense for some of Rome’s finest fritti (fried starters), precisely cooked pasta and other trattoria standards, all done to a commendably high standard at Cesare al Casaletto. Their polpette di bollito (meat croquettes in basil sauce) should open every meal here, ideally alongside impossibly light fried fish which is served in a cone that spills out all over the plate.
Follow it with a bowl of gnocchi fritti con cacio e pepe (fried gnocchi with pecorino and black pepper sauce), which may sound like overkill but tastes like genius, and is a welcome, very minor diversion from the classic spaghetti or rigatoni. The wine list is agreeably unique for a trattoria, with small producers and reasonable markups. Book ahead for their shaded patio in summer.
The team behind Casaletto have branched out in recent years, opening Cesare al Pellegrino near Campo de’ Fiori and Laboratorio, a wine bar and shop, close to the original.
Ideal for Rome’s most innovative pizza, date nights, design lovers
The minute you walk into Seu Pizza Illuminati, you know this isn’t your typical Roman pizzeria. Perhaps you already guessed that from the name, quite frankly…
The Copenhagen-meets-Trastevere design sets the stage for Pier Daniele Seu’s boundary-pushing pizzas, which are regularly named some of the best in Italy by the tastemakers in recent years.
Keeping both purists and pioneers happy, the menu smartly divides between old school classics and Seu’s more inventive creations, with the pizzas straddling Roman and Neapolitan pizza traditions (with a little New Haven thrown in for good measure) to arrive at a pizza that’s uniquely Seu; crisp and fluffy, generous but refined.
If you’re feeling adventurous, try the octopus and cherry pizza which inexplicably works, and finish with a strawberry and rhubarb ‘dessert pizza’ which, erm, inexplicably also works.
As if that wasn’t risky enough, a six course tasting menu is also available for €45. Dishes are of the chef’s choosing.
Obviously not that risky; Seu has also expanded internationally with outposts in Dubai and Ibiza, plus TAC, a thin-crust spinoff in Mostacciano.
Ideal for the city’s finest Roman-Jewish cuisine and a historic atmosphere…
In the heart of Rome’s Jewish Ghetto, Nonna Betta serves some of the most straightforward, downright delicious versions of Roman ‘cucina kosher’ classics that you’ll find in the city.
Their carciofi alla giudia (Jewish-style artichokes) are consistently perfect – crispy, meaty, and never greasy. The beef-stuffed agnolotti shows how Roman-Jewish cuisine extends beyond just fried snacks into something all the more wholesome. The dining room, with its vintage photos, huge murals and wrought-iron details, adds to the experience without feeling touristy. There are plenty of intimate nooks and crannies to get lost in on those more blustery Rome days, but if the sun’s out, Nonna Betta has plenty of outdoor seating in the connecting square.
Nonna Betta is open for lunch and dinner every day.
Inside Rome Cavalieri, a Waldorf Astoria Hotel, Rome’s only three-Michelin-starred restaurant earns its reputation through precision rather than pretension. Chef Heinz Beck’s German exactitude meets Roman ingredients in dishes that wow – properly wow – without showing off. After over three decades of cooking here, the food still feels fresh and alive – a remarkable achievement, quite frankly.
The dining room has recently had a refurb, and is now rendered in striking mauves and coppers. The wine cellar is legendary – let sommelier Marco Reitano guide you through it. Yes, it’s expensive (the 10 course tasting menu is priced at €350), but the level of cooking, service, and the stunning view over Rome from the terrace justifies the splurge for a special occasion.
Beck’s standing was further cemented in November 2025 when he received the Michelin Mentor Chef Award at the 2026 Guide ceremony – recognition of his influence on a generation of Italian fine dining.
Located in affluent Parioli and serving squeaky fresh, pristine seafood, Capo Boi could be stuffy but isn’t. Instead, dining here feels like being at a sophisticated friend’s dinner party – just one who happens to have access to Rome’s best seafood, and chooses to show it off in a big, icy display at the entrance. Hey, this friend sounds like an absolute blast!
Anyway, the crisp Sardinian flatbread pane carasau topped with baby octopus and shavings of bottarga sets the tone for the meal – a heady, oceanic bite that’s both light and eminently satisfying. Follow it with a whole turbot to share, which arrives blistered from the grill, still on the bone and ready for picking over. The restaurant’s starched white tablecloths don’t stand a chance.
Come with a group to justify ordering the impressive crudo platter, the sharing braised whole octopus, and multiple pasta courses – the paccheri with grouper and asparagus is particularly good.
Ideal for quinto quarto classics in the heart of Testaccio…
Don’t let the pared back dining room at Piatto Romano fool you – this Testaccio spot close to the Tiber serves some of Rome’s most carefully prepared classics. Their seafood dishes shine unexpectedly bright for an inland trattoria – try the stir fried lamb’s lungs and heart, served with sweet onions, for a taste of a long forgotten Roman classic. Warming to a theme, the horse meat coppiette (essentially jerky), which pairs so well with a cold Peroni.
The Thursday gnocchi and Friday fish specials follow Roman tradition, but it’s their pajata (milk-fed veal intestines, here served with rigatoni) that draws the crowds every day of the week (except Sundays, when the place is closed). Come hungry – portions are generous, even by the city’s usual hearty standards.
We’ve eaten a lot of trattoria classics by now, which is great, but sometimes a little innovation and experimentation is needed in a city so wedded to tradition. Enter Retrobottega…
This moody spot serves boundary-pushing dishes that still respect Roman ingredients. Chefs Giuseppe Lo Iudice and Alessandro Miocchi often forage for ingredients in the surrounding Lazio countryside themselves, and that dedication to provenance shows on the plate in dishes like broccoli tortellini with wild marjoram, and slow braised beef cheeks with barbecue carrots and hazelnut.
Though both of those dishes are available on the a la carte to be enjoyed at the large, central communal table, the €75 tasting menu is the way to go here – it features off-menu classics and plenty of extra innovation, all served at an intimate six-seat counter. Recent dishes included a katsu sando of escarole, caciocchiato cheese and umeboshi, and a sunflower and yellow courgette risotto.
The natural wine list is exceptional, focused on small producers and with plenty available of drops by the glass for as little as €6. Book well ahead – the intimate space fills up quickly.
We end, naturally, with something sweet. Not technically a restaurant, we know, but in a city swimming in gelaterias, Otaleg (that’s ‘gelato’ spelled backwards, in case you hadn’t noticed) stands head and shoulders above the competition. Located between Piazza San Cosimato and Piazza San Calisto in Trastevere, this artisanal gelato shop showcases the extraordinary talent of Marco Radicioni, an alumnus of Rome’s gelato maestro Claudio Torcè.
The shop’s name mirrors its inverted design concept – the gelato laboratory takes centre stage in the front, rather than being hidden away in the back. Here, you can watch Radicioni work his magic with a stunning vertical Cattabriga machine, turning premium ingredients like Valrhona chocolate and Madagascar-Bourbon vanilla beans into some of the city’s most compelling frozen treats.
The pistachio is, quite simply, transcendent – rich, nutty, and impossibly smooth. Pair it with their fior di latte, which comes with an inspired grapefruit marmalade twist. The seasonal fruit flavors change regularly, making repeat visits essential, while more adventurous options like gorgonzola showcase Radicioni’s creative flair.
Though the Trastevere outpost is smaller than the original Portuense location, every scoop is made fresh on site, maintaining the exceptional quality that’s made Otaleg a destination for serious gelato aficionados. Take your cone for a stroll through Trastevere’s cobbled streets – it’s the perfect way to end a meal after eating in one of the neighborhood’s trattorias.